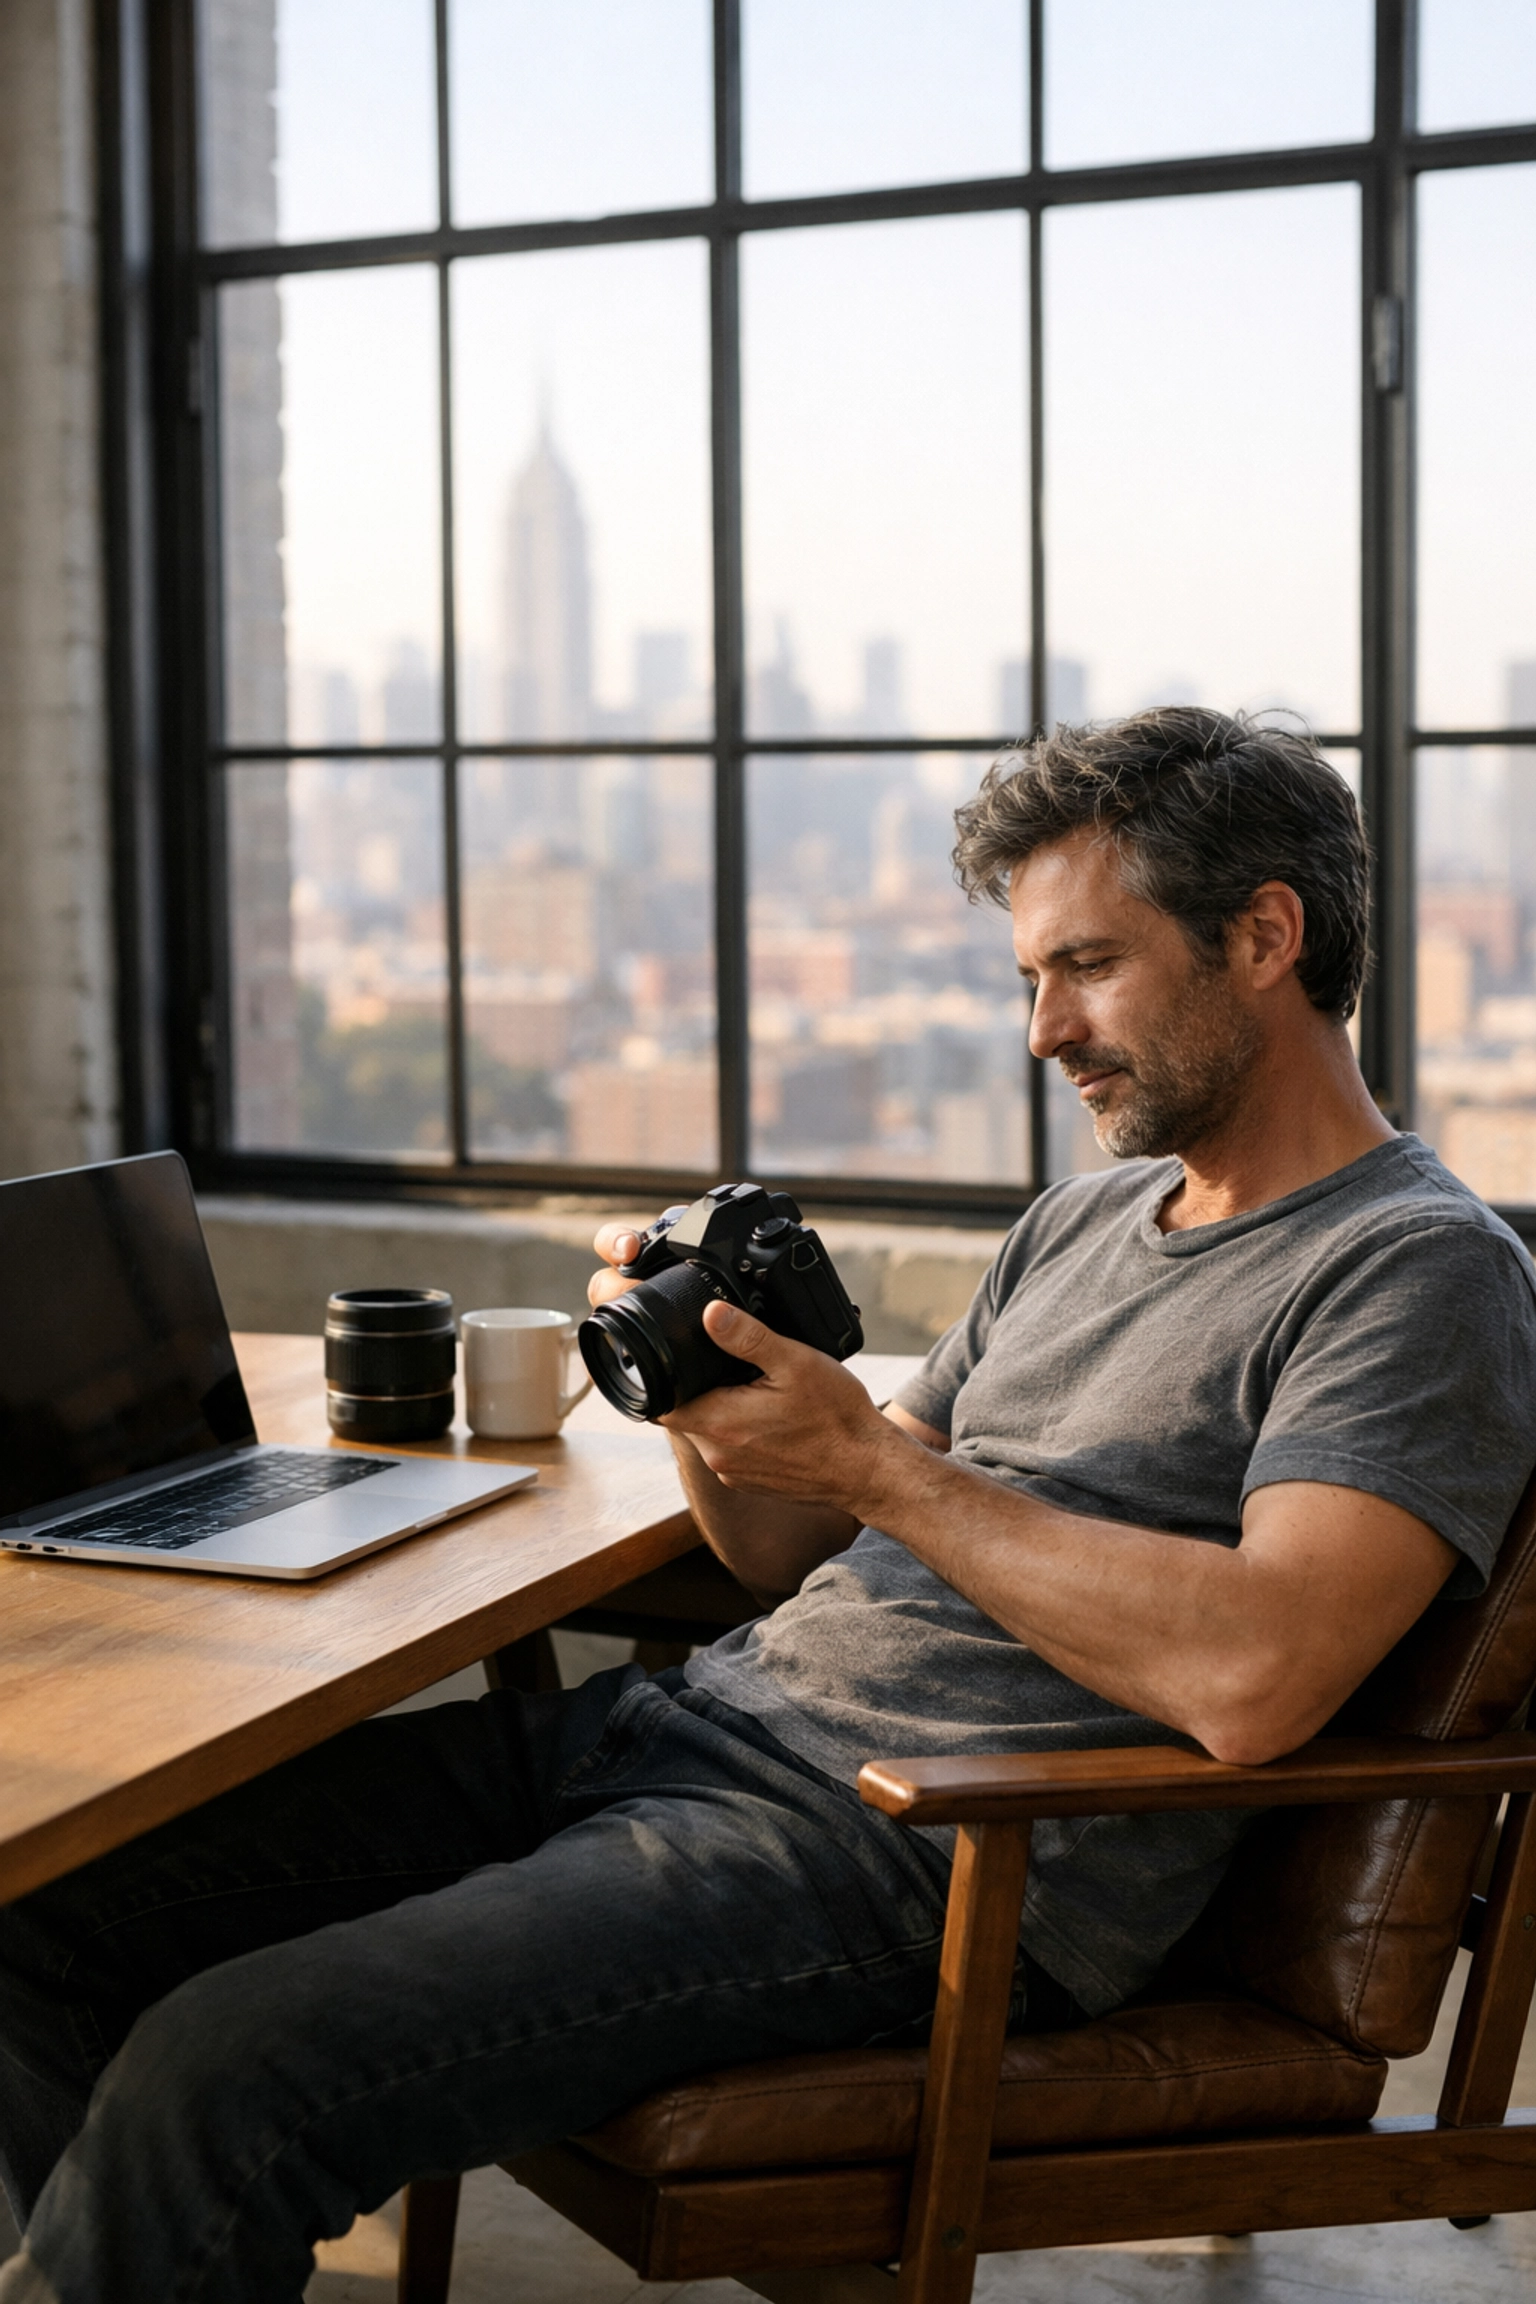
As a fine art photographer, you know that the distance between your creative vision and the final print can sometimes feel like a marathon through technical hurdles. You spend hours masking, adjusting exposure gradients, and meticulously cleaning up distracting elements. Just as the transition from film to digital opened new doors for expression, the emergence of AI-driven software like Luminar Neo is fundamentally shifting how you interact with your images. It is no longer just about "fixing" a photo; it is about sculpting an artistic vision with unprecedented speed and precision.
By integrating Luminar Neo into your workflow, you are not just choosing another photo editor: you are adopting a creative partner that understands depth, light, and geometry. This software empowers you to focus on the "why" of your art while it handles the "how" of the technical execution. Whether you are a seasoned pro or just starting your journey into Fine Art Photography, understanding how these tools function will redefine your expectations of what is possible in post-processing.
Sculpting Light and Depth with Wizard-Like Precision
One of the most significant challenges in fine art photography is managing the light after the shutter has already clicked. Traditional editors treat images as flat, two-dimensional planes of pixels. Luminar Neo changes this game through Light Depth technology. Using advanced 3D Depth Mapping, the software analyzes your image to calculate the distance between your lens and every object in the frame.
This allows you to "carve" light back into your scene. Imagine being able to add a soft glow to the background while keeping your foreground subject in high contrast, all without manual masking. This level of control creates an atmospheric depth that used to require hours of dodging and burning. When you use the Luminar Neo toolkit, you are gaining the ability to manipulate the environment of your shot as if you were still standing there with a reflector and a flash.
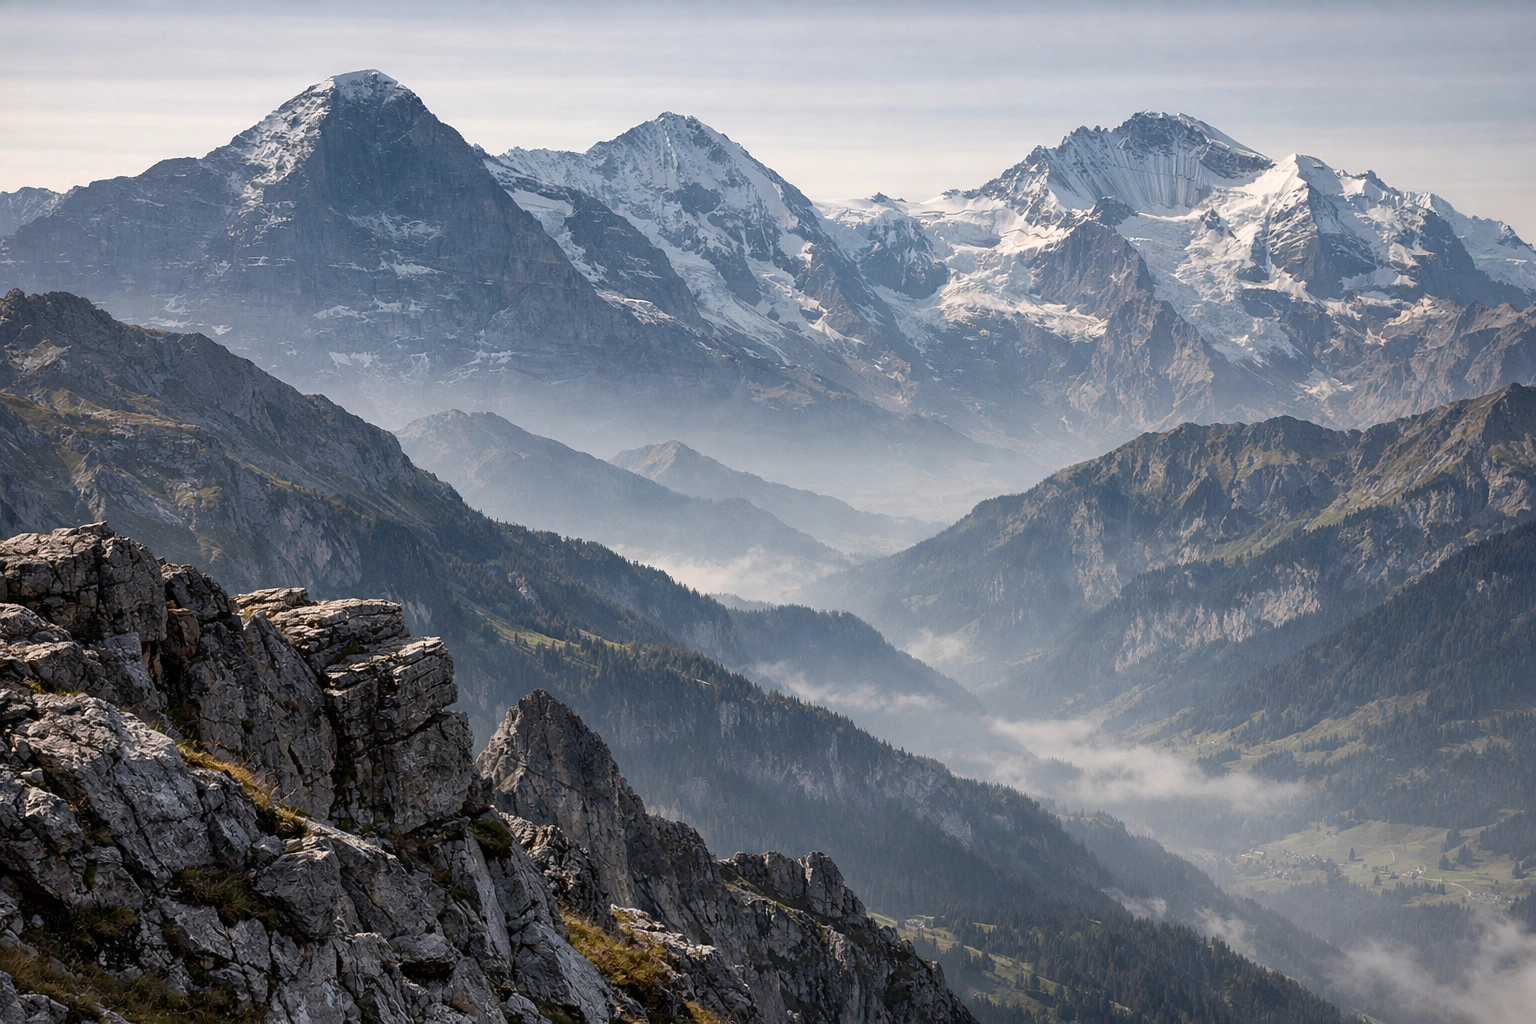
Alt Text: A high-end fine art landscape photograph of the Swiss Alps where depth-aware lighting tools have been used to create a misty, ethereal atmosphere between mountain layers.
AI-Powered Tools That Do the Heavy Lifting
The suite of AI tools within Neo is designed to eliminate the "busy work" of editing. Here are the core features that will transform your approach:
| Feature |
Creative Benefit for You |
Technical Impact |
| Sky AI |
Instantly replaces flat, boring skies with dramatic, high-dynamic-range alternatives. |
Automatically adjusts reflections and scene relighting to match the new sky. |
| Portrait Bokeh AI |
Creates a professional-grade shallow depth of field in any portrait. |
Recognizes subjects and creates a realistic blur gradient based on 3D depth. |
| Relight AI |
Provides studio-like lighting control for landscapes and portraits after the fact. |
Independently adjusts foreground and background brightness based on depth mapping. |
| Structure AI |
Enhances detail and texture only where it is needed, avoiding halos. |
Uses content-aware technology to identify subjects versus backgrounds. |
The Generative Revolution: Erasing the Mundane
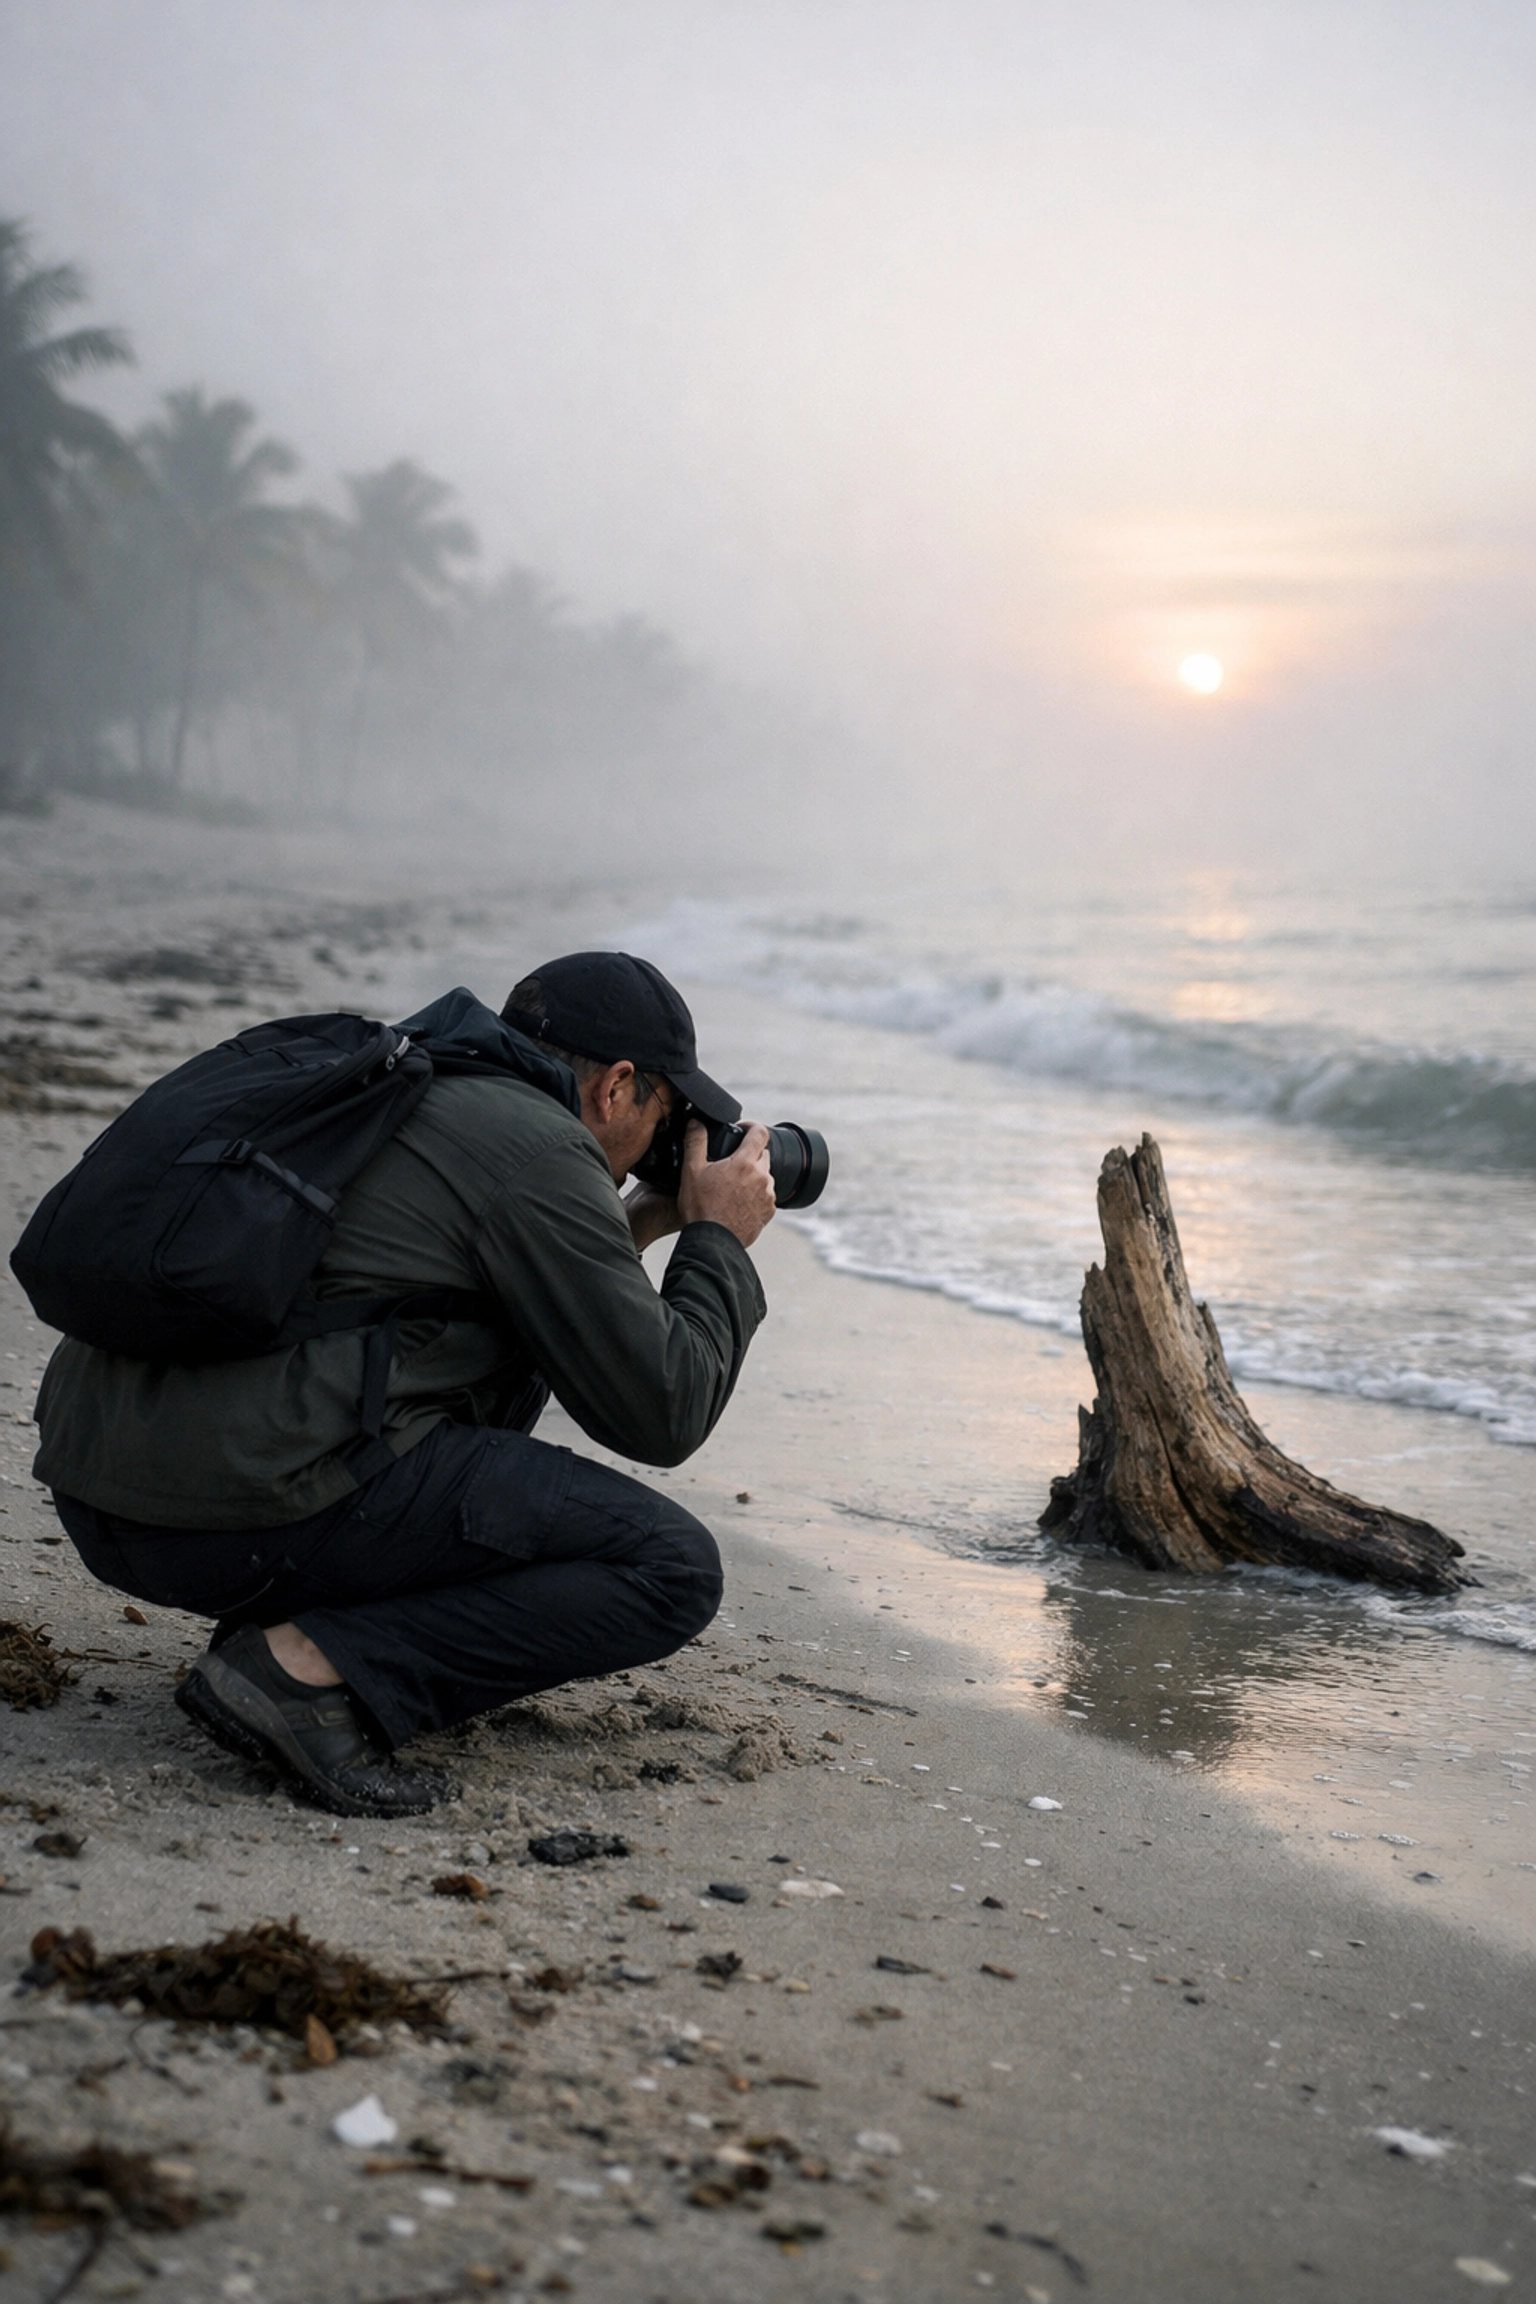
In fine art, every pixel matters. A stray power line, a distracting trash can, or a sensor spot can ruin the flow of a composition. While traditional cloning and healing tools have their place, they often struggle with complex textures like grass, water, or architectural patterns. This is where Generative Erase changes your life.
Unlike standard tools that "copy-paste" nearby pixels, Generative Erase uses AI to understand the context of the image and fills the space with entirely new, realistic textures that blend seamlessly. This ensures your final piece remains clean and focused on your subject. This efficiency is why many professionals are moving their primary retouching to Neo, often using it alongside the Ultimate Lightroom Preset Collection to achieve a polished, signature look in record time.

Alt Text: A before and after comparison of a minimalist beach scene where Generative Erase was used to remove footprints and debris from the sand, leaving a pristine fine art finish.
Why Neo Stands Out Against the Competition
You might wonder why you should add Luminar Neo to your arsenal if you already use Adobe products. The answer lies in the philosophy of the software. While Photoshop is a massive, multi-purpose tool that requires a steep learning curve, Neo is built specifically for photographers who want to achieve artistic results quickly.
The interface is intuitive, meaning you spend less time watching tutorials and more time experimenting. For those who frequently visit the Edin Chavez Blog for inspiration, you know that the goal is always to elevate the art. Neo allows for a "mood-first" approach. With the Mood tool (using LUTs) and a robust Layers feature, you can stack textures and light leaks with a level of organic blending that feels more like painting than traditional editing.
Efficiency Comparison for Professionals
| Task |
Traditional Manual Workflow |
Luminar Neo AI Workflow |
| Sky Replacement |
30–60 minutes (Masking & Color Correction) |
2 minutes (One click + Fine-tuning) |
| Object Removal |
15–20 minutes (Cloning/Healing) |
30 seconds (Generative Erase) |
| Portrait Skin Retouching |
20 minutes (Frequency Separation) |
1 minute (Face/Skin AI) |
| Depth of Field Adjustment |
Complex (Manual Blur & Masking) |
1 minute (Portrait Bokeh AI) |
Maximizing Your Efficiency Without Sacrificing Artistry
Speed is not just about saving time; it is about maintaining your creative momentum. When you spend too long on technical hurdles, you lose the "vibe" of the piece you are trying to create. Luminar Neo propels you through the mundane tasks so you can stay in the flow state.
By utilizing the Skylum ecosystem, you are ensuring that your workflow is as modern as your camera gear. For example, the HDR Merge extension is incredibly robust, allowing you to blend exposures for high-contrast architectural or landscape shots without the "crunchy" look that plagued early digital photography. It produces a natural, clean base that is perfect for fine art applications.

Alt Text: A stunning fine art interior of a historic cathedral in Italy, processed with HDR Merge to show detail in both the stained glass and the dark shadows of the pews.
Integrating Luminar Neo into Your Full Workflow
It is important to understand that Luminar Neo can work as a standalone application or as a powerful plugin for Lightroom and Photoshop. This flexibility ensures you don't have to change your entire organization system to benefit from its AI "wizardry."
- Import & Organize: Use Lightroom for your initial culling and basic metadata.
- Apply Foundations: Use the Ultimate Lightroom Preset Collection to set your base color and tone.
- Creative Sculpting: Open the image in Luminar Neo to apply Sky AI, Relight AI, or Generative Erase.
- Final Polish: Bring the image back for final export and printing.
This hybrid approach allows you to leverage the best of both worlds: the organizational power of Adobe and the creative innovation of Skylum. As you continue to explore the resources at Edin Studios, you will see that the most successful artists are those who adapt to the tools that provide them the most freedom.
A New Era for Fine Art Photographers
The goal of fine art photography is to share your unique perspective with the world. Whether you are capturing the raw power of nature or the quiet intimacy of a portrait, your tools should never be a bottleneck to your imagination. Luminar Neo stands out because it treats the editing process as a creative extension of the capture, rather than a corrective chore.
With its ability to understand depth, its generative capabilities, and its streamlined interface, it ensures that your focus remains on the art. By embracing these advancements, you are not taking a shortcut; you are clearing the path for your vision to shine.
Hence, if you are ready to see what your images are truly capable of, it is time to experiment with the future of editing. You can start your journey with Luminar Neo here and experience the difference that AI-powered creative freedom makes in your portfolio. Don't forget to check back with the Edin Chavez Blog for more tips on mastering your craft and exploring the world of Fine Art Photography.
Just as a painter approaches a blank canvas with a specific emotion in mind, you approach your camera to create something that transcends the physical world. Fine art photography isn't about capturing what is standing in front of you; it is about capturing how that subject makes you feel. When you dive into the world of ethereal photography, you are stepping away from the "snapshot" mentality and moving into the realm of visual poetry.
As the CEO of Edin Chavez Blog, I’ve seen countless photographers struggle to bridge the gap between a sharp, technical photo and a piece of art that actually stops someone in their tracks. To master this, you need to stop thinking like a documentarian and start thinking like a storyteller. Whether you are shooting in the heart of a city or the quietest corner of a forest, the goal is to create a mood that feels like a half-remembered dream.
Understanding the Fine Art Photography Mindset
Many beginners believe that fine art photography is simply a matter of applying a filter in post-processing. In reality, your journey begins long before you press the shutter button. This genre is defined by your personal vision. You aren't just showing the world what a tree looks like; you are showing the world your unique perspective on that tree’s existence.
To succeed, you must focus on three pillars: aesthetic appeal, impeccable craftsmanship, and conceptual depth. Your work stands out when it forces the viewer to ask questions. By integrating a narrative into your frames, you empower your audience to connect with your art on a visceral level. This commitment to storytelling is what separates a hobbyist from a professional artist. You can explore more about this creative philosophy at Edin Chavez Blog.
Technical Foundations for Ethereal Photography
Achieving that "glow" or soft, luminous quality requires a mastery of your gear. Ethereal photography relies heavily on how you manipulate light and depth of field. You want your images to feel as though they are floating, and that starts with your aperture settings.
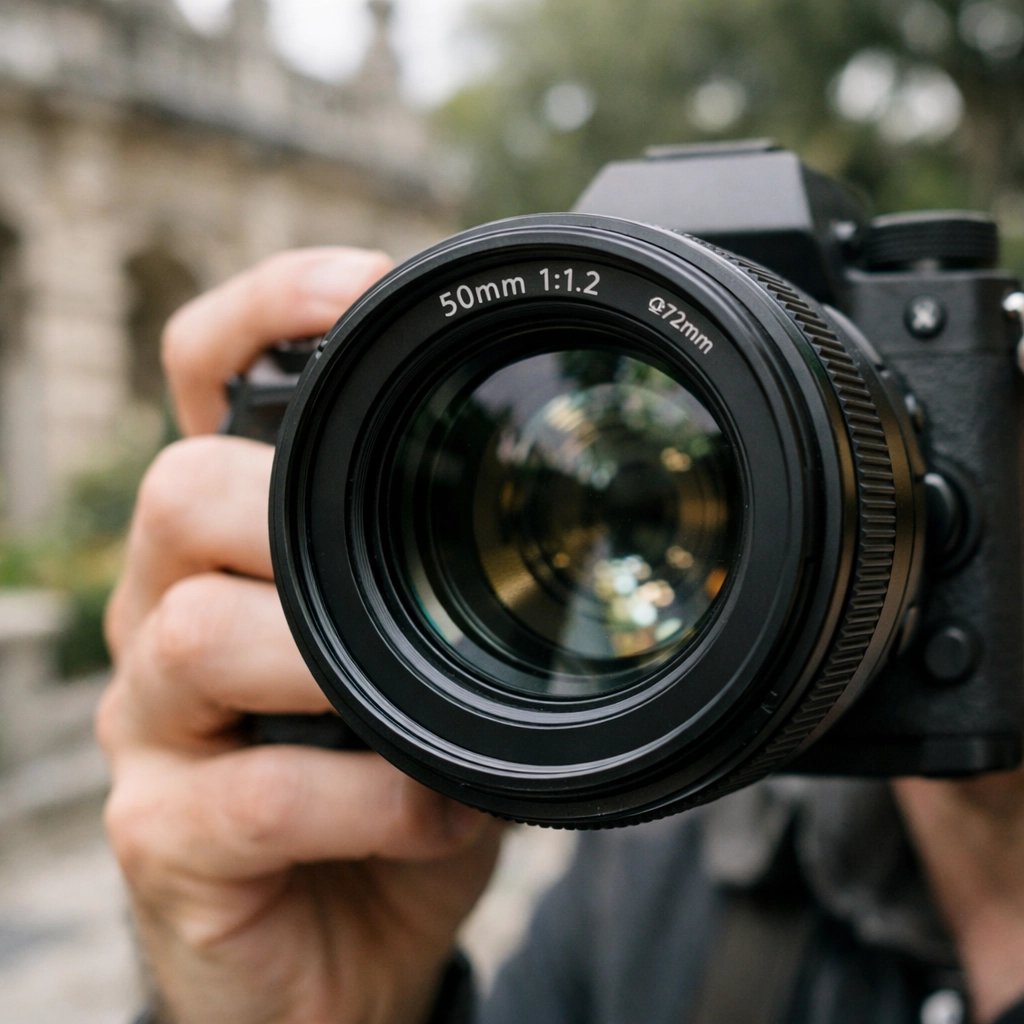
The Power of Wide Apertures
To create those creamy, blurred backgrounds: often referred to as bokeh: you need to use a wide aperture. Opening your lens to f/1.4, f/1.8, or f/2.8 allows a massive amount of light into your sensor while narrowing your plane of focus. This technique ensures that your subject remains the hero of the shot while the rest of the world melts into a soft, dreamy haze.
Choosing the Right Glass
While zoom lenses are convenient, prime lenses are your best friends in the fine art world. Fixed focal lengths like 35mm, 50mm, or 85mm typically offer wider maximum apertures and superior sharpness compared to their zoom counterparts. These lenses provide the clarity you need while delivering the "dreamy" fall-off that defines this style.
| Feature |
Prime Lens (35mm/50mm) |
Zoom Lens (24-70mm) |
| Max Aperture |
f/1.2 – f/1.8 (Ultra Wide) |
f/2.8 – f/4 (Moderate) |
| Weight |
Generally Lightweight |
Usually Heavier |
| Bokeh Quality |
Smooth and Creamy |
Can be "busy" or distracting |
| Sharpness |
Exceptional center-to-edge |
Good, but often variable |
By using these tools, you provide your images with a professional foundation that props up your creative vision. For more advanced gear insights and specialized techniques, check out Edin Studios.
Mastering Light and Composition
Light is the brush with which you paint your ethereal scenes. To achieve a sense of weightlessness, you should look for soft, diffused light sources. Overcast days, the "Golden Hour" just before sunset, and backlighting are your most powerful allies.
When you backlight a subject, the light wraps around their edges, creating a natural rim light that looks like a halo. This instantly elevates your work into the ethereal realm. You should also study the works of Impressionist painters like Claude Monet. Notice how they didn't focus on hard lines; instead, they used light and color to suggest form. You can emulate this by intentionally slightly overexposing your shots to create a "high-key" look that feels airy and light.
Dreamy Photography Editing: Bringing the Vision to Life
While the capture is vital, dreamy photography editing is where the magic truly happens. Post-processing in the fine art world isn't about "fixing" a photo; it’s about enhancing the mood you’ve already established.
The Orton Effect
One of the most popular techniques in ethereal editing is the Orton Effect. This involves a combination of high detail and soft glow. By duplicating your layer in Photoshop, applying a Gaussian blur, and then blending it back with the original, you create a look that feels both sharp and hazy at the same time. This ensures your images have that sought-after luminosity.
Color Grading for Mood
Your color palette should be intentional. For an ethereal look, you might want to lean toward desaturated pastels or cool blues and soft pinks. Use the HSL (Hue, Saturation, Luminance) sliders in Lightroom to fine-tune these tones. If you want to streamline this process and achieve professional results instantly, I highly recommend using the Ultimate Lightroom Preset Collection. These presets are designed to give your work that polished, fine-art finish with just one click.
Developing Your Artistic Voice
The biggest hurdle for most photographers is moving past the technical and into the conceptual. Your work should be cohesive. This means when someone looks at your portfolio, they should recognize your "hand" in the images. Whether it’s the way you use light or the specific way you handle dreamy photography editing, consistency is key to building a brand as an artist.
- Plan Your Shoots: Don't just walk out and hope for the best. Sketch your ideas. Think about the wardrobe, the location, and the specific time of day.
- Experiment Constantly: Take 100 photos of the same mundane object. Challenge yourself to find 5 ways to make it look otherworldly.
- Study Other Mediums: Look at film, classical paintings, and even poetry to inspire your visual metaphors.
By dedicating time to your craftsmanship, you ensure that every image you produce is a reflection of your inner world.
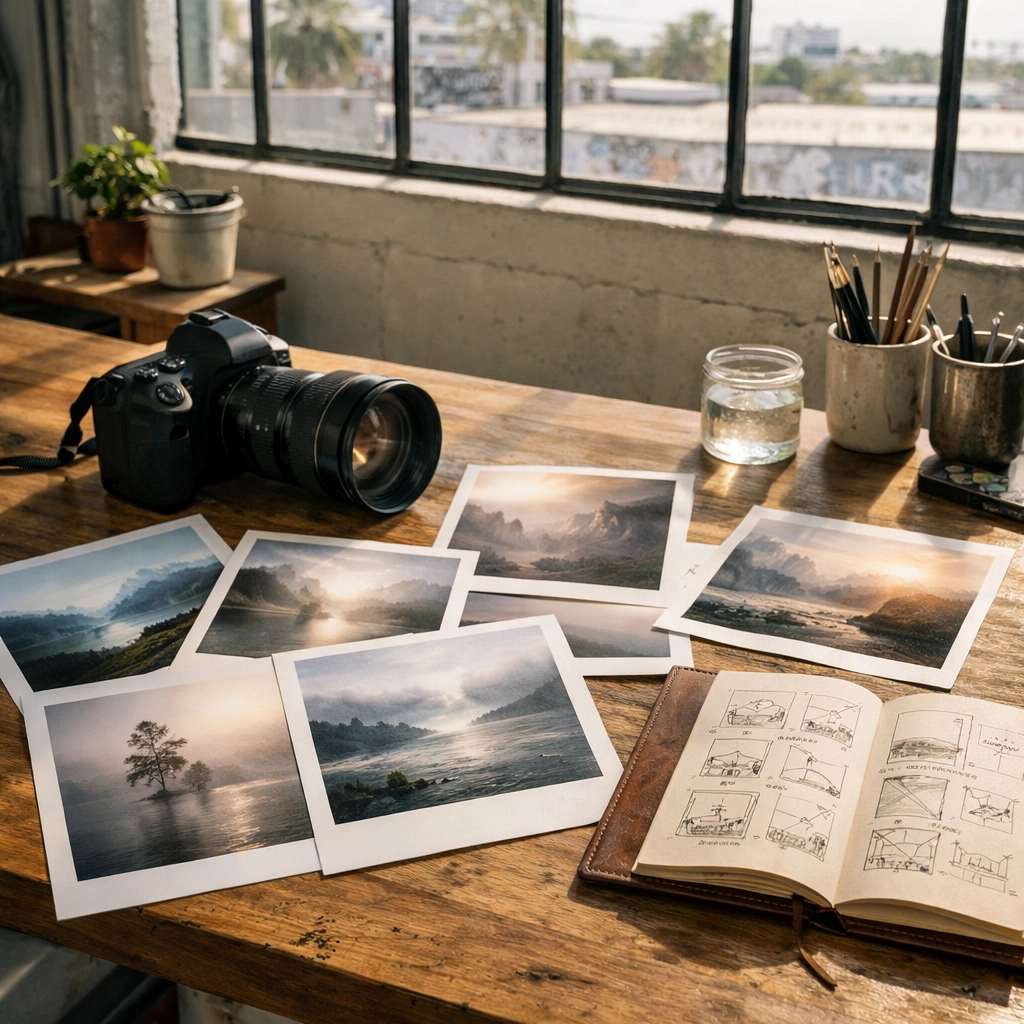
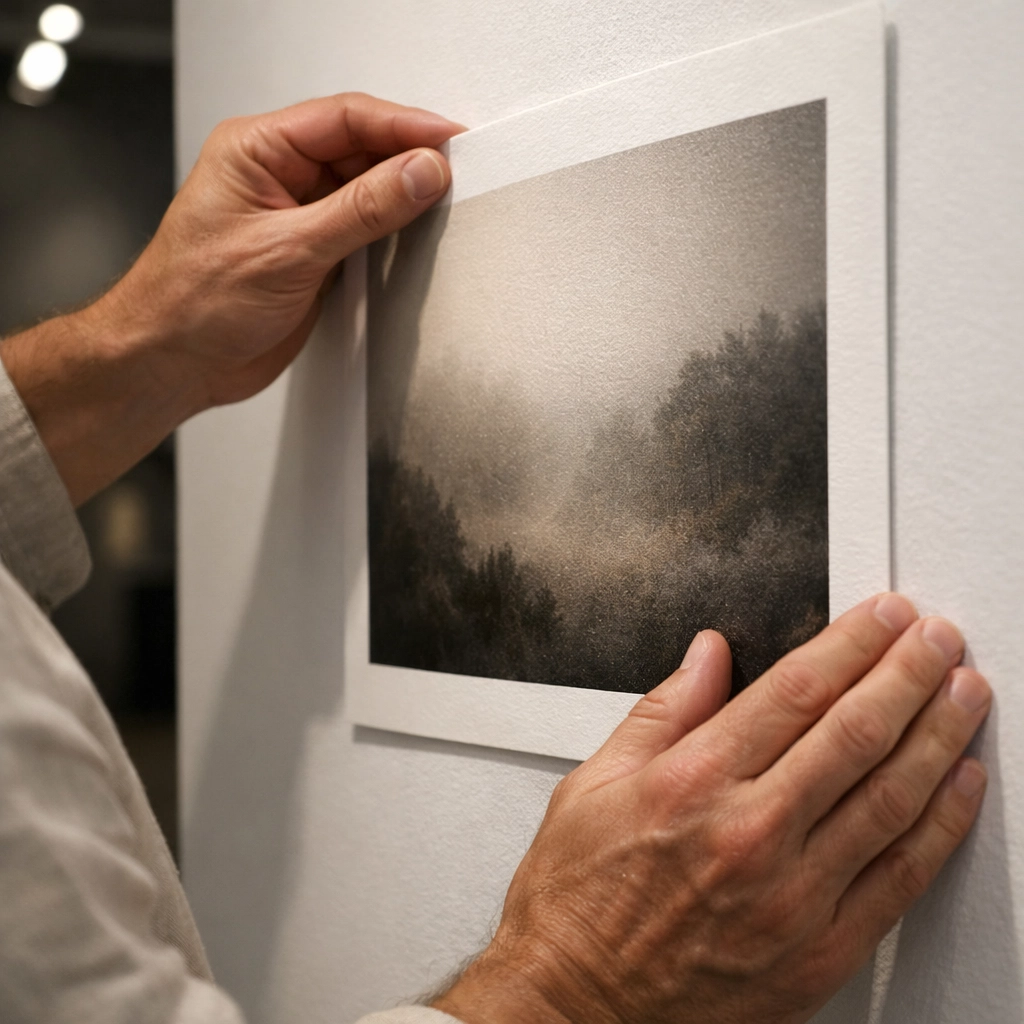
The Importance of the Physical Print
In today’s digital age, it is easy to leave your photos on a hard drive. However, you haven't truly seen your work until you see it printed. Fine art photography is a tactile experience. Seeing your ethereal landscapes on high-quality cotton rag or metallic paper reveals textures and depth that a screen simply cannot replicate.
Printing your work also forces you to be a better photographer. It reveals flaws in your focus or noise in your shadows that you might have missed on your phone. If you want to see how professional fine art is presented to collectors, take a look at the curated galleries at Edin Fine Art. It will give you a benchmark for the quality and presentation you should strive for in your own career.
Final Thoughts on Your Creative Journey
Mastering fine art photography is a marathon, not a sprint. It requires you to be patient with yourself and your gear. By focusing on technical skills like wide apertures and soft lighting, and combining them with sophisticated dreamy photography editing, you empower yourself to create work that is truly unique.
Remember, the most important tool in your kit isn't your camera: it's your vision. Don't be afraid to be controversial or to show a side of the world that only you can see. With these considerations, you are well on your way to transforming from a photographer into a true artist. Keep pushing the boundaries of what is possible, and continue to refine your craft every single day.
Hence, start today by picking one concept, one lens, and one afternoon to lose yourself in the process of creation. Your ethereal masterpiece is waiting to be captured.
Just as the transition from film to digital revolutionized how you capture moments, the emergence of dedicated marketplaces is currently transforming how you secure your next paycheck. For years, finding consistent jobs for photographers has felt like a second full-time job. You spend hours cold-emailing, posting to social media, and bidding on generic freelance sites only to be undercut by someone with a smartphone and a filter.
The landscape is shifting. As a professional, your time is your most valuable asset, and wasting it on unproductive "hustle" isn't just exhausting: it’s bad for your bottom line. That is where Proshoot.io enters the frame. This isn't just another job board; it is a specialized ecosystem designed to eliminate the friction between your talent and a client's needs. By integrating advanced vetting, transparent bidding, and high-end portfolio hosting, Proshoot.io ensures that you spend less time hunting and more time shooting.
The End of the Freelance Grind
Many photographers find themselves stuck in a cycle of "feast or famine." One month you are booked solid, and the next, you are refreshing your inbox every five minutes. This instability often stems from the fragmented nature of the industry. When you search for jobs for photographers on traditional platforms, you are often competing in a "race to the bottom" where the lowest price wins.
Proshoot.io flips this dynamic on its head. By creating a vetted marketplace, the platform ensures that only serious, high-quality professionals are present. This commitment to quality attracts a different caliber of client: people who value your eye, your technical skill, and your professional reliability over a bargain-basement price. When you join this community, you aren't just another profile; you are a verified expert in a marketplace built for your success.
Vetting as Your Competitive Advantage
Your reputation is everything in the world of fine art and professional photography. While you might showcase your best work on the Edin Chavez Blog, having a third-party platform verify your credentials adds an immediate layer of trust. Every photographer on Proshoot.io undergoes a rigorous portfolio review.
This vetting process acts as a filter that benefits you directly. Because clients know that every professional on the platform has been checked for quality and reliability, the initial barrier of "proving yourself" is significantly lowered. You aren't starting from zero with every new lead. Instead, you are stepping into a room where your expertise is already assumed. This professional standing ensures that your conversations with clients focus on the creative vision and project scope rather than justifying your rates.
Traditional Job Boards vs. Proshoot.io
| Feature |
Traditional Freelance Sites |
Proshoot.io Marketplace |
| User Base |
Generic (anyone can join) |
Vetted Professionals Only |
| Pricing Model |
Race to the bottom |
Value-based bidding |
| Client Intent |
High volume, low budget |
High quality, ready-to-shoot |
| Focus |
All industries |
Photography and Videography |
| Payment Security |
Often inconsistent |
Secure escrow-style payments |
A Marketplace That Works for You
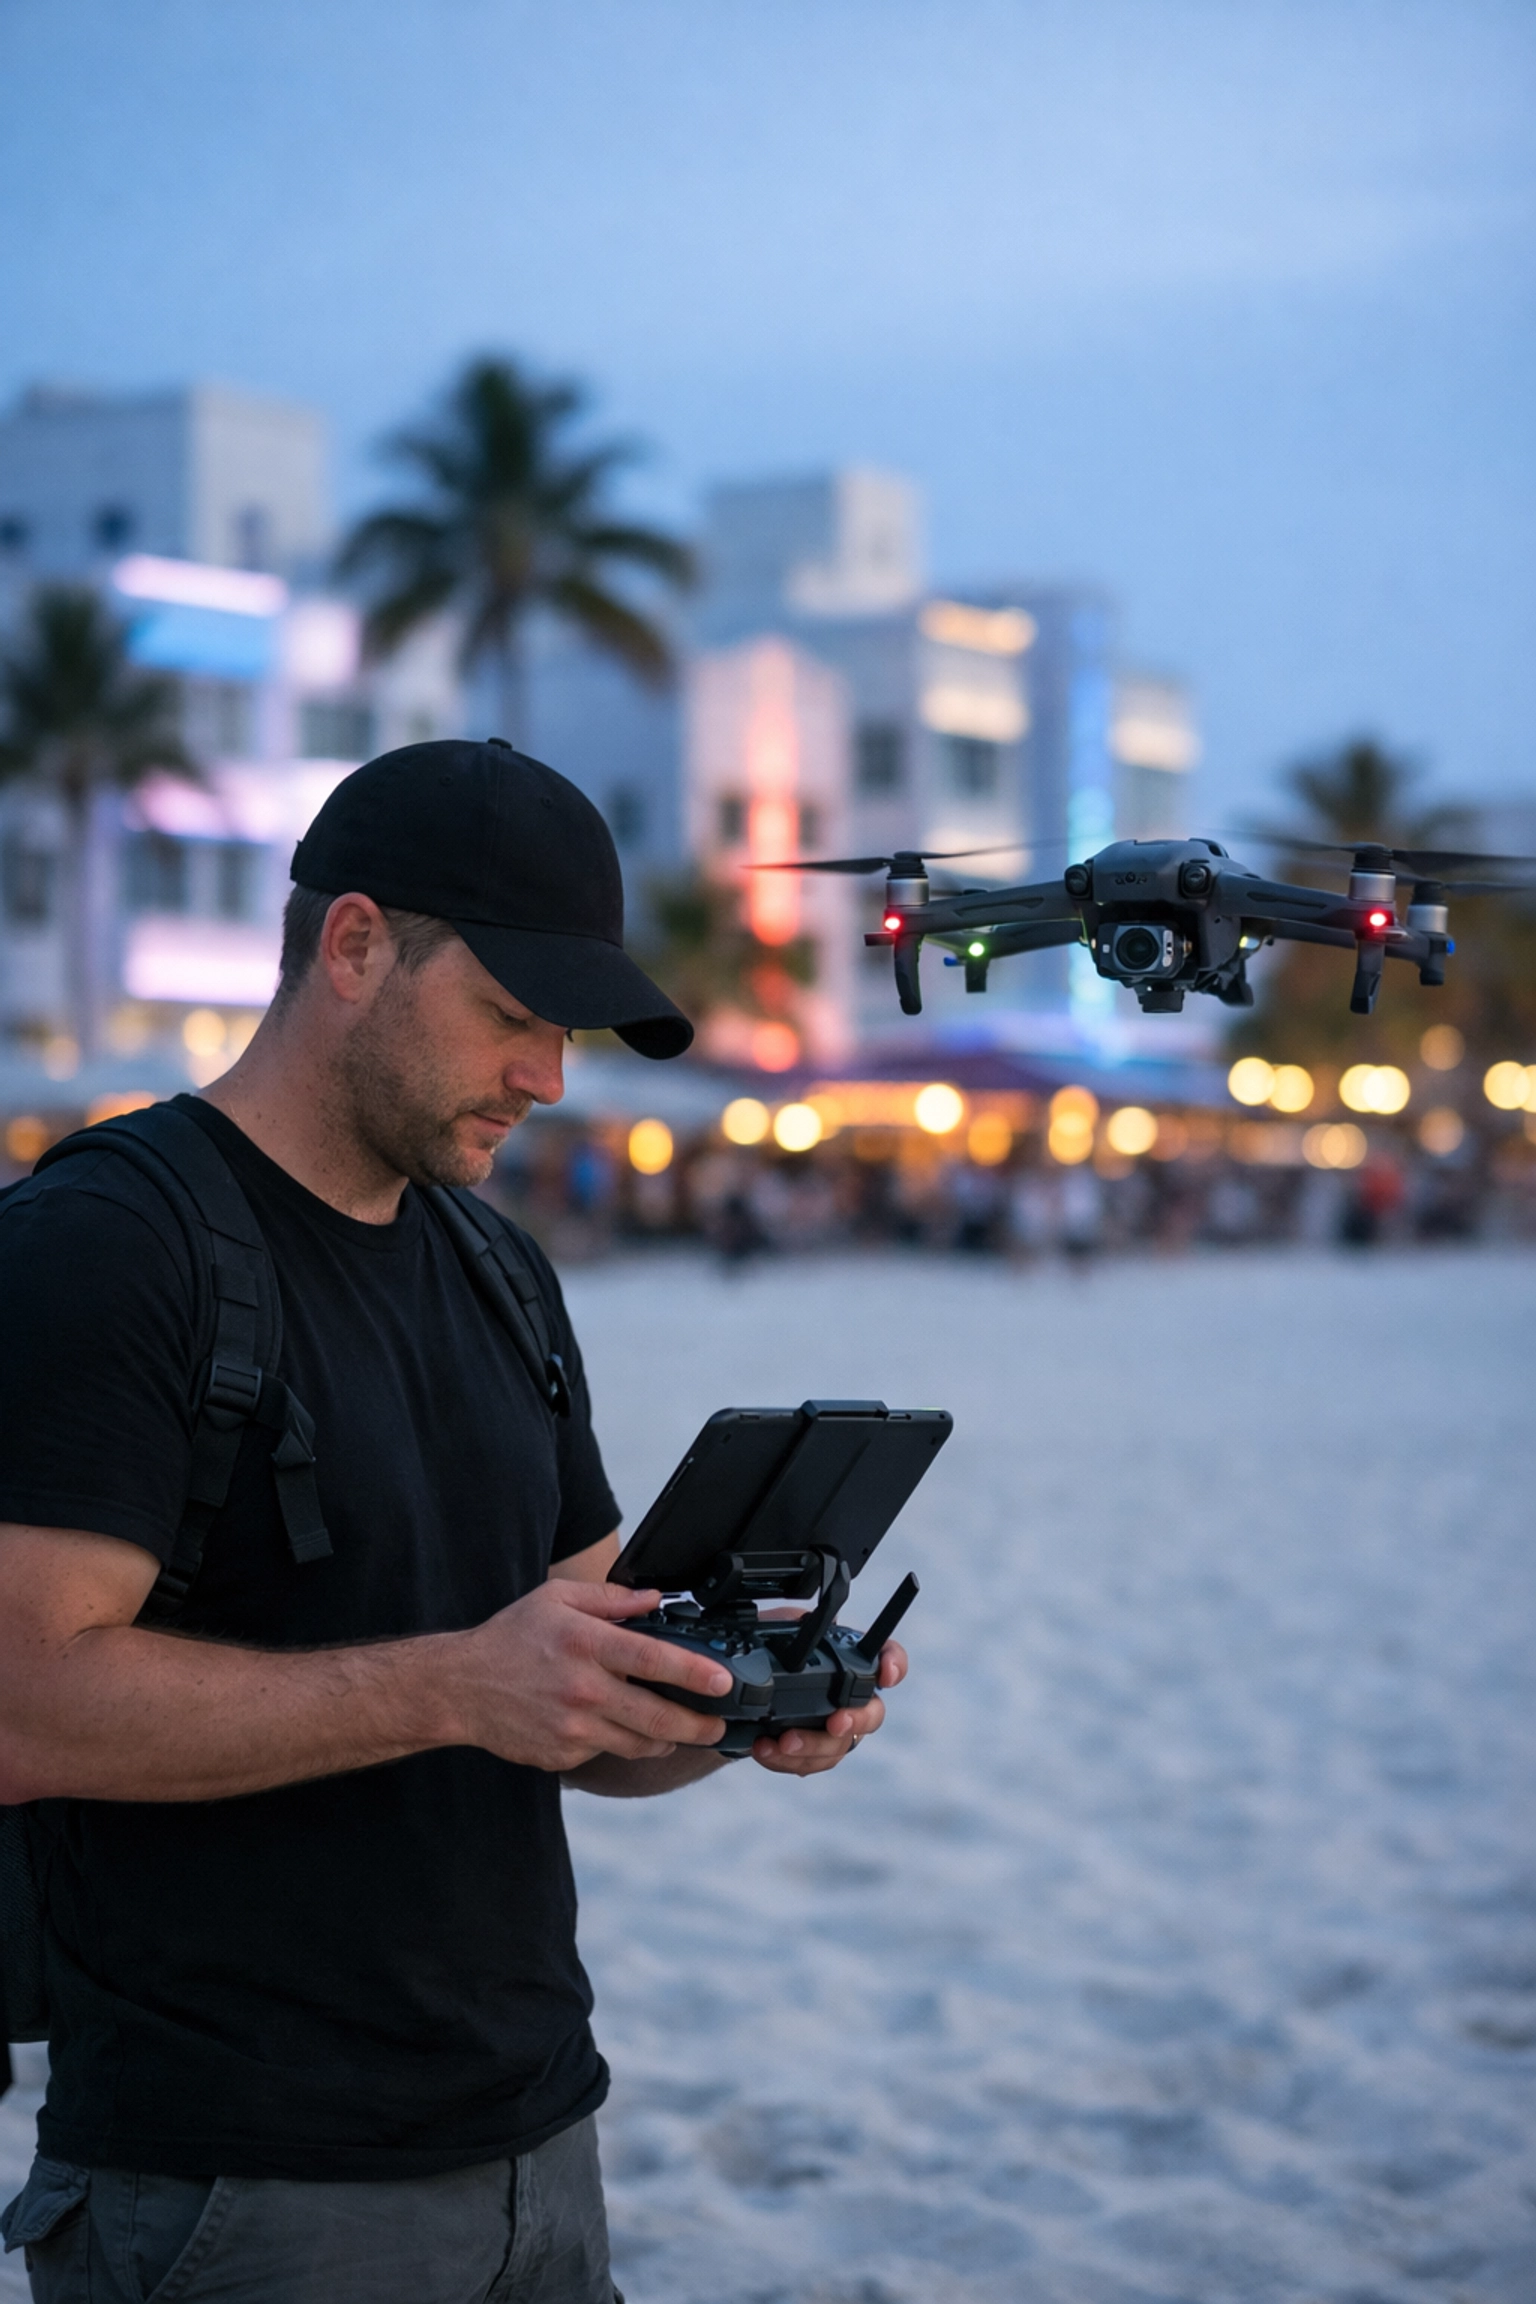
The core innovation of Proshoot.io is the "ready-to-shoot" job model. In the old world, you spent your energy marketing yourself to people who might need a photographer eventually. On this platform, clients come to the marketplace with specific, active projects. They post the job, and you receive competitive bidding opportunities that match your specific niche.
Whether you specialize in drone videography, editorial work, or high-end real estate, the platform’s categorization allows the right clients to find you at the right time. For instance, if you are looking for work in a competitive market like South Florida, you know that standing out is key. You can leverage your local expertise: perhaps perfected by following a Miami self-driving photography guide: to land high-ticket architectural or lifestyle shoots.
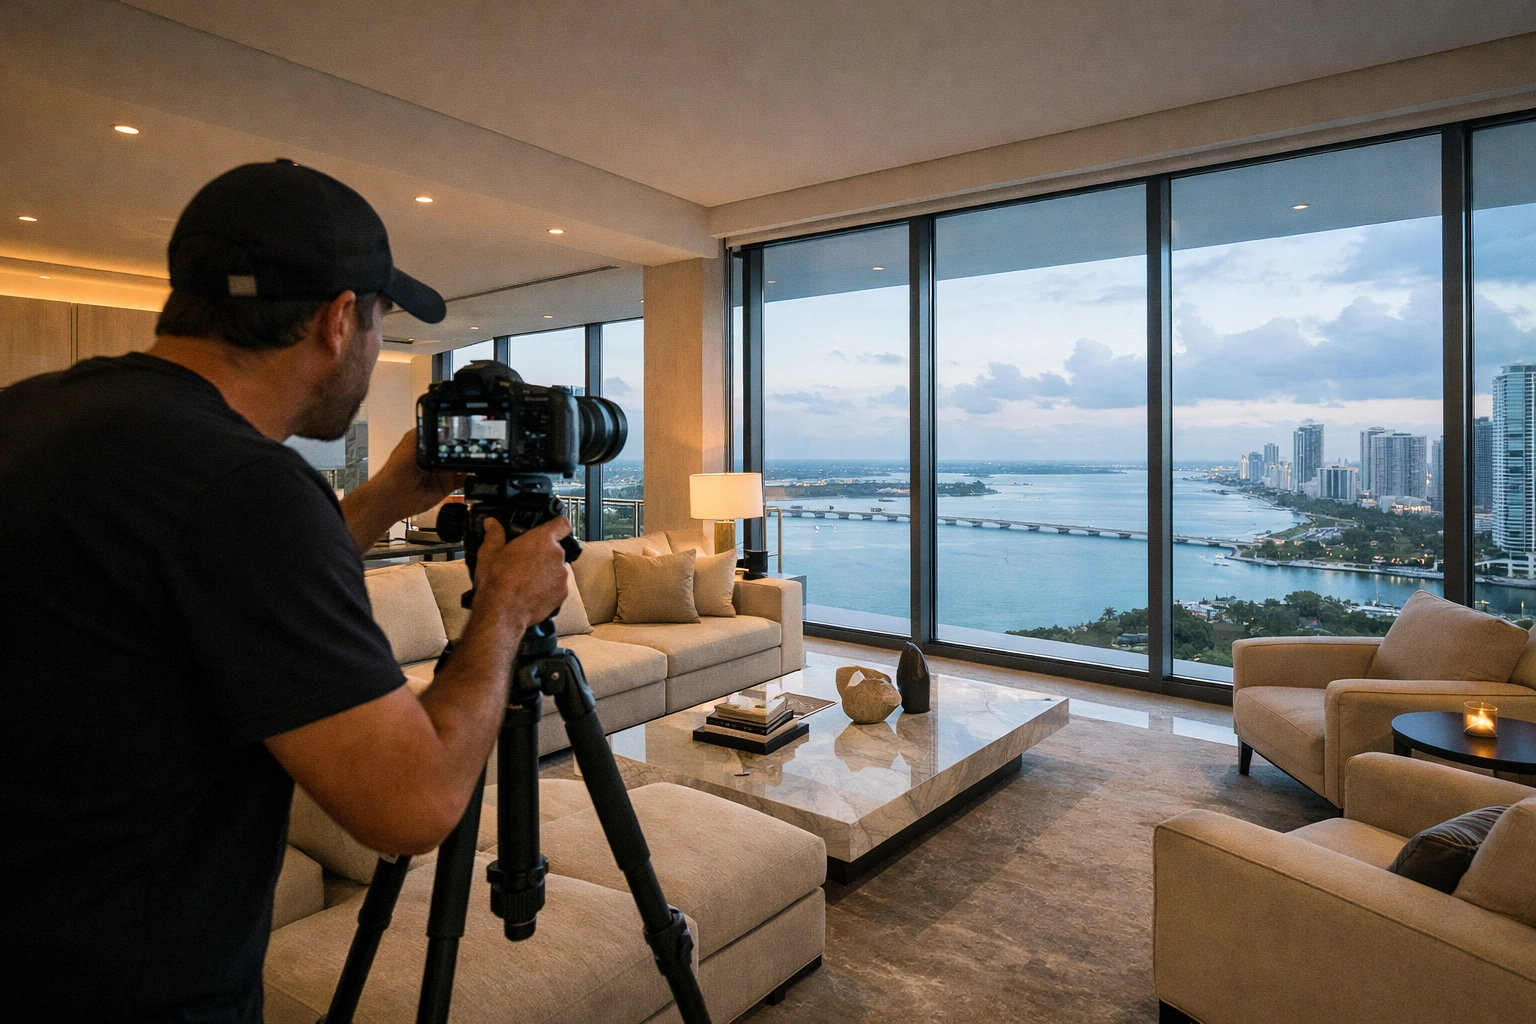
Portfolio Hosting and Your Digital Presence
You know that your portfolio is your most powerful sales tool. It’s why we focus so much on the visual experience at Edin Studios. Proshoot.io provides robust portfolio hosting that doesn't just display your images; it positions them within a professional context.
When a client looks at your work on the platform, they see a cohesive story of your capabilities. This is the perfect place to showcase your versatility. If you've been working on your post-processing skills using the Ultimate Lightroom Preset Collection, your Proshoot.io portfolio will reflect that polished, professional "look" that high-end clients demand. The platform ensures that your high-resolution files are displayed beautifully, providing a seamless viewing experience that propels the client toward the "hire" button.
Transparency in Bidding and Rates
One of the most frustrating aspects of searching for jobs for photographers is the lack of price transparency. You often don't know the client's budget until you've already invested hours in a proposal. Proshoot.io solves this by displaying clear job requirements and allowing for transparent, value-based bidding.
By seeing what is expected upfront, you can set your rates based on your actual expertise. This prevents the devaluation of your work. The platform fosters an environment where your unique style: the kind of artistry you might see in Edin Fine Art: is seen as a premium asset. When you bid on a project, the client is looking for the best fit for their brand, not just the cheapest option on the list.
Streamlining Your Operations
Running a photography business involves more than just clicking the shutter. There is the "boring" stuff: contracts, communication, project timelines, and chasing down payments. Proshoot.io acts as your centralized command center.
- Centralized Dashboard: Track all your bids, active projects, and upcoming deadlines in one place.
- Secure Payments: The platform handles the financial transaction, ensuring you get paid for the work you do. No more "ghosting" after the final files are delivered.
- Direct Messaging: Keep your client communication professional and organized, rather than buried in a messy personal inbox.
This administrative efficiency empowers you to focus on the creative side of your business. By reducing the friction of project management, you can take on more work without increasing your stress levels.
Specialization as Your Secret Weapon
The platform encourages you to lean into your niches. Whether you are an expert in wildlife photography: perhaps after spending countless hours following the Everglades photography guide: or a master of urban landscapes in New York, Proshoot.io allows you to tag and categorize your work so that you appear in targeted searches.
Specialization makes you more "findable." When a client needs a specific look or has a technical requirement like 360-degree imaging or underwater shots, they use filters to find the best of the best. Proshoot.io’s infrastructure ensures that if you have the skills, you get the visibility. This targeted matching is significantly faster and more efficient than broad-spectrum job boards.
Why You Need to Start Now
The world of photography is more competitive than ever, but the demand for high-quality visual content is also at an all-time high. Companies, brands, and individuals are looking for professionals who can tell their stories. Proshoot.io is the bridge that connects your creative talent with their commercial needs.
As you look to grow your business in 2026 and beyond, you need tools that evolve with the industry. Transitioning your job-seeking efforts to a vetted, professional marketplace is the most logical step you can take to ensure long-term sustainability. If you've spent years honing your craft, you deserve a platform that treats you like the professional you are.
Whether you are looking for private Miami photography tours or major commercial contracts, the way you find jobs for photographers has changed. By embracing the marketplace model, you are not just looking for work; you are building a professional pathway where your quality and consistency lead to a thriving career.
With these considerations, it is clear that Proshoot.io isn't just another website: it is the future of the photography industry’s workforce. By joining now, you position yourself at the forefront of this shift, ready to capture every opportunity that comes your way. Reach out, set up your profile, and see how much easier it is to find the work you were meant to do.
As you stand on the edge of the "River of Grass," the silence of the dawn is broken only by the rhythmic splash of a hunting heron. The Everglades is not merely a swamp; it is a complex, living masterpiece of nature that challenges and rewards your creative eye in ways few other places on Earth can. Whether you are a seasoned professional or a passionate hobbyist, capturing wildlife photography in the Everglades requires more than just a long lens: it requires an understanding of the rhythm of the water and the secret corners where the light hits just right.
Your journey into this UNESCO World Heritage site provides a unique opportunity to document species found nowhere else. To help you navigate this vast wilderness, I have curated a list of the premier Everglades photography locations that will elevate your portfolio and ensure you come home with breathtaking shots.
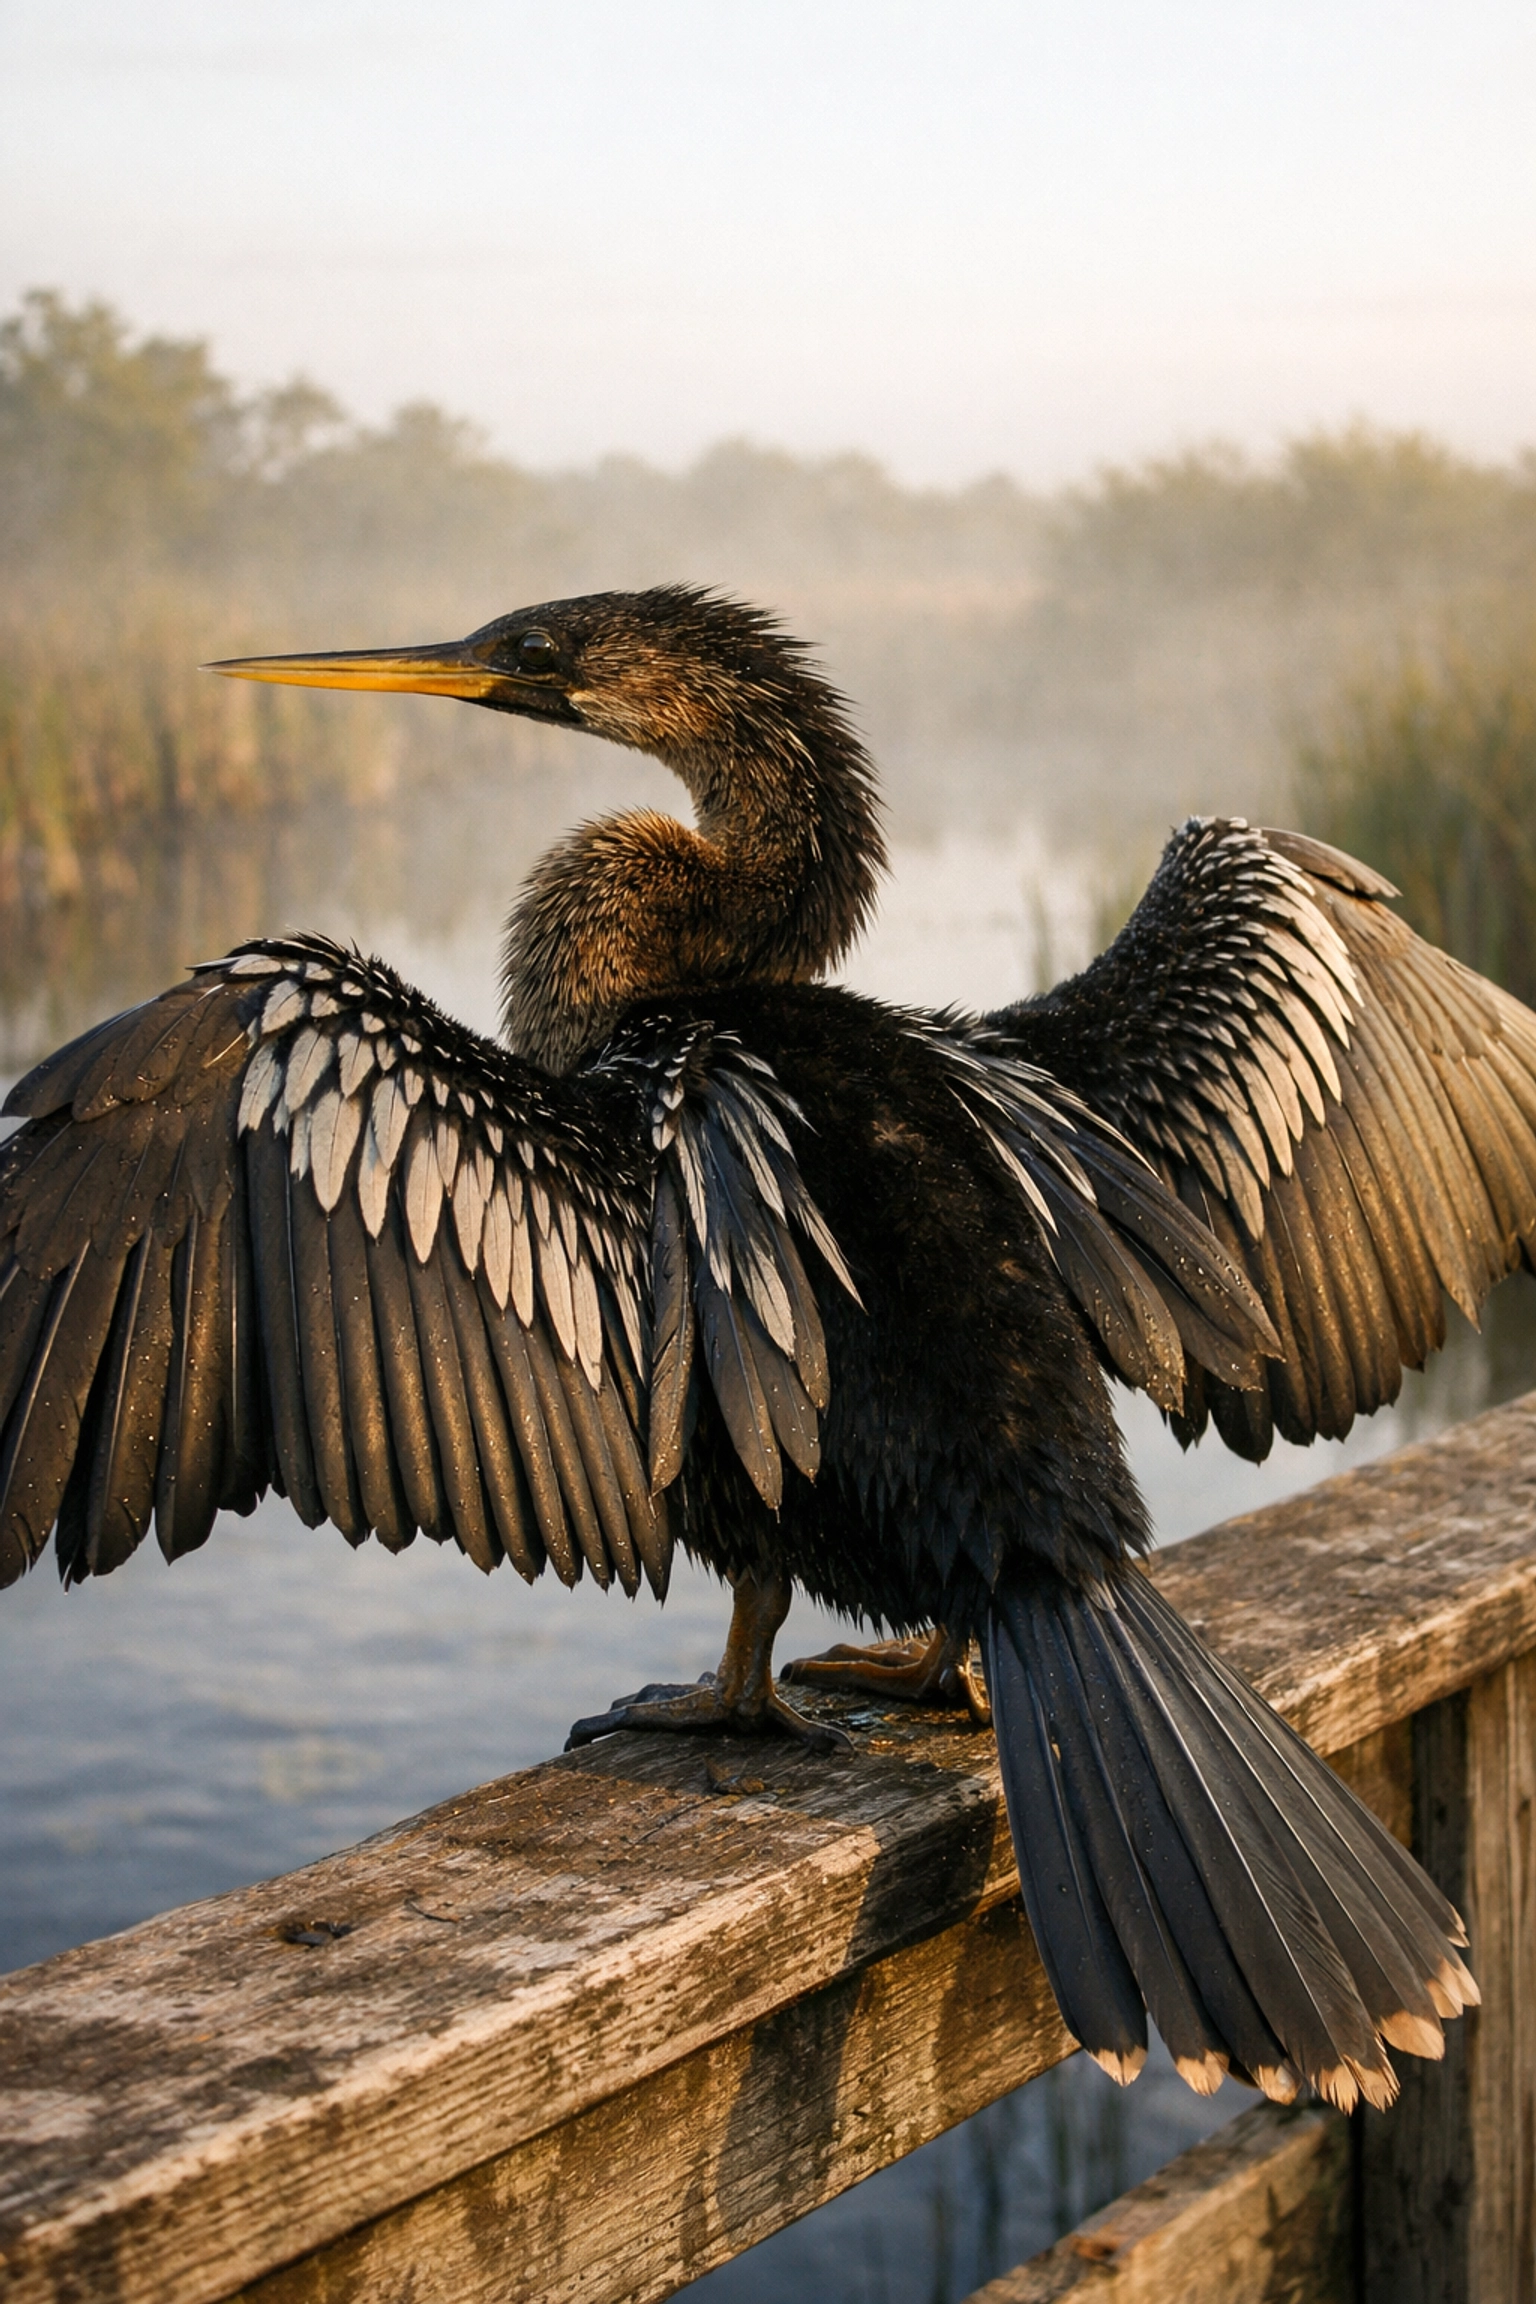
1. Anhinga Trail (The Gold Standard)
Just as you enter the park near the Royal Palm Visitor Center, the Anhinga Trail greets you as perhaps the most accessible and productive spot for wildlife photography in the Everglades. This self-guided boardwalk trail is legendary for a reason: the wildlife here is remarkably accustomed to human presence.
When you walk this path during the early morning hours, you are essentially stepping into a natural studio. You will find Anhingas drying their wings, Great Blue Herons stalking the shallows, and Alligators sunning themselves within mere feet of your lens. Because the birds are non-skittish, you can focus on capturing intricate details: the texture of a feather or the reflection in a reptile’s eye: without the need for extreme camouflage.
2. Shark Valley (The Heart of the Glades)
Located along the Tamiami Trail, Shark Valley offers you a 15-mile loop that cuts directly through the heart of the freshwater marsh. This location is unparalleled for landscape photography in the Everglades, especially if you make the journey to the 45-foot observation tower.
As you bike or take the tram along the loop, keep your eyes peeled for wading birds within 50 feet of the path. The elevation of the tower provides a panoramic perspective that allows you to capture the sheer scale of the sawgrass prairie. For the best results, arrive when the gates open at 8:30 AM to catch the soft morning light illuminating the alligators that frequently lounge right on the pavement.
| Feature |
Best For |
Recommended Lens |
| Observation Tower |
Panoramic Landscapes |
16-35mm Wide Angle |
| Tram Road |
Bird-in-flight & Gators |
100-400mm Zoom |
| Canal Edge |
Close-up Wildlife |
400mm+ Prime |
3. Pa-hay-okee Overlook
If your goal is to capture the quintessential "River of Grass," Pa-hay-okee is your destination. The short boardwalk leads you to a raised platform that overlooks a vast expanse of sawgrass. This spot is a paradise for birders and landscape enthusiasts alike.
To maximize your success here, plan your visit for the late afternoon. With the sun behind you, the golden light hits the marsh, creating a high-contrast environment that makes the diverse bird species pop against the green and gold backdrop. This is the moment to use your Ultimate Lightroom Preset Collection to enhance those warm, swampy tones and bring out the true vibrance of the ecosystem.
4. Eco Pond at Flamingo
As you drive all the way south to the Flamingo area, you encounter Eco Pond. This location stands out for its sunset silhouettes. During the winter months, when water levels drop, the pond becomes a magnet for waterfowl.
You will likely encounter Roseate Spoonbills and Black-necked Stilts feeding in the shallows. The key here is patience; as the sun begins to dip, the sky transforms into a canvas of pinks and purples, providing the perfect backlight for dramatic bird silhouettes. Your experience at Eco Pond will be a highlight of your trip, offering a sense of isolation and peace that is hard to find elsewhere.
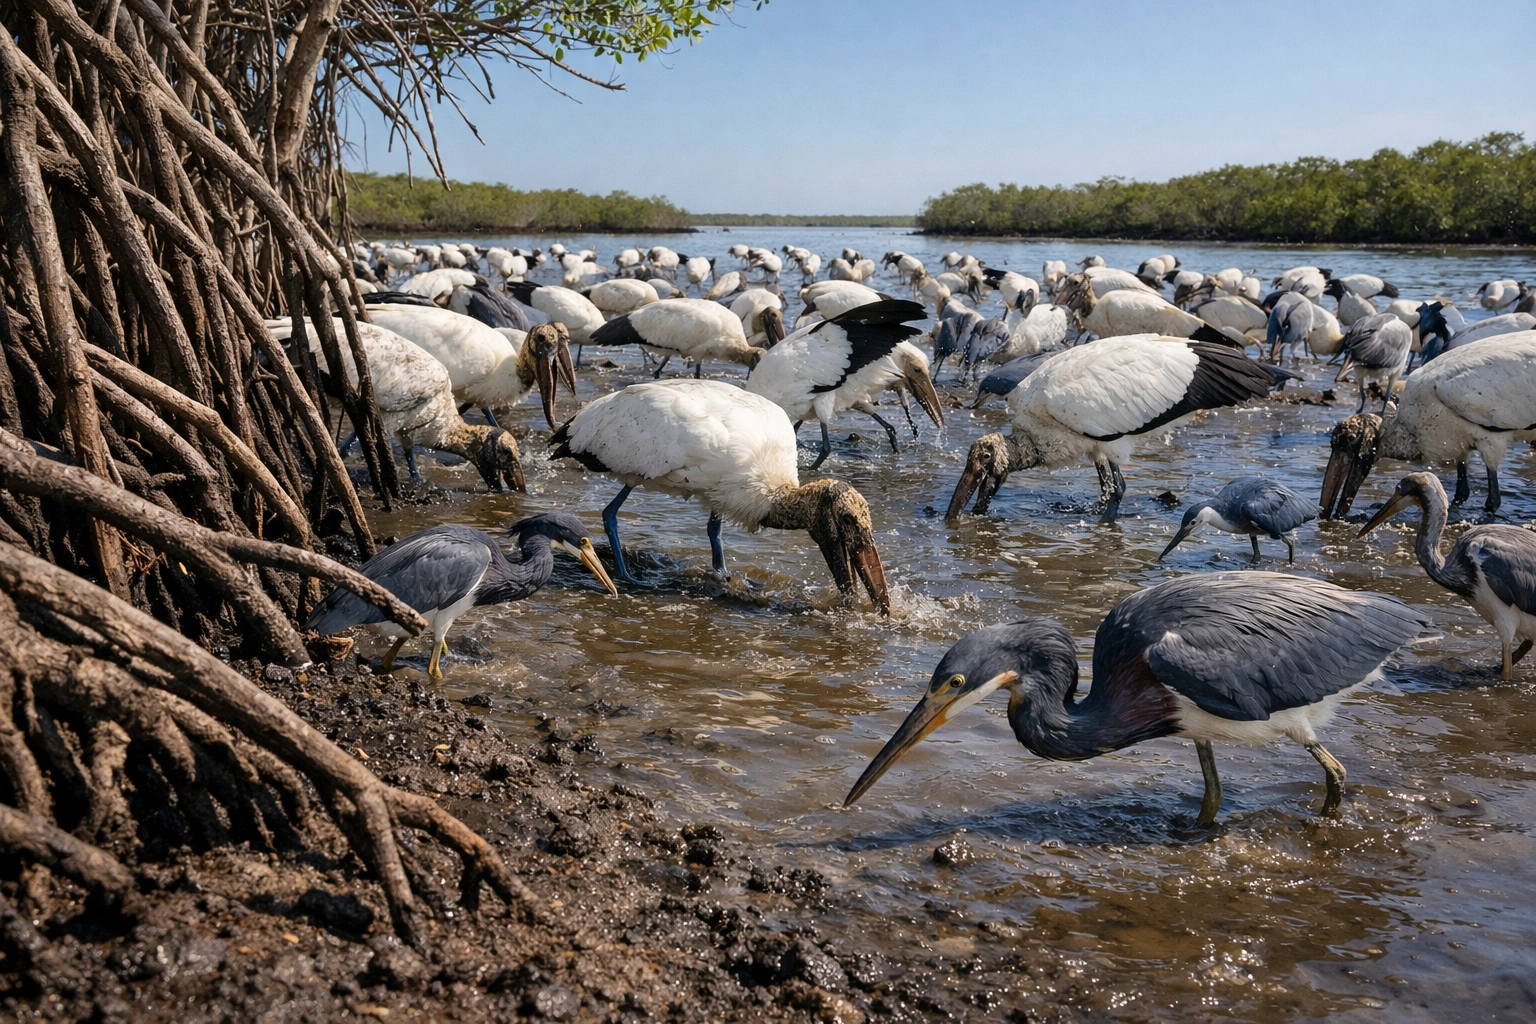
5. Mrazek Pond
From late February into mid-March, Mrazek Pond becomes one of the most concentrated Everglades photography locations for wading birds. As the dry season progresses, the receding water traps fish in small pools, creating a feeding frenzy that is a dream for any wildlife photographer.
You can expect to see Wood Storks, Tricolored Herons, and Snowy Egrets in staggering numbers. This is where your technical skills are put to the test. Managing the bright whites of the egrets against the dark mangroves requires precision, but the result is a professional, fine-art quality image that you would be proud to display on Edin Fine Art.
6. Nine Mile Pond Canoe Trail
For the more adventurous photographer, the Nine Mile Pond Canoe Trail offers a perspective that few tourists ever see. By taking a kayak or canoe into the shallow waters, you immerse yourself in the aquatic life and hidden rookeries.
Navigating through the mangrove tunnels and open marl prairies allows you to photograph reflections that are smooth as butter. If you are lucky, you might even spot "Croczilla," a massive American crocodile that frequents this area. Capturing a 14-foot predator from the low angle of a kayak will undoubtedly be the crown jewel of your wildlife photography in the Everglades.
7. Mahogany Hammock
Stepping into Mahogany Hammock feels like entering another world. This ancient hardwood forest offers a stark contrast to the open marshes. Here, you swap the wide-angle landscapes for tight, textured shots of the forest floor and canopy.
Your lens will find Barred Owls, Woodpeckers, and even the occasional raccoon hiding among the ferns. The light play through the dense canopy creates a moody, ethereal atmosphere. To ensure your shots look their best, check out the resources at Edin Chavez Photography for tips on shooting in low-light forest conditions.
8. Wakodahatchee Wetlands
While technically located in nearby Delray Beach, no photography trip to the region is complete without a visit to Wakodahatchee. This man-made sanctuary is one of the most prolific birding spots in Florida.
The boardwalk puts you right in the middle of the nesting action. You can photograph Wood Storks and Herons tending to their nests at eye level. This proximity provides an unmatched opportunity for behavioral shots. However, be mindful of the boardwalk vibrations; using a faster shutter speed ensures your images remain tack-sharp even when other visitors are walking by.

9. Big Cypress National Preserve
Connected ecologically to the Everglades, Big Cypress National Preserve offers a more rugged and wild experience. If you explore Loop Road or Sweetwater Strand, you are stepping into the territory of the Florida Panther and the Black Bear.
The 360-degree swamp views at Sweetwater Strand are breathtaking. You will often see otters swimming and catching food in the clear water. Because of the dark cypress canopy, you should be prepared to push your ISO to 2500 or higher. This dedication to capturing the raw, untouched beauty of the swamp is what separates a snapshot from a piece of fine art.
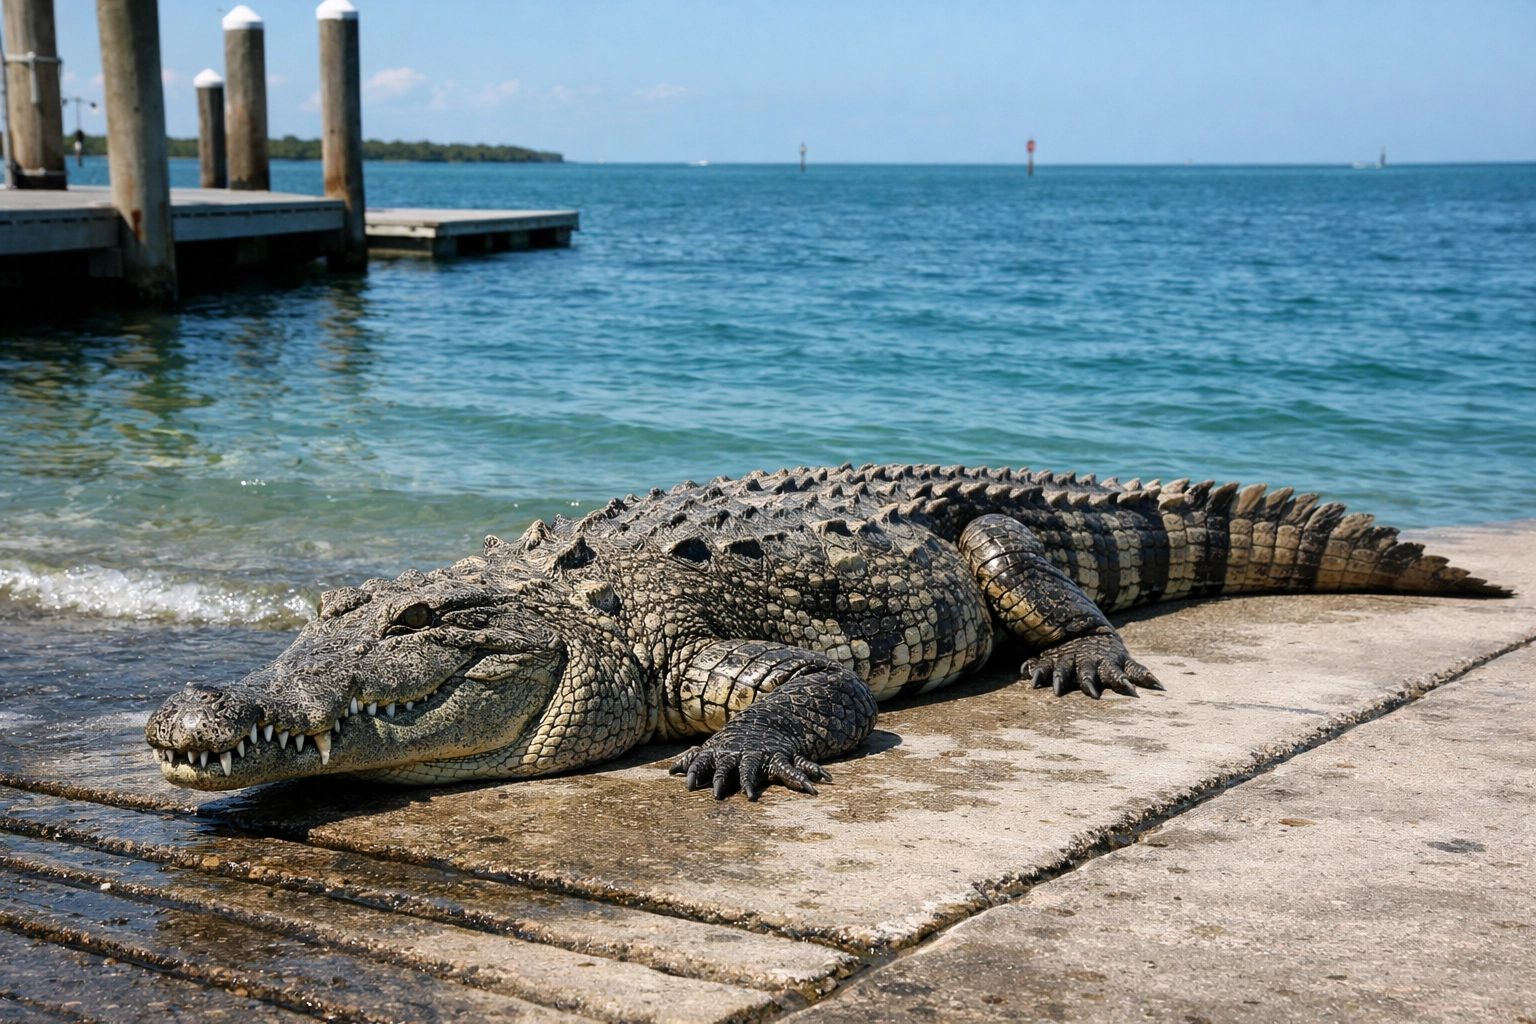
10. Flamingo Marina
Your final stop should be the Flamingo Marina, the gateway to Florida Bay. This is the premier spot for documenting the American Crocodile, which can often be seen basking on the boat ramps.
Beyond the crocodiles, the marina is a hub for Manatees and Ospreys. The combination of salt and fresh water creates a biological crossroads that guarantees variety in your portfolio. Whether you are shooting from the docks or taking a boat tour into the backcountry, the Flamingo Marina ensures your trip ends on a high note.
Elevate Your Craft
The Everglades is a vast and sometimes intimidating environment. To truly master this landscape, you need a guide that breaks down the best times to visit, the exact GPS coordinates for hidden spots, and the settings required to handle the challenging Florida light.
You can find all of this and more in the Everglades Photography Guide. This comprehensive resource is designed to empower you to skip the guesswork and go straight to the locations that yield the best results.
Essential Tips for Your Visit:
- Timing is Everything: Arrive 30 minutes before sunrise. The first hour of light is your most valuable asset.
- Respect the Wildlife: Never feed or harass the animals. A respectful distance ensures natural behavior and better photos.
- Stay Hydrated: The Florida sun is unforgiving. Your physical comfort is directly tied to your creative stamina.
- Post-Processing: Use a consistent workflow. My Lightroom presets are a great way to start.
By integrating these locations into your itinerary, you are setting yourself up for success. The Everglades is a place of profound beauty and quiet power. With your camera in hand and the right guidance, you are ready to capture the breathtaking wildlife shots that define this incredible ecosystem.
For more inspiration and professional fine art prints, visit Edin Studios and explore the world through my lens. Hence, with these tools and locations at your disposal, your next trip to the Everglades will be nothing short of extraordinary.


