Just as you feel that first hit of humid, salt-tinged air stepping off the plane, you realize Miami isn’t just a city; it’s a high-definition fever dream. For the creative soul, this place is a playground of saturated colors, Art Deco geometry, and a rhythm that forces your shutter finger to stay twitchy. Whether you are a professional photographer or someone who just appreciates the finer aesthetic details of life, finding fun things to do in Miami means looking beyond the neon-lit cliches of South Beach.
You aren't here just to bake in the sun. You’re here to capture the soul of the 305. To help you navigate this visual wonderland, I’ve curated the ultimate list of experiences that will fuel your inspiration and leave your portfolio looking like a million bucks. Before you head out, make sure you check out the best photography spots in Miami to ensure you don’t miss a single iconic frame.
1. Immerse Yourself in Wynwood Photography
If your creative heart doesn't skip a beat the moment you enter Wynwood, you might need to check your pulse. This neighborhood is the world’s premier outdoor museum, where every warehouse wall is a massive canvas. Wynwood photography is about more than just snapping a mural; it’s about capturing the dialogue between street culture and high art.
You’ll find over 35 hand-sprayed murals at the Wynwood Walls, featuring legends like Os Gemeos. But don't stop there. The "real" magic happens in the back alleys where local artists leave their mark. The textures here are as gritty as they are beautiful. When you're done shooting, you can refine those raw files with the Ultimate Lightroom Preset Collection to make those street colors truly pop.
2. Step Back in Time in the Art Deco District
Miami Beach is home to the world's largest collection of Art Deco architecture. Walking down Ocean Drive feels like you’ve been transported into a 1930s postcard, but with better coffee. For a creative, the symmetry, pastel hues, and neon signage are a masterclass in design.
You should aim for the "blue hour": that magical window just after sunset: when the neon lights flicker to life. The juxtaposition of the electric blue sky against the glowing pink and yellow buildings is unmatched. If you want to dive deep into the history and best angles of these structures, our Miami self-driving photography guide is your best friend for navigating the beach like a local.
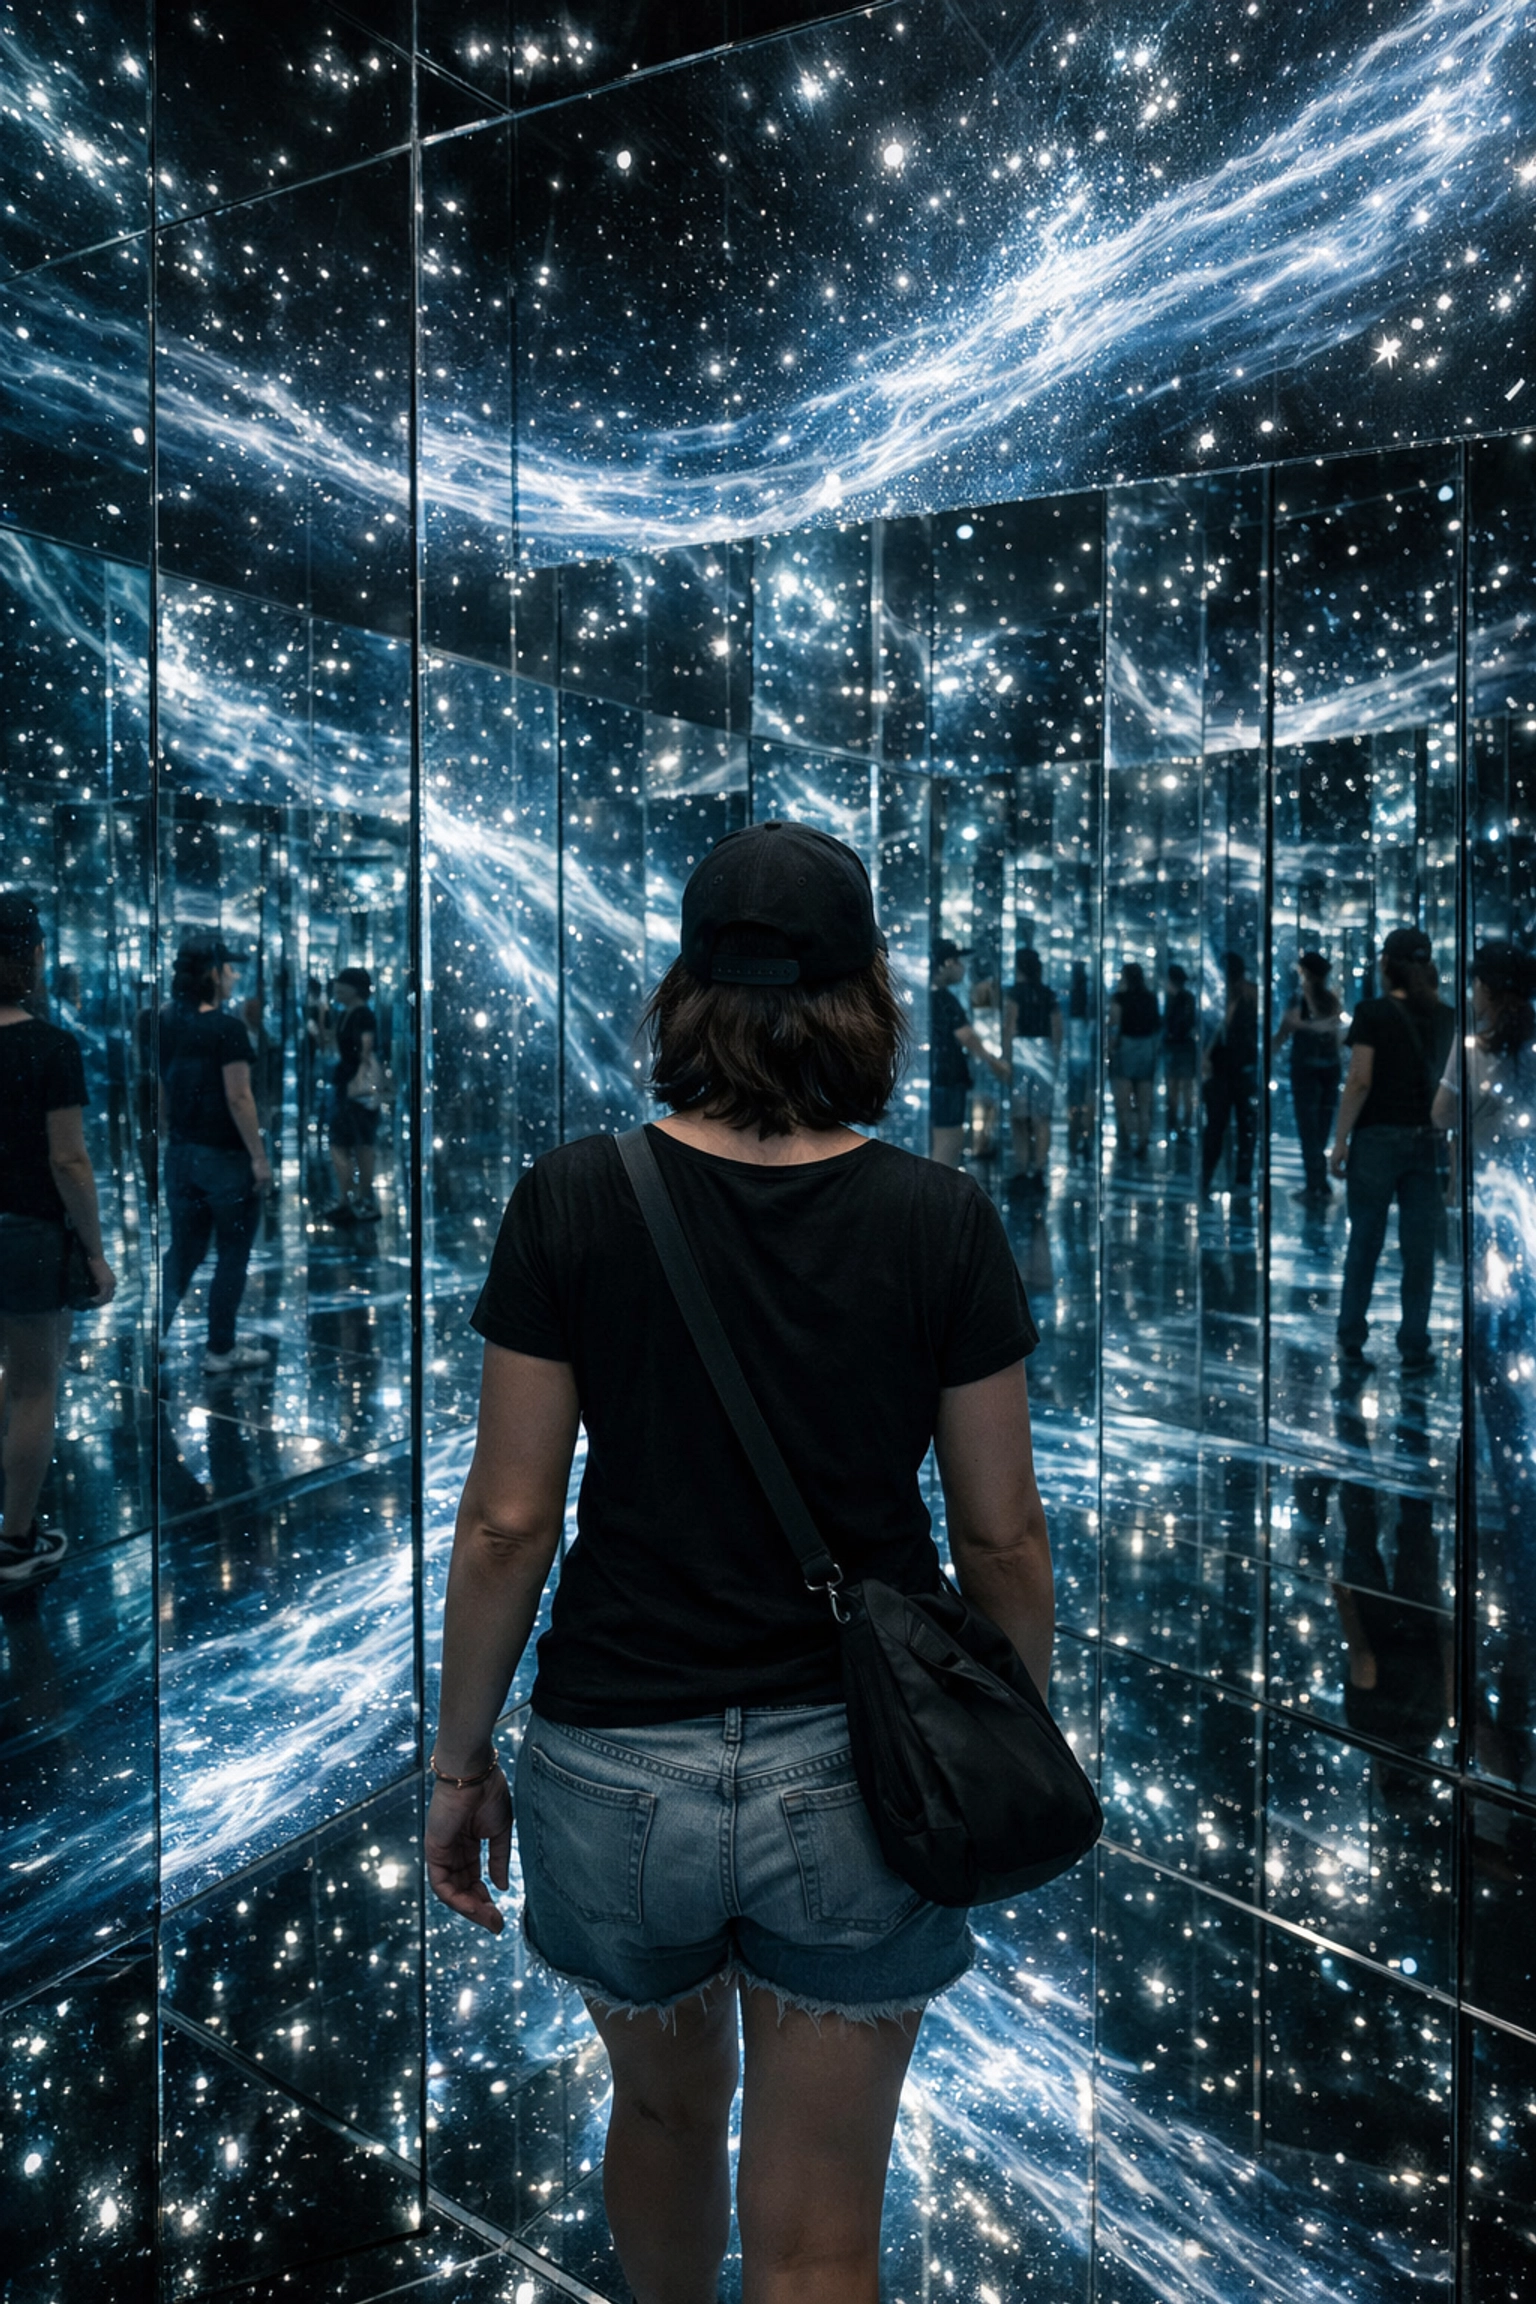
3. Experience the Immersive World of Superblue
If you want to step inside the art rather than just look at it, Superblue Miami in Allapattah is non-negotiable. This isn’t your grandmother’s gallery. We’re talking about mirrored labyrinths, digital waterfalls that react to your movement, and clouds made of soap bubbles that you can actually walk through.
For photographers, this place is a challenge and a gift. The lighting is complex, ethereal, and constantly shifting. It pushes you to master your low-light settings and think about composition in a three-dimensional space. It’s one of those miami hidden gems that feels like a secret portal to another dimension.
4. Explore the Ethereal Vizcaya Museum and Gardens
For a dose of European elegance dropped into a tropical jungle, Vizcaya is your spot. This historic estate is a sprawling ten-acre masterpiece of Italian Renaissance gardens and Mediterranean Revival architecture. You’ll find stone barges, intricate fountains, and mangroves that creep right up to the ornate sea wall.
The light here filters through the ancient banyan trees in a way that feels like visual poetry. It’s a favorite for high-end fashion shoots and fine art photography. If you find yourself falling in love with the timeless aesthetic of Vizcaya, you can see how that classic beauty translates into collectible art at Edin Fine Art.
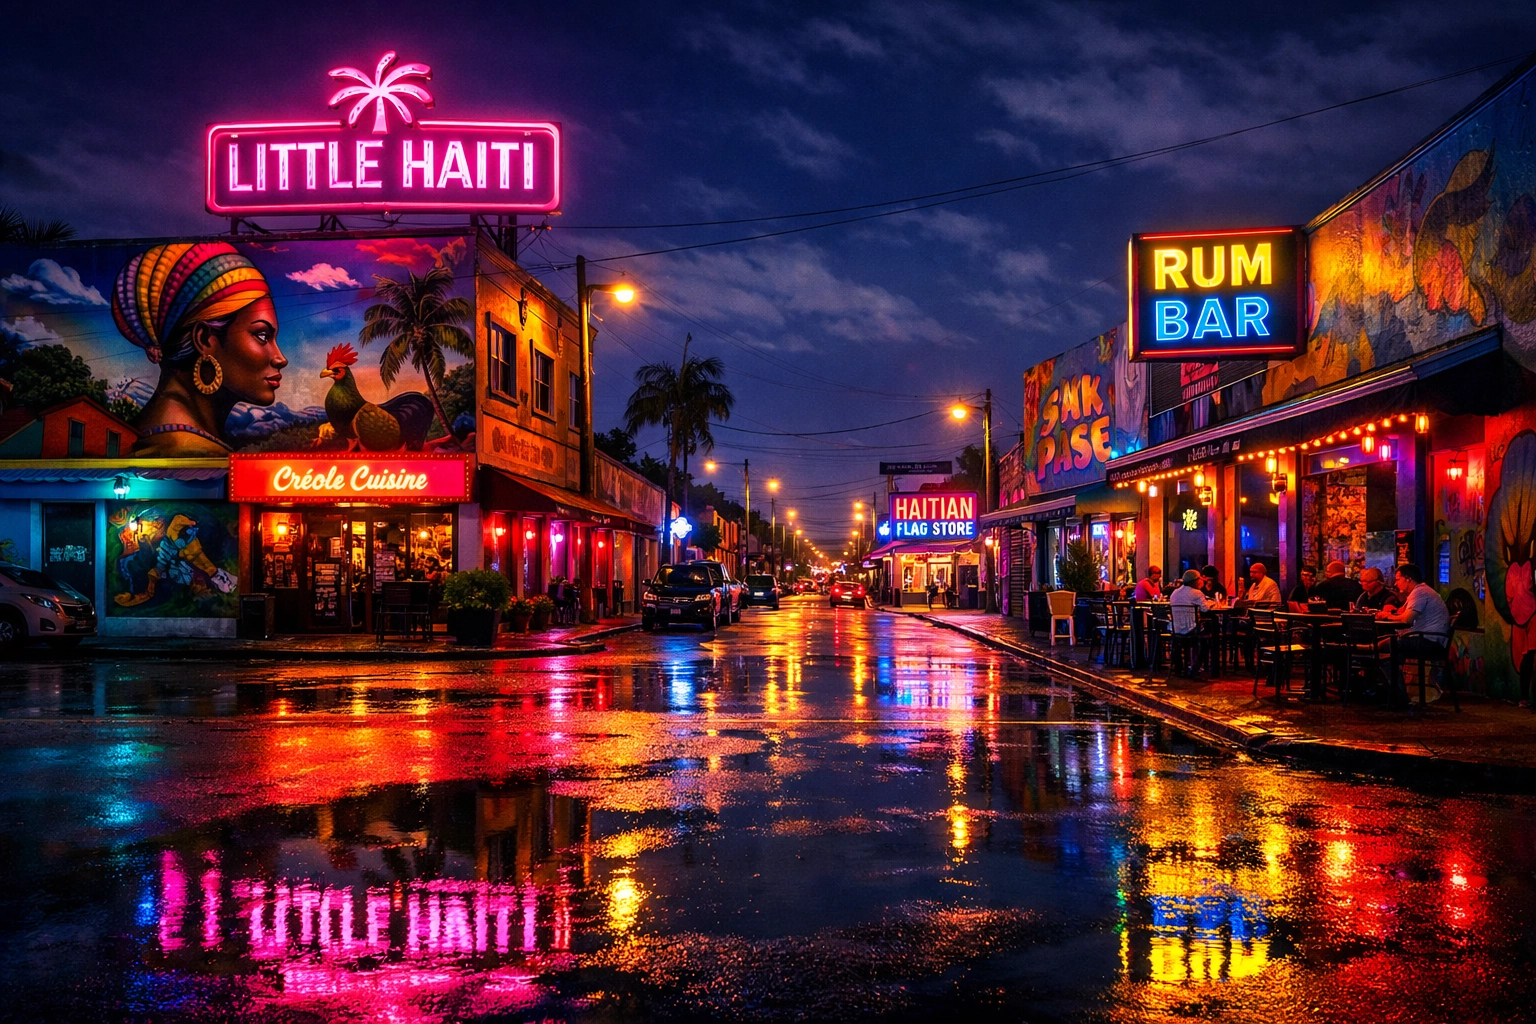
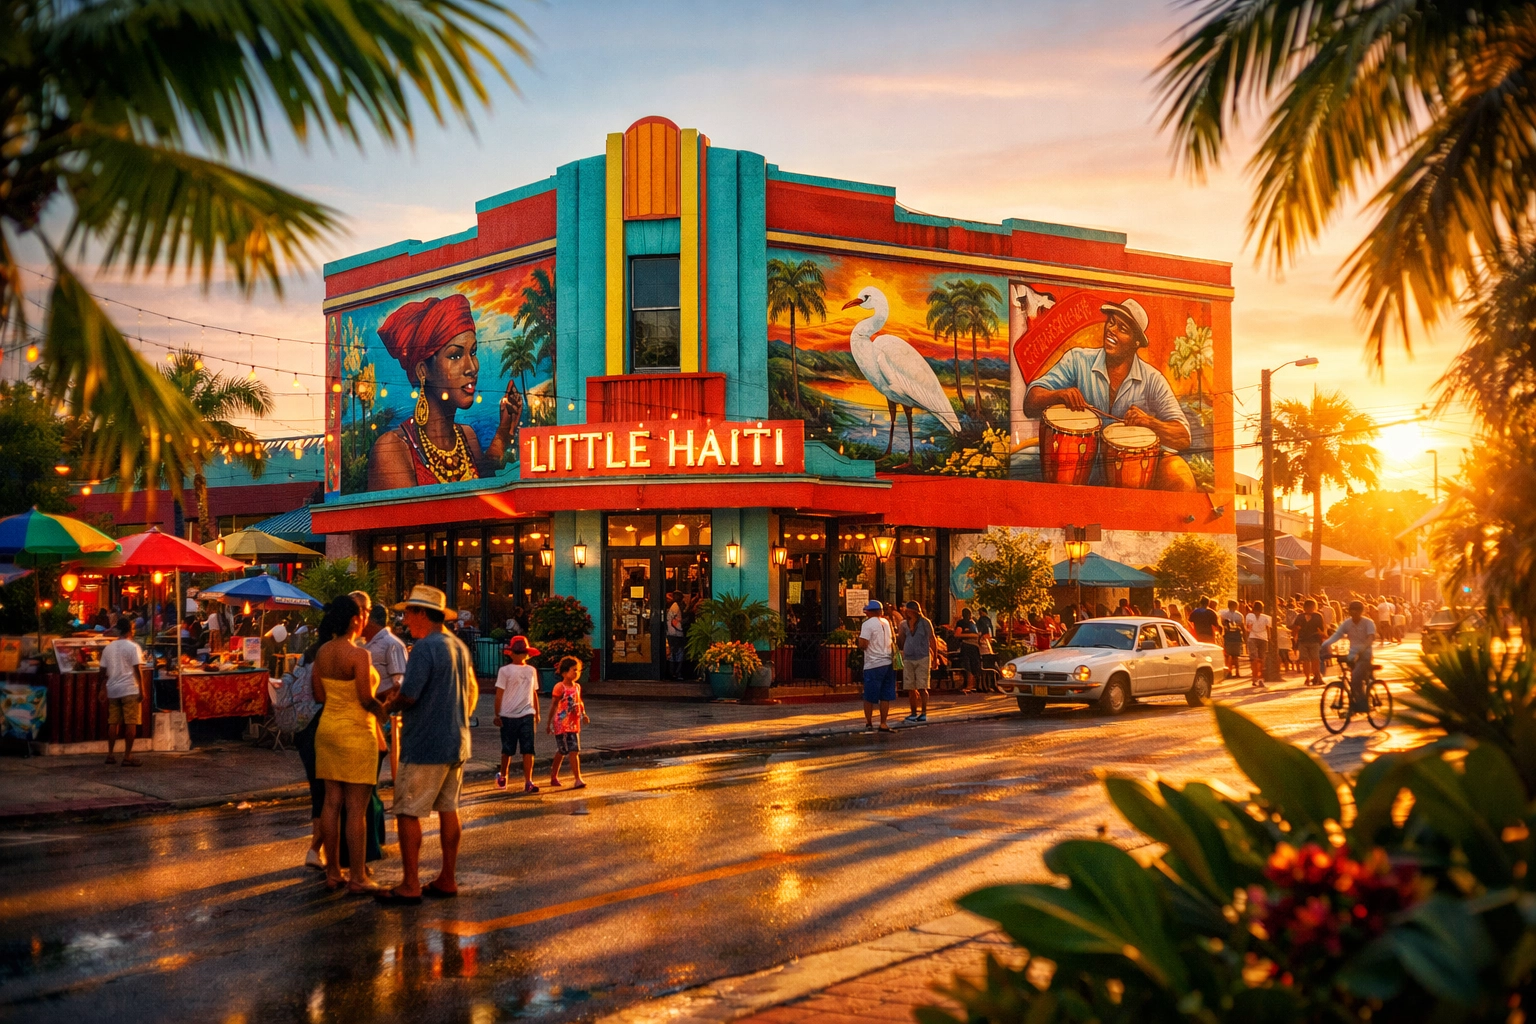
5. Discover Miami Hidden Gems in Little Haiti
While Wynwood gets the lion's share of the tourist attention, Little Haiti offers a raw, authentic creative energy that is purely infectious. The Caribbean Marketplace is a vibrant architectural tribute to the Iron Market in Port-au-Prince, and the surrounding streets are filled with brightly colored storefronts and community-focused murals.
This is the place to capture the "human-first" side of Miami. The community is welcoming, and the cultural richness provides a depth to your photos that you simply won't find in the more commercialized areas. It’s an essential stop for anyone looking for the soul of the city.
6. Catch the Sunset at the Best Miami Beaches
Not all beaches are created equal. If you are looking for the best miami beaches to shoot, South Pointe Park is the crown jewel. You get the pier, the greenery of the park, and the massive cruise ships gliding past as they exit Government Cut. It provides a sense of scale that is incredibly dramatic.
For a more secluded, "island" vibe, head over to Crandon Park on Key Biscayne. The petrified mangroves and shallow sandbars offer a minimalist landscape that is perfect for long-exposure photography. Whether you are shooting the Atlantic or the skyline across the bay, the water here acts as a giant reflector for Miami’s legendary sunsets.
7. A Creative Deep Dive at Pérez Art Museum Miami (PAMM)
PAMM is where contemporary art meets architectural genius. Designed by Herzog & de Meuron, the building itself is a work of art, featuring hanging gardens and sweeping views of Biscayne Bay. Inside, you’ll find a rotating selection of international art that reflects Miami’s diverse cultural landscape.
The outdoor deck is a creative’s dream for architectural photography. The vertical gardens against the backdrop of the MacArthur Causeway provide a stunning contrast between nature and urban infrastructure. For more insights on how to elevate your work in these types of environments, explore our site for a deep dive into hundreds of tutorials and guides at Edin Chavez Blog.
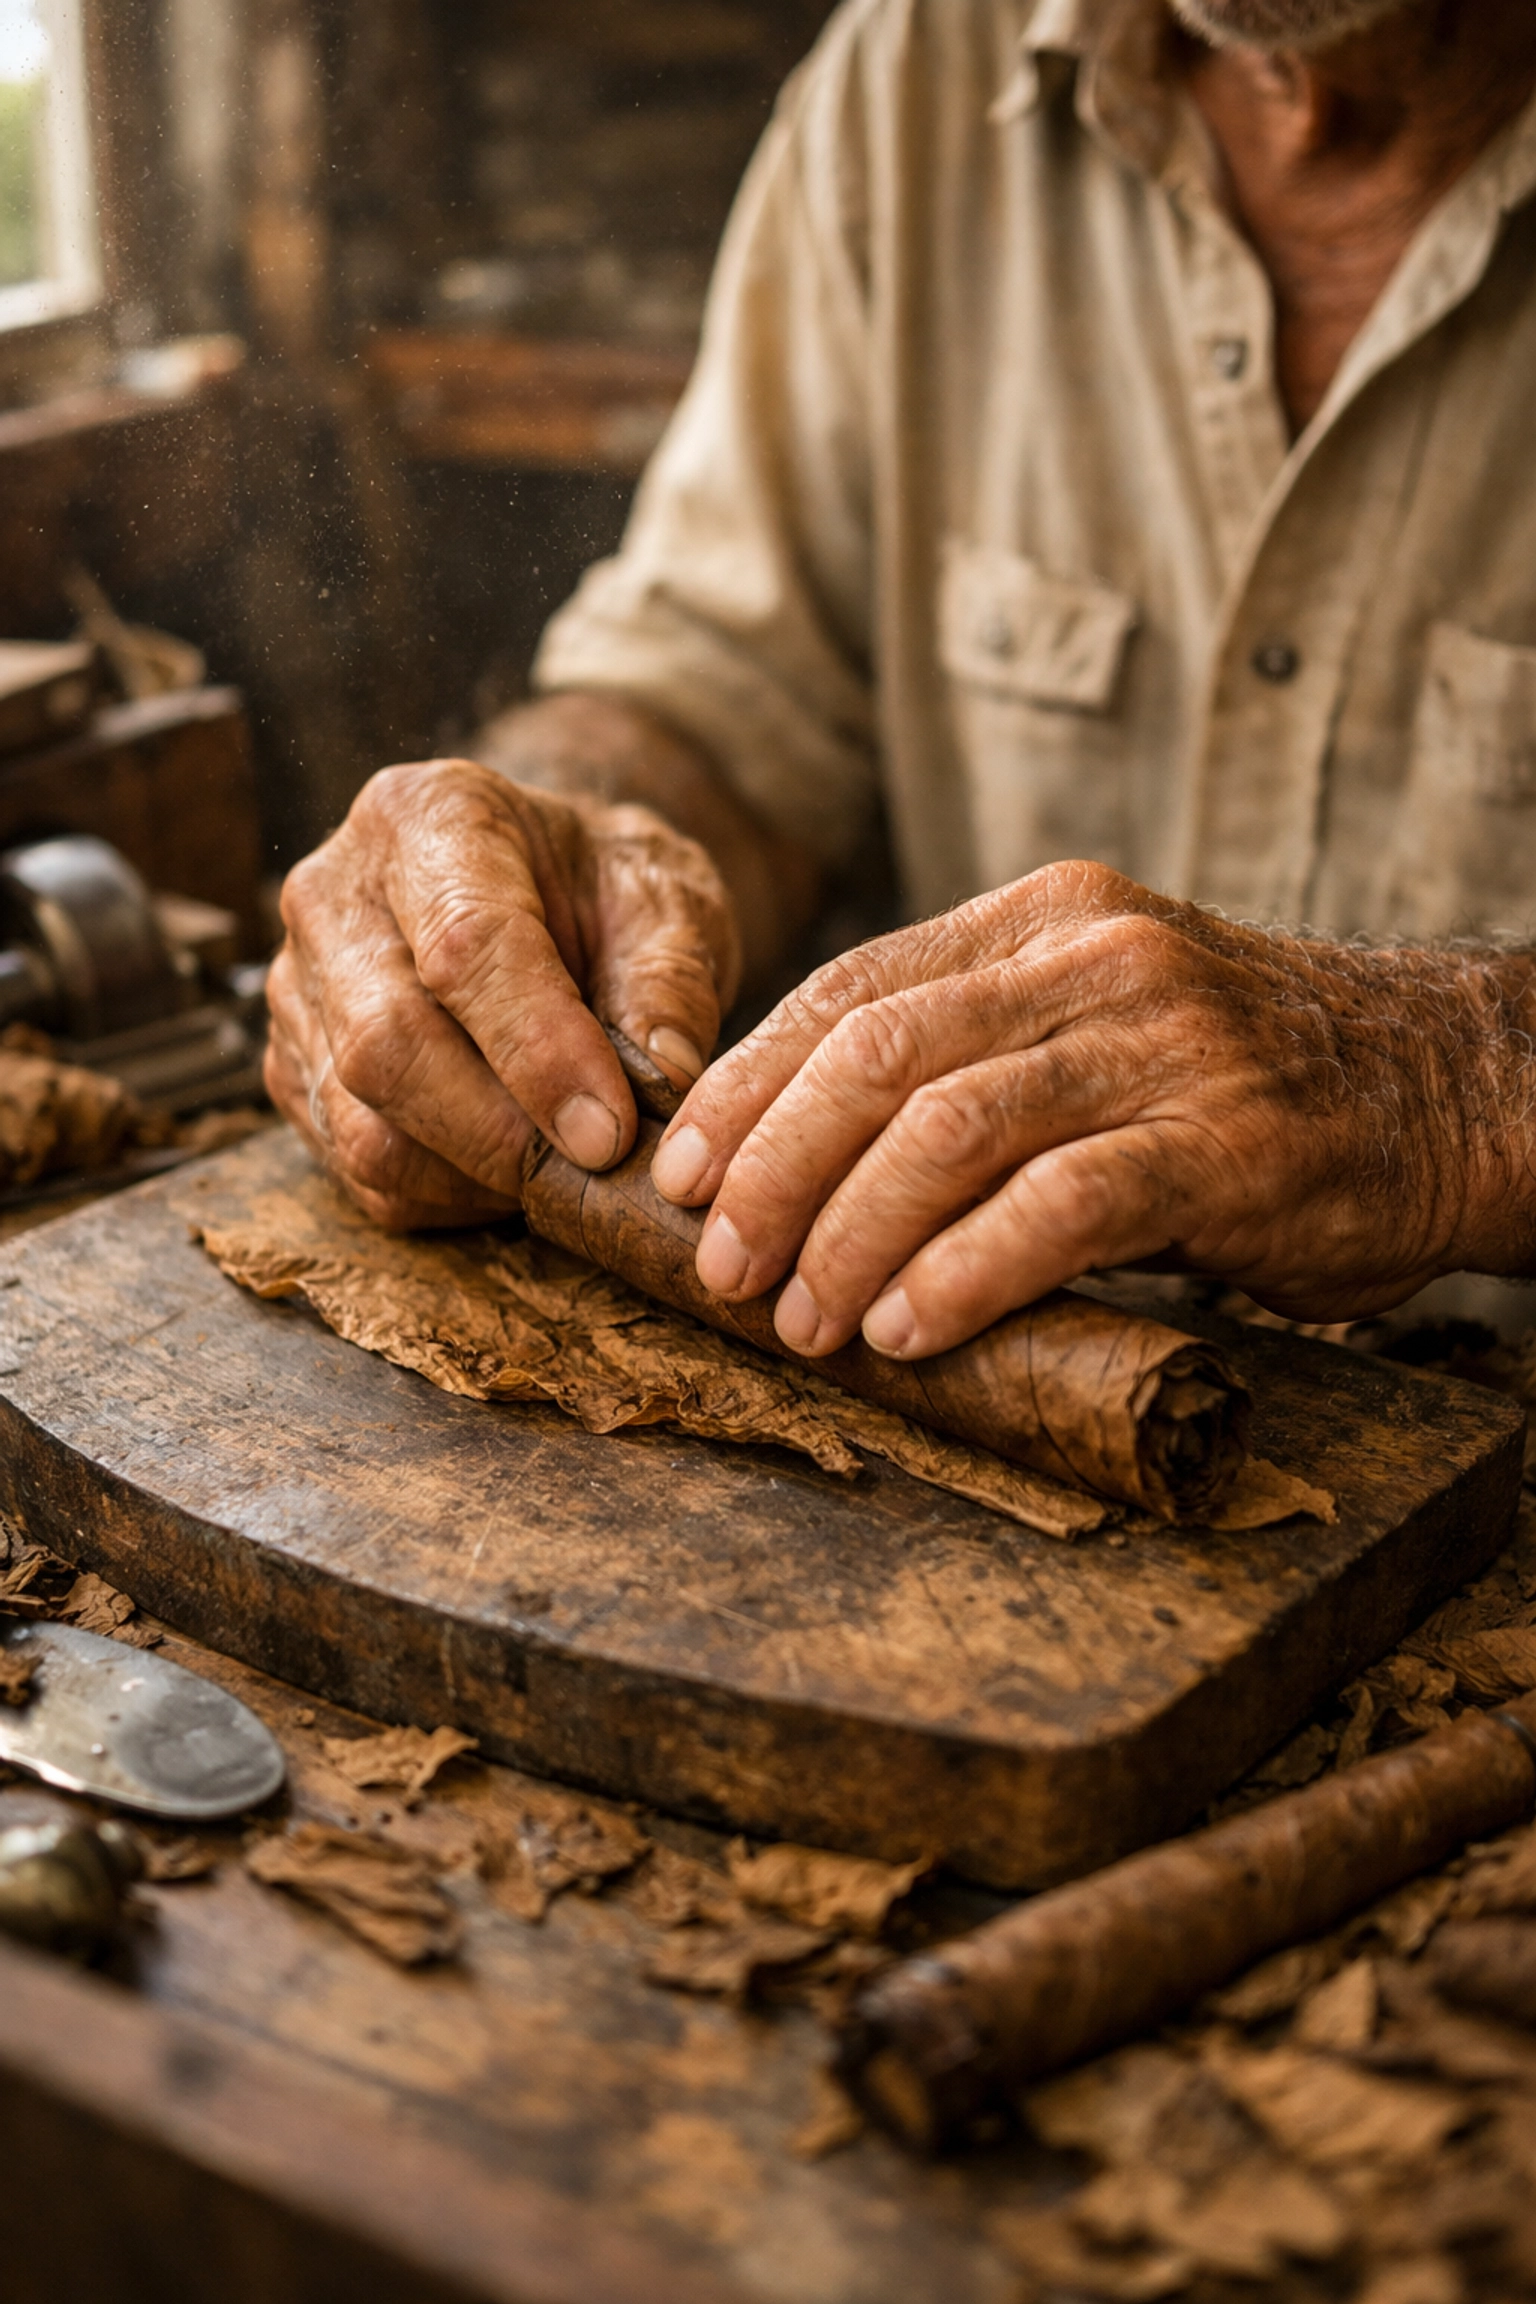
8. Savor the Culture and Coffee of Little Havana
Creative inspiration often starts with the senses, and there is no better place to wake them up than Calle Ocho. The smell of roasting tobacco, the clack of dominoes in Maximo Gomez Park, and the vibrant red of a freshly poured cafecito: it’s a sensory overload in the best way possible.
Little Havana is about the "Artist's Hand." It’s about the craftsmanship of the cigar rollers and the passion of the street musicians. Capturing these moments requires a quick eye and a respectful approach. If you’re feeling overwhelmed by the pace, booking a private Miami photography tour can help you slow down and find the narrative in the chaos.
9. Find Industrial Beauty in Allapattah
Allapattah is the "new" frontier for Miami creatives. It’s gritty, industrial, and increasingly home to some of the most important art collections in the city, like El Espacio 23. For the photographer who loves lines, shadows, and the beauty of "the premium of flaws," this neighborhood is a goldmine.
The warehouses here haven't all been polished yet, which gives your work an edge that is hard to replicate. It’s where the "Industrial" category of our blog comes to life. You can check out more of that aesthetic at Edin Studios.
10. Creative Comparison Table
To help you plan your trek through the magic city, here is a quick breakdown of what to expect at these creative hubs:
| Location |
Creative Vibe |
Best Time to Visit |
Primary Subject |
| Wynwood |
Energetic & Urban |
Early Morning |
Street Art & Murals |
| Art Deco Dist. |
Retro & Symmetrical |
Blue Hour |
Architecture & Neon |
| Superblue |
Futuristic & Immersive |
Mid-day |
Digital Art & Light |
| Vizcaya |
Romantic & Old World |
Golden Hour |
Gardens & History |
| Little Havana |
Soulful & Vibrant |
Afternoon |
Culture & People |
| South Pointe |
Scenic & Grand |
Sunset |
Landscapes & Ships |
Elevate Your Miami Experience
Miami is a city that rewards the curious. It’s easy to stay on the beaten path, but the real magic: the miami hidden gems: requires a bit of legwork and a creative eye. Whether you’re chasing the perfect sunset at the best miami beaches or getting lost in the geometry of wynwood photography, remember that your perspective is what makes the image unique.
If you are serious about capturing the essence of this city, don’t go it alone. Our Miami self-driving photography guide provides you with the exact coordinates and tips needed to beat the crowds and get the shot.
Every corner of this city tells a story, from the secret spots only locals know to the world-renowned galleries. By immersing yourself in these ten experiences, you aren't just visiting Miami; you’re documenting its pulse.
Hence, with these considerations in mind, grab your gear, charge your batteries, and go make something beautiful. For more insights on how to elevate your work, explore our site for a deep dive into hundreds of tutorials and guides at https://blog.edinchavez.com/.
Just as the first light of dawn hits the steel crown of the Chrysler Building, you realize that New York City isn’t just a place: it’s a living, breathing masterpiece of light and shadow. If you’ve ever stood on a street corner in Manhattan with your camera in hand, you know that the "City That Never Sleeps" is also the city that never stops giving you incredible frames. But let’s be real: NYC is massive, chaotic, and can be totally overwhelming if you don’t have a plan.
You aren't here just to take snapshots; you’re here to create fine art. Whether you are hunting for that perfect long exposure of the yellow taxi blur or a sunrise that makes the Brooklyn Bridge look like it’s made of gold, you need the right intel. This guide is your backstage pass to the best places to take pictures in NYC. We’re talking about the iconic, the hidden, and the downright jaw-dropping NYC photo spots that will elevate your portfolio from "tourist" to "pro."
If you want to skip the trial and error and go straight to the shots that sell, you absolutely need to grab my New York City Photography Guide. It’s the ultimate roadmap for your lens.
The Sky-High Perspective: Seeing the City from Above
When you want to capture the sheer scale of the concrete jungle, you have to get vertical. New York’s observation decks aren't just for tourists; they are some of the most strategic New York City photography locations for capturing the urban layout.
Top of the Rock (Rockefeller Center)
Top of the Rock stands out as the heavyweight champion for photographers. Why? Because from here, you can actually see the Empire State Building in all its glory. You get three levels of observation decks with 360-degree views that are unmatched. To ensure your shots are crisp and free of glass reflections, you need to head to the very top floor where the view is completely unobstructed.
Imagine the sun dipping below the horizon, the city lights beginning to flicker like diamonds on velvet. When you use your camera's night mode or a steady tripod (check local rules first!), the resulting fine art is pure magic.
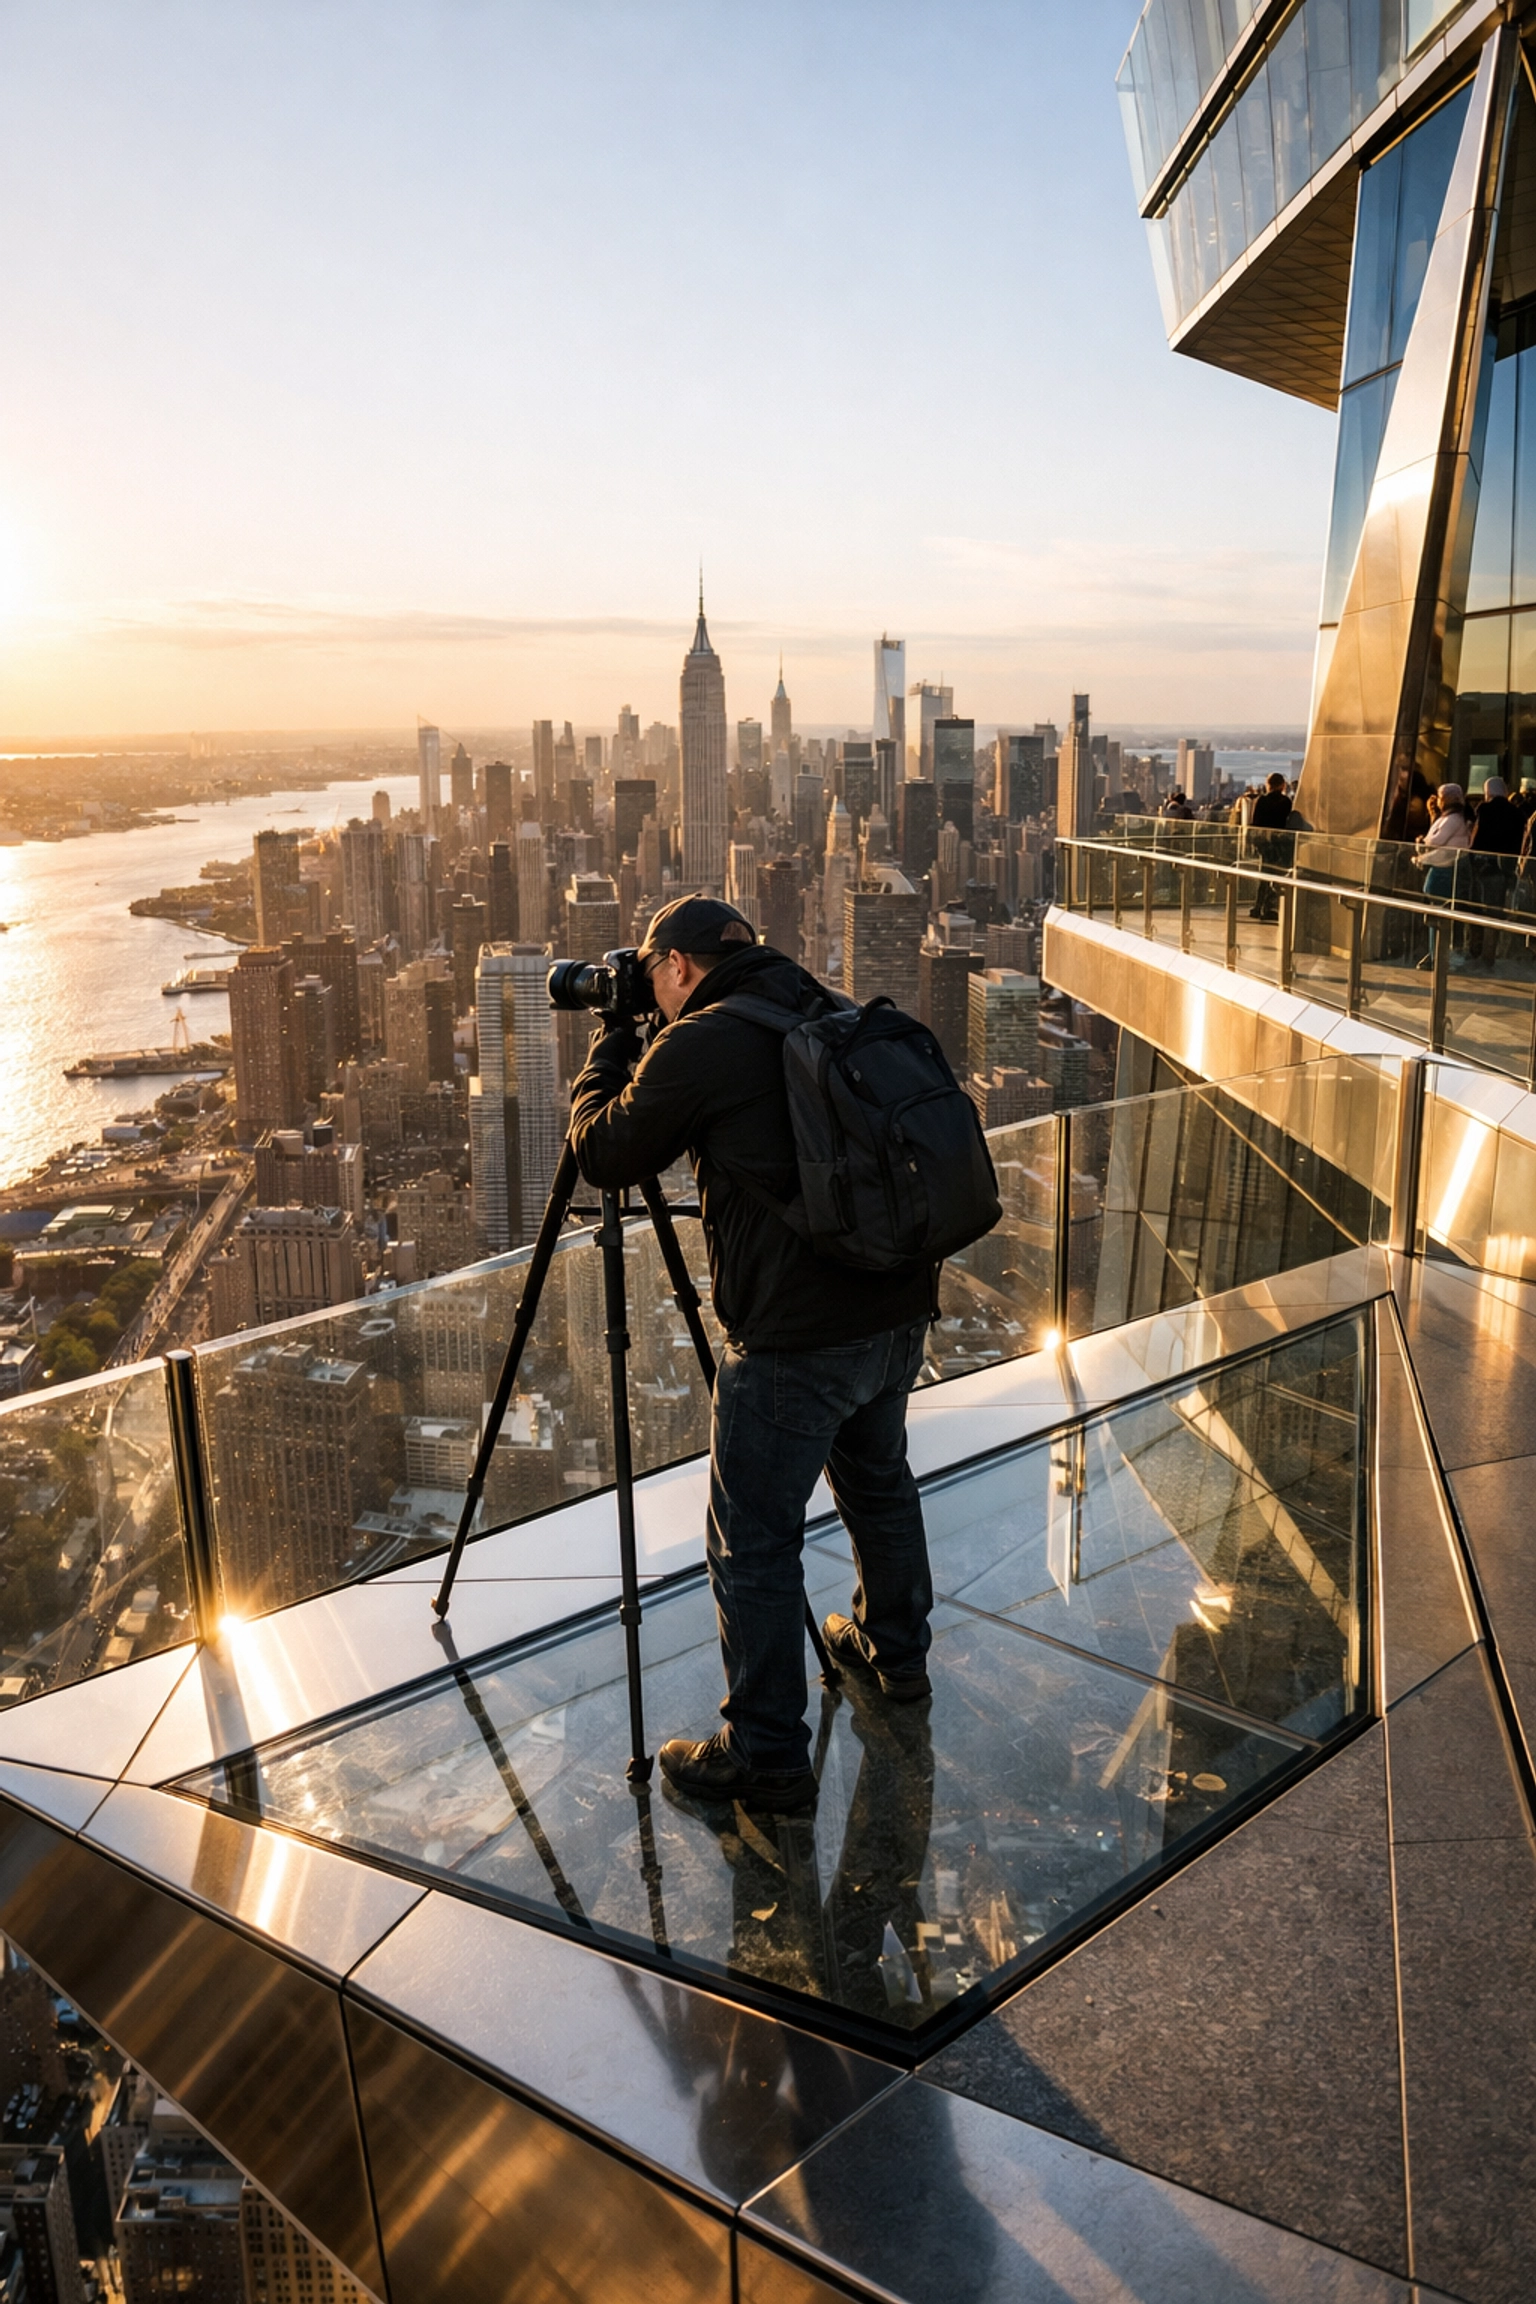
The Edge
If you want something that feels a bit more "cutting-edge" (pun intended), The Edge at Hudson Yards provides a thrilling perspective. Suspended mid-air, it gives you a sense of floating over the city. It’s a game-changer for architectural enthusiasts who want to play with sharp angles and modern glass.
Brooklyn Dreams: The Classic Waterfront Shots
You haven't truly photographed New York until you’ve crossed the East River. Brooklyn offers the scale and the skyline views that Manhattan simply can’t give you while you’re standing inside it.
DUMBO (The Manhattan Bridge View)
This is arguably the most famous shot in the world right now. When you stand at the intersection of Washington Street and Water Street, the Manhattan Bridge is perfectly framed by two towering red-brick buildings. If you time it right, the Empire State Building is visible right through the legs of the bridge.
Penny’s Pro Tip: Do not: I repeat, do not: try to shoot this at noon unless you love photos of other people’s heads. Sunrise is the only realistic time to get a clear shot. The light is contrasted, the street is quiet, and the energy is electric. After you finish, take a stroll through Edin Studios to see how we process these iconic urban landscapes.
Brooklyn Bridge Park
For those sunset vibes, Brooklyn Bridge Park is where your soul finds its peace. The view of the Lower Manhattan skyline across the water is smooth as butter during blue hour. Use a long exposure to flatten the water of the East River, turning it into a silky mirror that reflects the financial district’s glow. This is where you create the kind of work you see in the Edin Fine Art collection.
| Location |
Best Time |
Vibe |
| DUMBO |
Sunrise |
Industrial & Iconic |
| Brooklyn Bridge Park |
Sunset / Blue Hour |
Serene & Grand |
| Pebble Beach |
Sunset |
Dramatic & Textural |
Central Park: The Green Lungs in Fine Art
Central Park is so expansive you could spend a week there and still find new NYC photo spots. It provides a natural contrast to the harsh steel and glass of the surrounding skyscrapers.
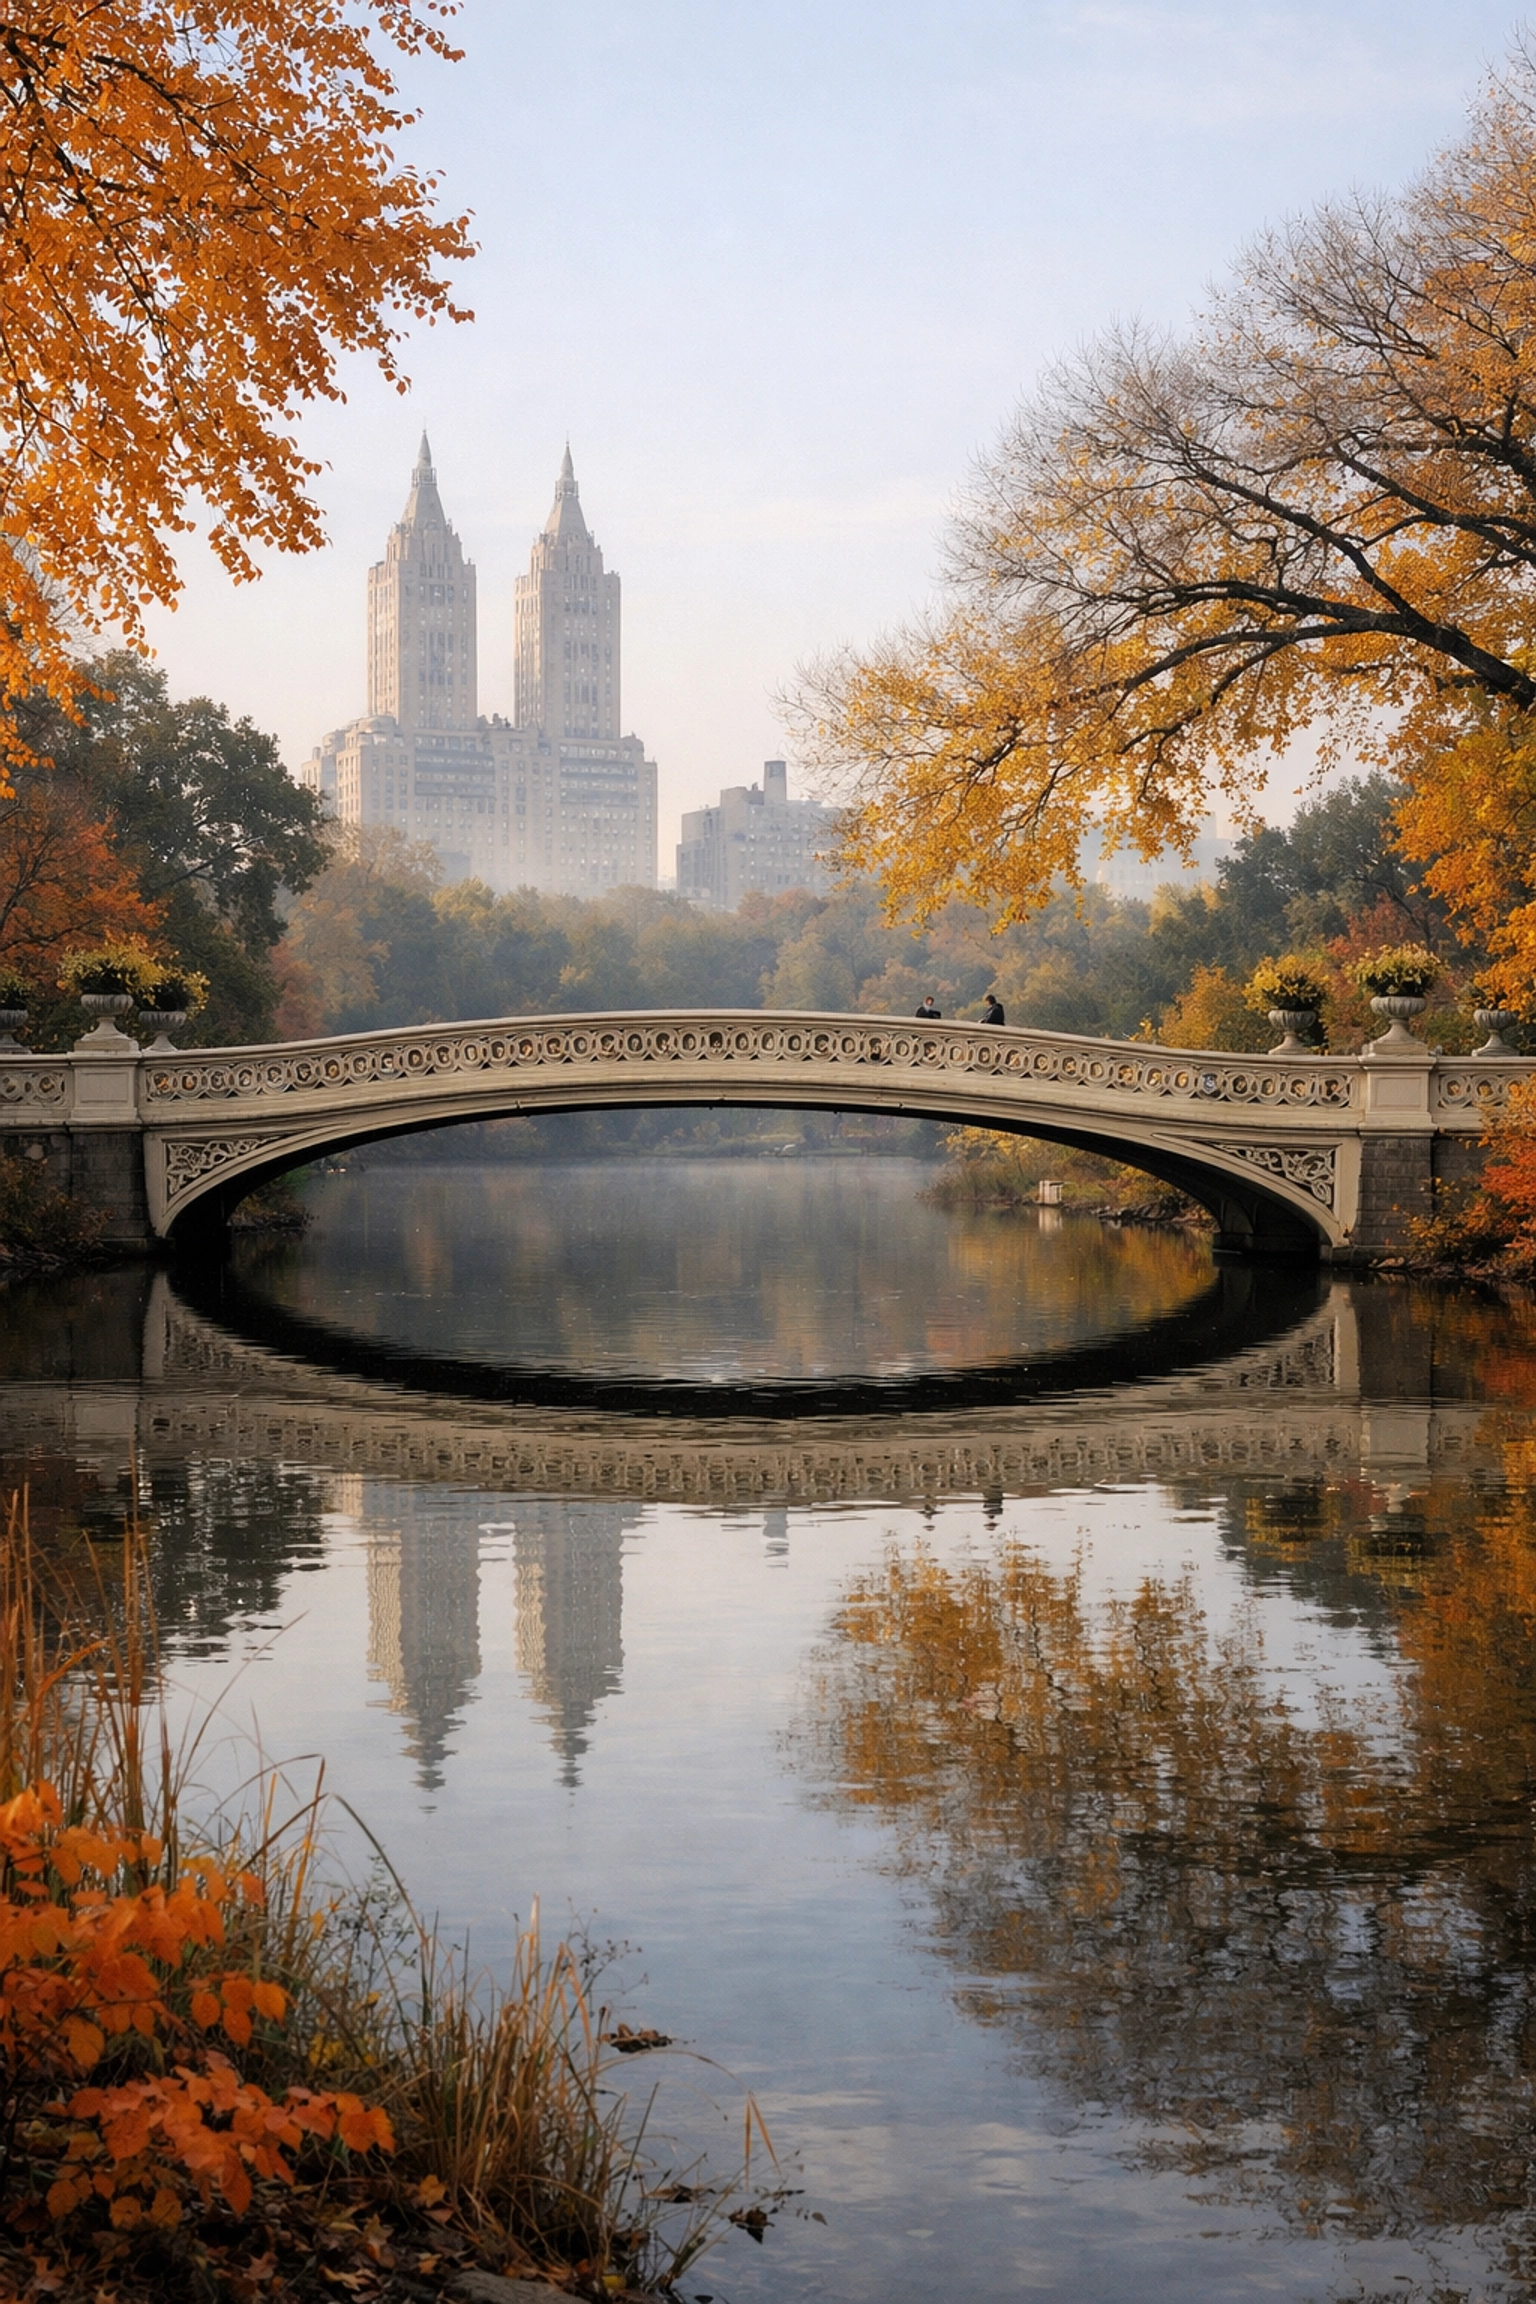
Bow Bridge and Bethesda Terrace
Often called the "Marriage Bridge," Bow Bridge is a masterpiece of Victorian design. The contrast of the white cast iron against the lush greenery (or the fiery oranges of autumn) creates a stunning composition. Just a short walk away is Bethesda Terrace. The Minton tiles on the ceiling of the arcade provide a repetitive geometric pattern that is a dream for fine art photographers.
When you are editing these shots, you want those greens and earthy tones to pop. I highly recommend using the Ultimate Lightroom Preset Collection to give your park photos that professional, high-end finish.
The Pulse of Manhattan: Streets and Neon
Sometimes, you want your photos to scream "New York." That means leaning into the chaos, the taxis, and the neon lights.
Times Square at Night
Times Square is the ultimate test of your low-light capabilities. It truly shows its character after dark, especially after a fresh rain. The reflections of the massive LED billboards on the wet pavement create a cyberpunk aesthetic that is incredibly fun to shoot. This is street photography at its loudest and most vibrant.
Tudor City Bridge
Located over East 42nd Street, this bridge overlooks the canyon of buildings leading straight to the Chrysler Building. It’s famous for Manhattanhenge (occurring around May and July), where the sunset aligns perfectly with the street grid. Even on a normal day, the yellow taxis streaming underneath create incredible light trails for your long-exposure work.
Stone Street
Deep in the Financial District, Stone Street is the first paved street in the city. It’s filled with cobblestones and historic charm. Because it’s a pedestrian-only zone, you can take your time setting up your tripod without worrying about getting buzzed by a delivery bike. It has a European feel that provides a unique break from the standard NYC skyscraper shots.
Specialized Locations for the Adventurous
If you want to go beyond the "usual" best places to take pictures in NYC, you have to travel a bit further uptown or across the bridges.
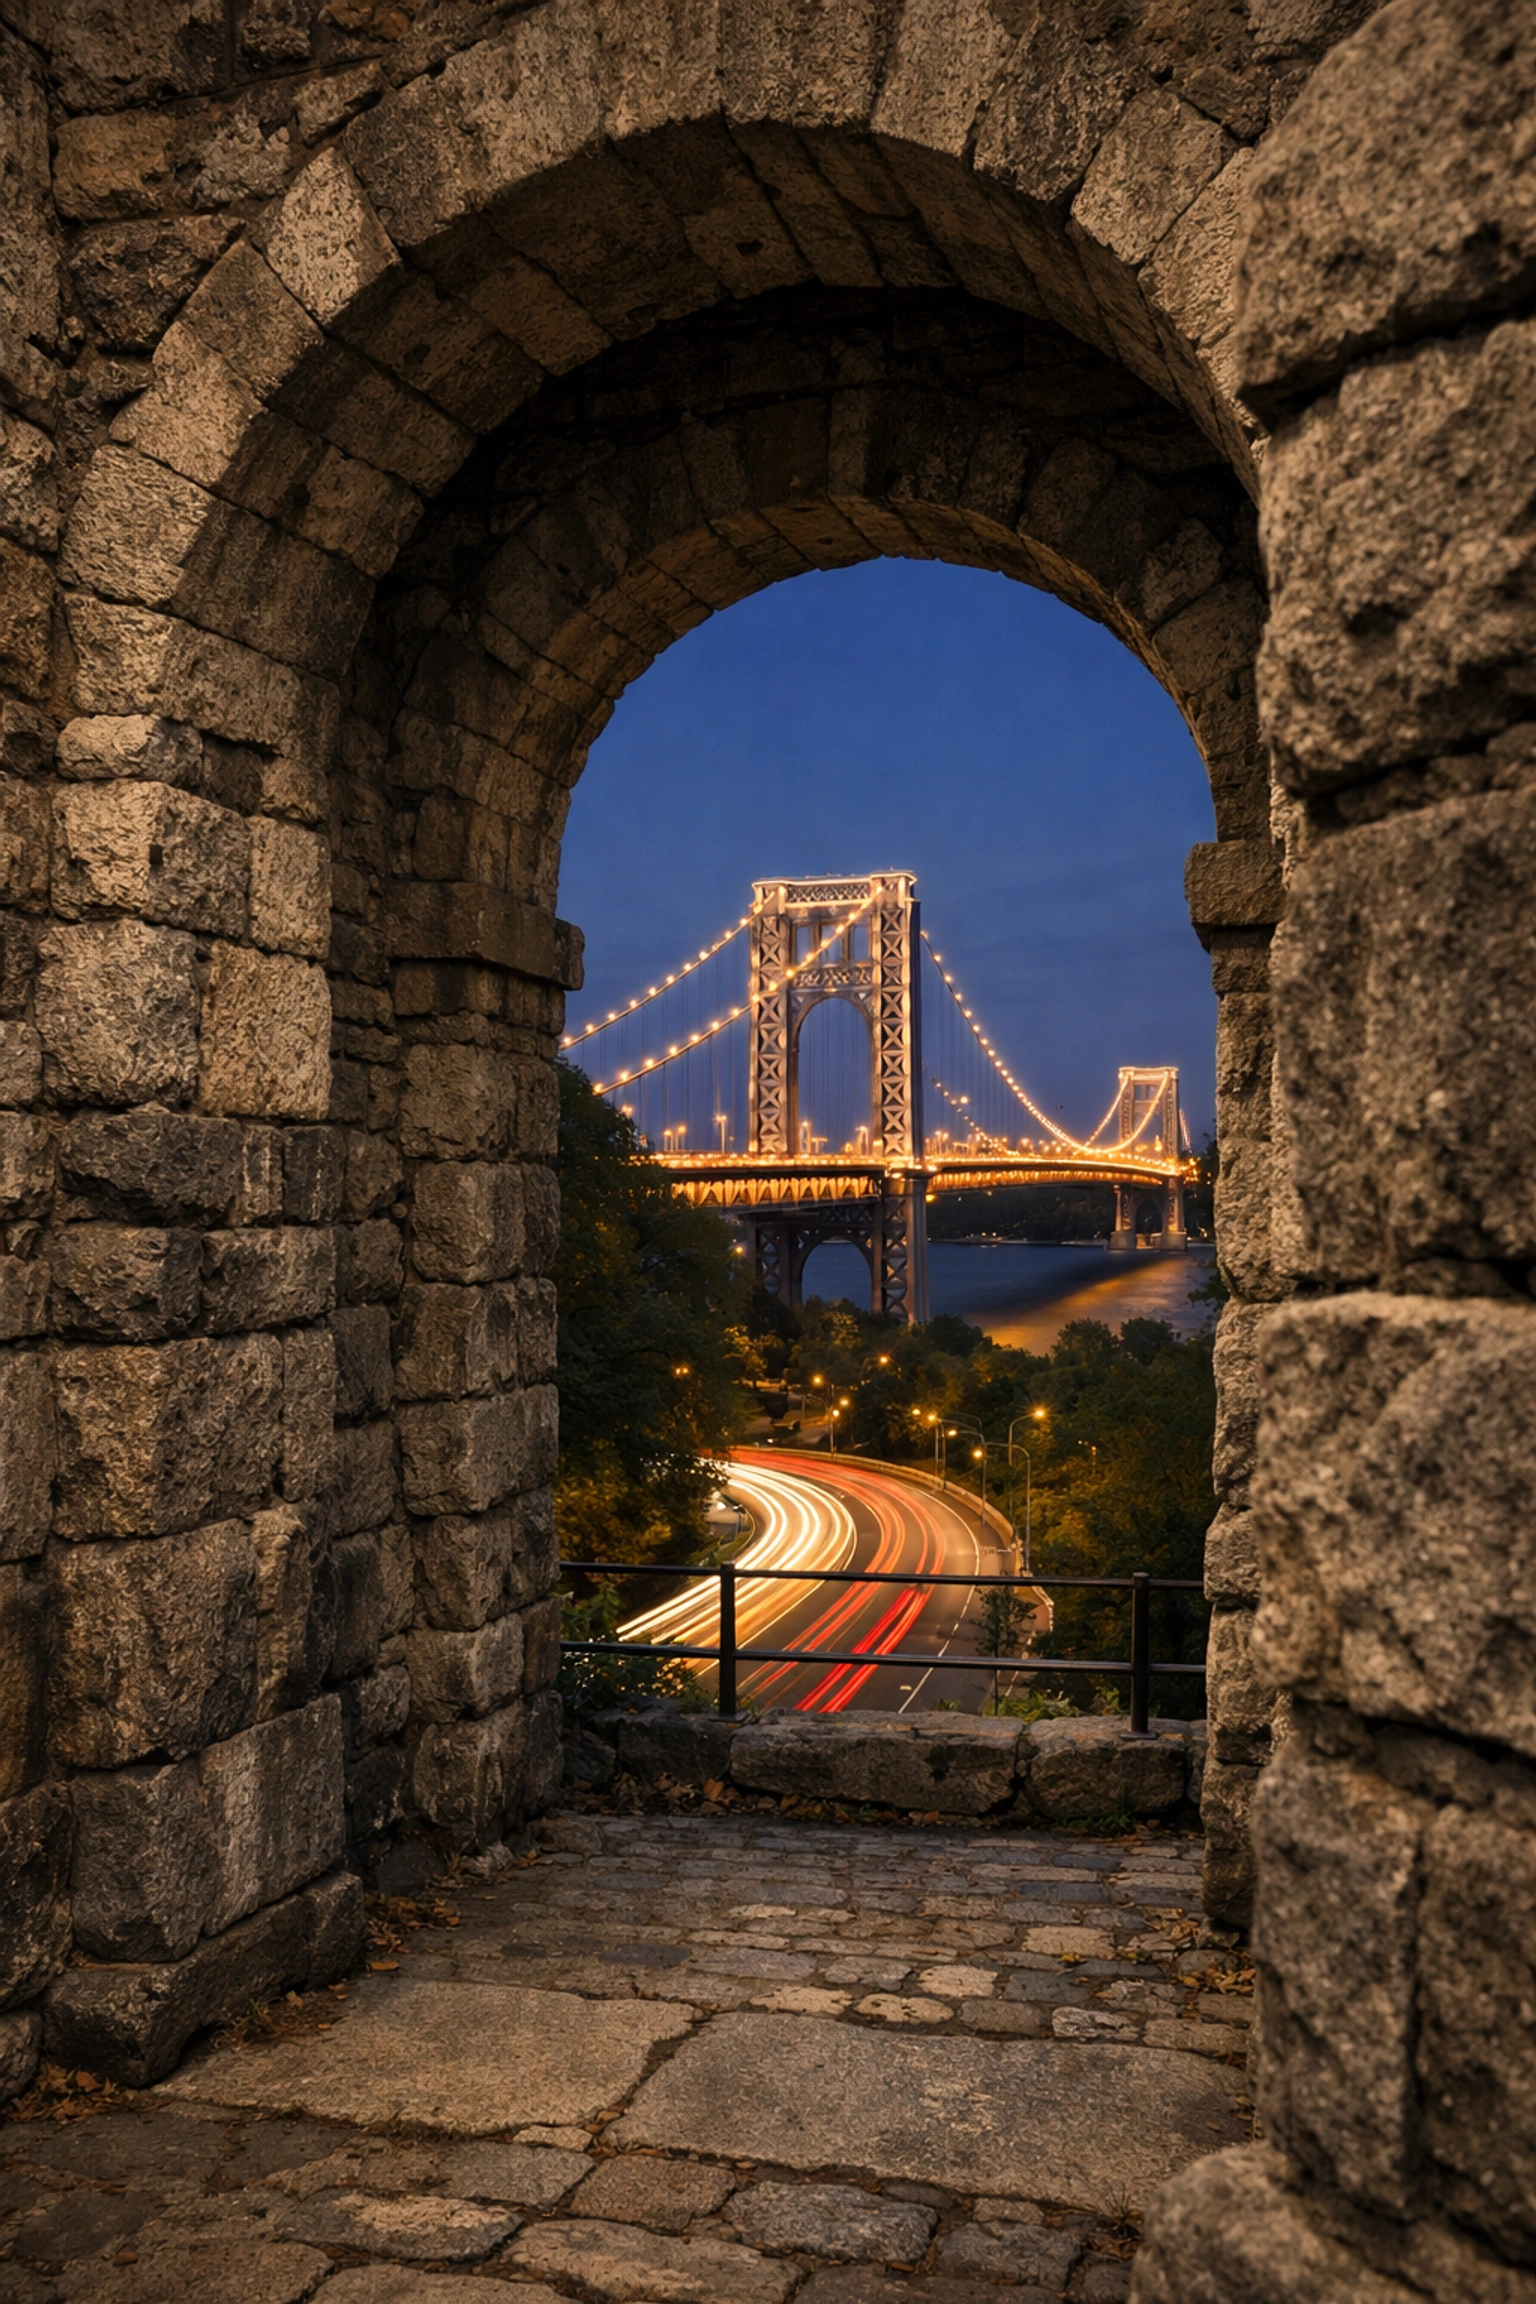
- Fort Tryon Park: Located in Washington Heights, this park features a grand stone archway that looks like it belongs in a dark fantasy novel. The view of the George Washington Bridge from here at sunset is unparalleled.
- The Little Red Lighthouse: Tucked under the George Washington Bridge, this tiny lighthouse provides a sense of scale and a nautical touch to your urban portfolio.
- Washington Mews: A private, gated street near Washington Square Park that feels like a time capsule. The ivy-covered buildings and quiet atmosphere are perfect for intimate architectural studies.
Mastering the Technical Side of NYC Photography
Capturing the beauty of New York City isn't just about showing up; it’s about execution.
- Timing is Everything: Most popular spots get crowded by 10:00 AM. If you want the "soul" of the city without the tourists, you have to be a morning person.
- Gear Choice: A wide-angle lens is essential for the tight streets and soaring towers, but a telephoto lens allows you to compress the layers of the city, making the buildings look like they are stacked on top of each other.
- Post-Processing: The difference between a "good" photo and a "fine art" photo is often the edit. Your vision shouldn't end when you click the shutter.
By integrating professional techniques and using the right tools, you elevate your work to a level that collectors notice. If you’re looking to start collecting or want to see how these locations look when printed on high-end archival paper, check out the Edin Chavez Blog and my gallery at Edin Fine Art.
Take the Guesswork Out of Your Trip
Look, New York is expensive, fast-paced, and can be frustrating if you end up at the wrong place at the wrong time. You don’t want to spend your entire trip looking at a map. You want to spend it behind the lens.
That’s why I created the New York City Photography Guide. It’s packed with the exact coordinates, best times to shoot, and insider tips that I’ve gathered over years of shooting this incredible city. It’s like having me right there next to you, whispering the secrets of the city into your ear.
Don't leave your best shots to chance. Grab the guide and dominate the NYC photo scene!
For more insights on how to elevate your work, explore our site for a deep dive into hundreds of tutorials and guides at https://blog.edinchavez.com/. Whether you’re shooting the concrete jungle or the serenity of nature, we’ve got the knowledge to help you succeed.
Hence, with these locations in your pocket and your gear ready to go, the only thing left is to hit the pavement. New York is waiting for you. Go capture it!
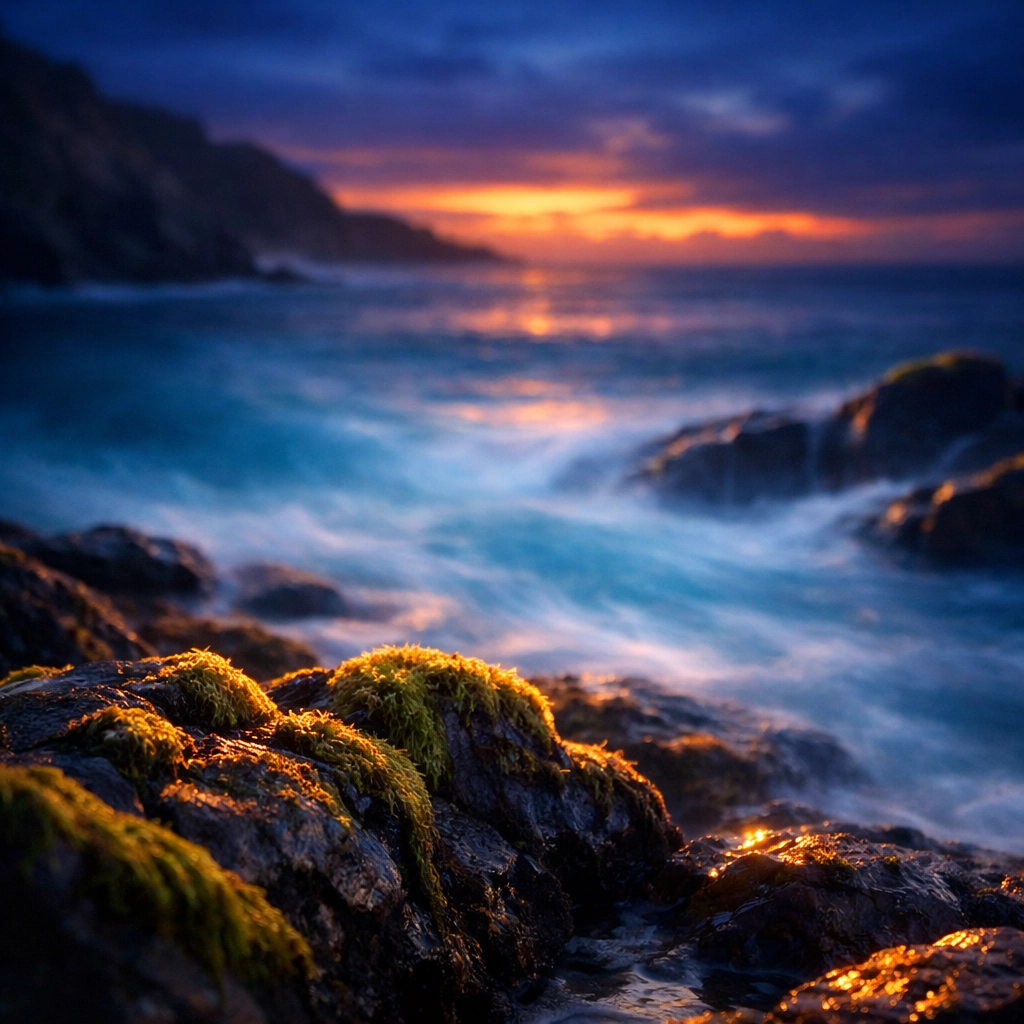
Just as the Sierra Nevada peaks begin to glow with that first liquid gold of dawn, you realize that Lake Tahoe isn’t just a destination: it’s a playground for your lens. If you’ve ever scrolled through Instagram and wondered how photographers capture that impossible electric blue water or those perfectly placed boulders, you’re in the right place. Tahoe is a high-altitude masterpiece, and I’m going to show you exactly where to point your camera to bring home shots that look like they belong in a gallery.
Finding the best photo spots Lake Tahoe has to offer can feel overwhelming because, let’s be honest, the whole place is a vibe. But there are three heavy hitters that every landscape photographer needs in their portfolio: Emerald Bay, Bonsai Rock, and Sand Harbor. Whether you are hunting for the perfect sunrise or a minimalist long exposure, these spots deliver every single time.
Before you pack your bags and head into the mountains, make sure you have the ultimate advantage. My Lake Tahoe Photography Guide gives you the exact GPS coordinates, secret timing tips, and gear recommendations to master this region like a local.
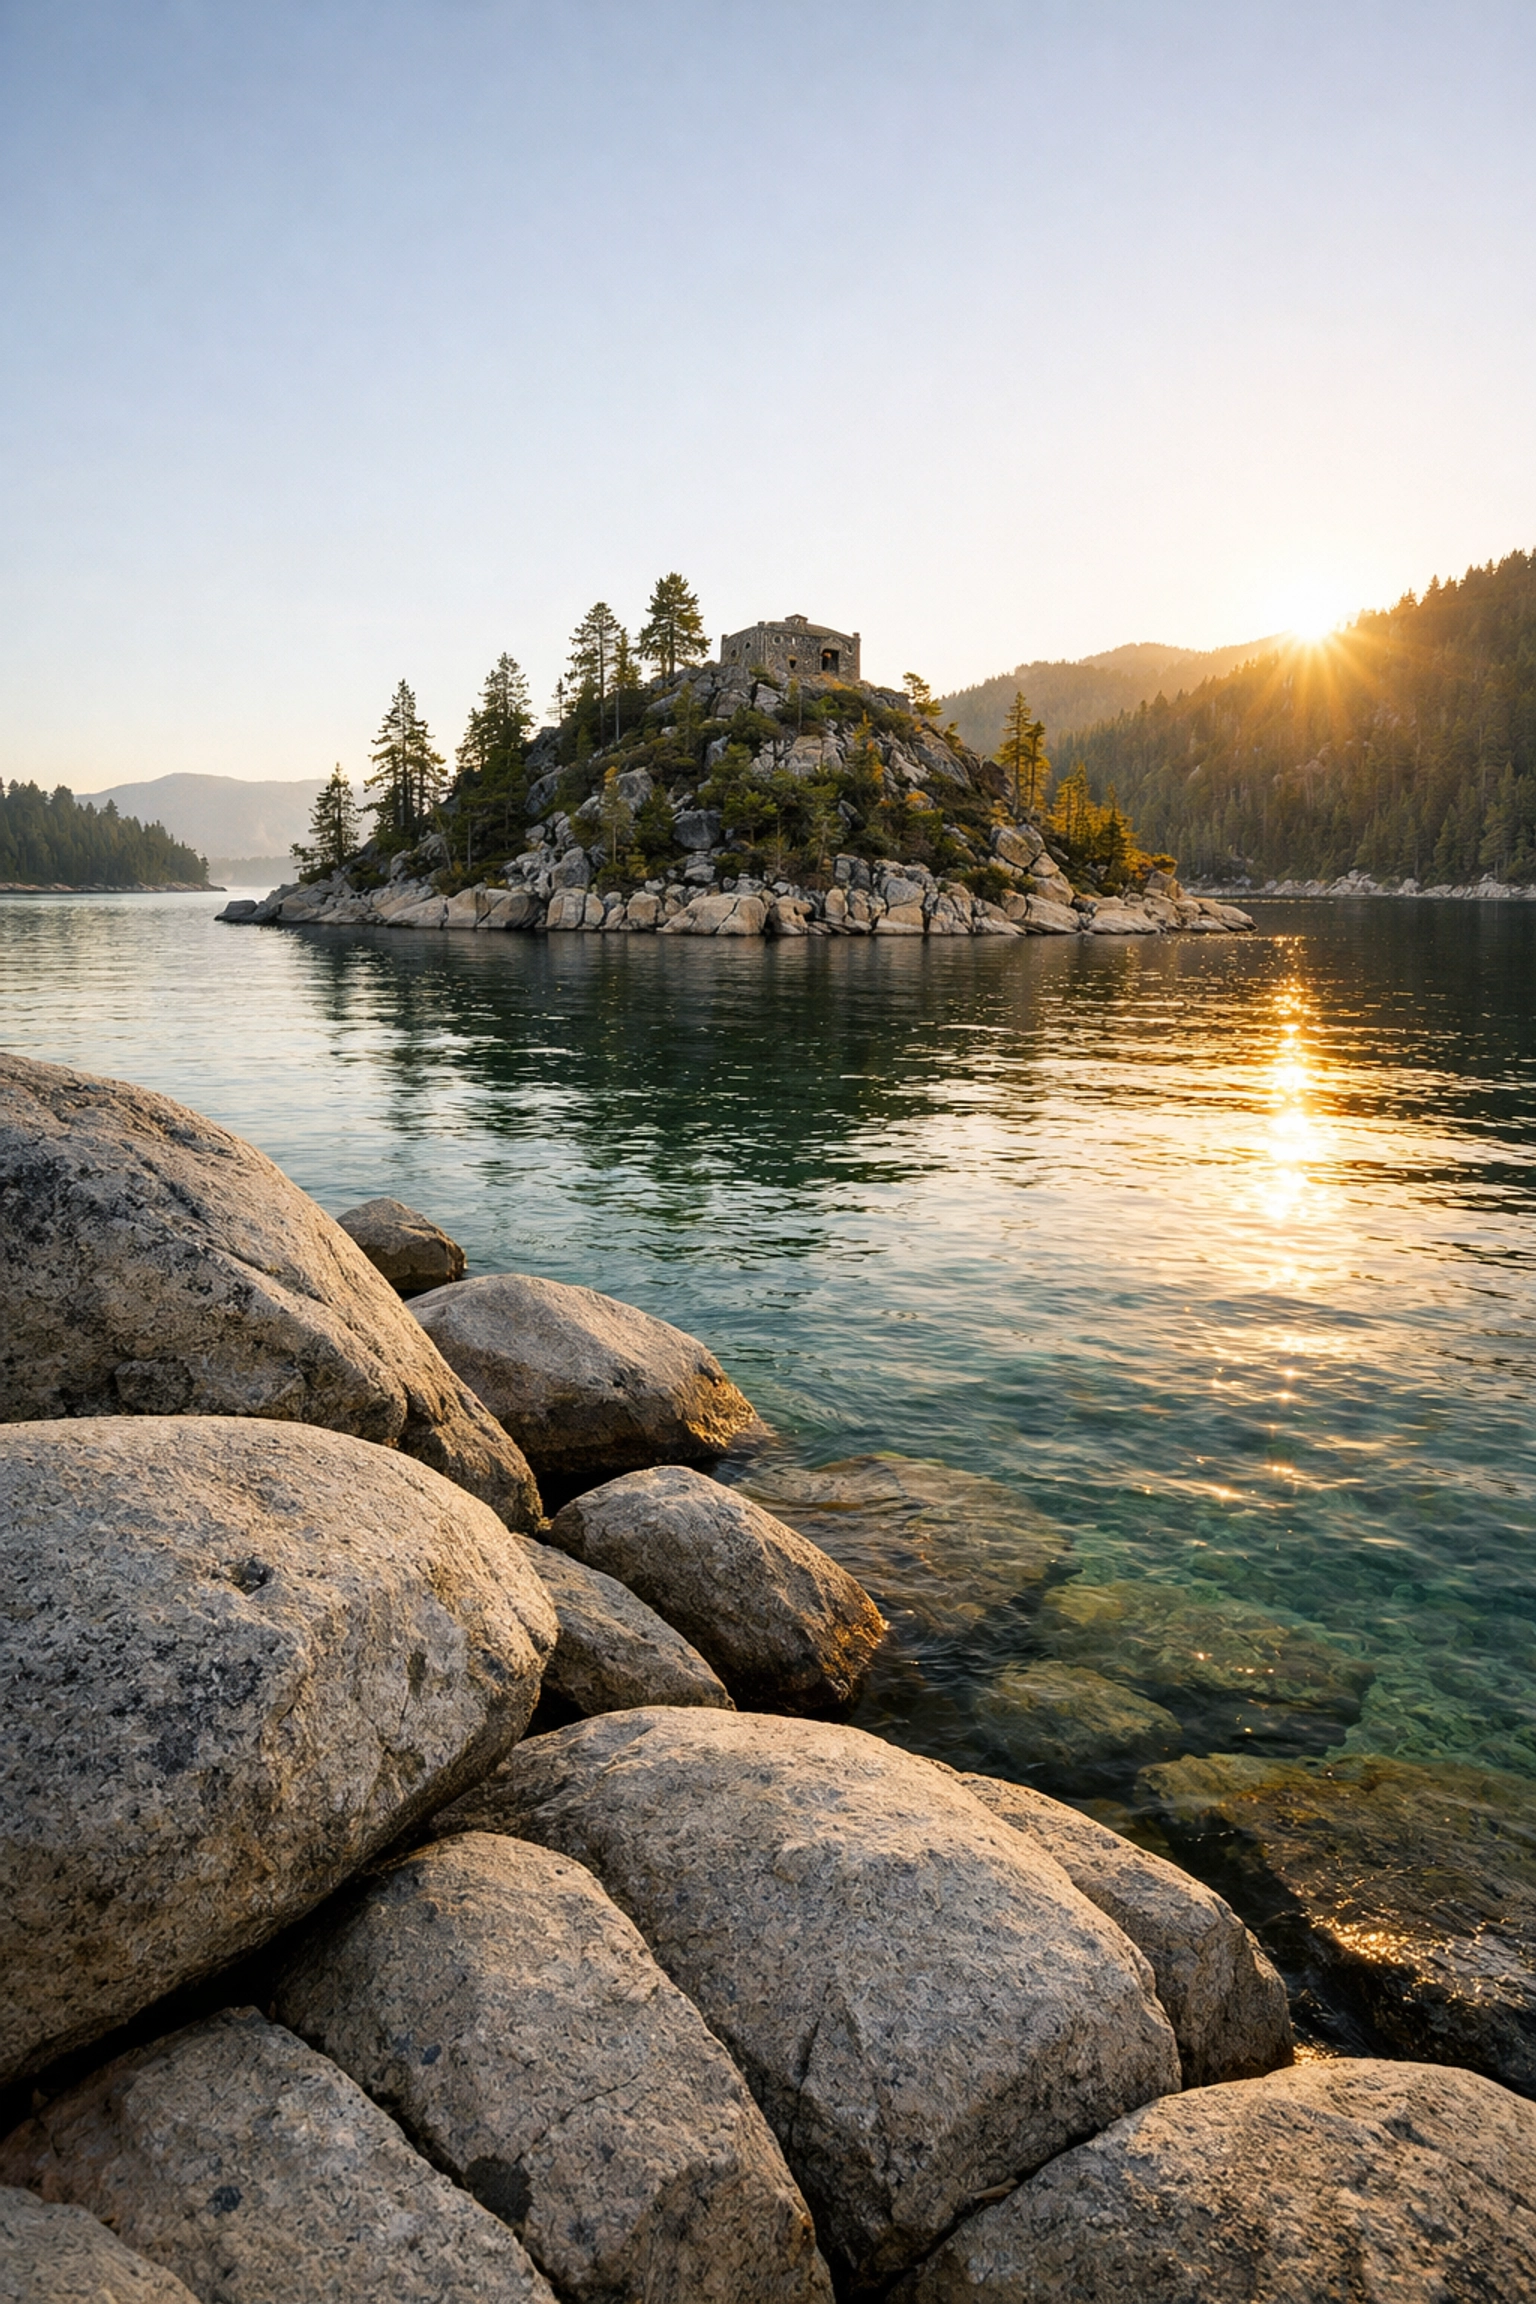
Emerald Bay: The Crown Jewel of the Sierras
If Lake Tahoe had a monarch, Emerald Bay would be wearing the crown. This is arguably the most photographed location in the entire lake, and for good reason. The bay is a perfect crescent of deep greens and vibrant blues, with the tiny, mysterious Fannette Island sitting right in the center.
To truly capture the scale of Emerald Bay, you need to be there for sunrise. As you stand at the overlook on Highway 89, you’ll watch the sun creep over the eastern peaks, hitting the water and turning the bay into a literal emerald. The air is crisp, the silence is heavy, and the light is pure magic.
How to Nail the Shot
Your first stop should be the main parking lot overlook. It’s an easy win, but don’t just stay there. If you’re feeling adventurous, hike down the Vikingsholm Trail. It’s a steep mile down, but it puts you right at the water’s edge. From here, you can use the shoreline rocks as leading lines pointing toward the island.
Pro Tip: Bring a wide-angle lens to capture the entire sweep of the bay. If you want to make those colors pop and cut through the surface glare of the water, a Circular Polarizer (CPL) is non-negotiable. It transforms the water from a reflective sheet into a window showing the submerged boulders below. If you want that "pro-level" finish in your edits, my Ultimate Lightroom Preset Collection is the secret sauce you need to make those blues and greens sing.
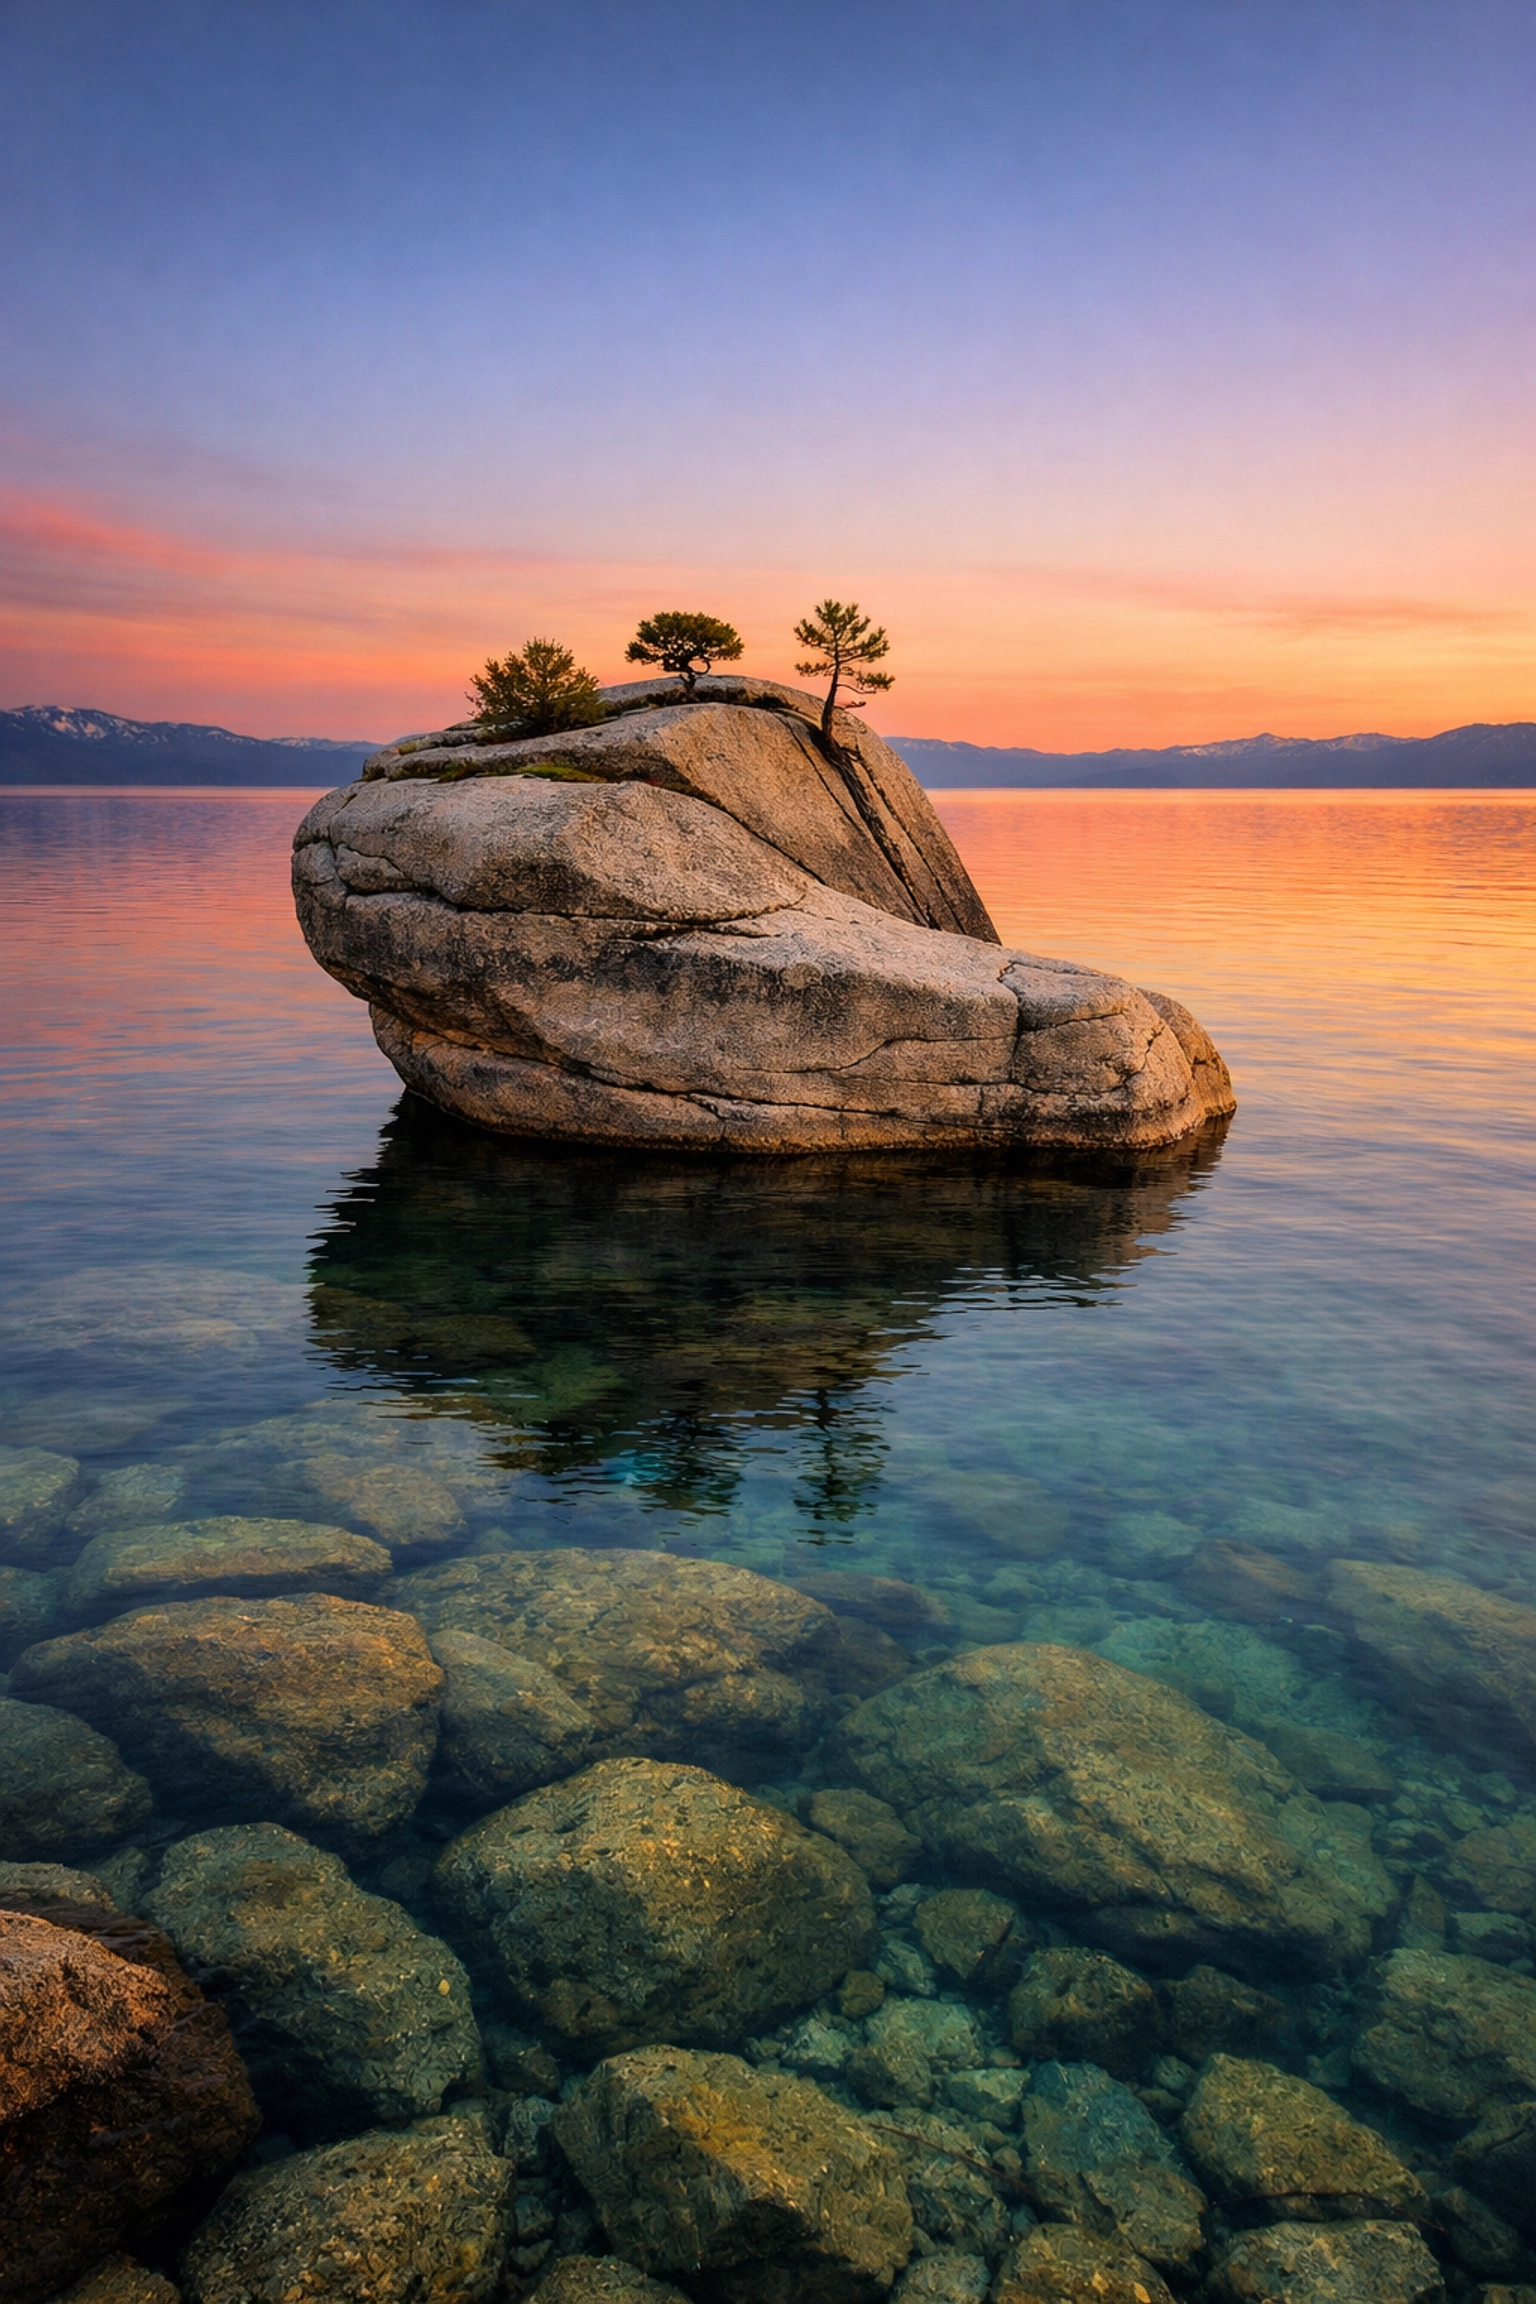
Bonsai Rock: Minimalist Perfection
Located on the East Shore, Bonsai Rock is a masterclass in minimalist landscape photography Lake Tahoe. It’s a large, weathered boulder sitting just offshore with four tiny trees growing out of a crack in its top. It looks like a giant, natural bonsai tree, and it is absolutely striking against the clear, turquoise water.
The vibe here is different from the grand scale of Emerald Bay. Bonsai Rock is about intimacy and composition. This is where you want to be for sunset. As the sun dips lower, the light hits the rocks along the shore, creating a warm, golden glow that contrasts beautifully with the cool tones of the lake.
Finding the Angle
Getting down to the water requires a bit of a scramble down a steep, sandy embankment. Watch your step: your gear will thank you. Once you’re at the waterline, you have endless options.
- Long Exposure: Use a 10-stop ND filter to turn the lake into a smooth, ethereal mist, leaving Bonsai Rock as a sharp, solitary subject.
- Drone Perspective: If you have a drone, this is the place to fly. From above, the water clarity is mind-blowing. You can see every rock on the lake floor, and Bonsai Rock looks like a jewel in a sea of turquoise.
For those who appreciate this kind of minimalist beauty but want it professionally captured and printed on museum-quality materials, you can explore my fine art landscape photography to find the perfect piece for your home.
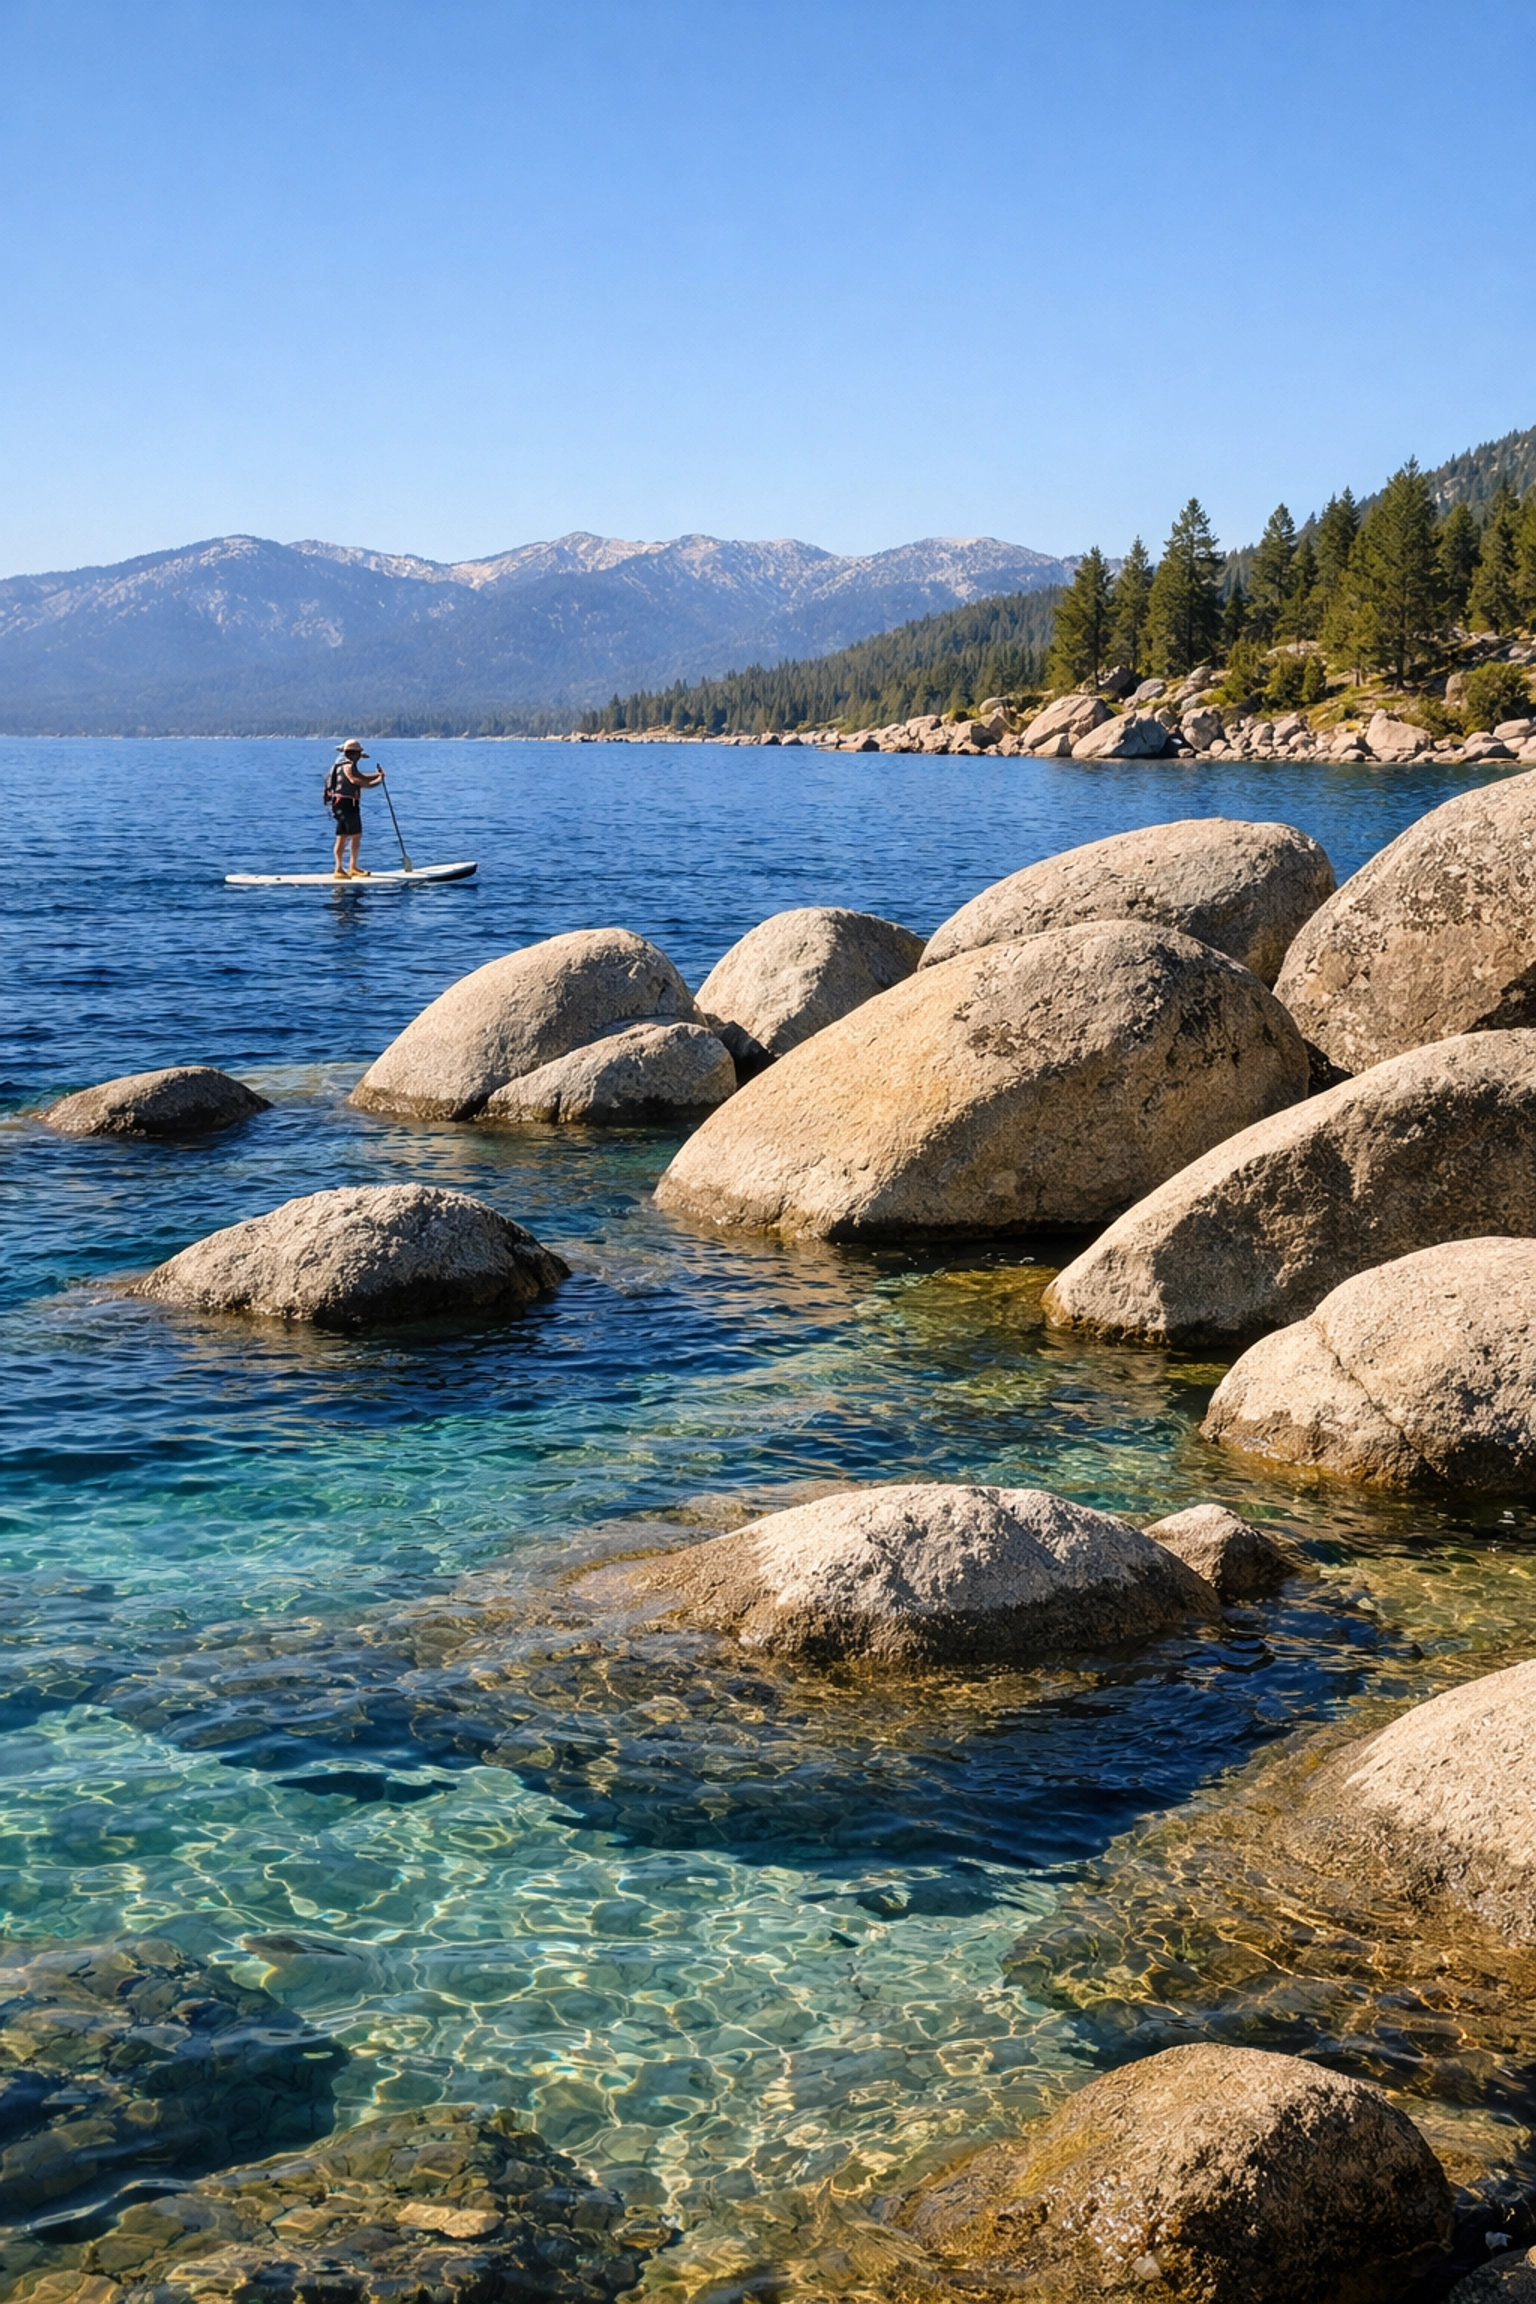
Sand Harbor: The Caribbean of the Sierras
If you told someone you were in the Bahamas while standing at Sand Harbor, they might actually believe you: at least until they touched the freezing water. This is one of the best photo spots Lake Tahoe offers for anyone who loves dramatic rock formations and gradient water colors.
Sand Harbor is famous for its smooth, giant boulders that dot the shoreline and hide just beneath the surface. The water here transitions from a pale, translucent cream at the sand’s edge to a bright neon turquoise, then finally to a deep navy blue as the shelf drops off.
Master the Boulders
The "Bonsai Rocks" (not to be confused with the singular Bonsai Rock mentioned above) are the cluster of boulders at the north end of the park. These are your best friends for composition. Use them to create depth in your frame. Position your tripod low to the ground to make the foreground rocks feel massive and imposing.
| Feature |
Best Photography Approach |
Timing |
| Crystal Water |
Use a CPL to see the underwater boulders. |
Mid-morning for max light. |
| Sunset Glow |
Look for the "Alpine Glow" on the distant peaks. |
20 mins after sunset. |
| Action Shots |
Capture paddleboarders for a sense of scale. |
Daytime. |
Sand Harbor is incredibly accessible, which means it gets crowded. If you want a clean shot without a dozen tourists in the background, you’ve got to be the first one through the gates in the morning or stay until the very last light when the crowds head to dinner.
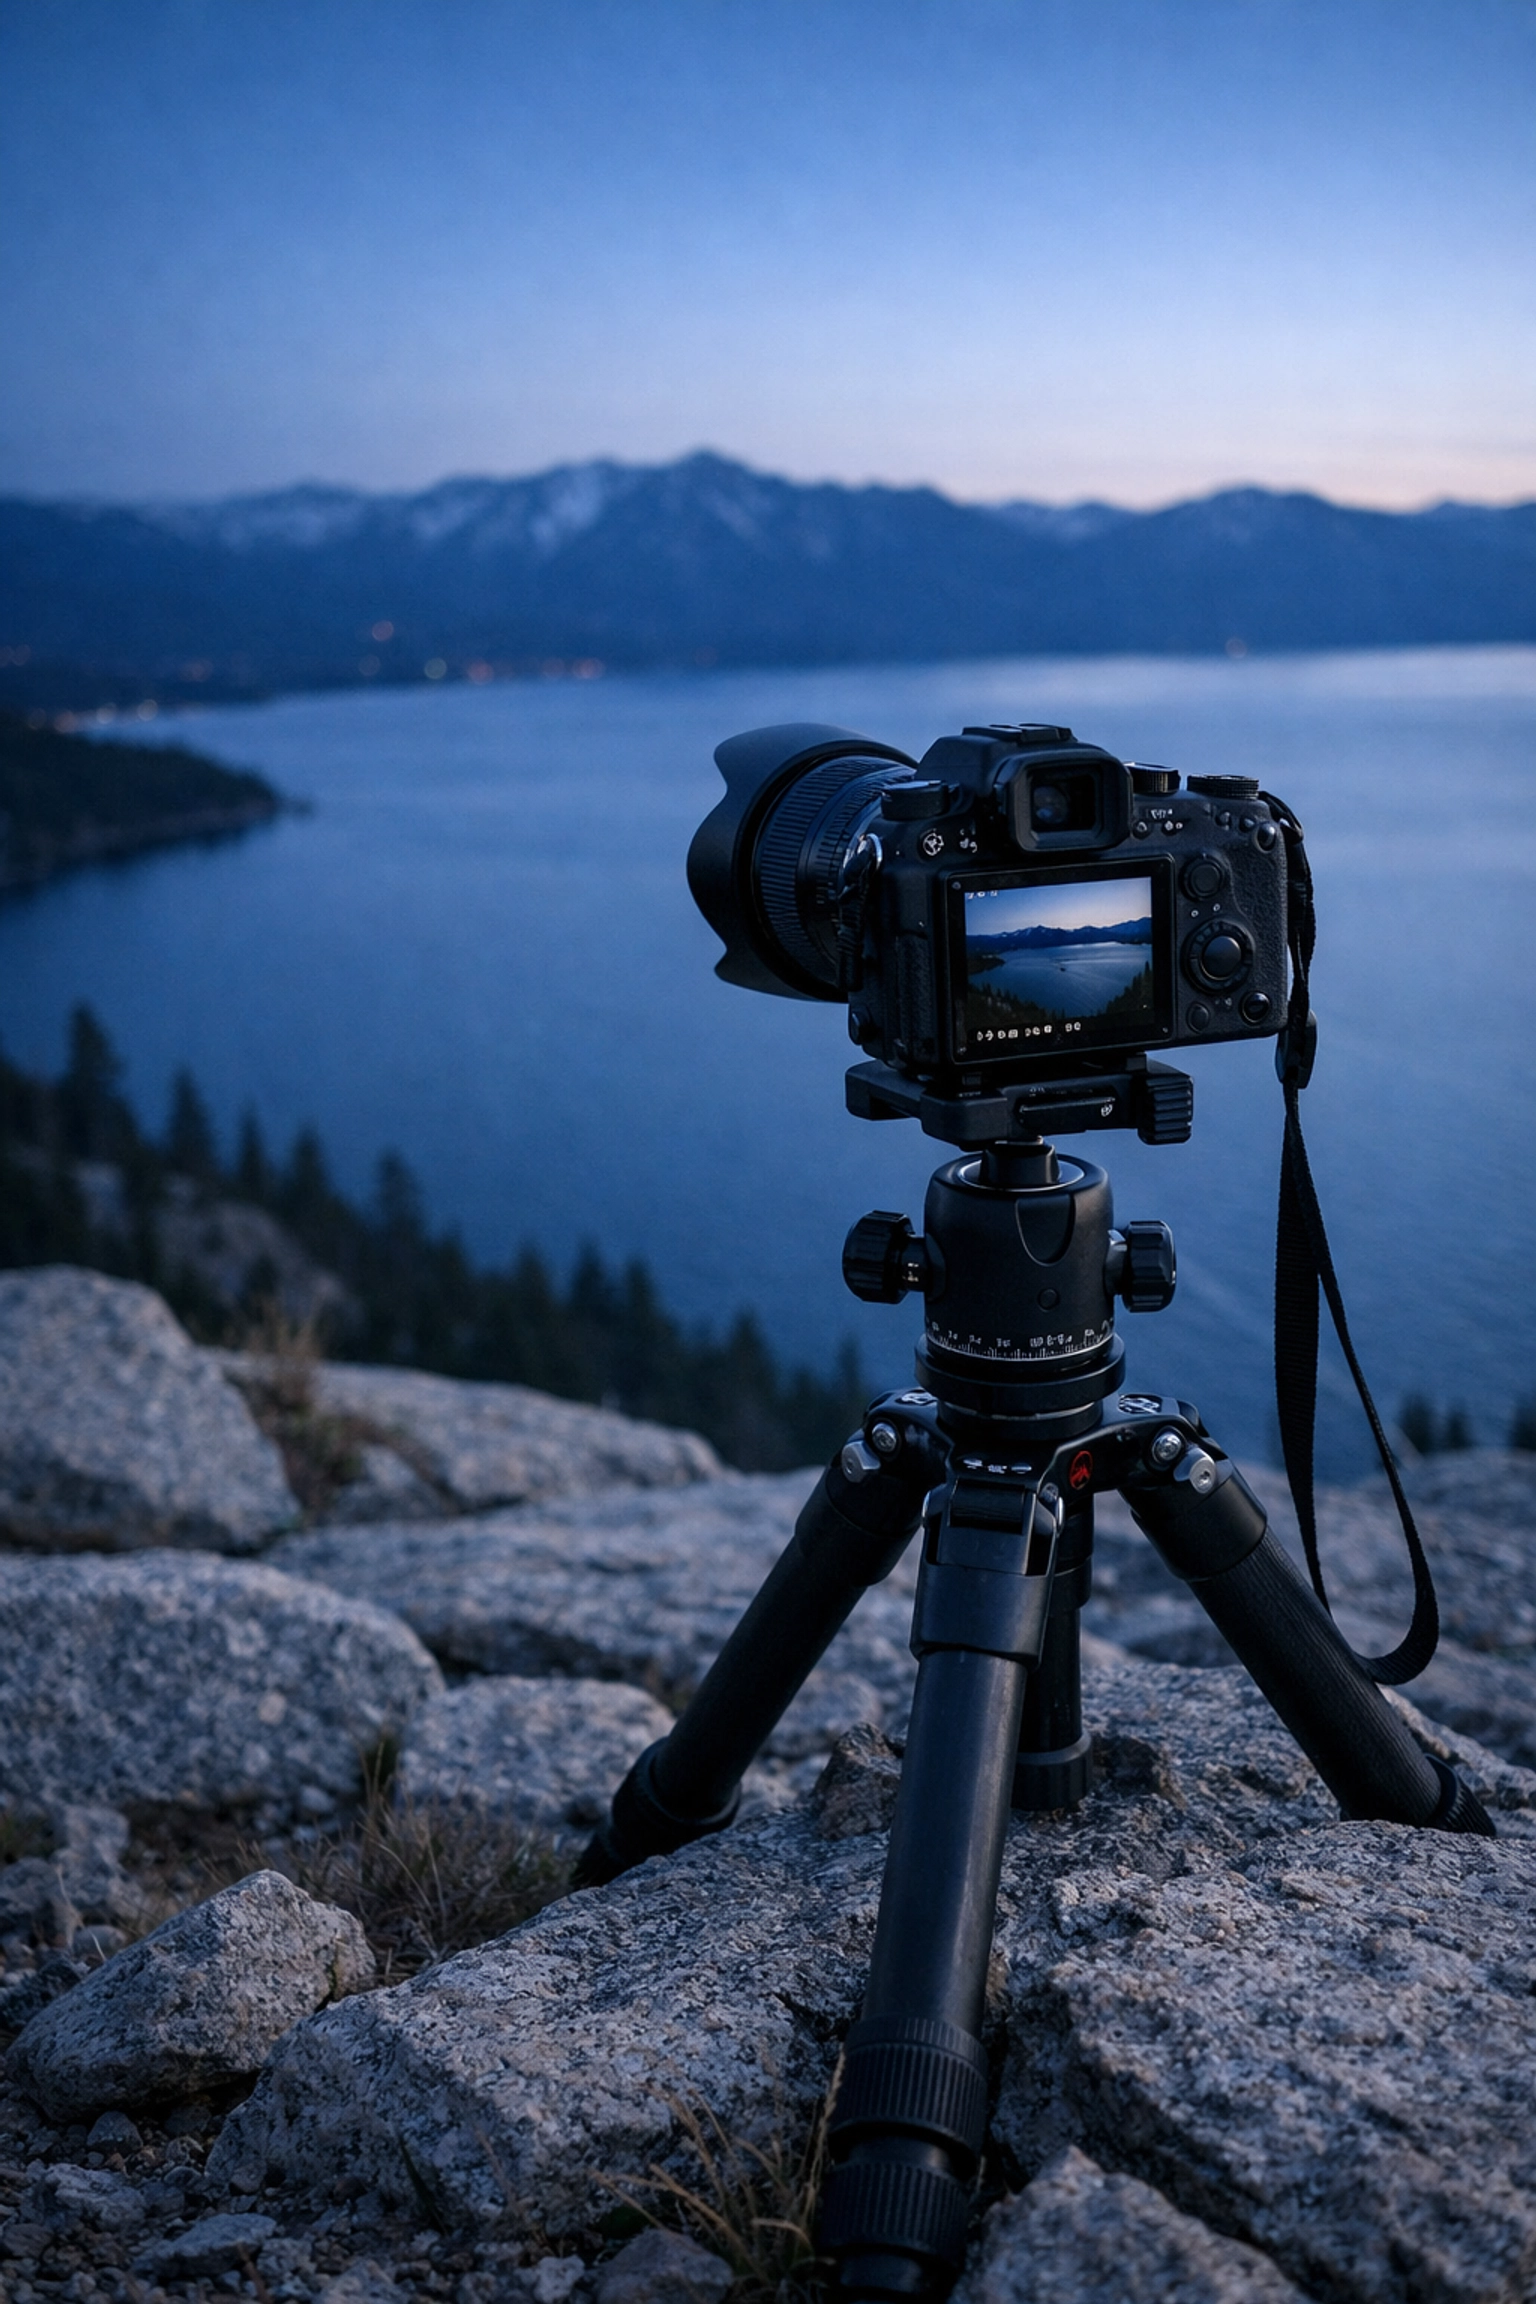
Essential Gear for Lake Tahoe Photography
You can’t just show up with a smartphone and expect National Geographic results. To truly master these Lake Tahoe photography locations, your gear bag needs to be dialed in.
- A Sturdy Tripod: Between the wind coming off the lake and the long exposures you’ll want to take, a cheap tripod won't cut it. You need stability.
- Circular Polarizer (CPL): This is the most important filter for Tahoe. It removes the glare from the water and lets those famous turquoise colors shine.
- Neutral Density (ND) Filters: If you want that silky water look at Sand Harbor or Bonsai Rock, a 6-stop or 10-stop ND filter is your best friend.
- Wide-Angle Lens: A 16-35mm is the sweet spot for those massive Emerald Bay panoramas.
- Telephoto Lens: Don't sleep on the 70-200mm. It's perfect for compressing the mountains and catching details on Fannette Island.
Once you have the shots, the real work begins in the digital darkroom. To ensure your images reflect the majesty of what you saw in person, check out the tutorials at Edin Studios or jump straight to the finish line with my Ultimate Lightroom Preset Collection.
Why You Need the Lake Tahoe Photography Guide
Lake Tahoe is massive, and timing is everything. You can be at the right spot but at the wrong time and miss the shot of a lifetime. Should you shoot Emerald Bay in the winter? Which side of the lake gets the best "Alpine Glow"? Where can you park without getting a ticket or towed?
I’ve spent years scouting these shores, and I’ve put all that knowledge into the Lake Tahoe Photography Guide. It’s not just a list of spots; it’s a tactical manual designed to help you bypass the "tourist shots" and create high-end fine art.
If you’re serious about your craft, don't leave your trip to chance. Get the guide and arrive at the lake with a plan. Whether you are a seasoned pro or a hobbyist looking to level up, having an expert roadmap ensures you spend more time shooting and less time searching for a parking spot.
For more insights on how to elevate your work, explore our site for a deep dive into hundreds of tutorials and guides.
Final Thoughts on Tahoe’s Big Three
Emerald Bay, Bonsai Rock, and Sand Harbor are the foundations of any successful Tahoe trip. They offer variety, challenge, and immense visual rewards. Emerald Bay gives you the grand landscape; Bonsai Rock offers the artistic, minimalist challenge; and Sand Harbor provides the stunning colors and textures of a mountain paradise.
Remember, the best shot is the one you haven't taken yet. Grab your camera, respect the environment, and get out there. The light is waiting for you.
For more tips on locations like this, or to see how these spots look when printed for a gallery, visit the Edin Chavez Blog or see my latest work at Edin Fine Art. Happy shooting!
Just as a painter approaches a blank canvas with a specific emotion in mind, you, as a fine art photographer, must approach your sensor with more than just a desire to "document" the world. Most people think photography is about clicking a shutter to prove they were somewhere. But you? You know better. For you, the camera is a tool for expression, a way to translate the whispers of your soul into a visual language that others can actually feel.
Welcome to the world of fine art photography. This isn't just about sharp focus and correct exposure: though those help: it’s about vision, intention, and creating something that didn't exist until you saw it. Whether you are looking to hang your work in a gallery or you're a collector looking for that next masterpiece at Edin Fine Art, understanding the DNA of a fine art image is the first step to mastering the craft.
Defining Your Artistic Vision
Before you even pick up your camera, you need to ask yourself: What am I trying to say? Fine art photography is distinguished by the fact that the artist’s vision precedes the image. You aren't just a bystander; you are the director.
Your vision is the "why" behind your work. Are you fascinated by the fleeting nature of time? Do you want to explore the concept of isolation? Or perhaps you’re obsessed with the ethereal photography style that makes the world look like a waking dream. Whatever it is, your theme should be the thread that ties your entire portfolio together. Consistency isn't just a buzzword; it’s how you build a brand that people recognize across the Edin Chavez Blog.
The Shift from Documentarian to Artist
| Feature |
Standard Photography |
Fine Art Photography |
| Primary Goal |
Documenting reality and facts |
Expressing a concept or emotion |
| Subject Matter |
What is in front of the lens |
How the artist feels about the subject |
| Editing Style |
Realistic, color-corrected |
Stylized, often involving dreamy photography editing |
| Success Metric |
Sharpness and clarity |
Emotional impact and conceptual depth |
Technical Skills for Fine Art Excellence
You can have the most profound message in the world, but if you don't have the technical chops to execute it, your message gets lost in the noise. To succeed in fine art photography, you need to move beyond "Auto" mode and start manipulating light like a master.
Mastering Depth of Field
If you want to create those soft, blurred backgrounds that make a subject pop, you need to understand your aperture. For a dreamy, intimate look, shooting wide open (between f/1.2 and f/2.8) is your best friend. This allows you to isolate your subject and turn a busy background into a wash of color.
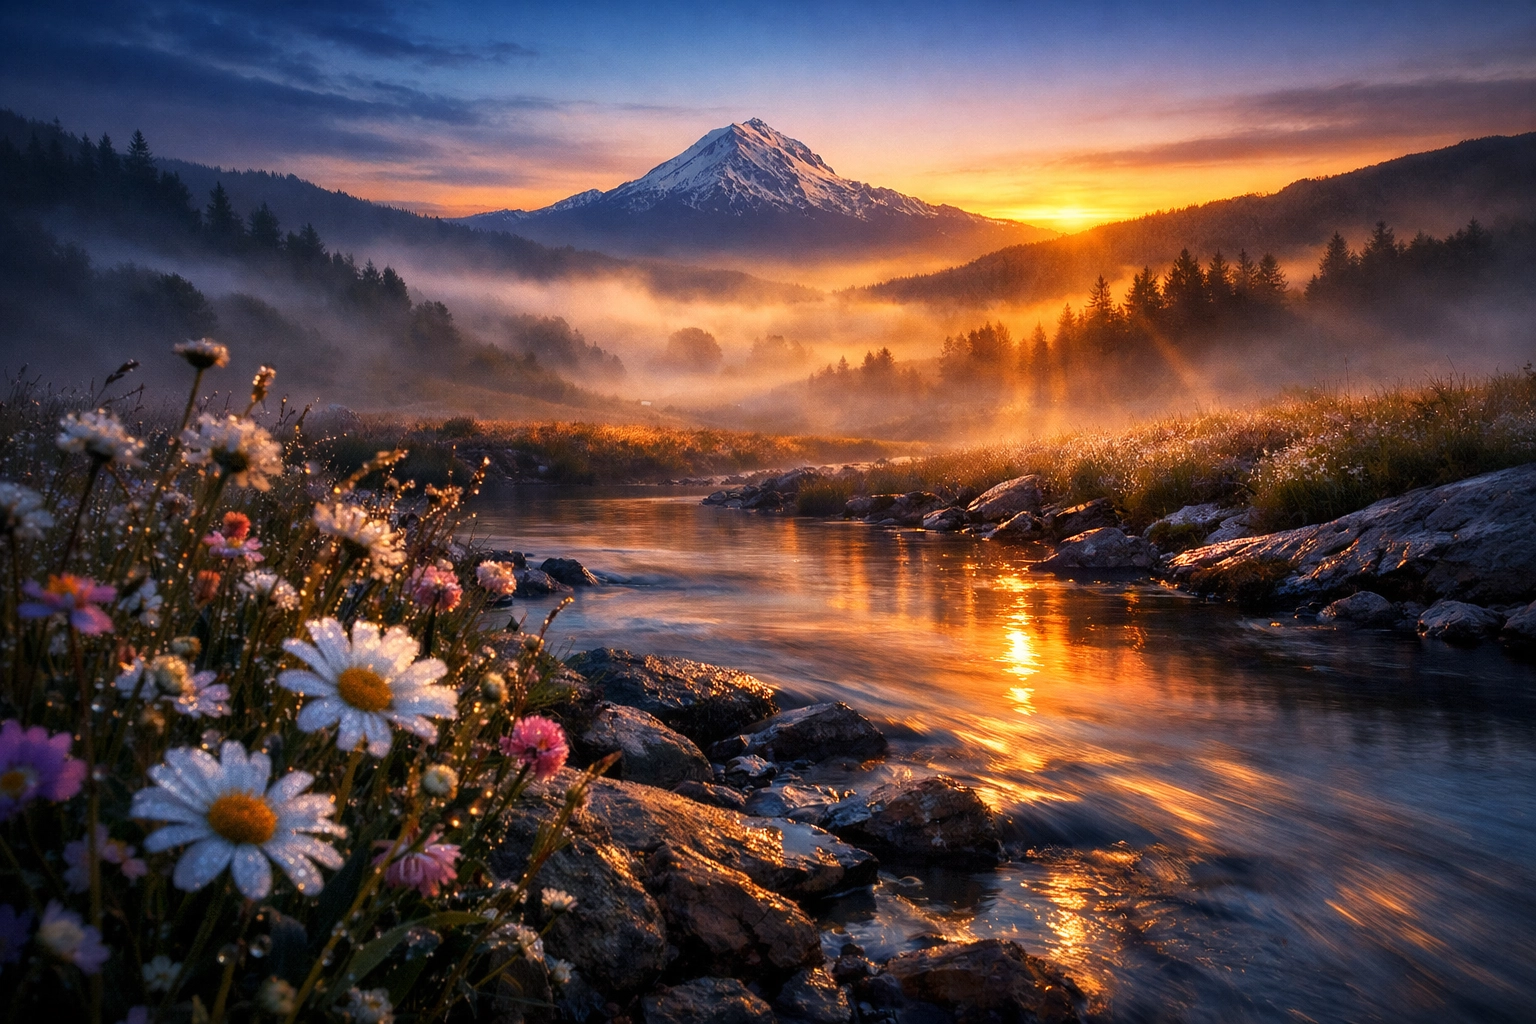
The Magic of Long Exposure
Nothing says "fine art" quite like the silky movement of water or the streaking of clouds. By using a sturdy tripod and neutral density (ND) filters, you can extend your shutter speed to several seconds: or even minutes. This technique is essential for achieving that ethereal photography aesthetic, where the world feels still, quiet, and slightly surreal. It transforms a chaotic beach into a meditative landscape.
Creating the Ethereal Look in Post-Production
Let’s be honest: the RAW file is just the beginning. In the realm of fine art, the "darkroom" (a.k.a. Lightroom and Photoshop) is where your vision truly comes to life. This is where dreamy photography editing takes center stage.
To get that soft, glowy, ethereal vibe, you aren't just slapping on a filter. You are carefully manipulating tones. Here’s a quick tip: try lowering your "Clarity" and "Dehaze" sliders slightly to soften the textures, then use the "Orton Effect" (a technique of layering a blurred version of the image over a sharp one) to give it that signature glow.
If you want to skip the guesswork and get straight to the professional results, I highly recommend checking out our Ultimate Lightroom Preset Collection. It’s designed specifically to help you achieve these high-end looks with just a few clicks, allowing you to focus on the creative side of things.
Building a Cohesive Body of Work
One great photo is a fluke; twenty great photos that look like they belong together is a career. When you start thinking about your work as a "series," you elevate yourself from a hobbyist to a fine artist.
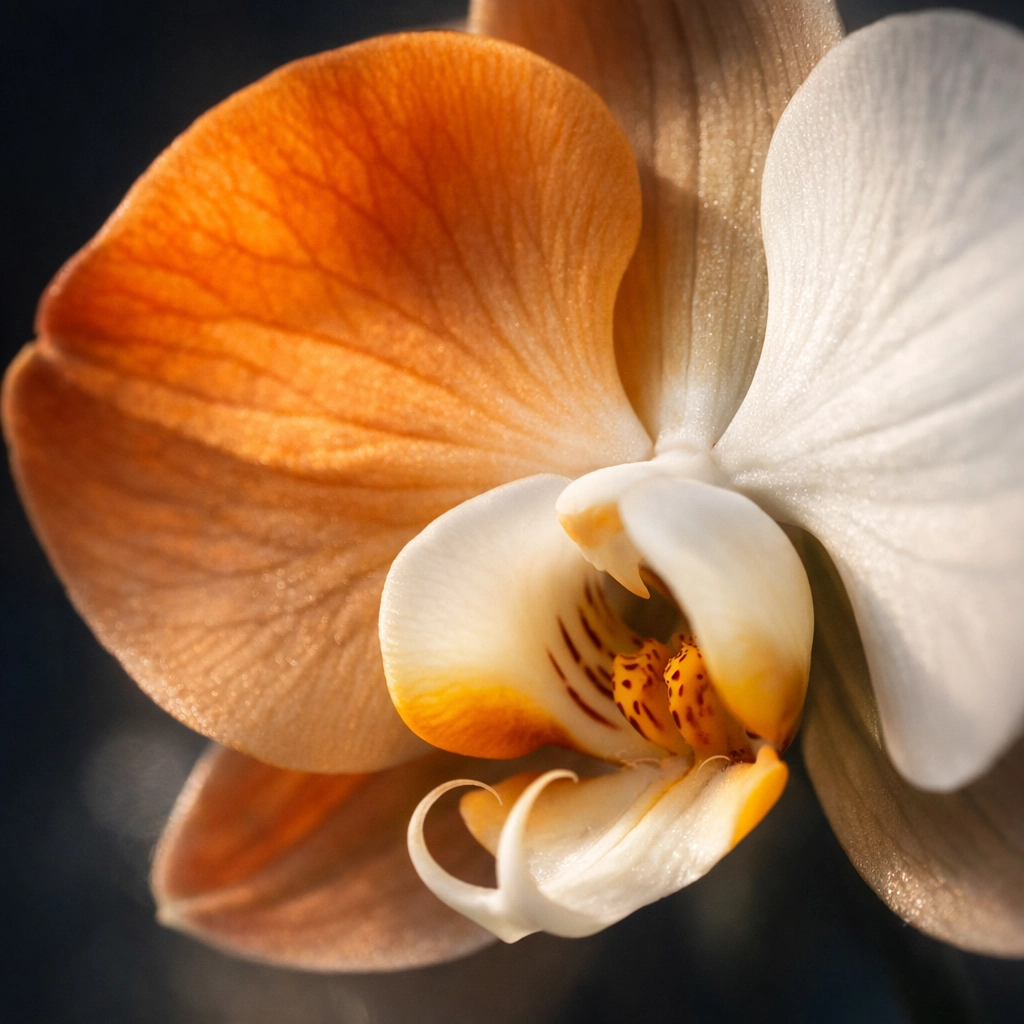
Think about your portfolio like chapters in a book. Each image should be able to stand on its own, but when viewed together at Edin Studios, they should tell a larger story. This might mean using a consistent color palette, focusing on a specific subject like macro florals, or sticking to a particular lighting style.
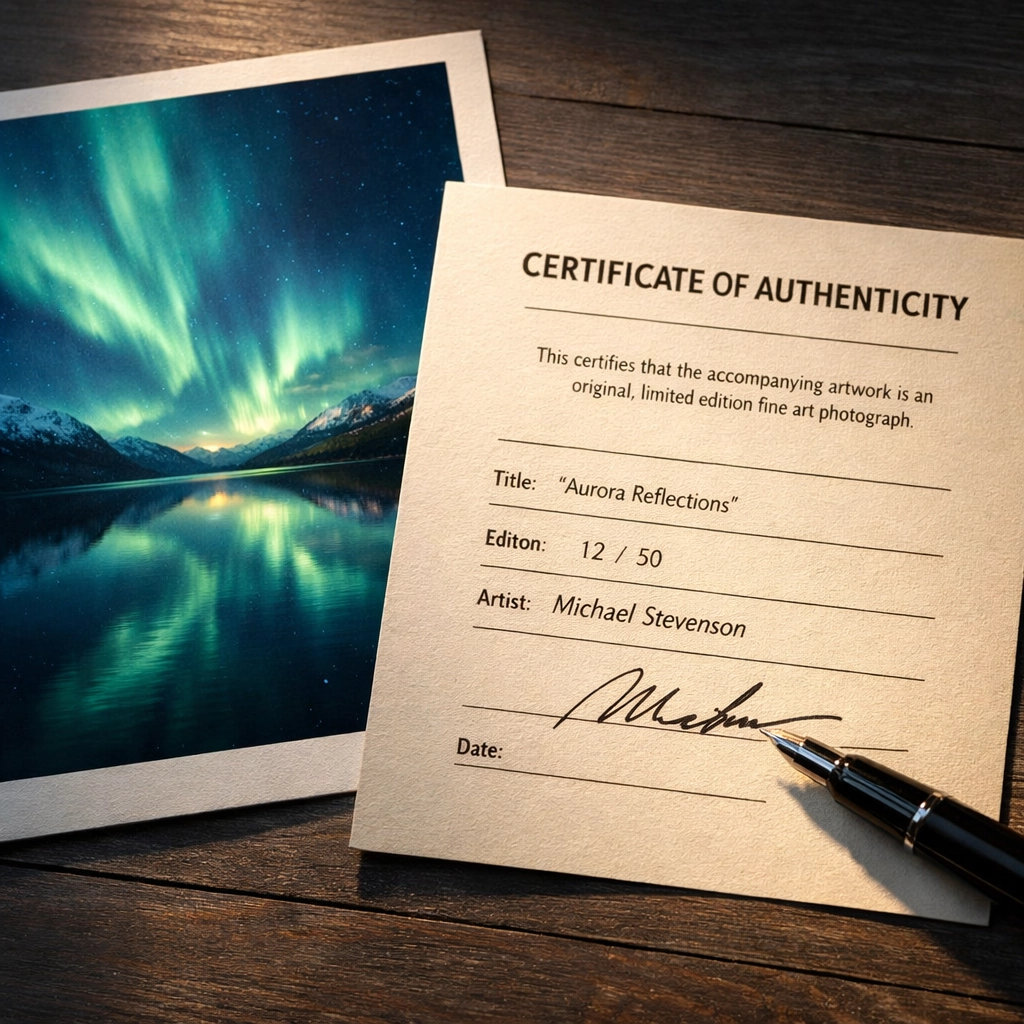
Why Provenance and Quality Matter
As you grow, you'll find that collectors don't just buy a picture; they buy a piece of your history. This is why high-quality printing and certificates of authenticity are vital. When a collector visits Edin Fine Art, they are looking for work that is archival, limited, and professionally handled. Your attention to detail in the physical world must match your attention to detail in the digital one.
Practical Steps to Launch Your Fine Art Career
You’ve got the vision, the gear, and the editing skills: now what? How do you actually "succeed" in this competitive field? It’s a mix of networking, online presence, and continuous learning.
- Start a Blog: Share your process! People love to see how the sausage is made. Writing about your journeys and your techniques helps build trust and authority. You can learn how to start a photography blog right here on our site.
- Enter Competitions: While they can be a bit of a gamble, winning or even being shortlisted for a major award can put your work in front of the right curators.
- Visit Galleries: Don't just stay behind your screen. Go to fine art galleries, look at the paper types used, the framing styles, and the way light hits the prints. It will change the way you shoot.
- Network Locally: If you are in South Florida, for instance, knowing the Miami hidden gems can give you a unique edge in your subject matter.
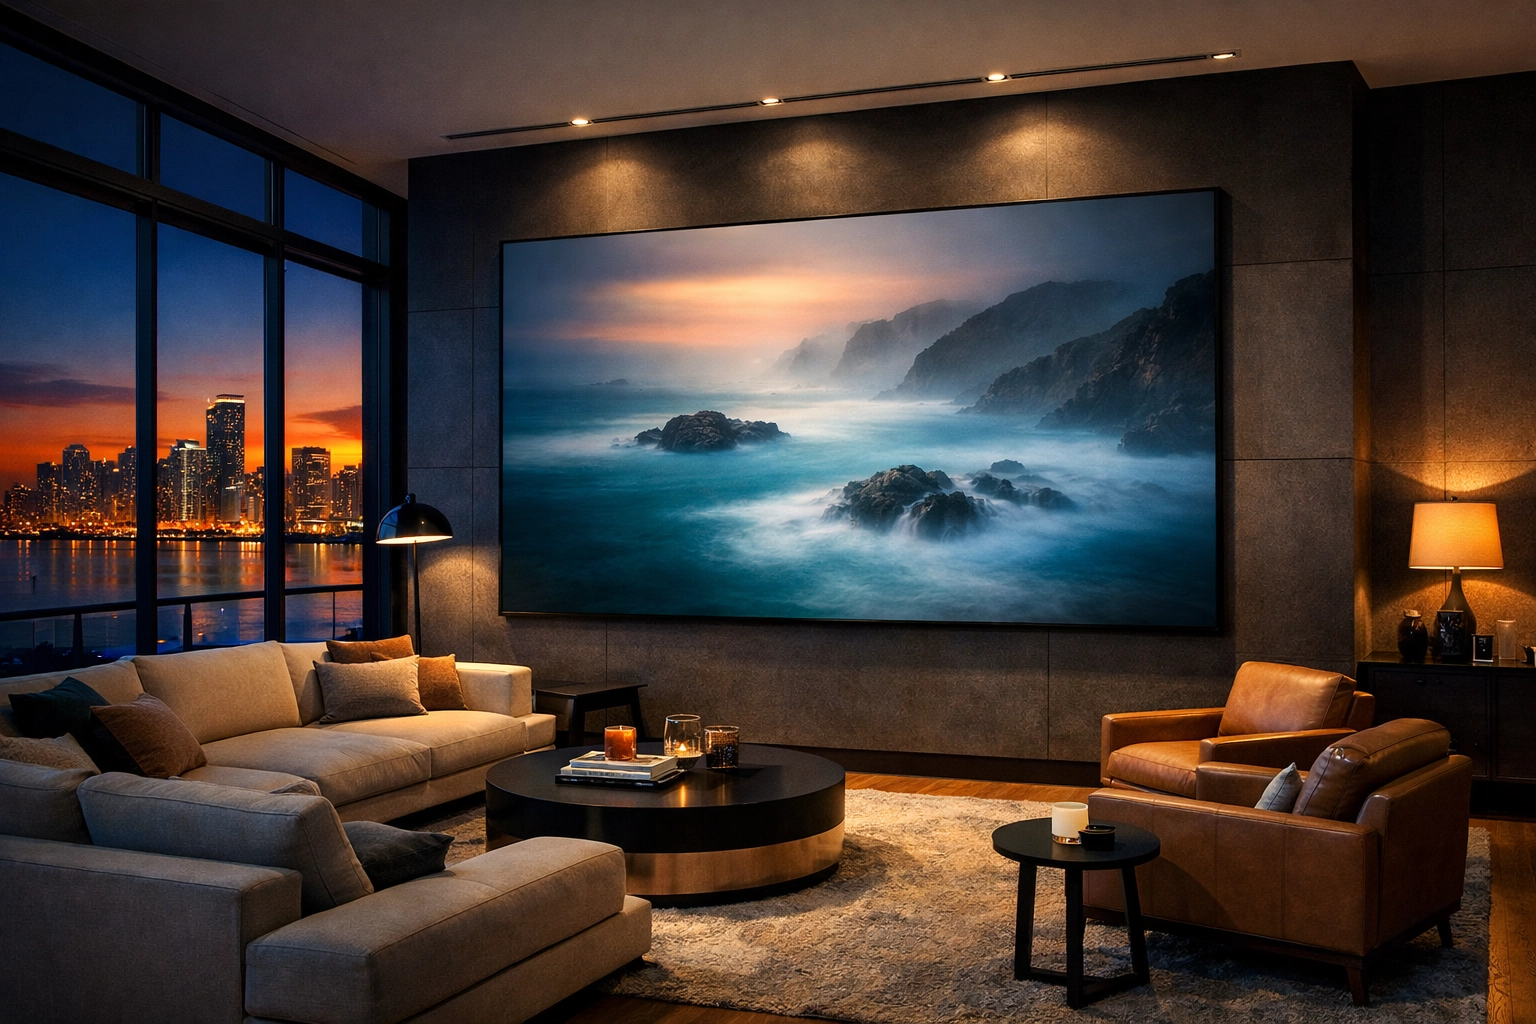
The Interior Design Connection
Fine art photography doesn't just live on a hard drive; it’s meant to live on a wall. When you are shooting, consider how your work will look in a modern home or a corporate office. Images with a dreamy photography editing style often work well in residential spaces because they create a sense of calm and luxury.
When you view your work through the lens of a collector, you start to see things differently. You look for "negative space" where a piece of furniture might sit. You look for colors that complement high-end finishes. This mindset shift is what separates a snapshot from a piece of fine art.
Final Thoughts: The Journey is Yours
Fine art photography is a marathon, not a sprint. It takes time to find your voice and even longer to refine it. But with the right mix of technical skill, dedicated post-processing, and a clear artistic vision, you can create work that truly resonates with the world.
Remember, your unique perspective is your most valuable asset. No one else sees the world exactly the way you do. Use that. Lean into the ethereal photography vibes, experiment with your editing, and don't be afraid to fail. Some of my best work came from "happy accidents" that I leaned into.
For more insights on how to elevate your work, explore our site for a deep dive into hundreds of tutorials and guides at Edin Chavez Blog. Whether you’re looking to master the technical side at Edin Studios or you’re ready to invest in world-class art at Edin Fine Art, we’re here to help you every step of the way.
Now, grab your camera, find your light, and go create something beautiful. The world is waiting to see your vision.


