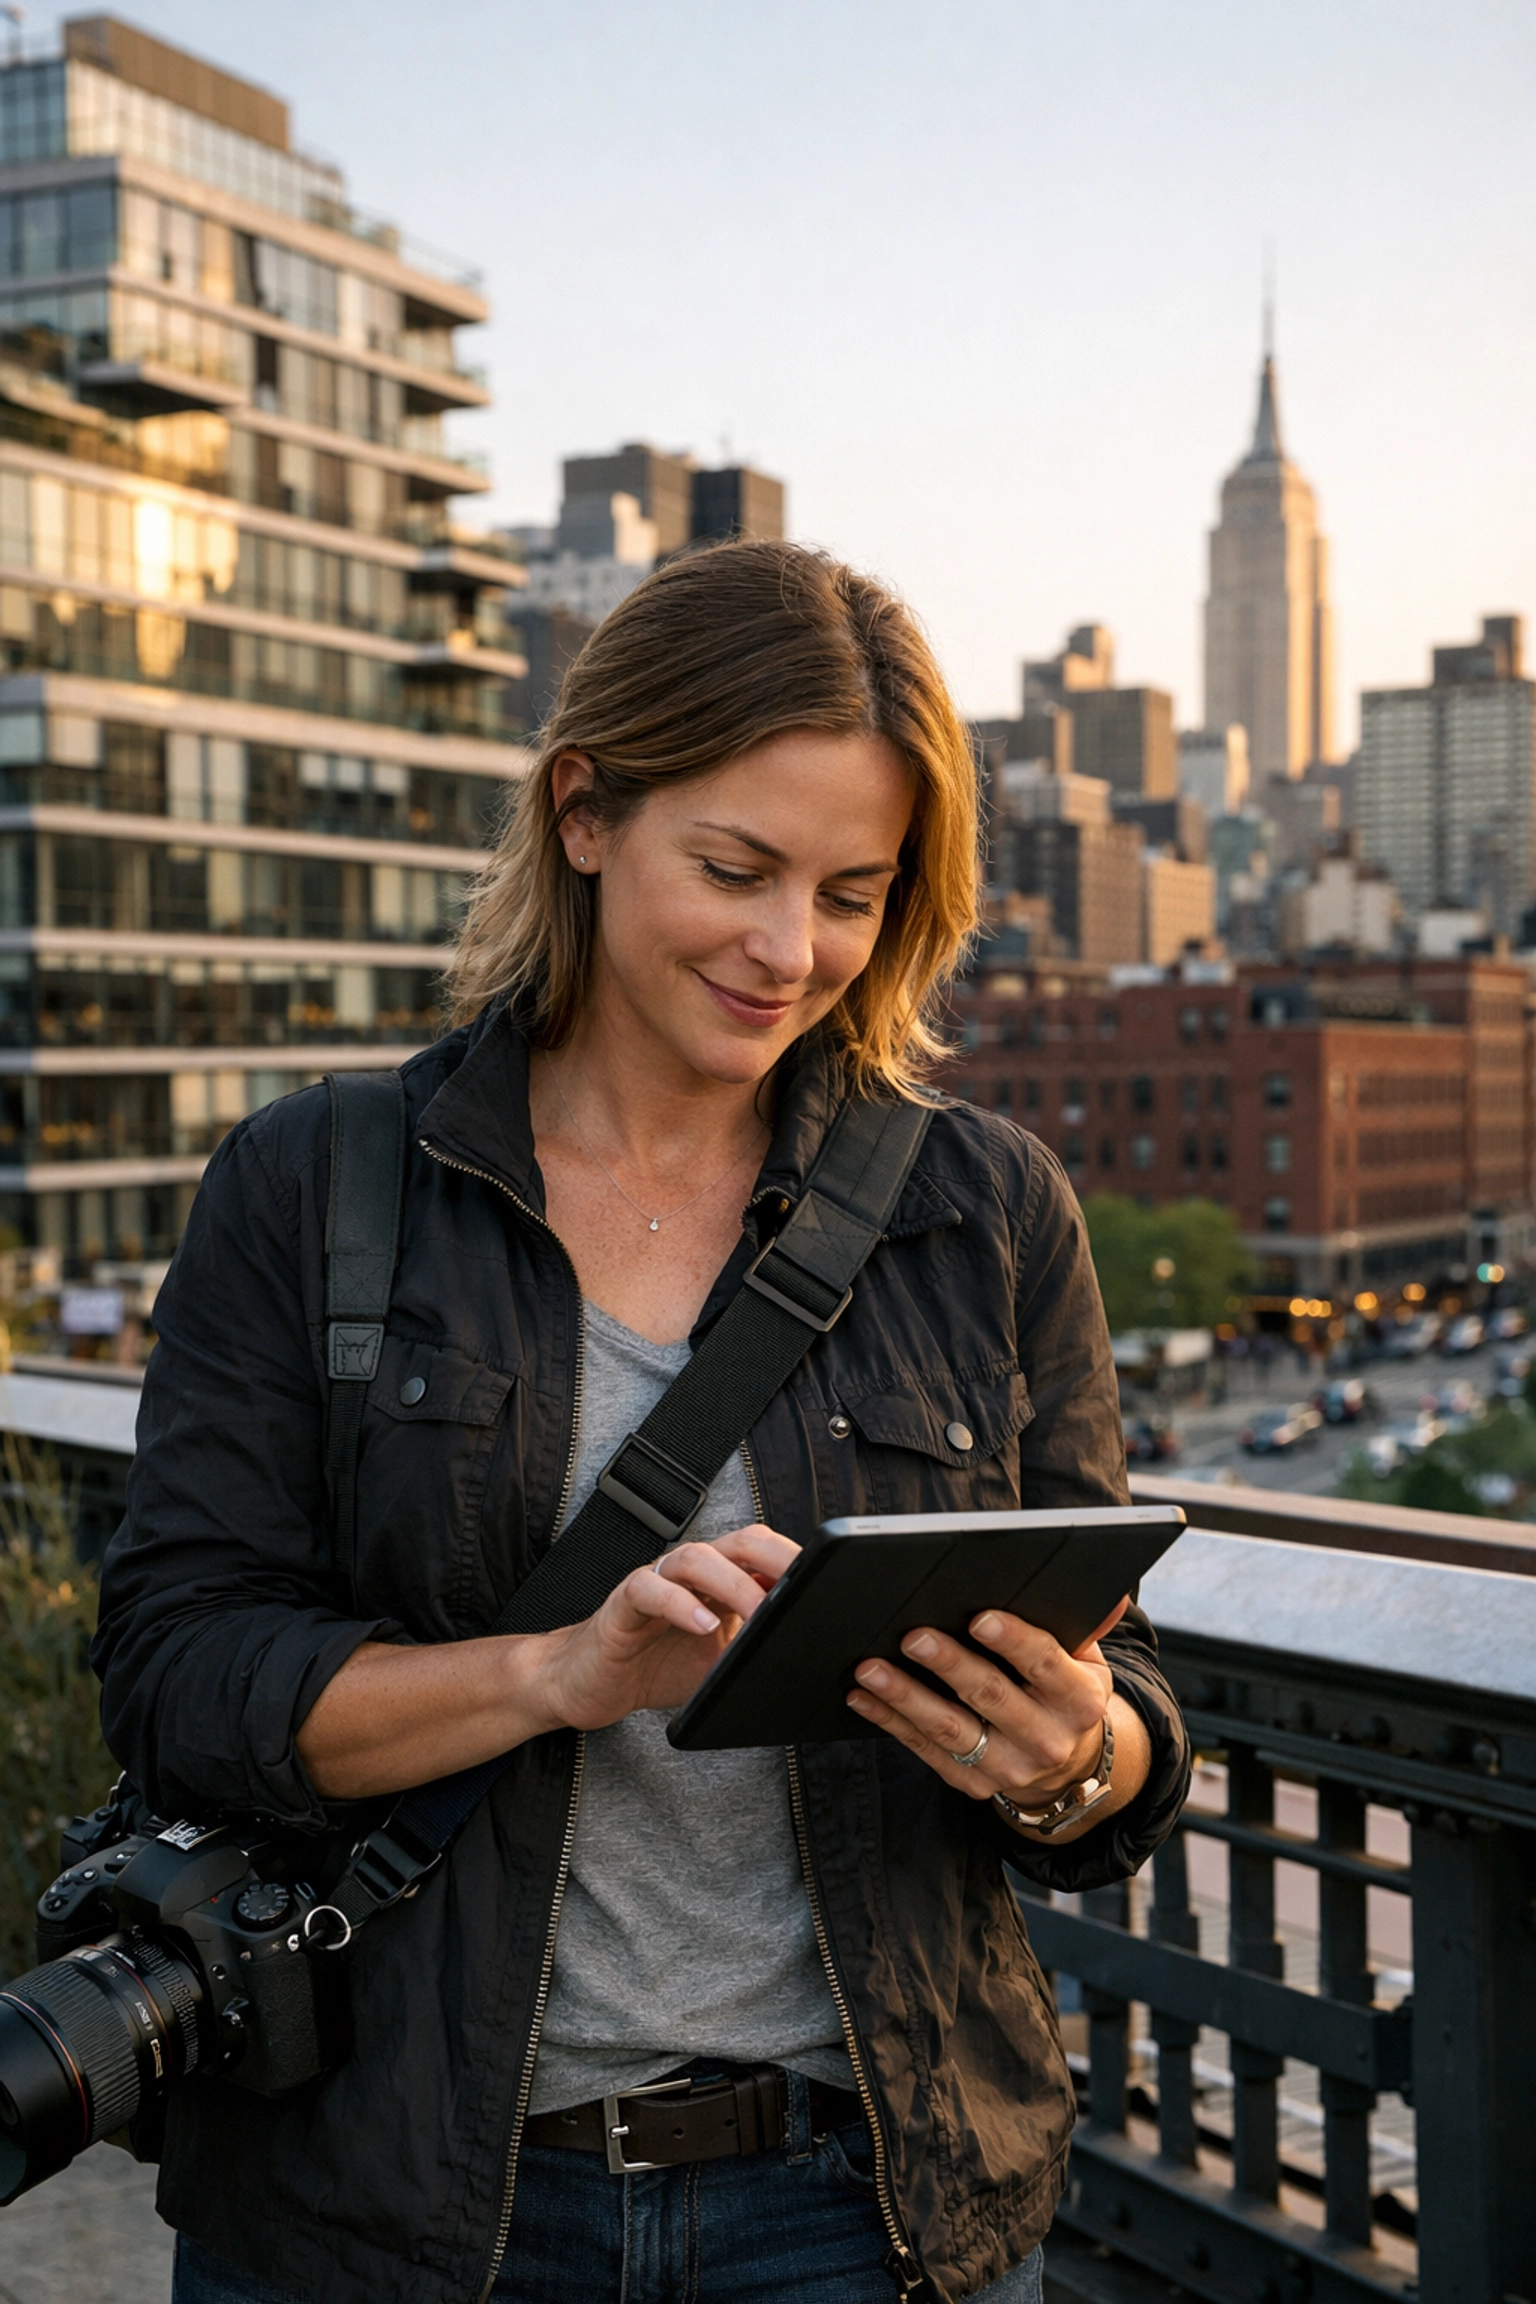
Just as a dream lingers in the back of your mind long after you’ve woken up, ethereal photography captures a feeling rather than a static, sharp reality. It’s that soft-focus, glow-from-within aesthetic that makes you feel like you’ve stepped into a fairytale or a distant memory. If you’ve ever looked at a photo and felt a sense of calm, nostalgia, or quiet magic, you’ve likely been staring at a piece of ethereal fine art.
At Edin Chavez Blog, we believe that photography is more than just clicking a shutter; it’s about storytelling through light and emotion. Mastering ethereal photography isn't just about having a fancy lens; it's about training your eye to see the softness in a world that often feels too sharp. Whether you are looking to sell high-end prints like those found at Edin Fine Art or you simply want to level up your Instagram game, this guide will walk you through the technical skills and the creative mindset you need to succeed.
What Exactly is Ethereal Photography?
Before you dive into your camera bag, you need to understand the vibe. Ethereal photography is characterized by light, airy, and atmospheric qualities. It prioritizes the "glow" over the "grain." While traditional landscape or street photography often celebrates tack-sharp details, ethereal work embraces blur, movement, and a delicate palette.
Think of it as the visual equivalent of a whisper. It’s about creating a mood that feels otherworldly and safe. Your goal is to make the viewer feel like they are remembering a beautiful dream. This style is a pillar of fine art photography, where the artist's vision takes precedence over a literal representation of the subject.
Master the Light: Your Secret Weapon
In the world of the ethereal, light is your most important tool. You aren't just looking for light; you are looking for quality of light. Forget the harsh midday sun: that’s the enemy of the dream. To achieve that signature glow, you need to master these lighting scenarios:
The Golden and Blue Hours
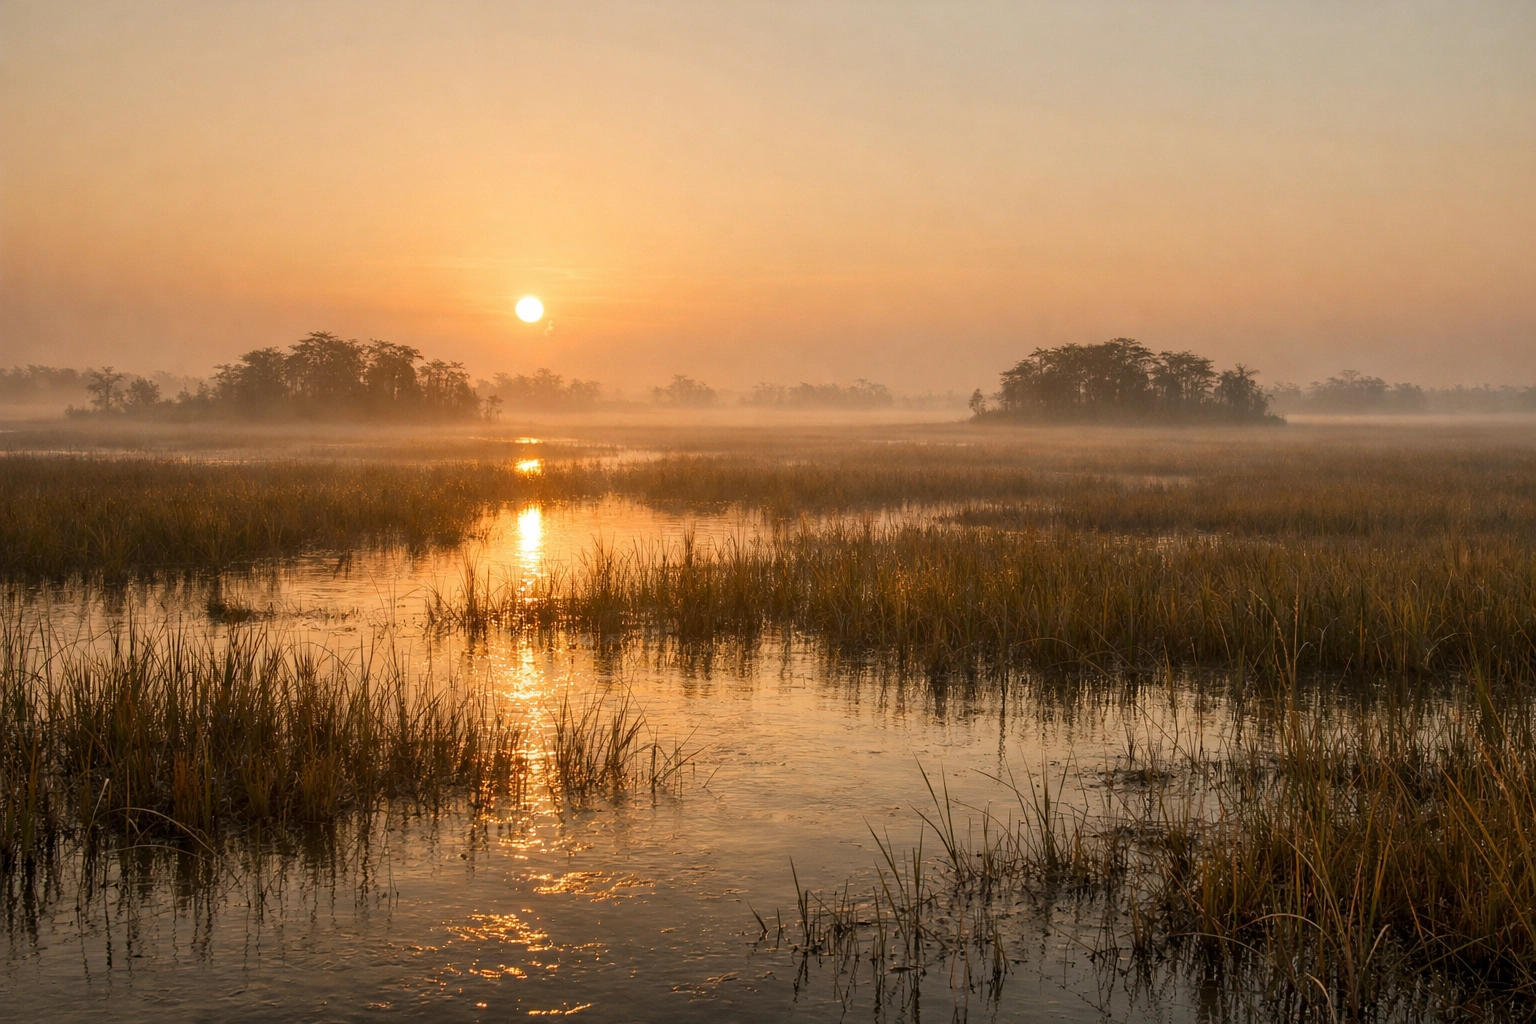
Many photographers swear by the golden hour (just after sunrise or before sunset), and for good reason. The long shadows and warm, directional light create a natural radiance. However, don't sleep on the blue hour (the period just before sunrise or after sunset). The cool, soft tones of the blue hour provide a moody, spiritual quality that is perfect for ethereal landscapes.
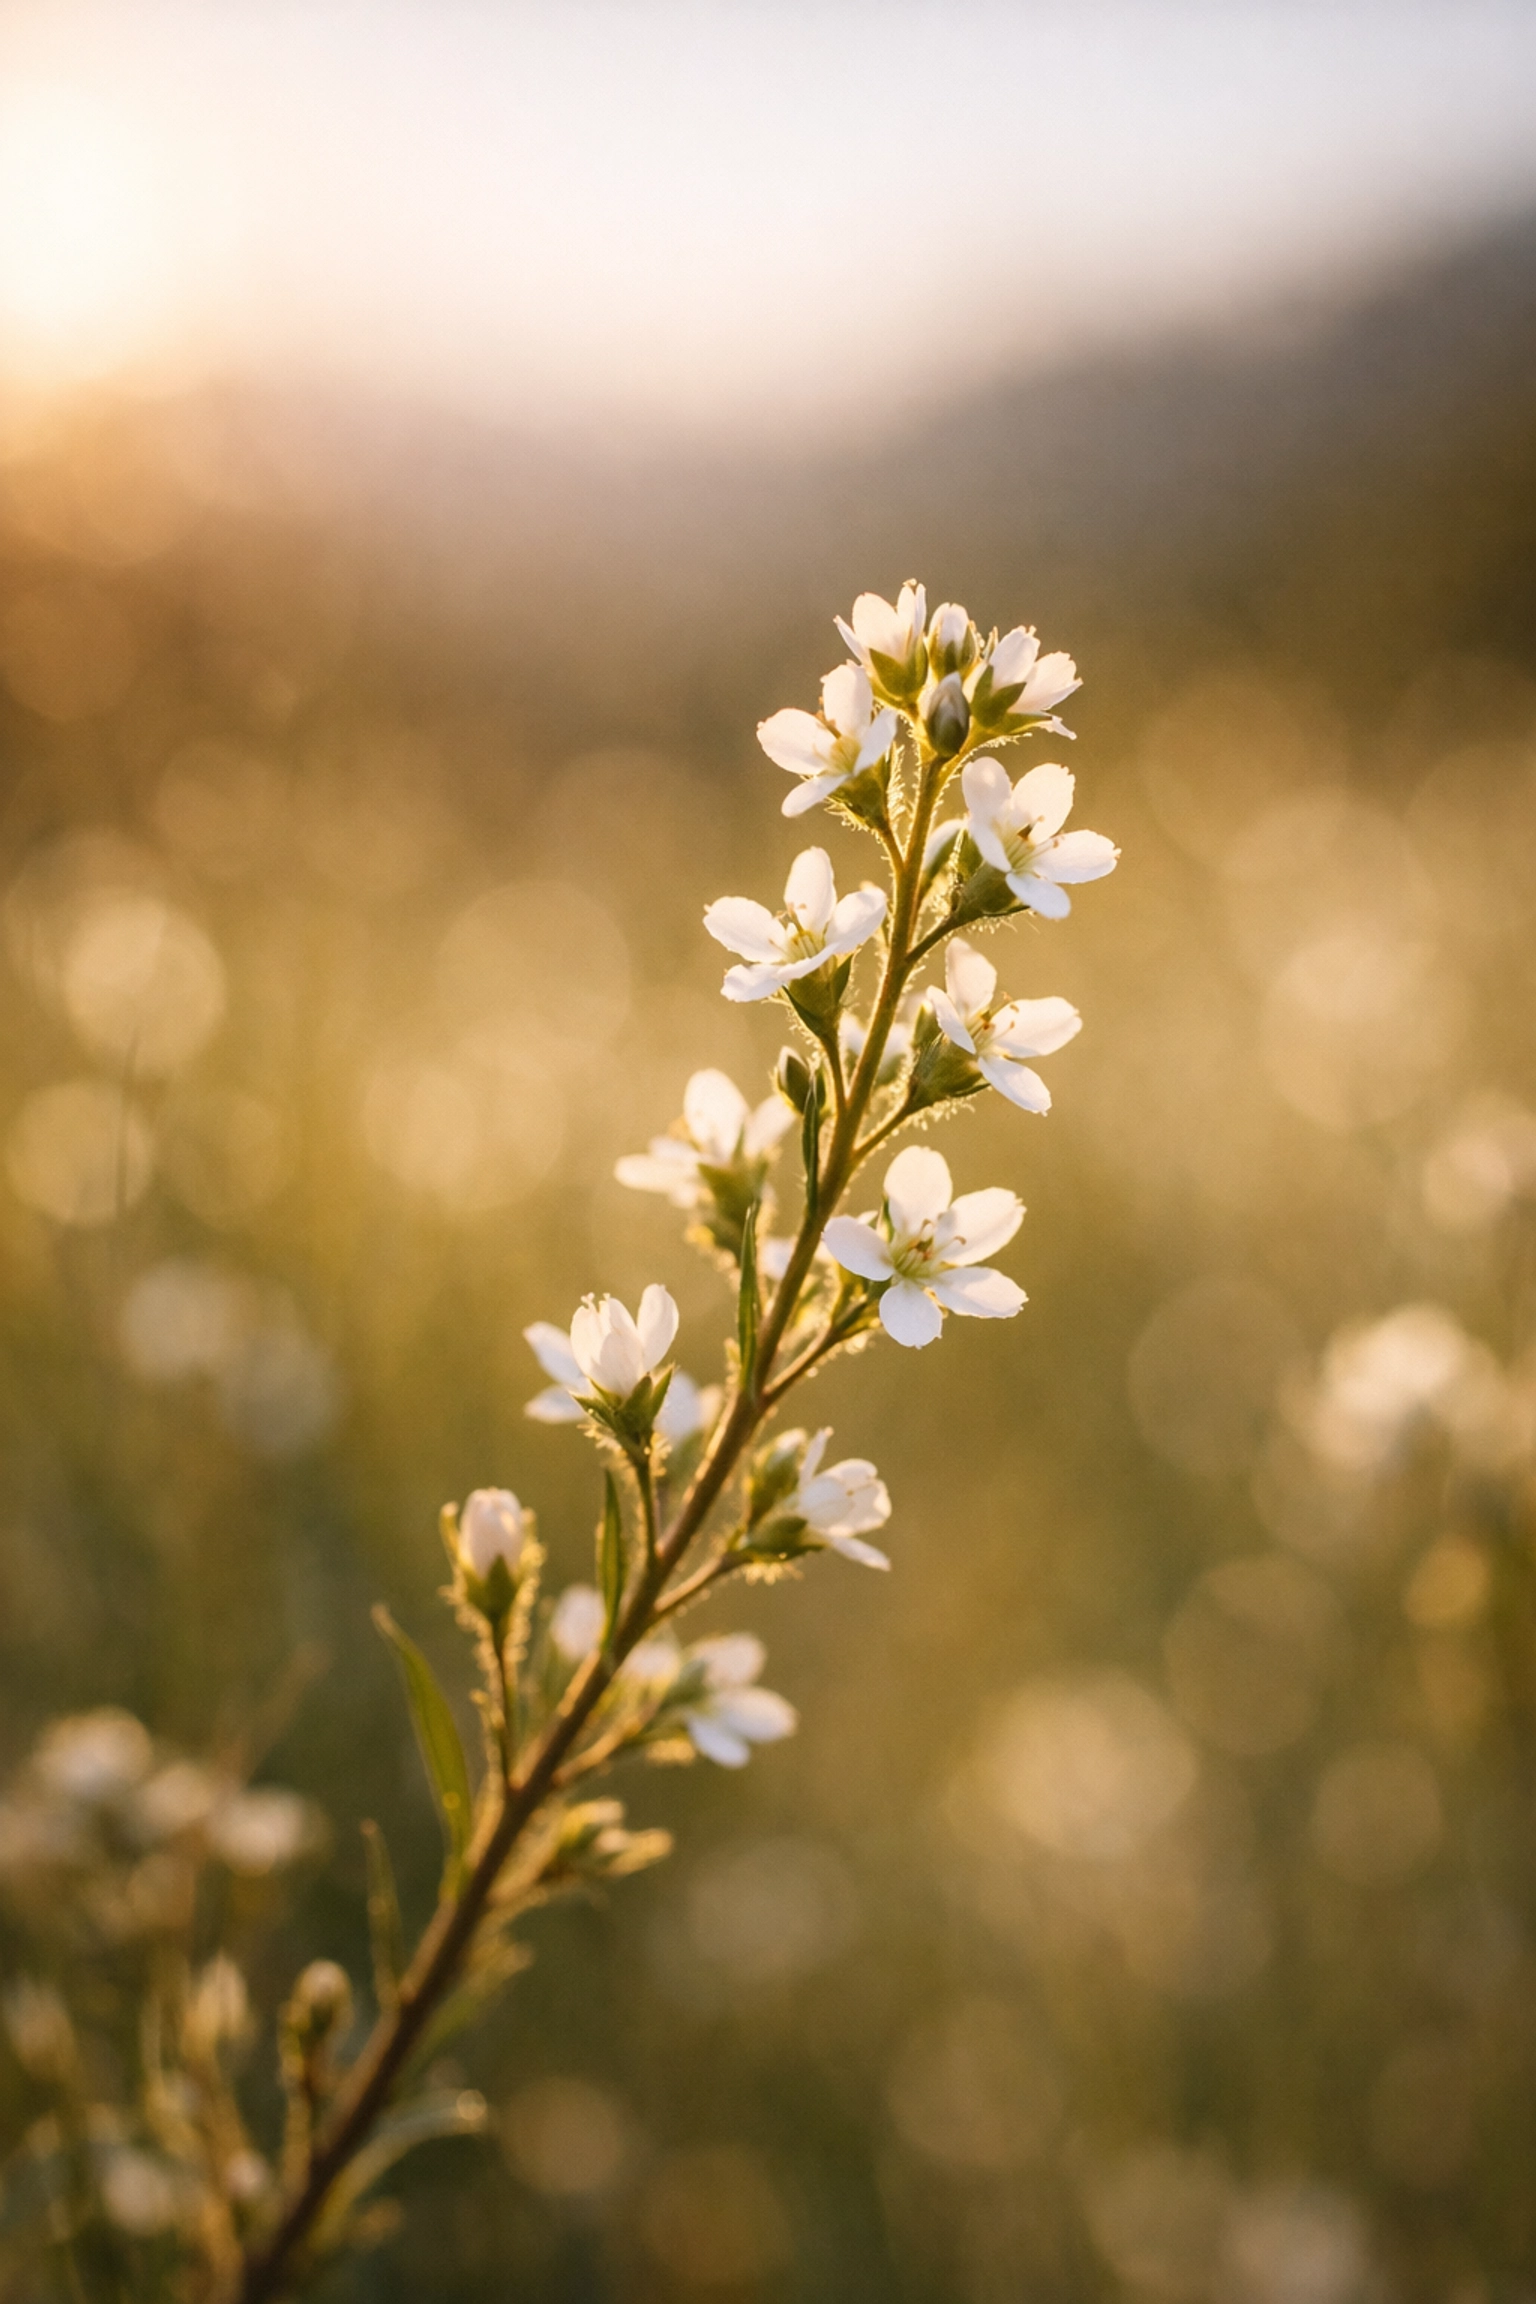
Backlighting for the Win
If you want your subjects to look like they’re illuminated from within, you must learn to backlight. By positioning your subject between you and the light source, you create a "rim light" effect. This makes hair, fabric, and nature (like tall grass or mist) glow brilliantly. This is a staple technique in fine art photography that separates the pros from the hobbyists.
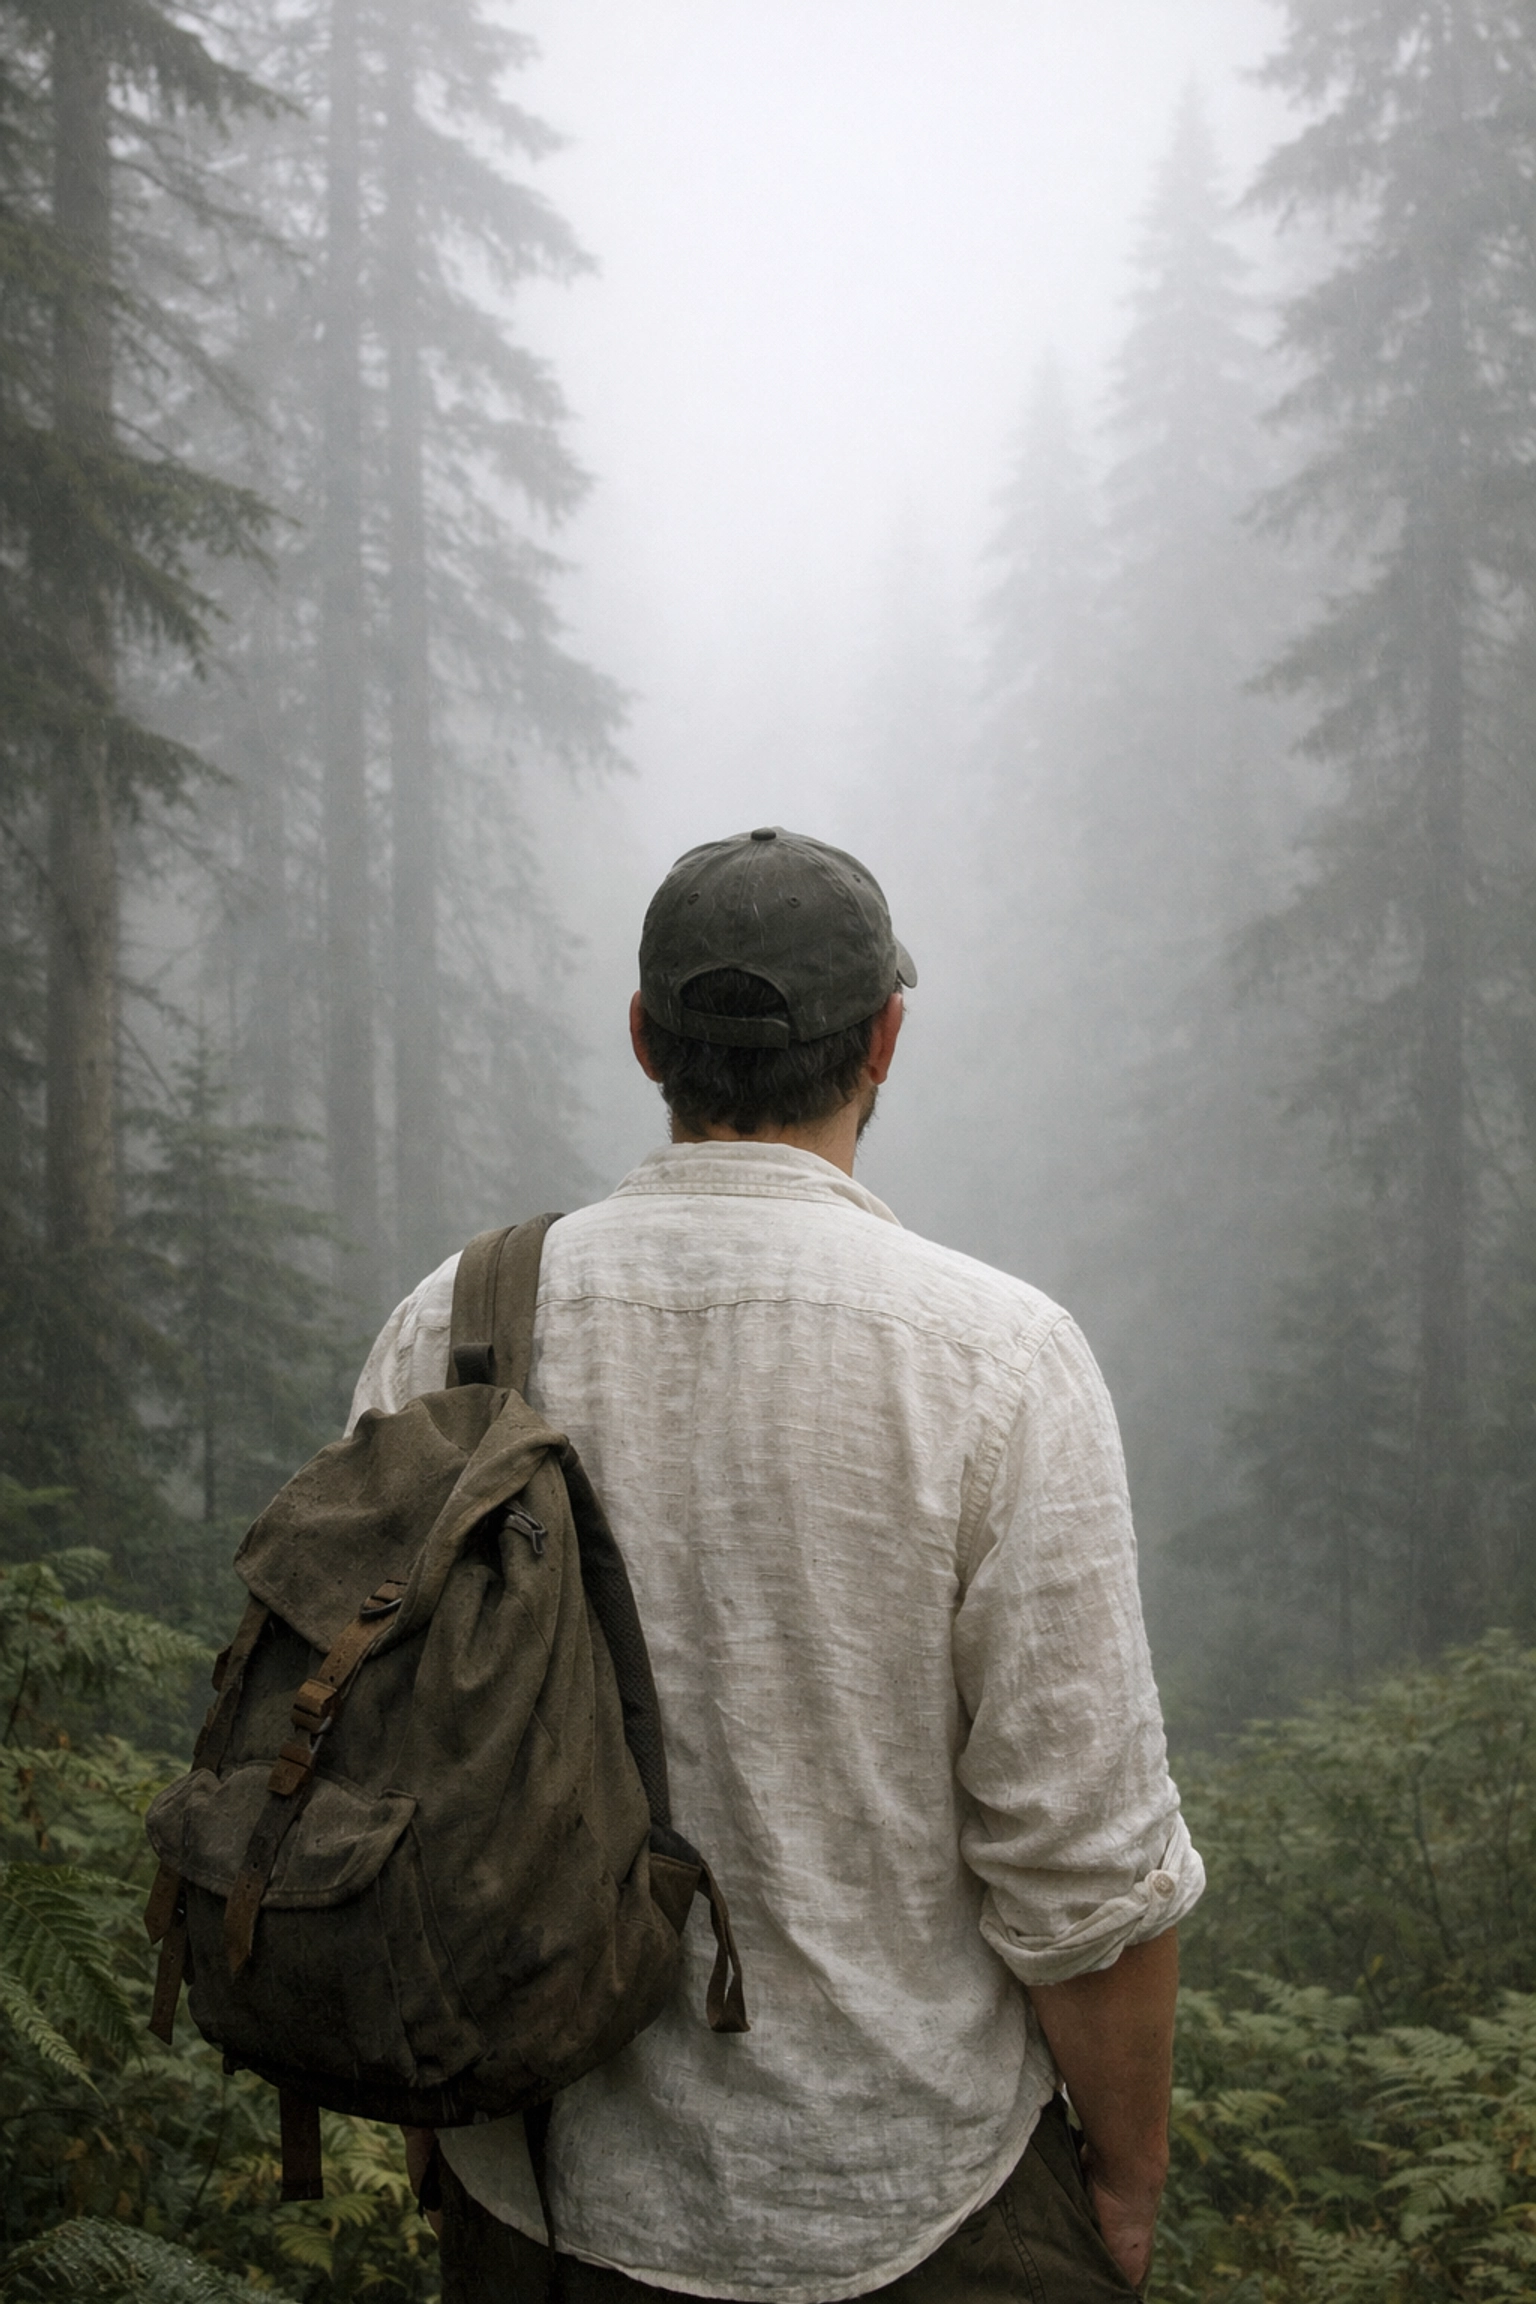
Overcast and Foggy Days
Don't let a "gloomy" day keep you inside. Overcast skies act as a giant softbox, eliminating harsh shadows and providing a flat, even light that is incredibly easy to work with for dreamy photography editing later on. Fog, of course, is the holy grail. It provides natural diffusion and adds an instant layer of mystery and depth to your frames.
| Lighting Type |
Mood Created |
Best Used For |
| Golden Hour |
Warmth, nostalgia, hope |
Portraits, beach landscapes |
| Blue Hour |
Mystery, calm, spirituality |
Cityscapes, quiet forests |
| Backlighting |
Glow, separation, magic |
Fine art portraits, flowers |
| Fog/Mist |
Depth, isolation, dreamlike |
Moody landscapes, storytelling |
Technical Camera Settings for a Soft Touch
While your vision is the driver, your gear needs to be tuned correctly. To get that "floating" feeling, you need to manage your depth of field and focus with intention.
Wide Aperture is Non-Negotiable
To get that signature soft, blurred background (bokeh), you need to shoot "wide open." If you have a prime lens, drop your aperture to f/1.8, f/2.0, or f/2.8. This shallow depth of field isolates your subject and turns the background into a painterly wash of color. If you are shooting portraits, ensure you lock your focus on the eyes: even in a dreamy world, the eyes are the window to the soul.
Lens Choice and Diffusion
While modern lenses are designed to be sharp, ethereal photography often benefits from a little "imperfection." Many fine art photographers use vintage lenses to get a softer look. If you don't want to buy new gear, you can use physical diffusion:
- Lens Filters: Use a "Pro-Mist" or "Black Mist" filter to bloom your highlights.
- The DIY Route: Stretch a piece of thin pantyhose or tulle over your lens.
- The Old-School Trick: A tiny (and I mean tiny!) smear of Vaseline on a clear UV filter can create a beautiful blur around the edges of your frame.
For more technical deep dives, check out our Photography Guides which cover everything from gear to composition.
Practical Tips: Shooting Through the Veil
One of the best ways to enhance ethereal photography is to add layers between your lens and your subject. This creates a "veil" that softens the entire image.
- Shoot Through Objects: Hold a piece of glass, a prism, or even a branch of flowers right in front of your lens while focusing on a subject further away. The foreground object will turn into a soft blur of color.
- Use Movement: Don't be afraid of a little camera shake or subject movement. A slightly blurred hand or a flowing dress caught in a long exposure can add a sense of ghost-like elegance.
- Find the Negative Space: Don't crowd your frame. Leave plenty of "room to breathe": empty sky, calm water, or a field of grass. This gives your subject a sense of weightlessness.
If you find yourself in Florida, the Everglades offer some of the most atmospheric, ethereal landscapes in the world: especially at dawn. Grab our Everglades Photography Guide to find the best spots for that misty morning glow.
Dreamy Photography Editing: Where the Magic Happens
Your work isn't done when you press the shutter. In fact, for many, the dreamy photography editing phase is where the true ethereal quality is born. You don't want to over-process, but you do want to enhance the atmospheric elements you’ve captured.
The Power of Color Grading
Ethereal images often lean toward a specific color palette: either warm and golden or cool and pastel. Use the HSL panel in Lightroom to desaturate harsh colors and shift your hues toward a more harmonious look. Whites should be bright but not blown out, and shadows should be "lifted" to avoid heavy, dark blocks of black.
Adding the "Orton Effect"
Named after Michael Orton, this technique involves layering a sharp version of an image with a blurred version. In Photoshop, you can duplicate your layer, apply a Gaussian Blur, and then change the blending mode to "Soft Light" or "Overlay." Lower the opacity until you have a subtle, dreamlike glow that feels like a painting.
Efficiency with Presets
If you want to achieve this look consistently without spending hours at your desk, using a well-crafted starting point is key. Our Ultimate Lightroom Preset Collection is designed to help you nail that professional fine art look with just a few clicks. It’s the same foundation Edin uses to create his world-class imagery.
Building Your Fine Art Vision
Ethereal photography is as much about the "why" as the "how." To succeed in fine art photography, you need a concept. Before you head out, ask yourself what feeling you are trying to evoke. Is it loneliness? Peace? Whimsy?
Creating a mood board on Pinterest or in a physical notebook can help you stay focused. Collect images that share a similar color story or lighting style. By planning your shoot around a specific emotion, your photos will resonate much more deeply with your audience.
If you're looking for hands-on guidance to find your voice, we offer Workshops and Private Miami Photography Tours where we can work one-on-one to refine your skills in some of the most beautiful locations in the world. Speaking of Miami, if you're exploring the Magic City on your own, don't forget to grab the Miami Self-Driving Photography Guide to find those hidden, dreamy gems away from the tourist traps.
Final Thoughts: Your Path to Ethereal Mastery
Mastering the art of the ethereal takes patience and a willingness to experiment. It’s about letting go of the need for "perfect" sharpness and embracing the beauty of the blur. With the right lighting, a solid understanding of your camera settings, and a gentle hand in post-processing, you can create images that stop people in their tracks and transport them to another world.
Remember, every great fine art photographer started exactly where you are. The difference is they kept shooting, kept experimenting, and kept refining their vision. So, grab your camera, find some soft light, and start creating your own dreamscape.
For more insights on how to elevate your work, explore our site for a deep dive into hundreds of tutorials and guides at https://blog.edinchavez.com/. You can also visit Edin Studios to see our latest commercial projects or browse Edin Fine Art for inspiration on how to turn your ethereal visions into stunning physical prints.
As a photographer, you probably didn't get into this business because you had a burning passion for cold-calling marketing directors or refreshing job boards until your eyes bled. You got into this because you love the click of the shutter, the magic of the "golden hour," and the thrill of capturing a story in a single frame. But let's be real: the "business" side of finding jobs for photographers often feels like a second, much more soul-crushing job.
Just as the industry shifted from film to digital, we are currently standing at the edge of another massive evolution. The way you connect with clients is changing. For years, you’ve been told to "hustle," build a site, run ads, and hope the right person stumbles across your portfolio. That model is broken. It’s inefficient, it’s expensive, and it takes you away from your craft.
Enter Proshoot.io. This platform isn't just another directory; it’s a fundamental shift in the photography ecosystem that flips the script on how you land work. By the time you finish reading this, you’ll understand why the old way of "chasing" leads is about to become a relic of the past.
The Death of the "Chase": How the Inverted Marketplace Empowers You
Most platforms for freelancers operate on a "begging" model. A client posts a vague job, and three hundred people: half of whom aren't even professionals: flood their inbox with low-ball offers. It’s a race to the bottom that devalues your skill and wastes your time.
Proshoot.io changes this dynamic by utilizing an inverted marketplace model. Instead of you spending your days hunting down leads, the platform is designed to bring actively hiring clients directly to your doorstep. This isn't just about passive discovery; it’s about being part of a curated professional ecosystem. When you are on Proshoot.io, you aren't just another name in a hat. You are a vetted professional in a space where clients come specifically because they have a budget, a timeline, and a need for high-end results.
This reversal of the traditional dynamic ensures that your energy is spent evaluating opportunities rather than begging for them. You get to see the scope, the budget, and the timeline before you ever lift a finger. It’s smooth as butter and puts the power back where it belongs: in your hands.
SEO-Optimized Profiles: Let Google Do the Heavy Lifting
You know how much work it takes to get a personal portfolio website to rank on the first page of Google. Between keyword research, backlink building, and technical SEO, it’s a full-time job. Most photographers' websites end up buried on page ten, where the only people who see them are your mom and that one bot from Russia.
When you set up your profile on Proshoot.io, you aren't just getting a digital business card. You are tapping into a platform that is already optimized for the very search terms clients use. When a local business owner searches for "corporate headshots" or "real estate photographer," the platform's infrastructure propels your profile to the forefront.
By integrating your portfolio into this SEO-heavy environment, you gain the benefits of a massive marketing department without having to pay for one. Your work becomes discoverable through organic search, making you visible to clients who didn't even know they were looking for you yet. This level of technical credibility ensures that you aren't just a "photographer near me": you are the top choice.
Quality Over Quantity: The Vetted Talent Advantage
One of the biggest headaches in finding jobs for photographers on standard job boards is the sheer amount of noise. You’re competing with "Uncle Bob" who just bought a DSLR and is willing to shoot a wedding for fifty bucks and a slice of cake.
Proshoot.io eliminates this friction by maintaining a vetted talent pool. By filtering out the amateurs and focusing on pros, the platform ensures that when a client posts a job, they are looking for quality, not just the lowest price. This creates a high-trust environment where your expertise is respected.
When you bid on a project, you’re usually only up against a handful of other qualified pros. This doesn't just increase your chances of winning the job; it keeps the industry rates healthy. You can check out the level of professional work we value by browsing the Edin Chavez Blog or seeing the high-end prints at Edin Fine Art. When everyone in the room is a pro, the conversation moves away from "how cheap can you do this?" to "how great can we make this look?"
| Feature |
Traditional Job Boards |
Proshoot.io Marketplace |
| Discovery |
You chase the client |
Clients find your vetted profile |
| Competition |
Hundreds of unvetted bidders |
A handful of qualified pros |
| Bidding Window |
Often weeks of silence |
Rapid 12, 24, or 48-hour windows |
| Workflow |
Scattered across email/text |
Centralized in one dashboard |
| Portfolio |
Heavily compressed images |
High-resolution, professional hosting |
Rapid Bidding and Real Intent
Timing is everything in this business. How many times have you sent a proposal only to hear back three weeks later when you’re already booked? Or worse, you never hear back at all because the client was "just looking."
Proshoot.io implements rapid, quality-focused bidding windows: typically 12, 24, or 48 hours. This signals one very important thing: Real Intent. The clients on this platform aren't window shopping; they are ready to hire now. This sense of momentum helps you fill your calendar quickly and reduces the "dead time" between projects.
The All-in-One Dashboard: Stop the App-Switching Madness
Managing a photography business often feels like being an air traffic controller. You’ve got emails in one tab, Instagram DMs in another, invoices in a third, and your portfolio hosted somewhere else. It’s a recipe for missed messages and lost revenue.
Proshoot.io consolidates your entire professional life into a single, robust dashboard.
- Portfolio Hosting: Show off your work in high resolution without the ugly compression you see on social media.
- Messaging: Keep all client communication in one place so you never lose a project detail.
- Payments & Invoicing: Get paid through the platform, ensuring you don't have to chase checks in the mail.
- Project Management: Track your deadlines and deliverables with ease.
This administrative consolidation is a game-changer. It’s about more than just organization; it’s about professionalism. When a client sees that you have a streamlined system for communication and billing, their confidence in you skyrockets. Just as the Ultimate Lightroom Preset Collection streamlines your editing process and saves you hours of clicking, Proshoot.io streamlines your business operations.
Elevating Your Brand Presence
Your presence on Proshoot.io works in tandem with your other professional assets. While your profile on the marketplace handles the "jobs" side of things, you can still lead clients back to your specialized work at Edin Studios or show them your educational side through the tutorials on our main site.
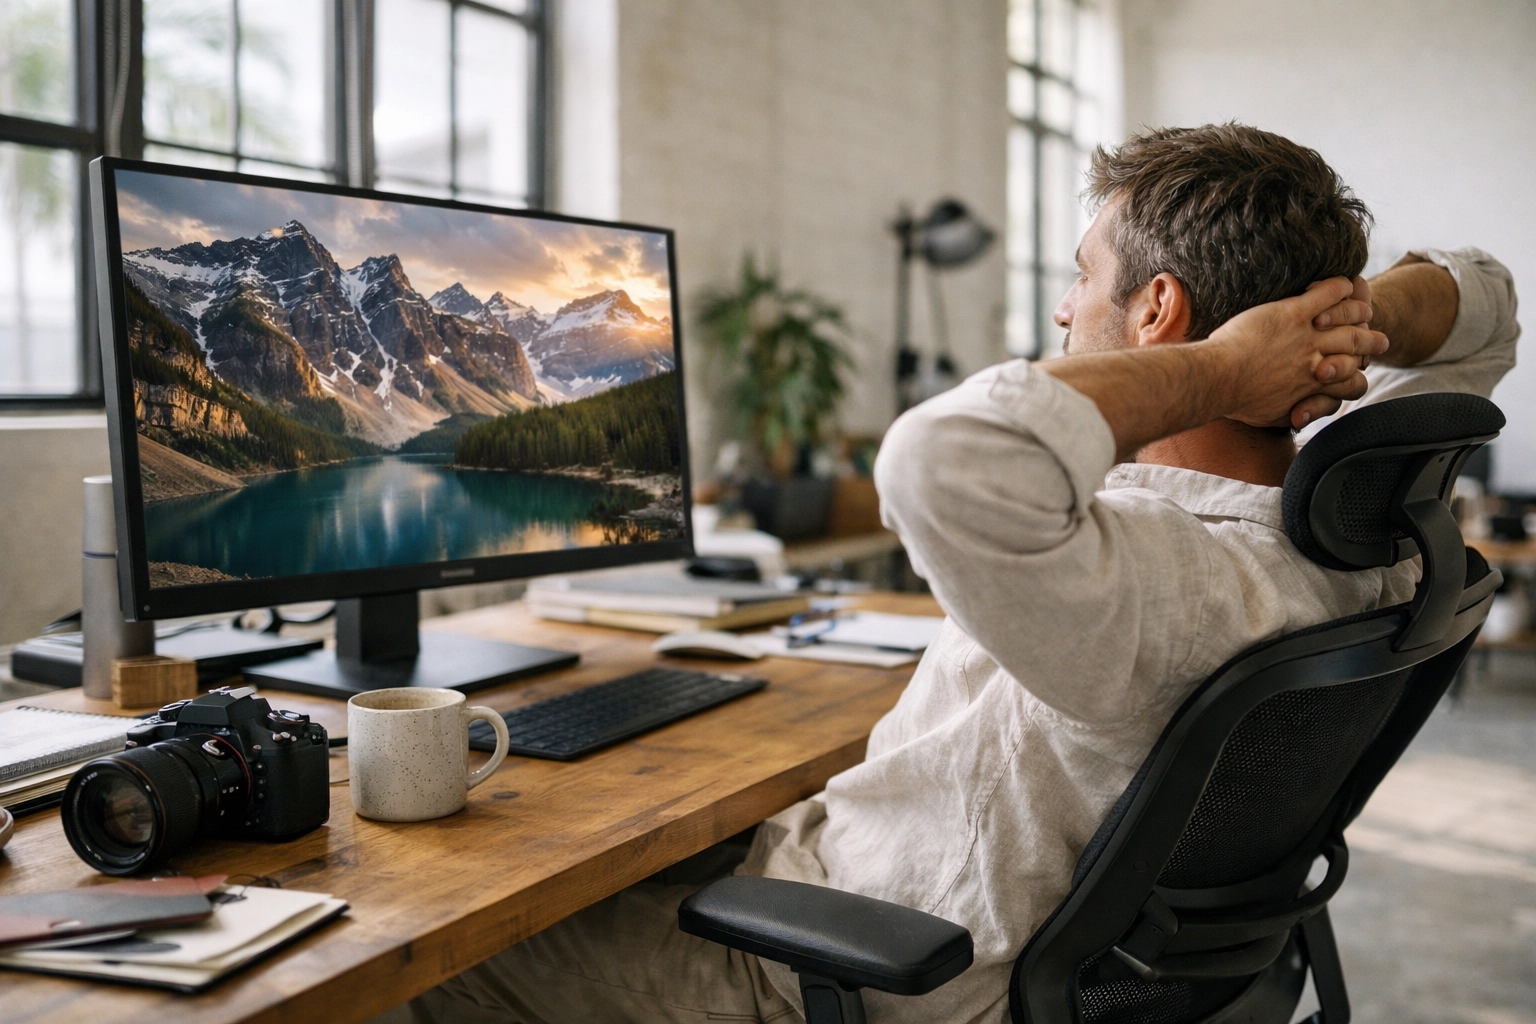
Think of it as your digital headquarters. You want a place that showcases your work with the same intensity and quality that you put into the shot itself. Traditional social media platforms are great for "likes," but they are terrible for business. They hide your content behind algorithms and compress your beautiful 45-megapixel images into blurry squares. Proshoot.io respects the art, providing a platform where the technical quality of your work: your editing, your lighting, your composition: is actually visible to the people paying the bills.
Why This Matters for Your Future
The landscape of jobs for photographers is becoming more competitive, but also more specialized. To stay ahead, you need more than just a good eye; you need a better system. Proshoot.io provides that system. It removes the friction of the "hustle" and replaces it with a streamlined, professional, and automated way to grow your business.
By joining this ecosystem, you aren't just signing up for a job board; you’re investing in a platform that works for you while you’re out in the field. It’s about working smarter, not harder. It’s about spending less time on the computer and more time behind the camera.
Whether you are shooting commercial real estate, high-fashion editorials, or fine art landscapes, the need for a centralized, professional marketplace is universal. The era of the "starving artist" who can't find work is over: if you have the right tools.
For more insights on how to elevate your work, explore our site for a deep dive into hundreds of tutorials and guides at the Edin Chavez Blog. We are dedicated to helping you master the craft, and platforms like Proshoot.io are the final piece of the puzzle in mastering the business.
Hence, if you’re ready to stop chasing and start shooting, it’s time to move your portfolio to a place that actually works as hard as you do. The future of photography work is here, and it’s looking pretty damn good.
Just as the first light of dawn begins to bleed across the horizon, painting the sawgrass in shades of liquid gold, you realize that the Everglades isn't just a swamp: it’s a living, breathing masterpiece. Many photographers make the mistake of thinking this ecosystem is a monotonous flatland, but once you step into the "River of Grass" with your camera in hand, you’ll discover a world of intricate textures, prehistoric predators, and some of the most dramatic light on the planet.
As a photographer, your goal is to capture the soul of this landscape, and I’m here to guide you through the maze of mangroves and cypress domes. Whether you are hunting for the perfect wildlife photography Everglades moment or aiming for a fine-art landscape photography Everglades shot, your success depends on knowing exactly where to stand when the light hits.
Why the Everglades is a Fine Art Photographer’s Dream
The Everglades is unparalleled in its diversity. It’s the only place on Earth where alligators and crocodiles coexist, and it serves as a vital sanctuary for hundreds of bird species. But beyond the biological wonders, it offers a unique challenge: capturing depth in a landscape that is famously horizontal.
When you master the Everglades photography locations outlined in this guide, you aren’t just taking snapshots; you are creating legacy pieces. To truly elevate your work, you need to understand the rhythm of the water and the movement of the light. If you’re looking to skip the trial and error, I highly recommend picking up my Everglades Photography Guide to have all these secrets in your pocket.
1. Anhinga Trail: The Wildlife Photography Hub
If you’re looking for high-impact wildlife shots without a five-mile hike into the backcountry, the Anhinga Trail is your first stop. Located at the Royal Palm Visitor Center, this boardwalk trail is arguably the most famous of all Everglades photography locations.
You’ll find anhingas (hence the name) drying their wings on the railings, alligators lounging just inches from the path, and a variety of herons and egrets. The best part? The animals here are relatively accustomed to humans, allowing you to get those intimate, tight portraits that usually require a 600mm lens and a lot of patience.
- Pro Tip: Arrive at sunrise. The mist rising off the Taylor Slough creates a moody, ethereal atmosphere that transforms a standard bird photo into a piece of fine art.
- Key Subjects: Alligators, Turtles, Purple Gallinules, and Anhingas.
2. Shark Valley: The Heart of the Glades
Located off the Tamiami Trail, Shark Valley offers a 15-mile loop that propels you into the heart of the freshwater marl prairies. While you can rent a bike or take the tram, your best bet for photography is walking the first mile or two or taking the tram to the observation tower.
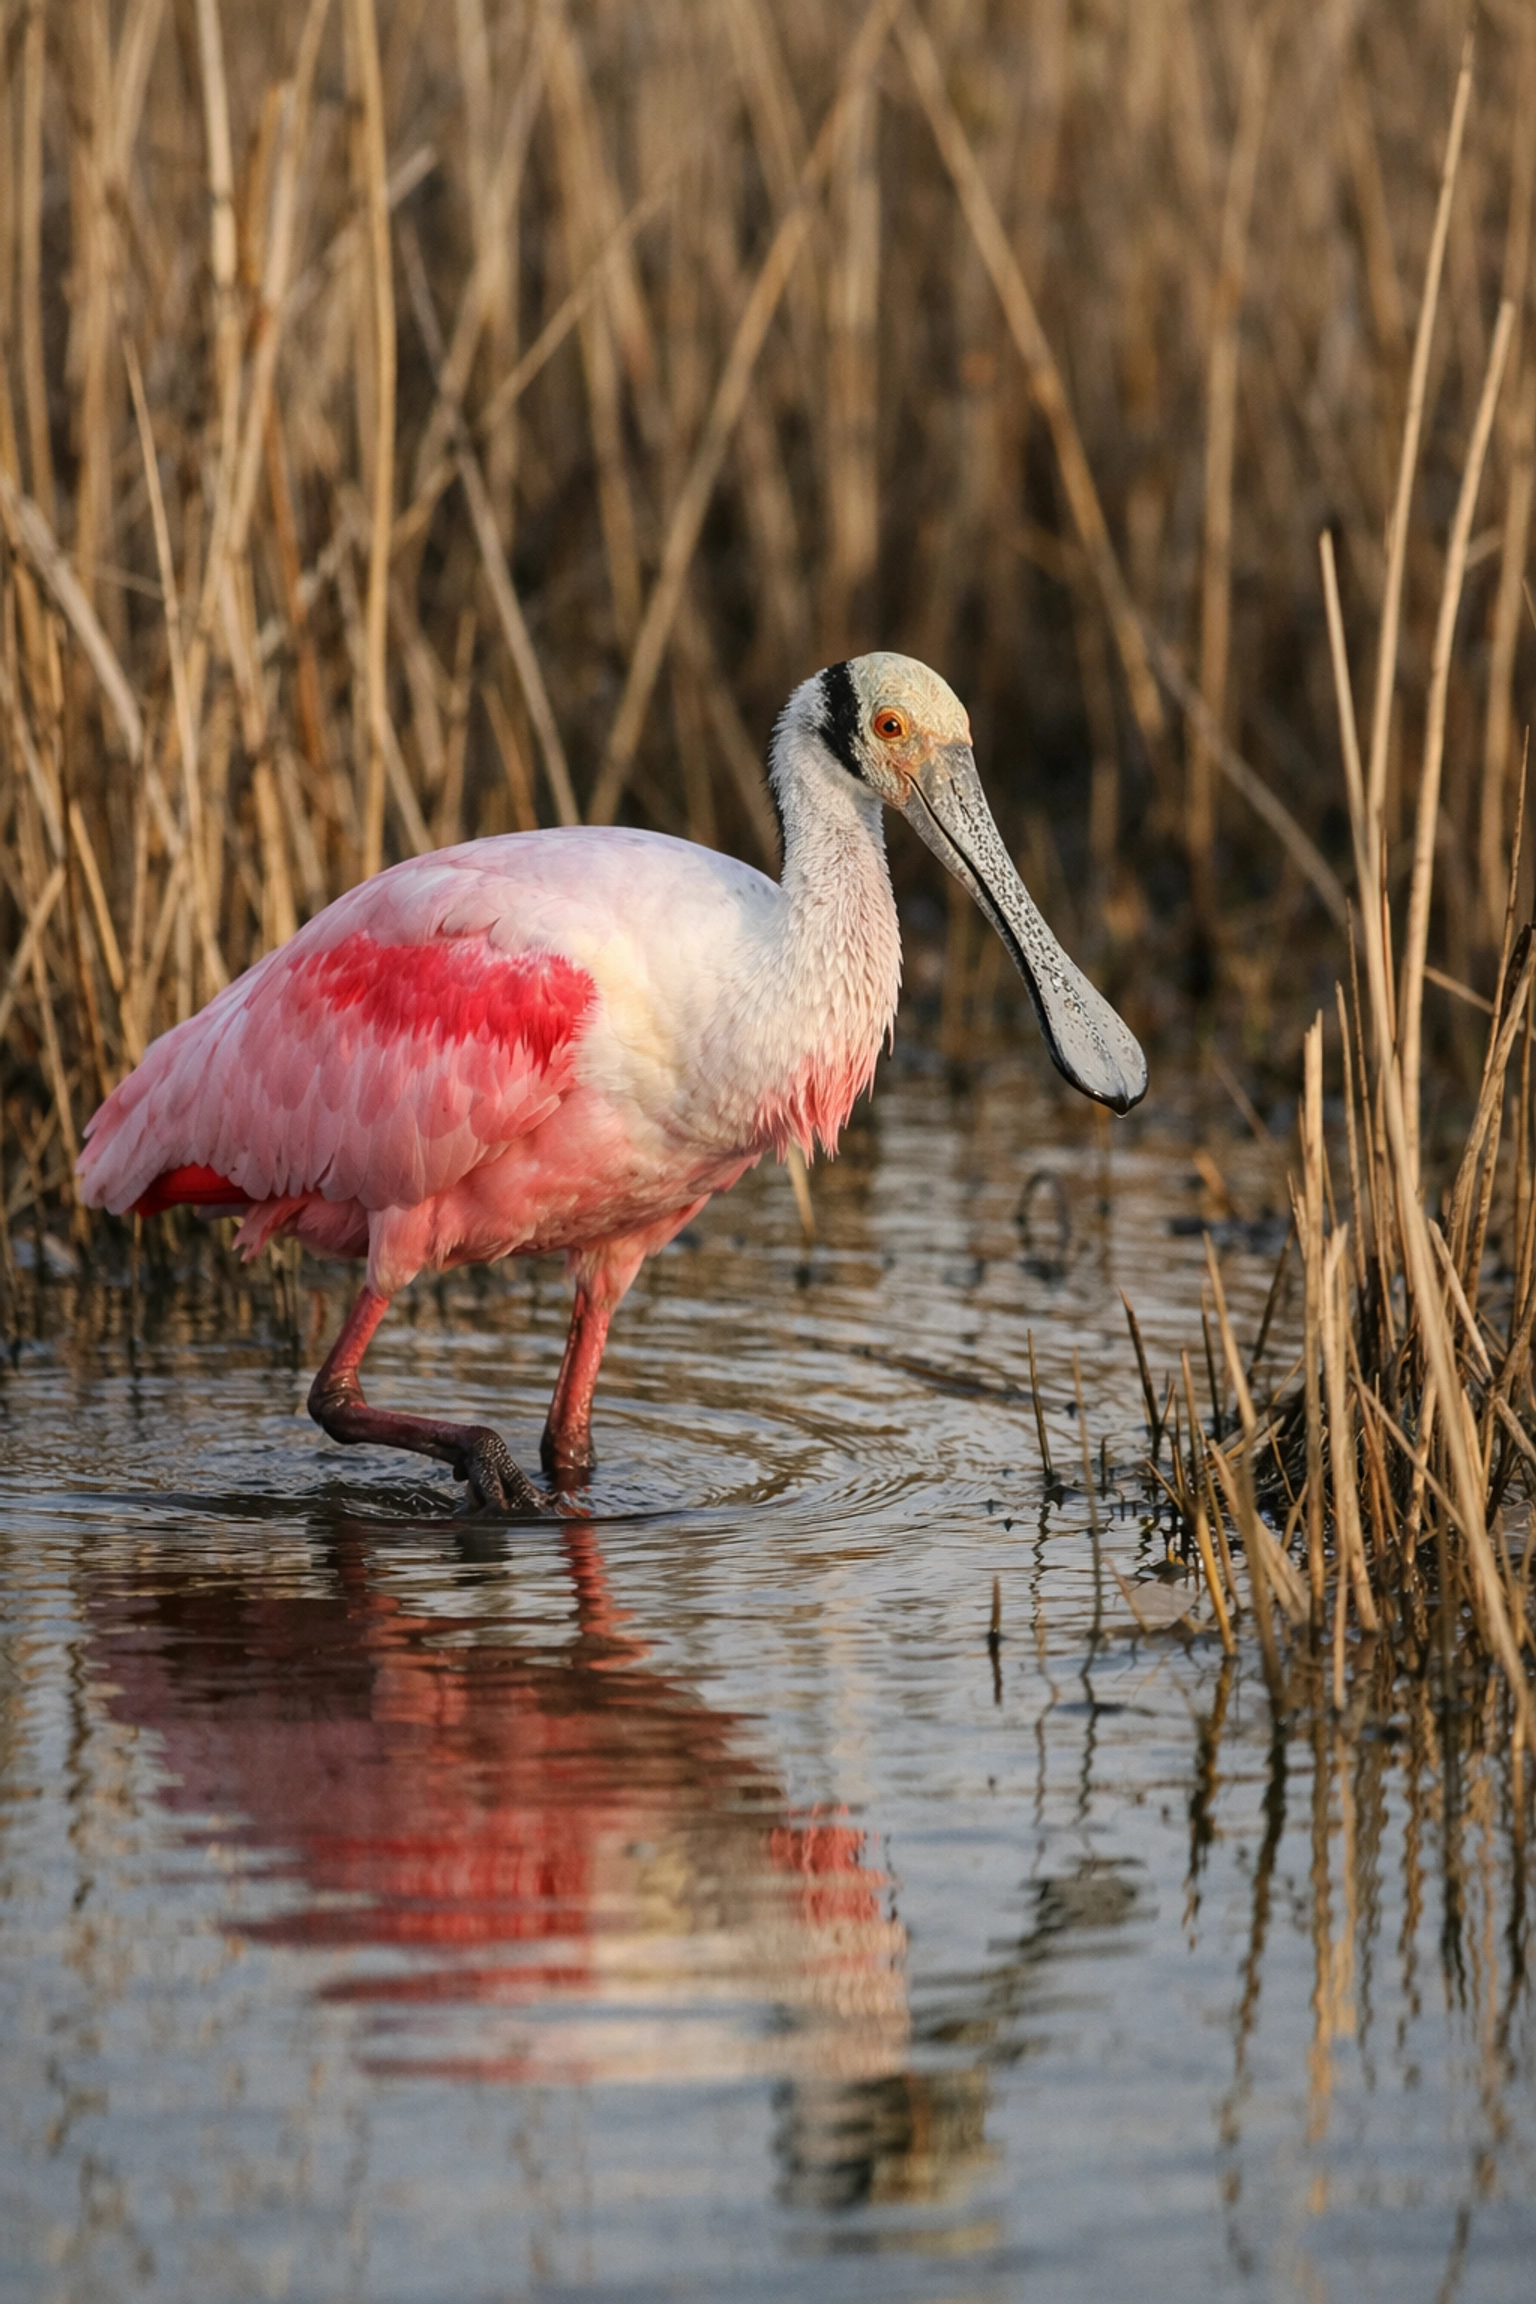
The observation tower provides an unmatched panoramic view of the landscape, perfect for capturing the vastness of the "River of Grass." During the dry season, the water holes along the trail become a magnet for wading birds. You’ll find Wood Storks and Roseate Spoonbills congregating in massive numbers.
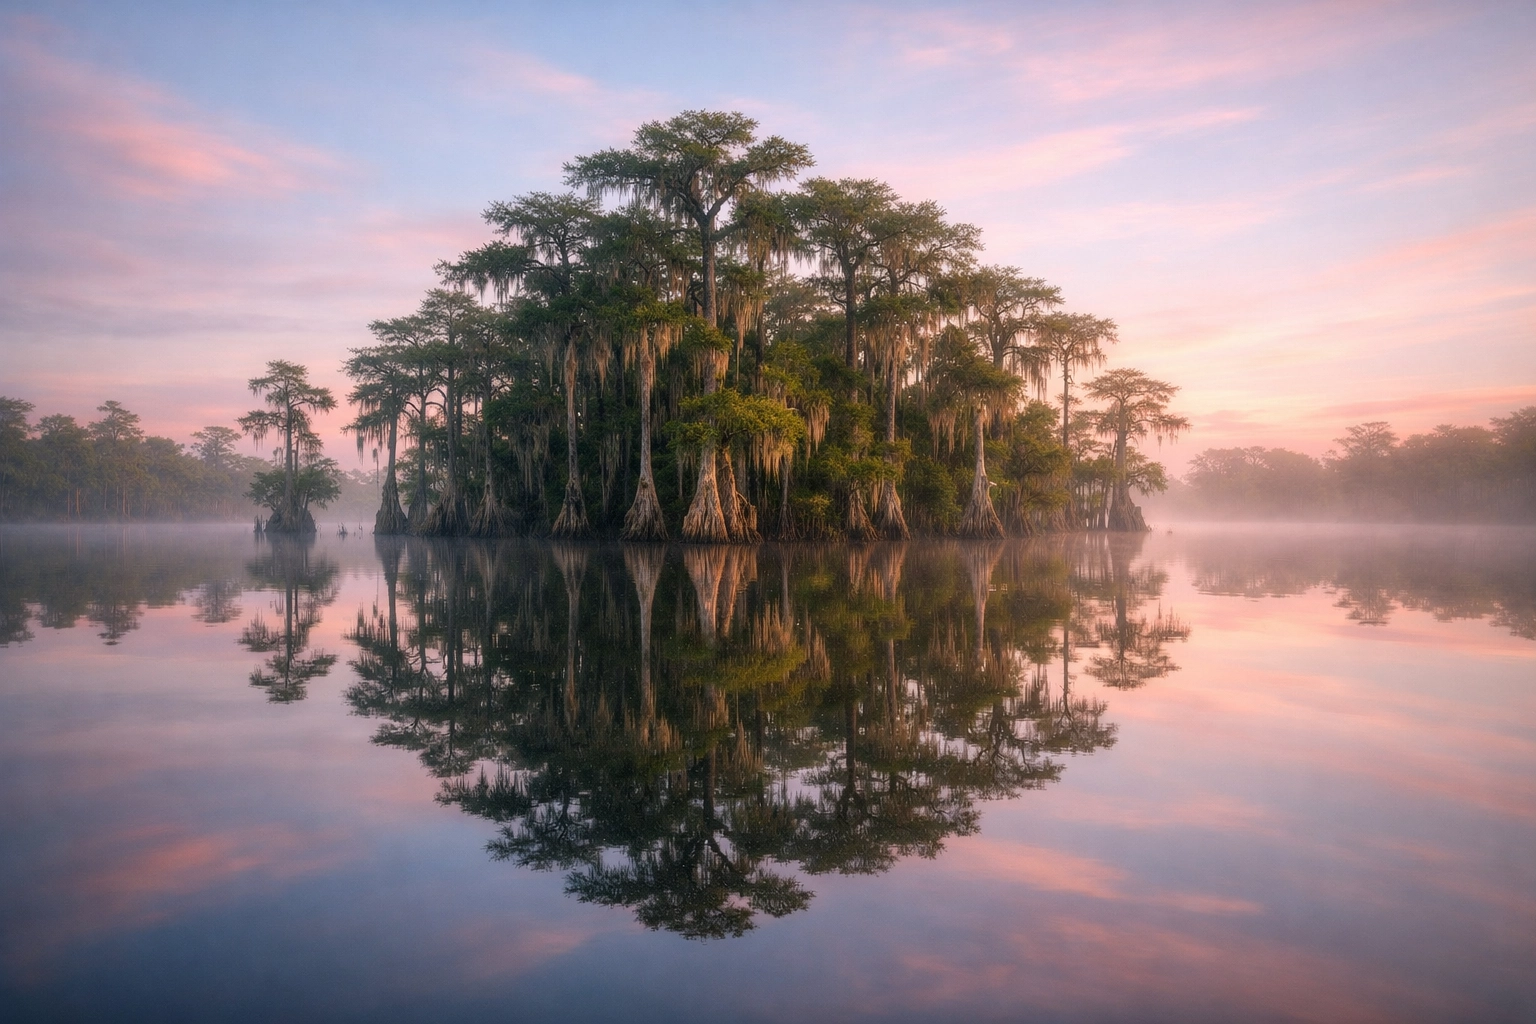
3. Pahayokee Overlook: Landscape Photography Perfection
For the landscape purist, Pahayokee Overlook is a sanctuary. This elevated boardwalk offers a sweeping view of the endless sawgrass prairie dotted with cypress "islands."
This is your go-to spot for sunset. As the sun dips low, the cypress trees create stunning silhouettes against the vibrant Florida sky. If you use a wide-angle lens and a sturdy tripod, you can capture the immense scale of the park. This is where you truly feel the "River of Grass" philosophy. To ensure your colors pop as much in print as they do in person, you might want to explore the Ultimate Lightroom Preset Collection to bring that professional finish to your raw files.
Photography Location Comparison Table
To help you plan your trek, here is a breakdown of what to expect at the primary locations:
| Location |
Primary Focus |
Best Time |
Recommended Lens |
| Anhinga Trail |
Wildlife (Close-up) |
Sunrise / Late Afternoon |
70-200mm |
| Shark Valley |
Wading Birds & Vistas |
Early Morning |
100-400mm / Wide Angle |
| Pahayokee |
Landscape Silhouettes |
Sunset |
16-35mm (Wide Angle) |
| Mahogany Hammock |
Owls & Ancient Trees |
Before Sunset |
24-70mm / 400mm |
| Big Cypress |
Rugged Swamps & Gators |
All Day (Overcast is best) |
70-200mm |
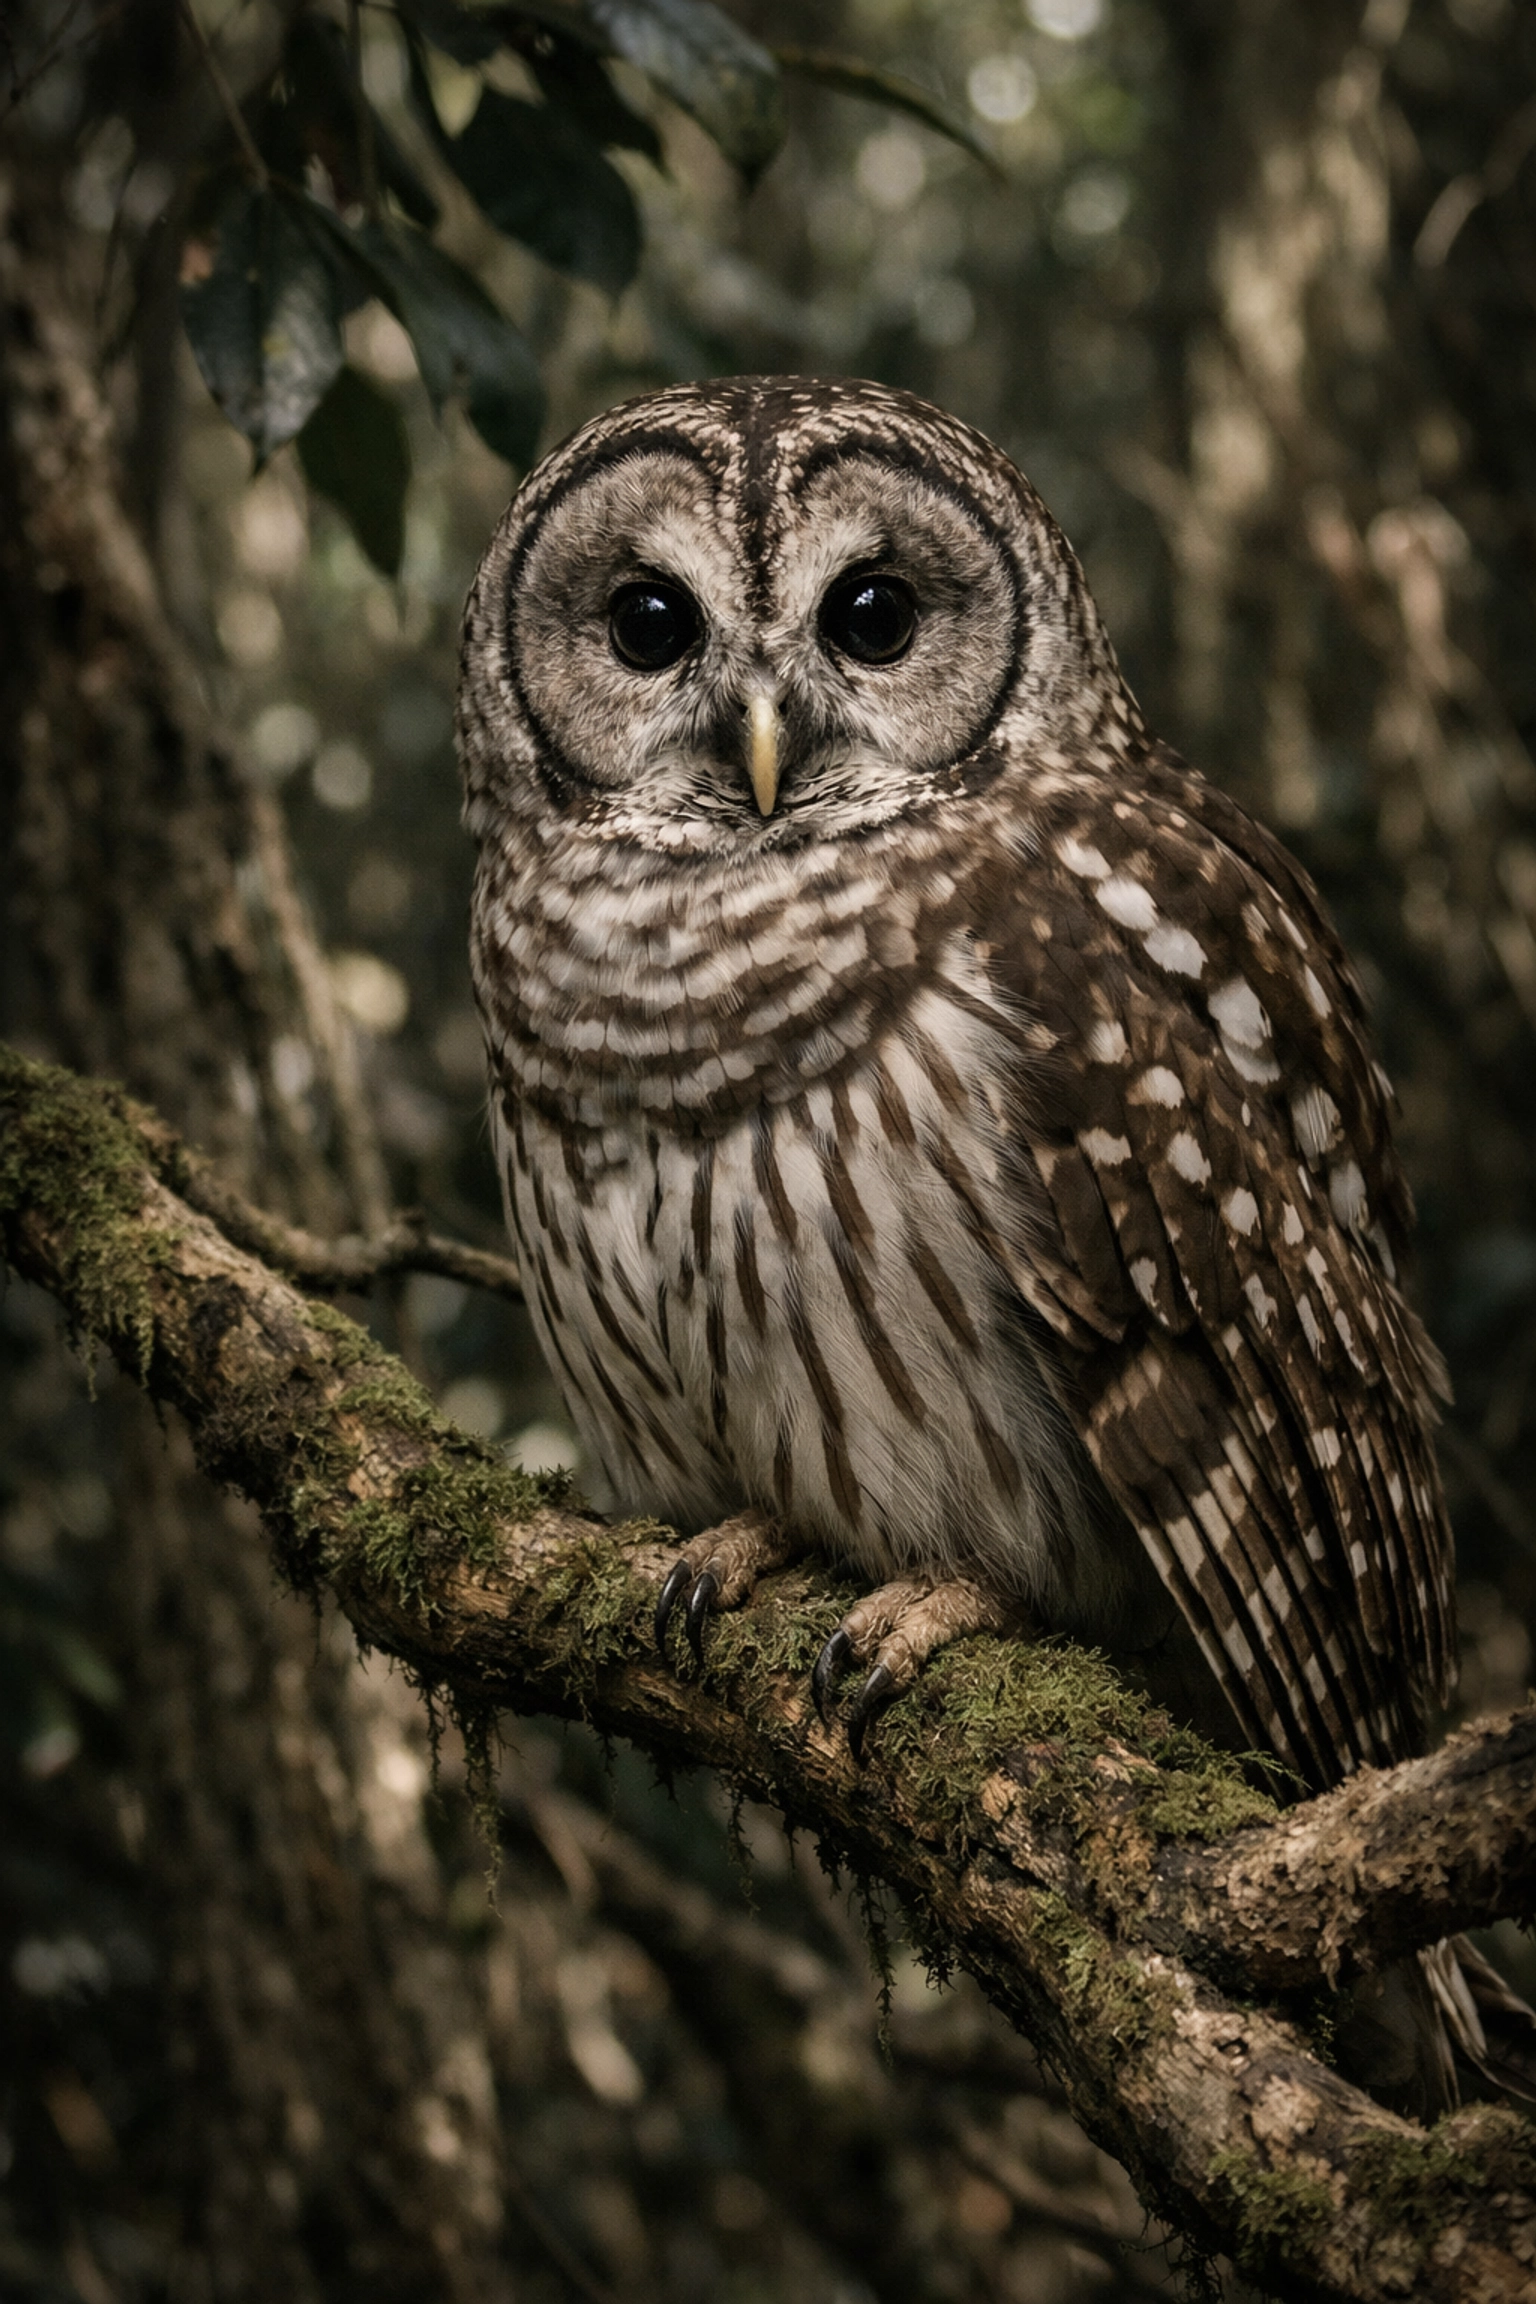
4. Mahogany Hammock: The Mystery of the Owls
Stepping into Mahogany Hammock feels like entering a different world. It’s a dense "island" of trees, including the largest living mahogany tree in the United States. The canopy is thick, and the air is still.
For you, the draw here is the Barred Owl. These magnificent birds are often perched just off the boardwalk. Because the light under the canopy is dim, you’ll need a fast lens and a steady hand. This location demands a more quiet, contemplative approach to wildlife photography Everglades.
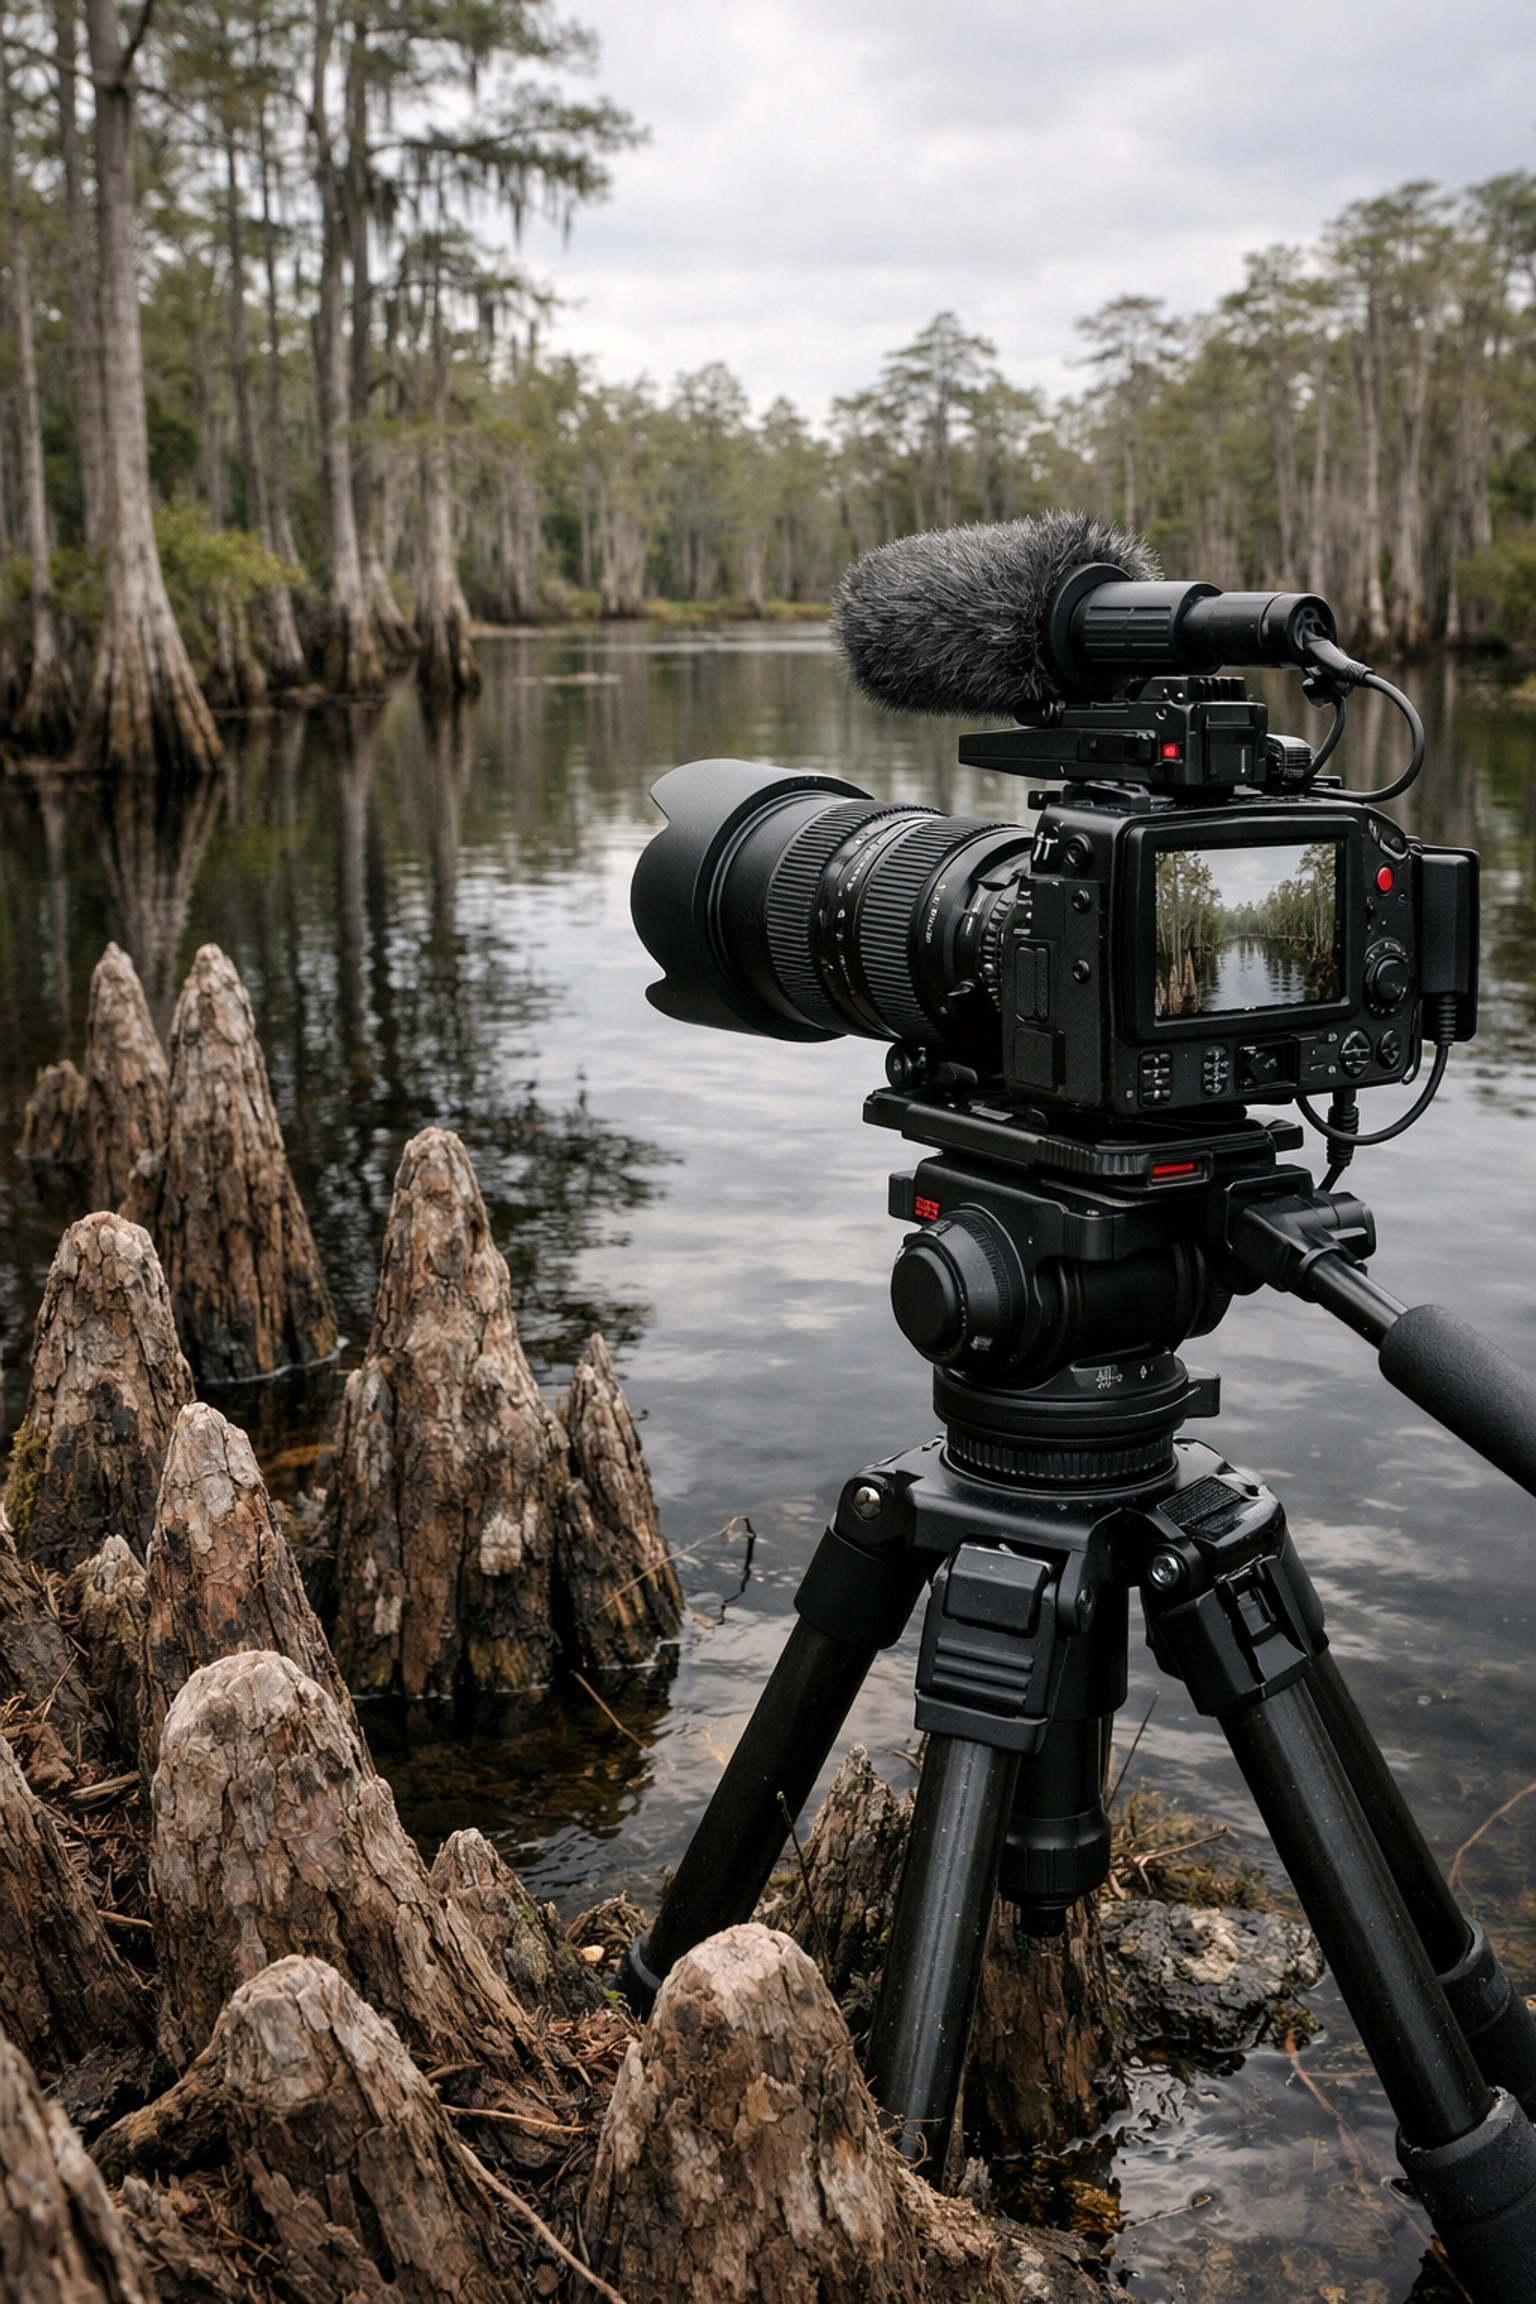
5. Big Cypress National Preserve: The Rugged Alternative
Just north of the main park entrance lies Big Cypress. While technically a separate preserve, it is an essential part of the Everglades ecosystem. The Loop Road is a 24-mile gravel stretch that offers some of the most "raw" photography opportunities in Florida.
Here, you’ll find deep cypress strands and an abundance of air plants and orchids. It’s more rugged than the National Park, and you’re likely to have the place to yourself. If you’re coming from the city, don’t forget that this area is just a short drive away. I often recommend my clients check out the Miami Self-Driving Photography Guide to help navigate the transition from the neon lights of South Beach to the deep swamps of Big Cypress.
Essential Gear for the Everglades
You wouldn't show up to a black-tie gala in flip-flops, so don't show up to the Everglades under-geared. Your kit needs to be versatile and protected.
- The Long Lens: A 100-400mm or 150-600mm is your bread and butter for bird and alligator shots. It keeps you safe and keeps the animals relaxed.
- Wide-Angle Lens: For those epic Pahayokee sunsets.
- Circular Polarizer: This is non-negotiable. It cuts the glare off the water and brings out the deep greens of the vegetation and the blues of the sky.
- Tripod: Essential for low-light landscape shots and for supporting heavy telephoto lenses.
- Protection: Bring a rain cover for your camera and plenty of bug spray for yourself.
If you want to see how these tools translate into high-end art, take a look at my Fine Art Gallery to see the Everglades through a professional lens.
Mastering the Light: When to Go
Your success in Everglades photography locations is dictated by the seasons.
- Dry Season (November – April): This is the "Golden Age" for photographers. As the water levels drop, wildlife congregates around the remaining deep-water holes. The weather is cooler, and the mosquitoes are manageable.
- Wet Season (May – October): This is for the bold. The storms are dramatic, providing incredible cloud formations for landscape photography. However, the wildlife is more dispersed, and the heat (and bugs) can be punishing.
Regardless of the season, your best work will happen during the "Golden Hours": the hour after sunrise and the hour before sunset. This is when the light is soft, the shadows are long, and the "River of Grass" truly glows.
Elevate Your Experience
If you’re visiting from out of town and want to maximize your time, you don't have to go it alone. I offer a Private Miami Photography Tour that can be tailored to include the best spots in and around the Everglades. It’s the fastest way to ensure you walk away with portfolio-grade images rather than just snapshots.
By integrating these strategies into your workflow, you aren't just visiting a park; you're documenting one of the world's most endangered and beautiful ecosystems. This commitment to your craft is what separates a hobbyist from a fine art photographer.
With these considerations in mind, you are now equipped to tackle the Everglades with confidence. Remember, the best shot is often the one you waited ten minutes longer for after everyone else went back to the car.
Hence, your journey into the Florida wilderness starts now. For more insights on how to elevate your work, explore our site at Edin Chavez Blog for a deep dive into hundreds of tutorials and guides. Whether you're exploring the swamps or the streets, we've got you covered. Check out Edin Studios for more professional photography resources and services.
Ready to capture the ultimate Everglades shot? Don't leave home without the Everglades Photography Guide: your definitive roadmap to success in the River of Grass.
As a photographer, you know that your portfolio is your heartbeat. It’s your handshake, your business card, and your visual legacy all rolled into one. If you feel like your current body of work is looking a little stagnant, there is no better place on the planet to inject some high-octane visual energy than Miami. This city isn't just about neon lights and palm trees; it’s a diverse ecosystem of textures, colors, and light that can transform your work overnight.
In this first installment of our 30-day series on the best places to take pictures in miami, I’m pulling back the curtain on the spots that will actually move the needle for you. Whether you’re shooting high-fashion, gritty street scenes, or ethereal landscapes, these miami photography locations are the secret sauce you've been looking for.
But let’s be real for a second: Miami traffic is a nightmare, and finding the light at the exact right moment can feel like chasing a ghost. If you want to skip the trial and error and get straight to the "money shots," you need to book a Private Miami Photography Tour. I’ll personally guide you through these spots, handle the logistics, and make sure you walk away with a portfolio that looks like a million bucks.
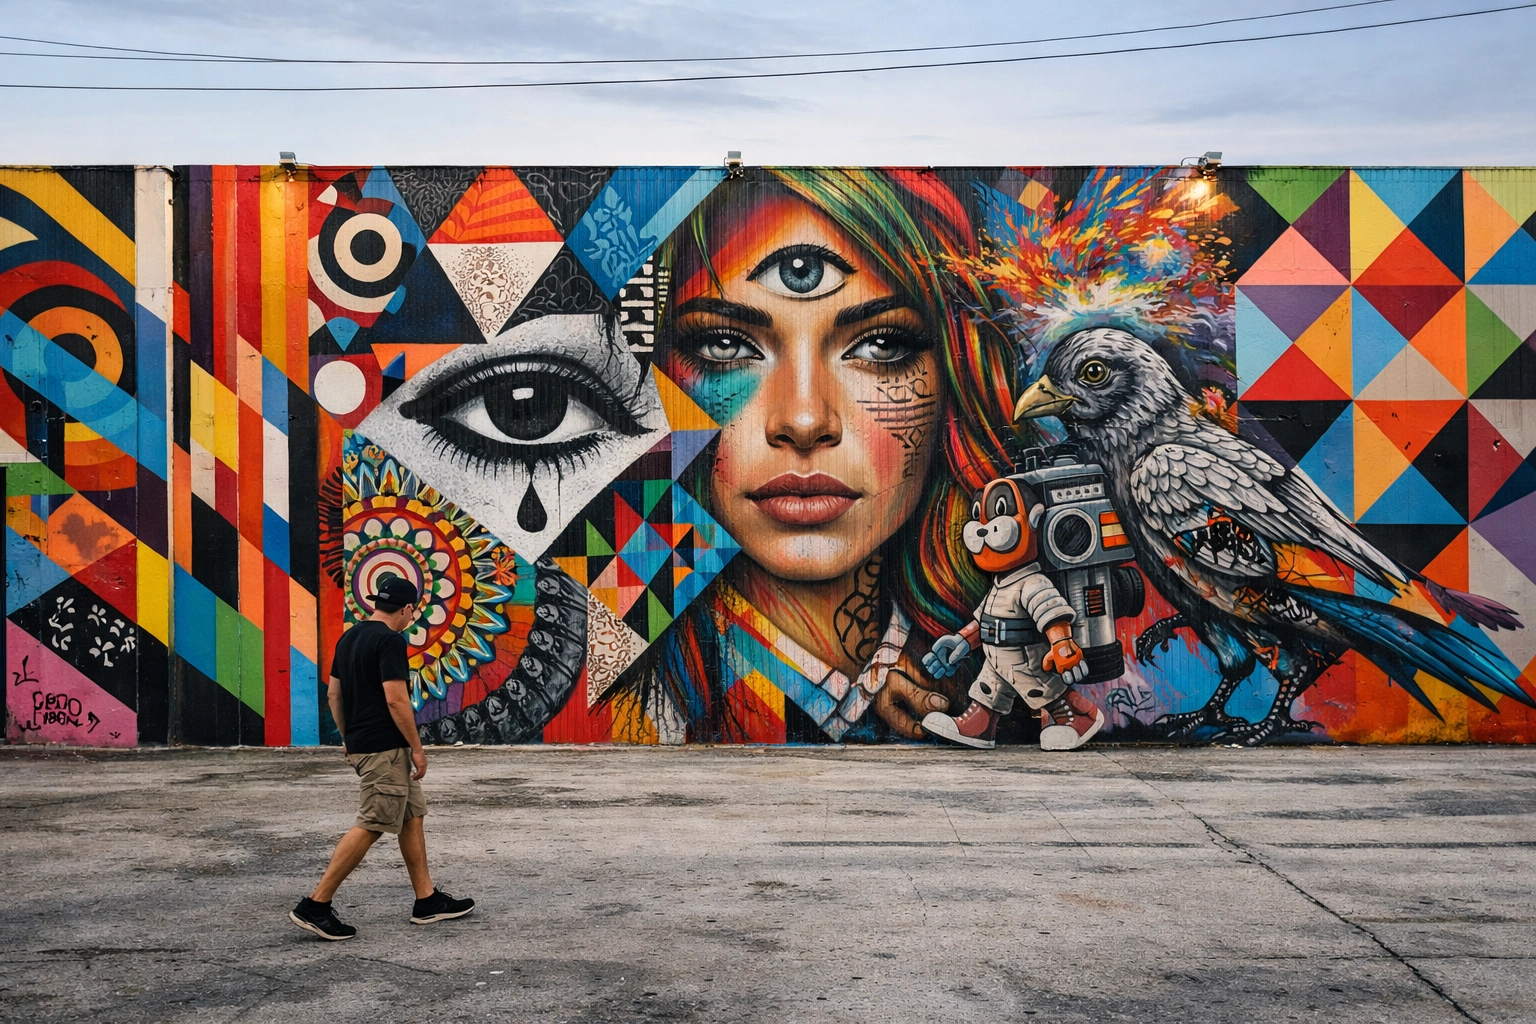
1. Wynwood Walls: The Urban Kaleidoscope
If your portfolio needs a punch of color, Wynwood Walls is your first stop. This isn't just a collection of graffiti; it’s a world-class street art destination featuring massive murals by globally renowned artists. The textures here are incredible. You can go from a hyper-realistic portrait mural to a neon-soaked abstract geometric pattern in three steps.
To get the best results, you need to arrive early. By 10:00 AM, the crowds become a major distraction. If you get there as the sun is coming up, you’ll find soft, even light that makes those colors pop without harsh shadows. This is a prime spot for fashion and urban portraiture. Pro tip: look for the smaller alleyways nearby for a grittier, more authentic feel.
2. Ocean Drive: The Neon Heartbeat
You can’t talk about miami photo spots without mentioning Ocean Drive. This is the iconic Art Deco strip you’ve seen in every movie from Scarface to Bad Boys. Between the pastel-colored hotels and the classic 1950s cars parked along the curb, it’s a time capsule of vintage cool.
While it looks great during the day, Ocean Drive truly comes alive at night. The neon signs transform the street into a glowing masterpiece. For your portfolio, I recommend shooting at "Blue Hour": that sweet spot right after the sun goes down but before the sky turns pitch black. Use a tripod and capture those long exposures to get the light trails from the passing cars.
3. Vizcaya Museum and Gardens: European Elegance
If you want your work to look like it was shot in the Italian Renaissance, head straight to Vizcaya Museum and Gardens. This elegant European-style estate sits right on the water and offers ten acres of formal gardens that are frankly mind-blowing.
The light here is beautiful all day, but the late afternoon sun hitting the stone architecture provides a warmth that is unmatched. It’s the ultimate location for weddings, high-end portraits, and architectural studies. Every nook and cranny is a potential masterpiece, from the secret garden paths to the iconic stone barge sitting in the bay.
| Location |
Best Time to Shoot |
Primary Subject Matter |
| Wynwood Walls |
8:00 AM – 10:00 AM |
Street Art & Fashion |
| Ocean Drive |
Blue Hour (Sunset + 20 min) |
Neon & Architecture |
| Vizcaya Gardens |
3:00 PM – 5:00 PM |
Luxury Portraits & Nature |
| South Pointe Park |
Sunrise |
Landscapes & Lifestyle |
| Design District |
Mid-Day (Clear Skies) |
Modern Architecture |
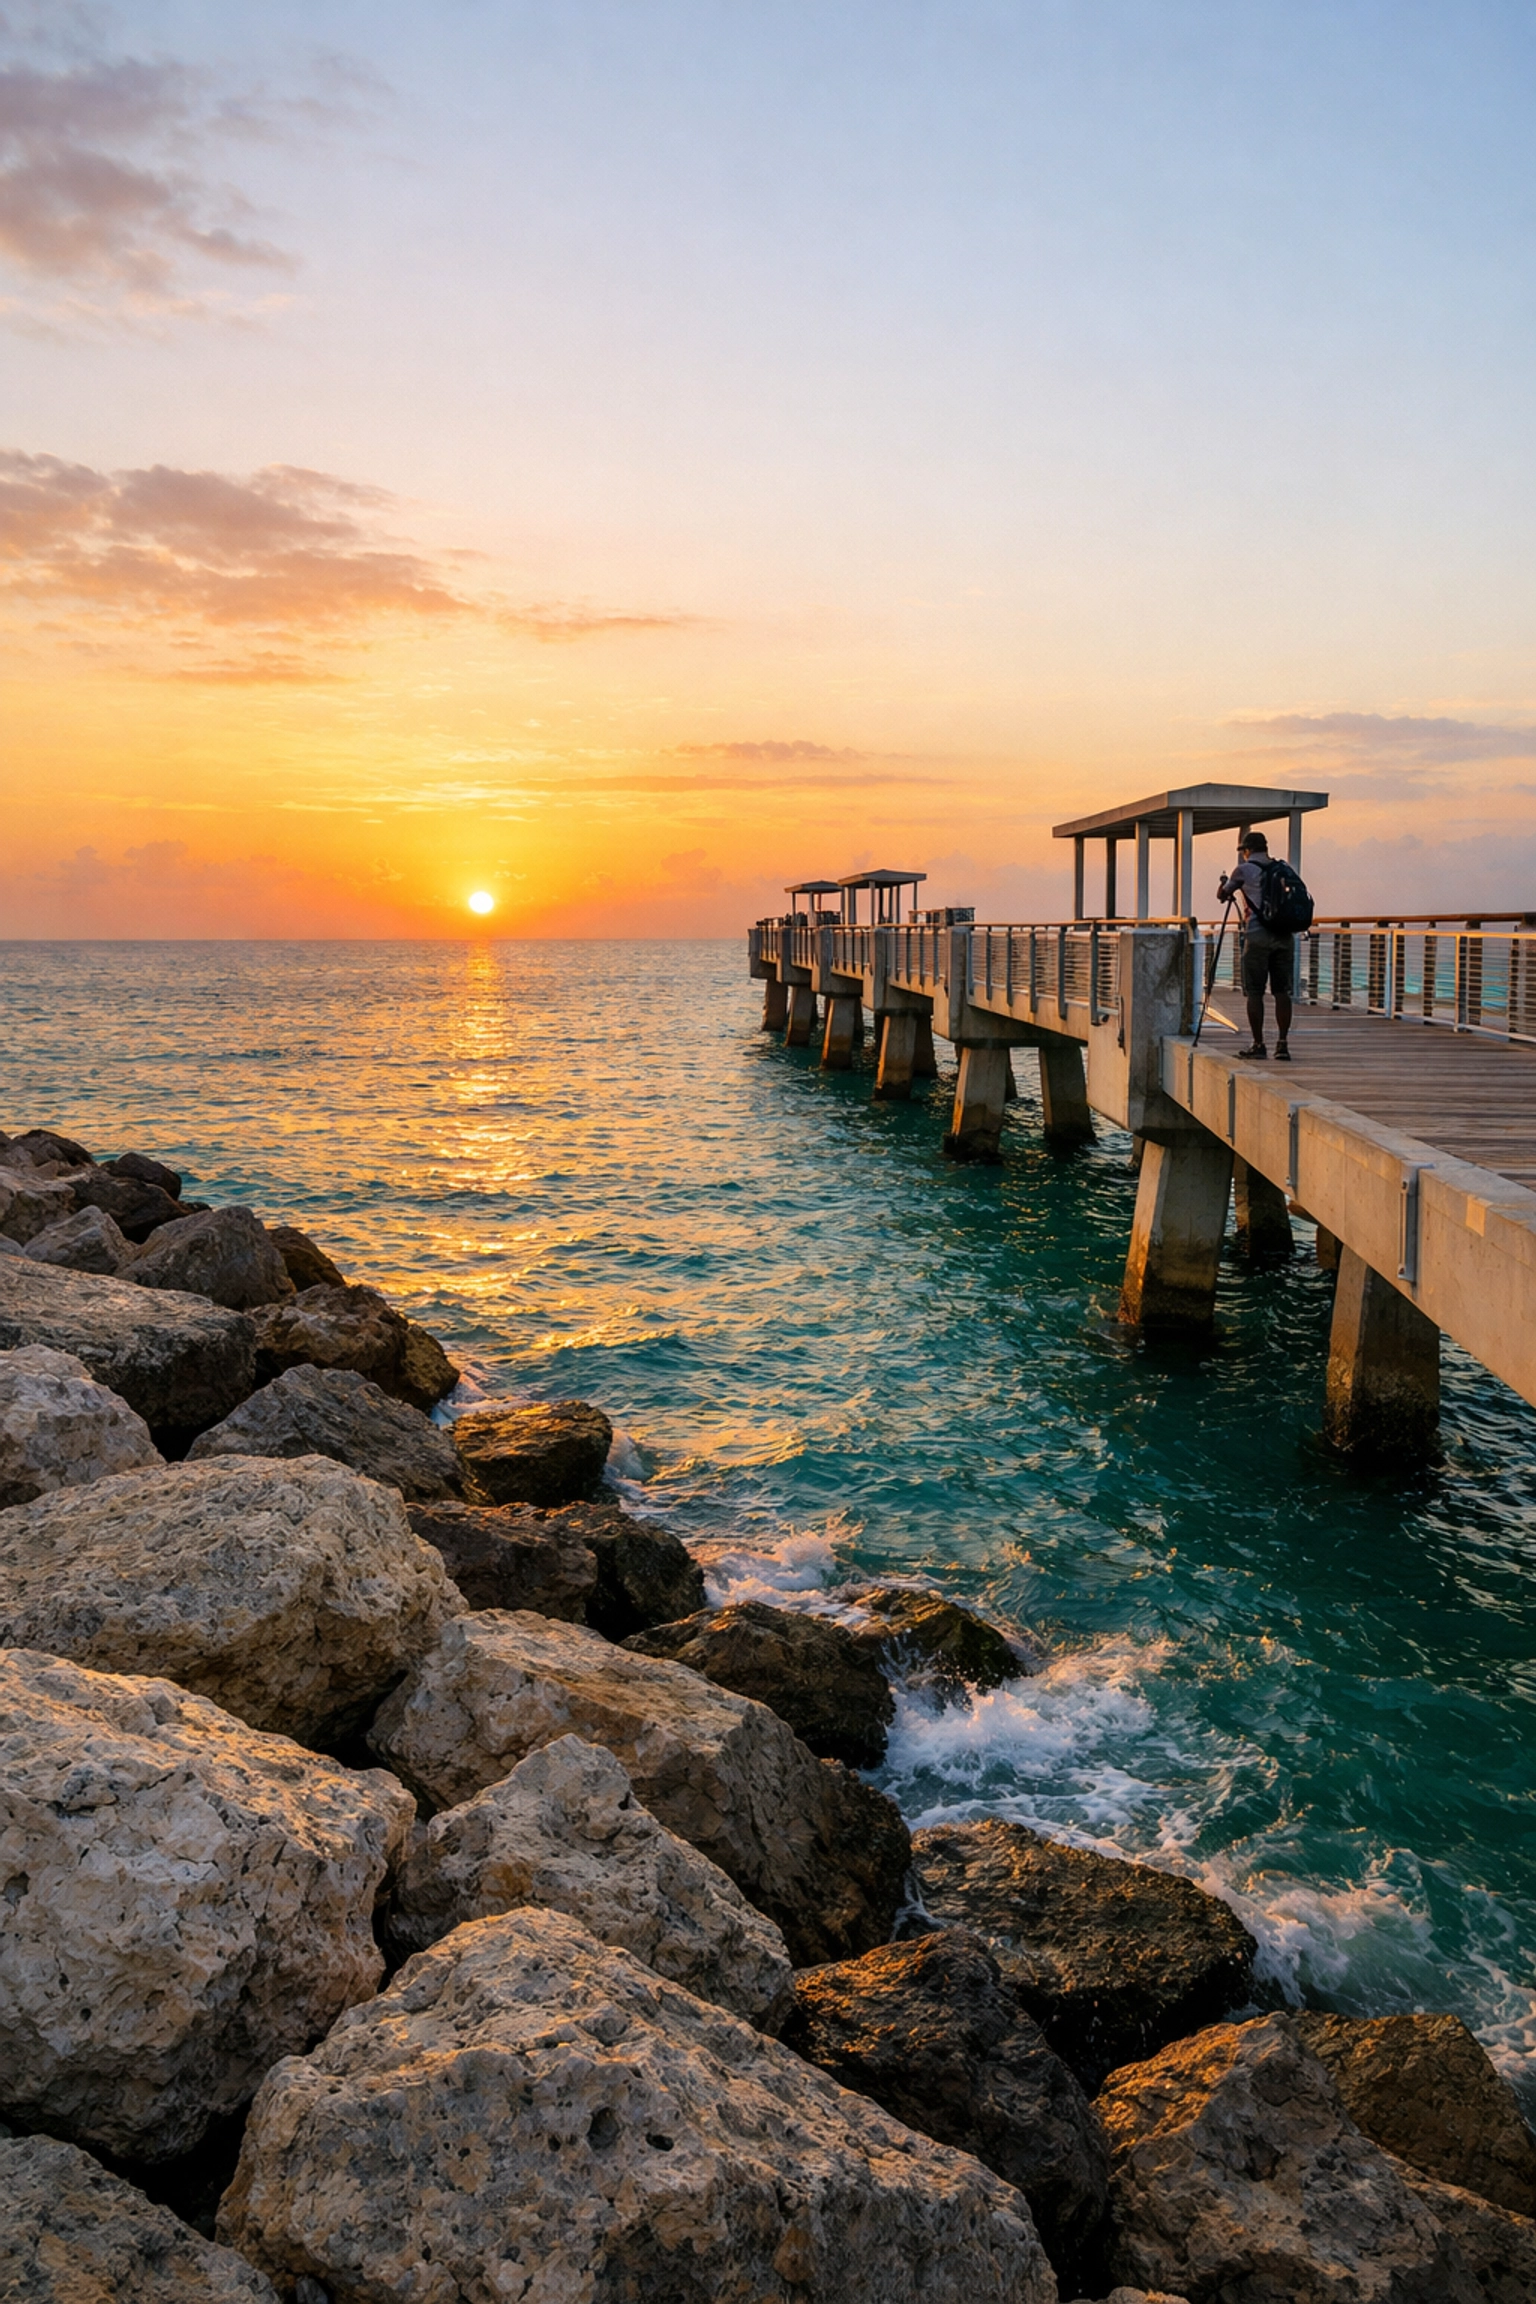
4. South Pointe Park & Pier: The Ultimate Sunrise
For the landscape junkies, South Pointe Park & Pier delivers the most dramatic sunrise views in Florida. You have the turquoise water of the Atlantic, the rugged limestone rocks, and the sleek, modern pier stretching out into the ocean.
When you shoot here at dawn, the golden light hits the water and reflects off the glass high-rises behind you. It’s a double-whammy of lighting perfection. Plus, you’ll often see massive cruise ships gliding out to sea, which adds an incredible sense of scale to your frames. If you need more tips on mastering the beach scene, check out our Miami Beach Photography Guide.
5. Miami Design District: Architecture of the Future
If your aesthetic is clean, polished, and design-forward, the Miami Design District is your playground. This neighborhood is a curated urban space designed specifically for the eyes. Think Buckminster Fuller’s "Fly’s Eye Dome" and architecture that looks like it was plucked from a sci-fi film.
The Design District is perfect for fashion photography. The high-end storefronts and public art installations provide a sophisticated backdrop that elevates any subject. Because the buildings are often white or metallic, they act as giant reflectors, giving you incredibly clean, high-key lighting even in the middle of the day.
6. Matheson Hammocks Park: Nature’s Atoll
For something a bit more serene, Matheson Hammocks Park offers a unique man-made atoll pool that flushes with the tides of Biscayne Bay. It’s surrounded by ancient oaks and mangroves, providing a tropical, natural vibe that contrasts perfectly with the city's concrete jungle.
This is a favorite spot for engagement sessions and lifestyle work. The calm water of the pool acts as a giant mirror, reflecting the sky and the surrounding palms. It’s one of those miami photography locations that feels like a hidden oasis.
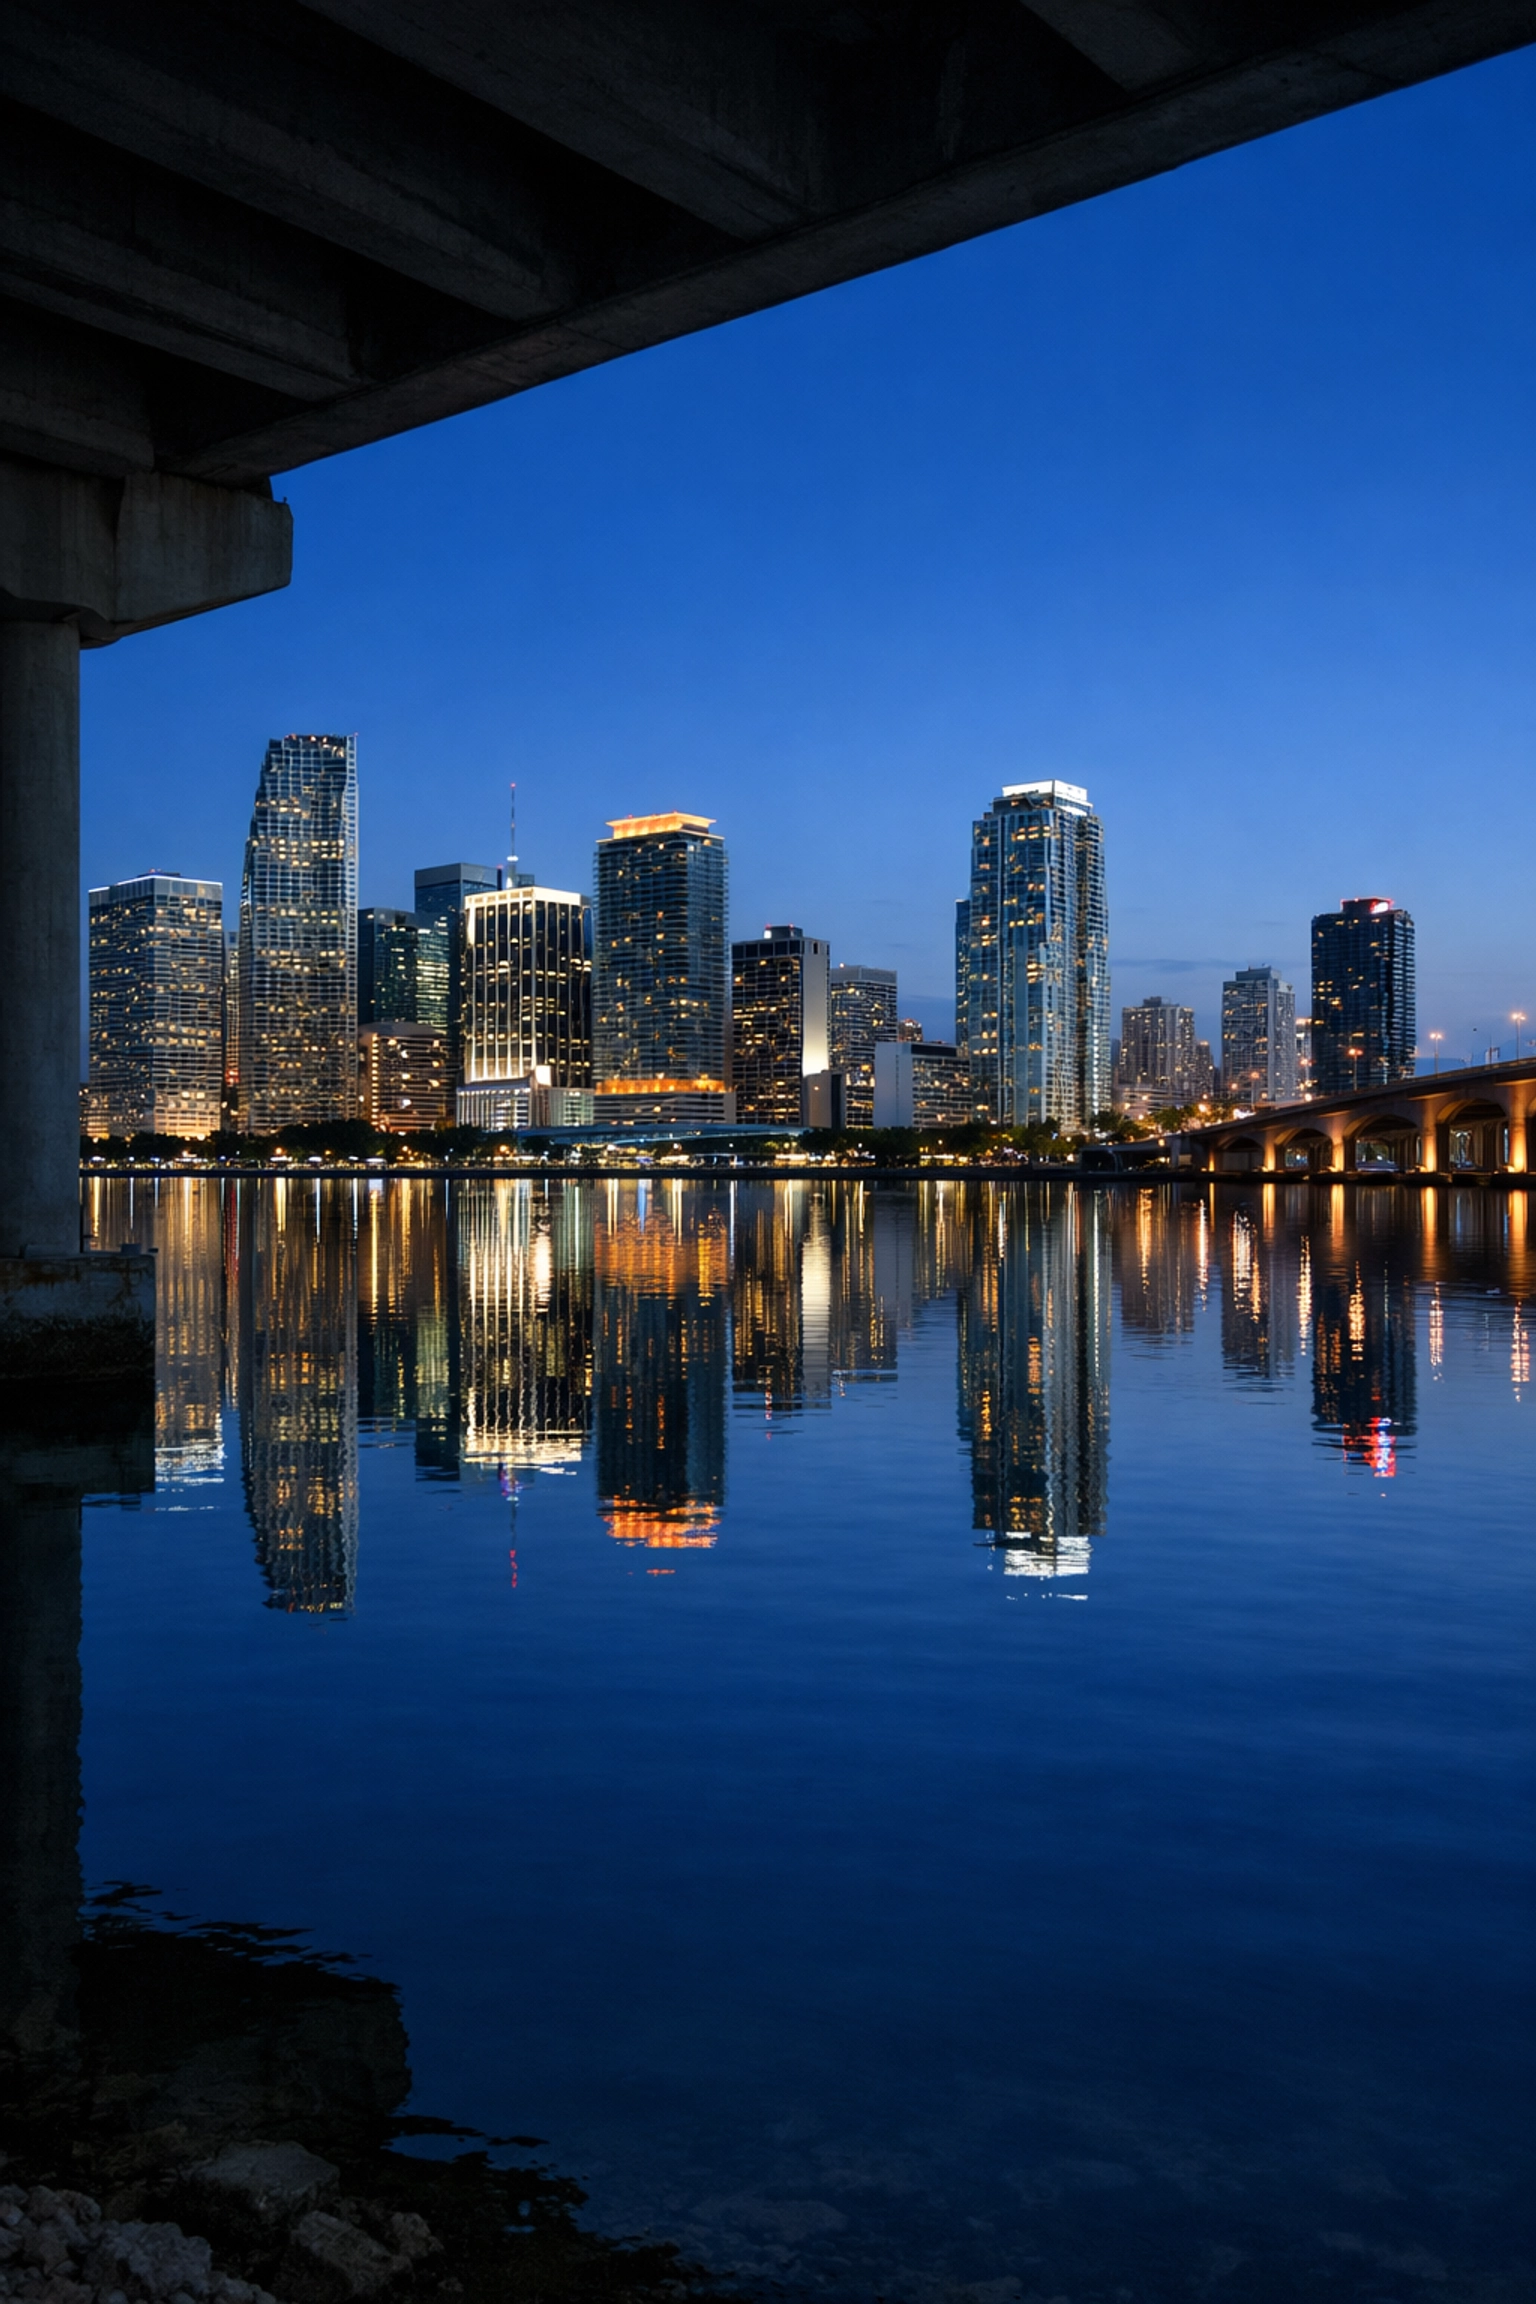
7. MacArthur Causeway: The Skyline "Money Shot"
You know that epic shot of the Miami skyline reflected in the water? This is where you get it. Park near the Miami Children’s Museum and head toward the southern ramp under the MacArthur Causeway.
From here, you have a clear view of the Downtown Miami skyline. At sunset, the buildings begin to glow, and the water provides a perfect reflection. This is a must-have for any professional portfolio. It demonstrates your ability to handle complex lighting and long exposures. To truly master the post-processing on these cityscapes, you'll want to use my Ultimate Lightroom Preset Collection to make those city lights truly sing.
8. Faena Hotel: Art and Opulence
The Faena Hotel in Mid-Beach is a visual fever dream. Its most famous resident is the "Gone but not Forgotten" sculpture by Damien Hirst: a massive, 24-karat gold-plated woolly mammoth skeleton encased in glass.
The hotel’s bold red-and-gold color palette and cinematic architecture offer a level of luxury that is hard to find anywhere else. Shooting here adds an instant "high-production" feel to your portfolio. It’s opulent, it’s loud, and it’s quintessentially Miami.
9. Key Biscayne Beach: Atlantic Serenity
If you want a beach shot that doesn't look like every other tourist photo, head to Key Biscayne. Whether you’re at Crandon Park or Bill Baggs Cape Florida State Park, the views are unparalleled. The historic lighthouse at the tip of the island provides a classic nautical element for your compositions.
Key Biscayne offers a more rugged, natural Atlantic view compared to the manicured sands of South Beach. It’s the perfect place to experiment with filters and long exposures to smooth out the waves against the shore.
10. Little Havana – Calle Ocho: The Soul of the City
Finally, to add depth and soul to your portfolio, you must visit Little Havana. This is where you capture the documentary-style street life of Miami. The domino players at Maximo Gomez Park, the hand-rolled cigars, and the vibrant murals of Calle Ocho tell a story of culture and history.
The colors here are earthy and warm, reflecting the Caribbean influence. It’s a great place to practice your candid photography and environmental portraiture. You aren't just taking a picture; you're capturing a heartbeat.
Take the Shortcuts to Success
Miami is a vast, beautiful, and sometimes frustrating city to photograph. You can spend weeks trying to find these spots, or you can spend one day with me and nail them all. My Private Miami Photography Tour is designed for photographers who value their time and want professional-grade results immediately. I don't just show you where to stand; I teach you how to see the light in a way that changes your work forever.
If you prefer to go at your own pace but still want the insider knowledge, grab the Miami Self-Driving Photography Guide. It's the ultimate roadmap to every spot I've mentioned and a dozen more.
Don't forget that if you want to expand your horizons beyond the city limits, the river of grass is just a short drive away. You can find my Everglades Photography Guide to help you navigate that wild landscape, or even join me for a Capture Everglades Photography Workshop.
For more insights on how to elevate your work, explore our site for a deep dive into hundreds of tutorials and guides at Edin Chavez Blog. You can also see my latest fine art pieces over at Edin Fine Art to see these locations in action, or visit Edin Studios for our commercial services.
Now, grab your gear, get out there, and start shooting. Your portfolio won't level itself up!


