As you step onto the sun-drenched pavement of Ocean Drive, you are immediately transported into a world of pastel hues, neon glows, and geometric precision. Many photographers visit Miami hoping to capture that iconic "Magic City" vibe, but without a plan, you might find yourself overwhelmed by the sheer volume of architectural eye candy. South Beach isn't just a beach; it’s the largest concentration of Art Deco architecture in the world, and mastering it requires more than just pointing and clicking.
Whether you are a seasoned professional or a hobbyist looking to level up your portfolio, understanding the nuances of the Art Deco District is essential. This guide provides the insider knowledge you need to navigate the best miami photography locations and ensures you walk away with gallery-quality shots. To truly master these streets with a professional by your side, you should consider booking a Private Miami Photography Tour to get tailored instruction and exclusive access to the best angles.
Why South Beach is a Photographer's Paradise
Just as a master painter selects their palette with care, the architects of the 1920s and 30s crafted South Beach with a specific aesthetic in mind. Known as "Tropical Deco," this style incorporates floral motifs, nautical themes, and vibrant colors that pop against the Florida sky. When you explore these streets, you aren't just looking for buildings; you are looking for symmetry, light, and shadow.
The Art Deco District, stretching from 5th to 23rd Streets, contains over 800 historic buildings. This density makes it one of the best places to take pictures in miami because you can capture dozens of unique subjects within a short walking distance. At Edin Chavez Photography, we believe that great photography is about more than just the subject: it’s about how you interpret the environment.
Top Photography Spots in the Art Deco District
To maximize your time, you need to know exactly where the "hero shots" are located. While every corner has potential, some buildings are simply more photogenic than others.
| Building Name |
Location |
Why You Should Shoot It |
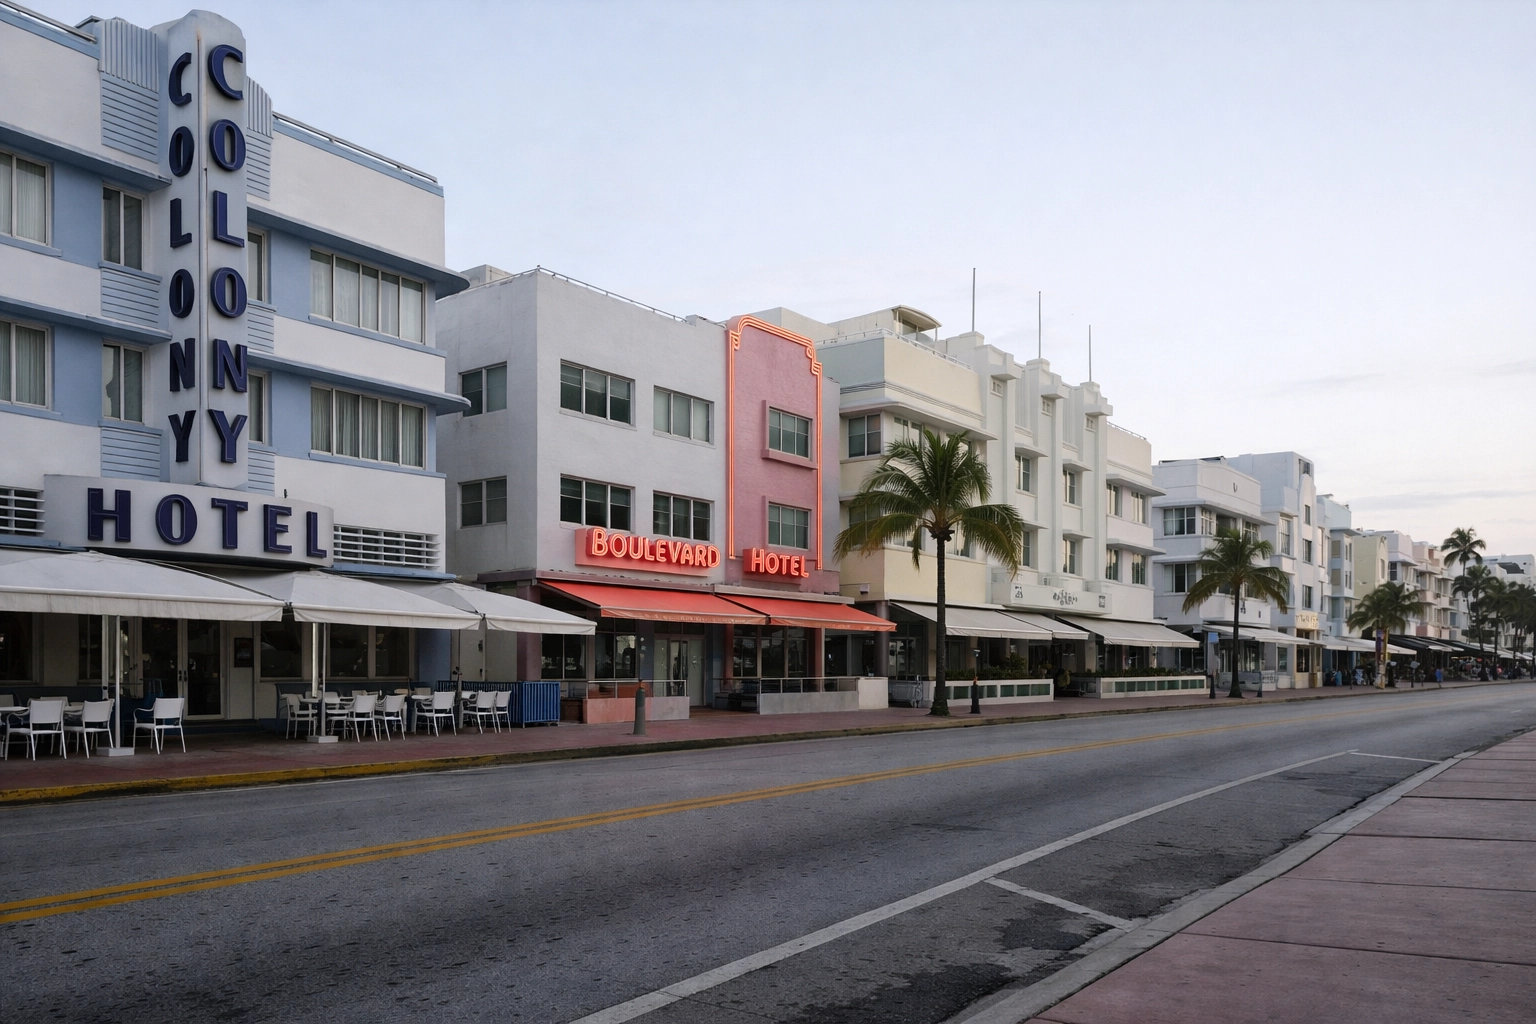
| Colony Hotel |
736 Ocean Drive |
The most photographed hotel in Miami; features iconic blue neon and perfect symmetry. |
| The Breakwater |
940 Ocean Drive |
Known for its bold central spire and vibrant evening lighting. |
| The McAlpin |
1424 Ocean Drive |
Offers a classic pastel pink and white facade with perfect "eyebrow" windows. |
| U.S. Post Office |
1300 Washington Ave |
A hidden gem with a stunning starburst ceiling and brass detailing. |
| The Wolfsonian |
1001 Washington Ave |
Features the "frozen fountain" and intricate stone carvings. |
Mastering the Architectural Details
When you are hunting for the perfect miami photo spots, you must train your eye to look beyond the "whole" and focus on the "parts." Art Deco is defined by specific elements that, when isolated, create stunning abstract compositions.
1. The "Eyebrows"
In the days before air conditioning, architects designed concrete overhangs above windows to provide shade. These "eyebrows" create deep, dramatic shadows during the day and are often highlighted by neon at night. Using these as leading lines in your composition elevates your work from a standard snapshot to a professional architectural study.
2. Porthole Windows and Nautical Curves
Miami’s version of Art Deco heavily features nautical themes. You will find round windows resembling ship portholes and curved corners that look like the hull of a luxury liner. When you frame your shot, try to emphasize these curves against the sharp, vertical lines of the building’s central spire.
3. Terrazzo Floors and Intricate Lobbies
Don't just stay on the sidewalk. Many of these hotels have beautifully preserved lobbies with terrazzo flooring featuring intricate geometric patterns. Stepping into the National Hotel or the Delano allows you to capture interior shots that most tourists miss. For more tips on finding these hidden interiors, check out our latest posts at our blog.
The Best Time to Shoot: Lighting is Everything
Your success on a miami photography tour depends heavily on your understanding of light. South Beach transforms completely depending on the position of the sun.
The Golden Hour (Sunrise)
While sunset is popular, sunrise is the "secret weapon" for pro photographers. Because South Beach faces east, the morning sun hits the facades of the Ocean Drive hotels directly. The light is soft, warm, and golden, and: most importantly: the streets are empty. You won't have to worry about delivery trucks or crowds of tourists blocking your view of the Colony Hotel.
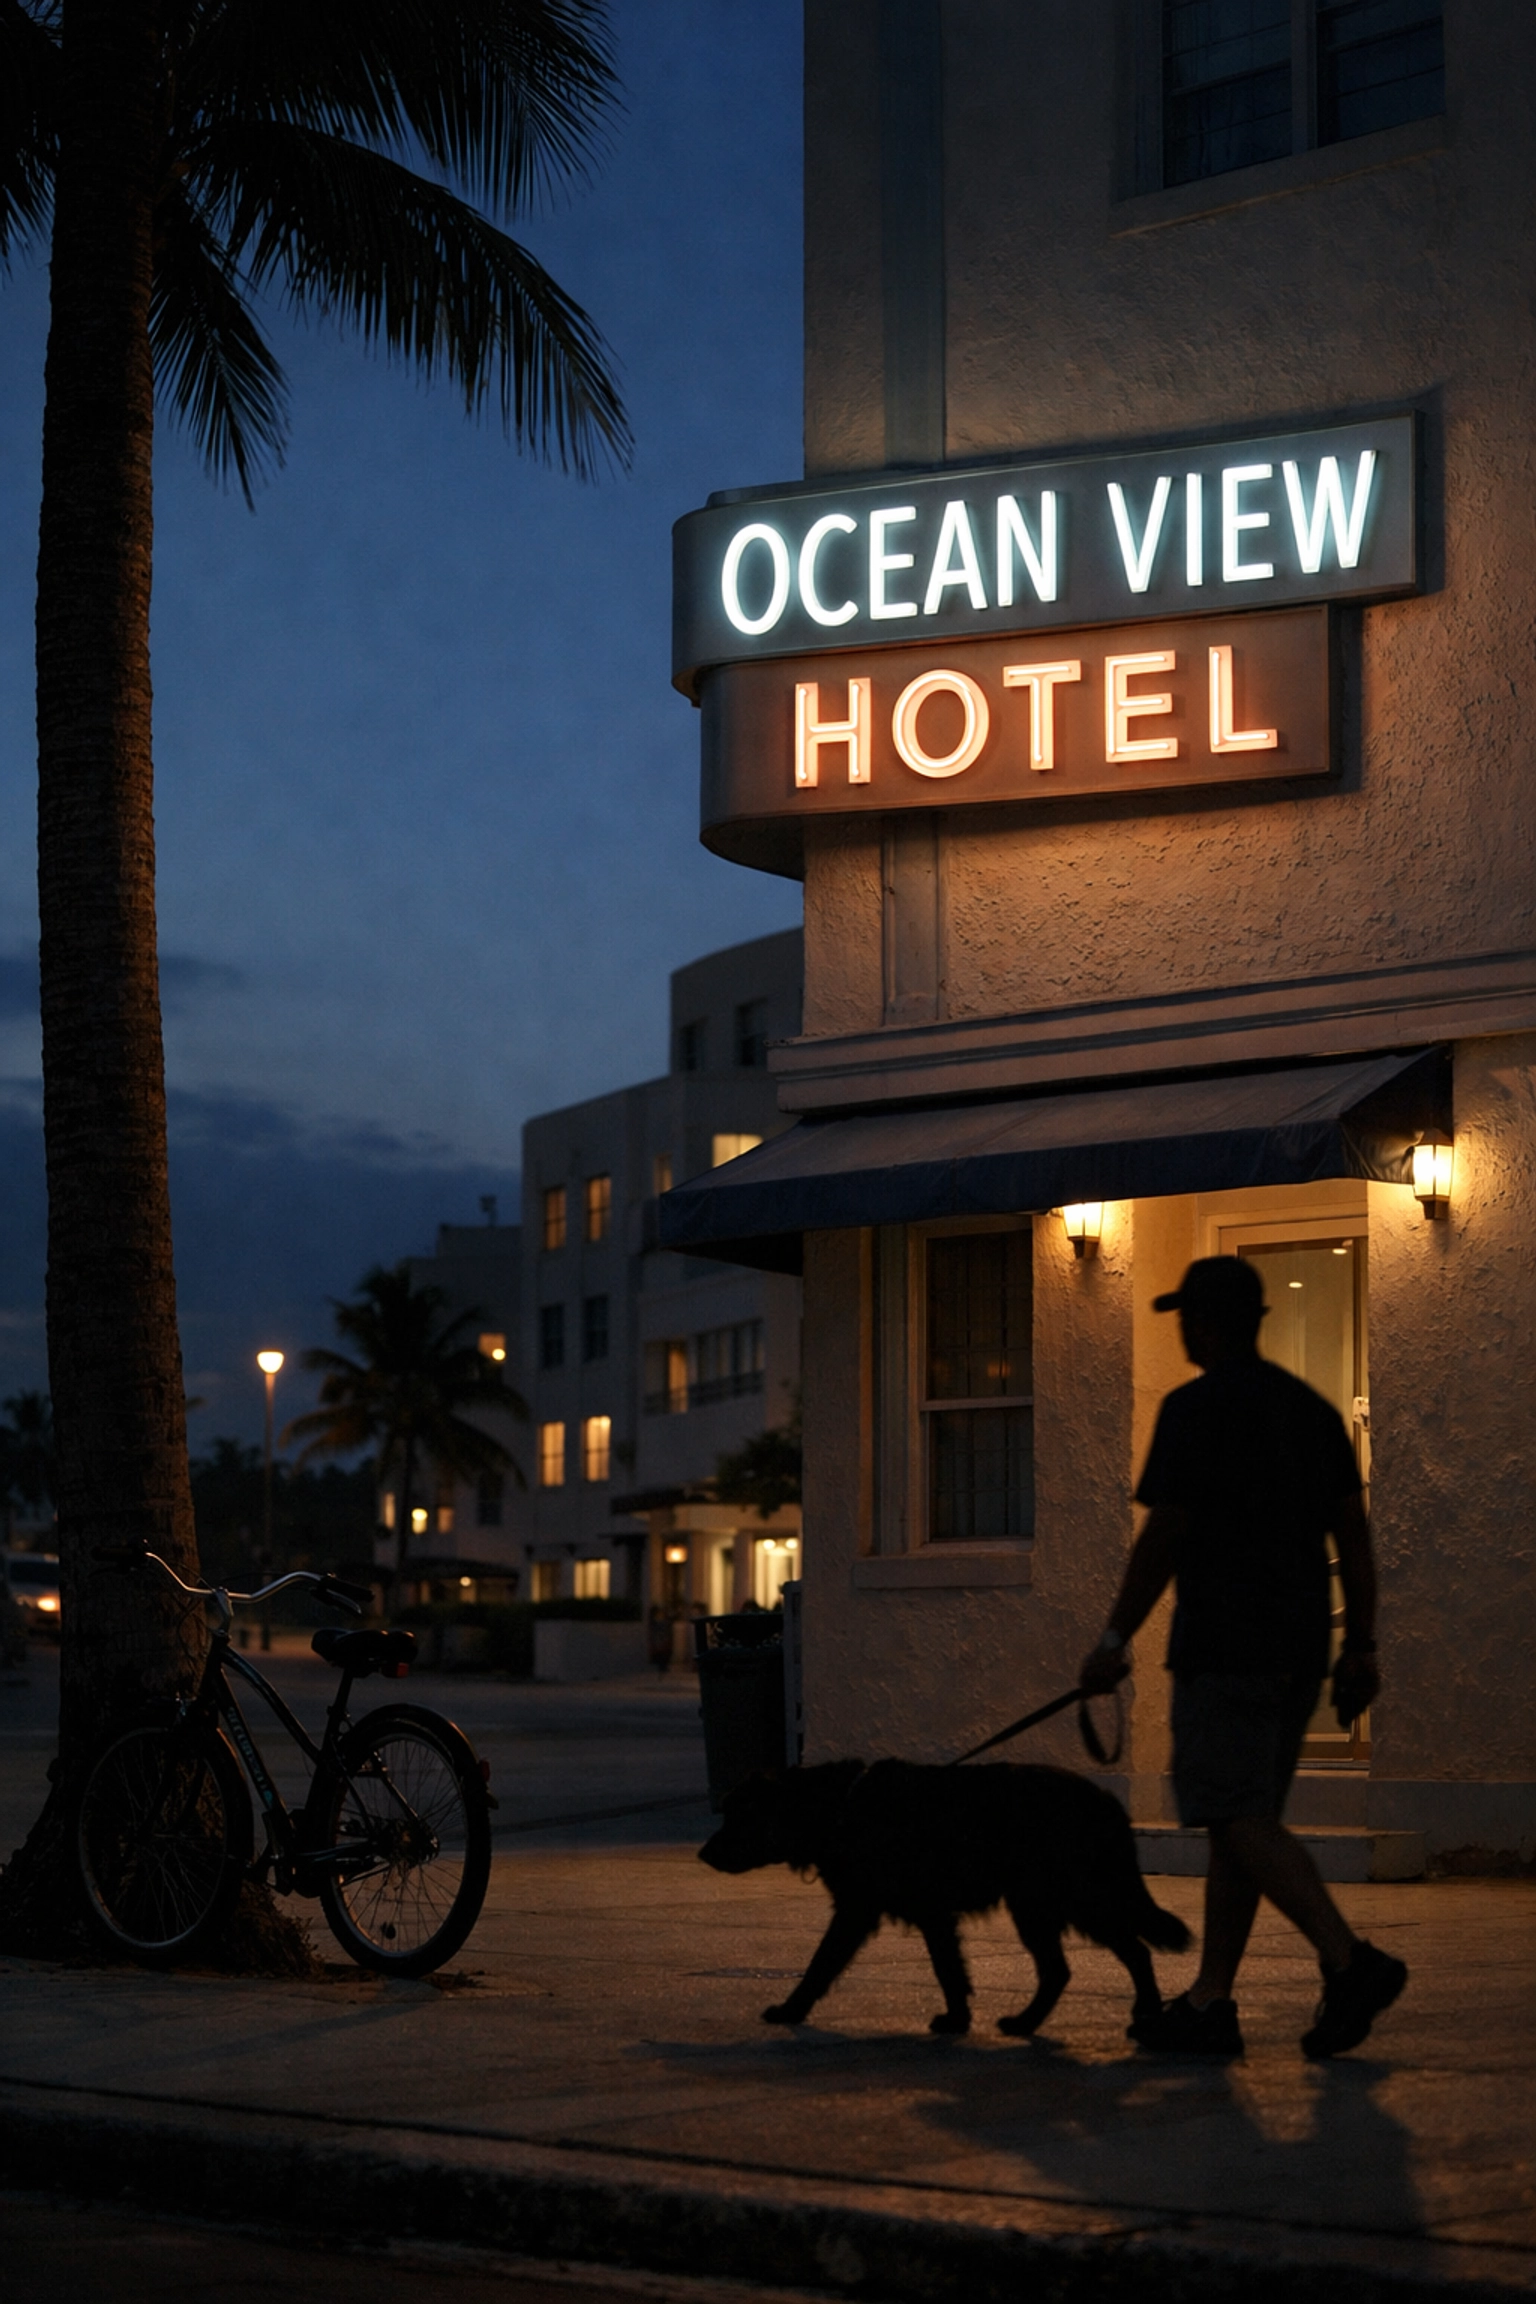
The Blue Hour and Neon Nights
As the sun dips below the horizon, the neon lights flicker to life. This is when the district becomes a cinematic playground. The "Blue Hour" (the period of twilight when the sky is a deep blue) provides the perfect contrast to the warm orange and pink neon tubes. To capture this, you will need a tripod and a slow shutter speed to ensure the colors are rich and the image is sharp.
Essential Gear for Your Miami Photography Tour
To ensure you are prepared for every scenario, you need the right kit. While you can get great shots with a smartphone, a dedicated camera setup gives you the flexibility to handle the high-contrast environment of Miami Beach.
| Gear Item |
Recommended Use |
Benefit for the Reader |
| Wide-Angle Lens |
16mm to 35mm |
Allows you to capture entire buildings even from across the street. |
| Circular Polarizer |
Mid-day shooting |
Cuts through glare on glass and makes the pastel colors and blue sky "pop." |
| Tripod |
Night/Blue Hour |
Essential for sharp neon shots and long exposures. |
| Prime Lens (35mm or 50mm) |
Street photography |
Perfect for capturing the "vibe" and details without distortion. |
By integrating these tools, you ensure that your technical execution matches your creative vision. If you’re unsure how to use this gear effectively in the field, our Private Miami Photography Tour is designed to provide you with hands-on training so you can master your equipment in real-time.
Compositional Techniques for Art Deco
To make your photos stand out among the thousands of images tagged as miami photography locations, you need to apply advanced compositional rules.
- Symmetry and Centering: Art Deco is all about balance. Position yourself exactly in the center of a building’s facade to emphasize the "rule of odds" and vertical spires.
- Leading Lines: Use the sidewalk, the palm trees, or the rows of parked vintage cars to lead the viewer’s eye toward the main architectural subject.
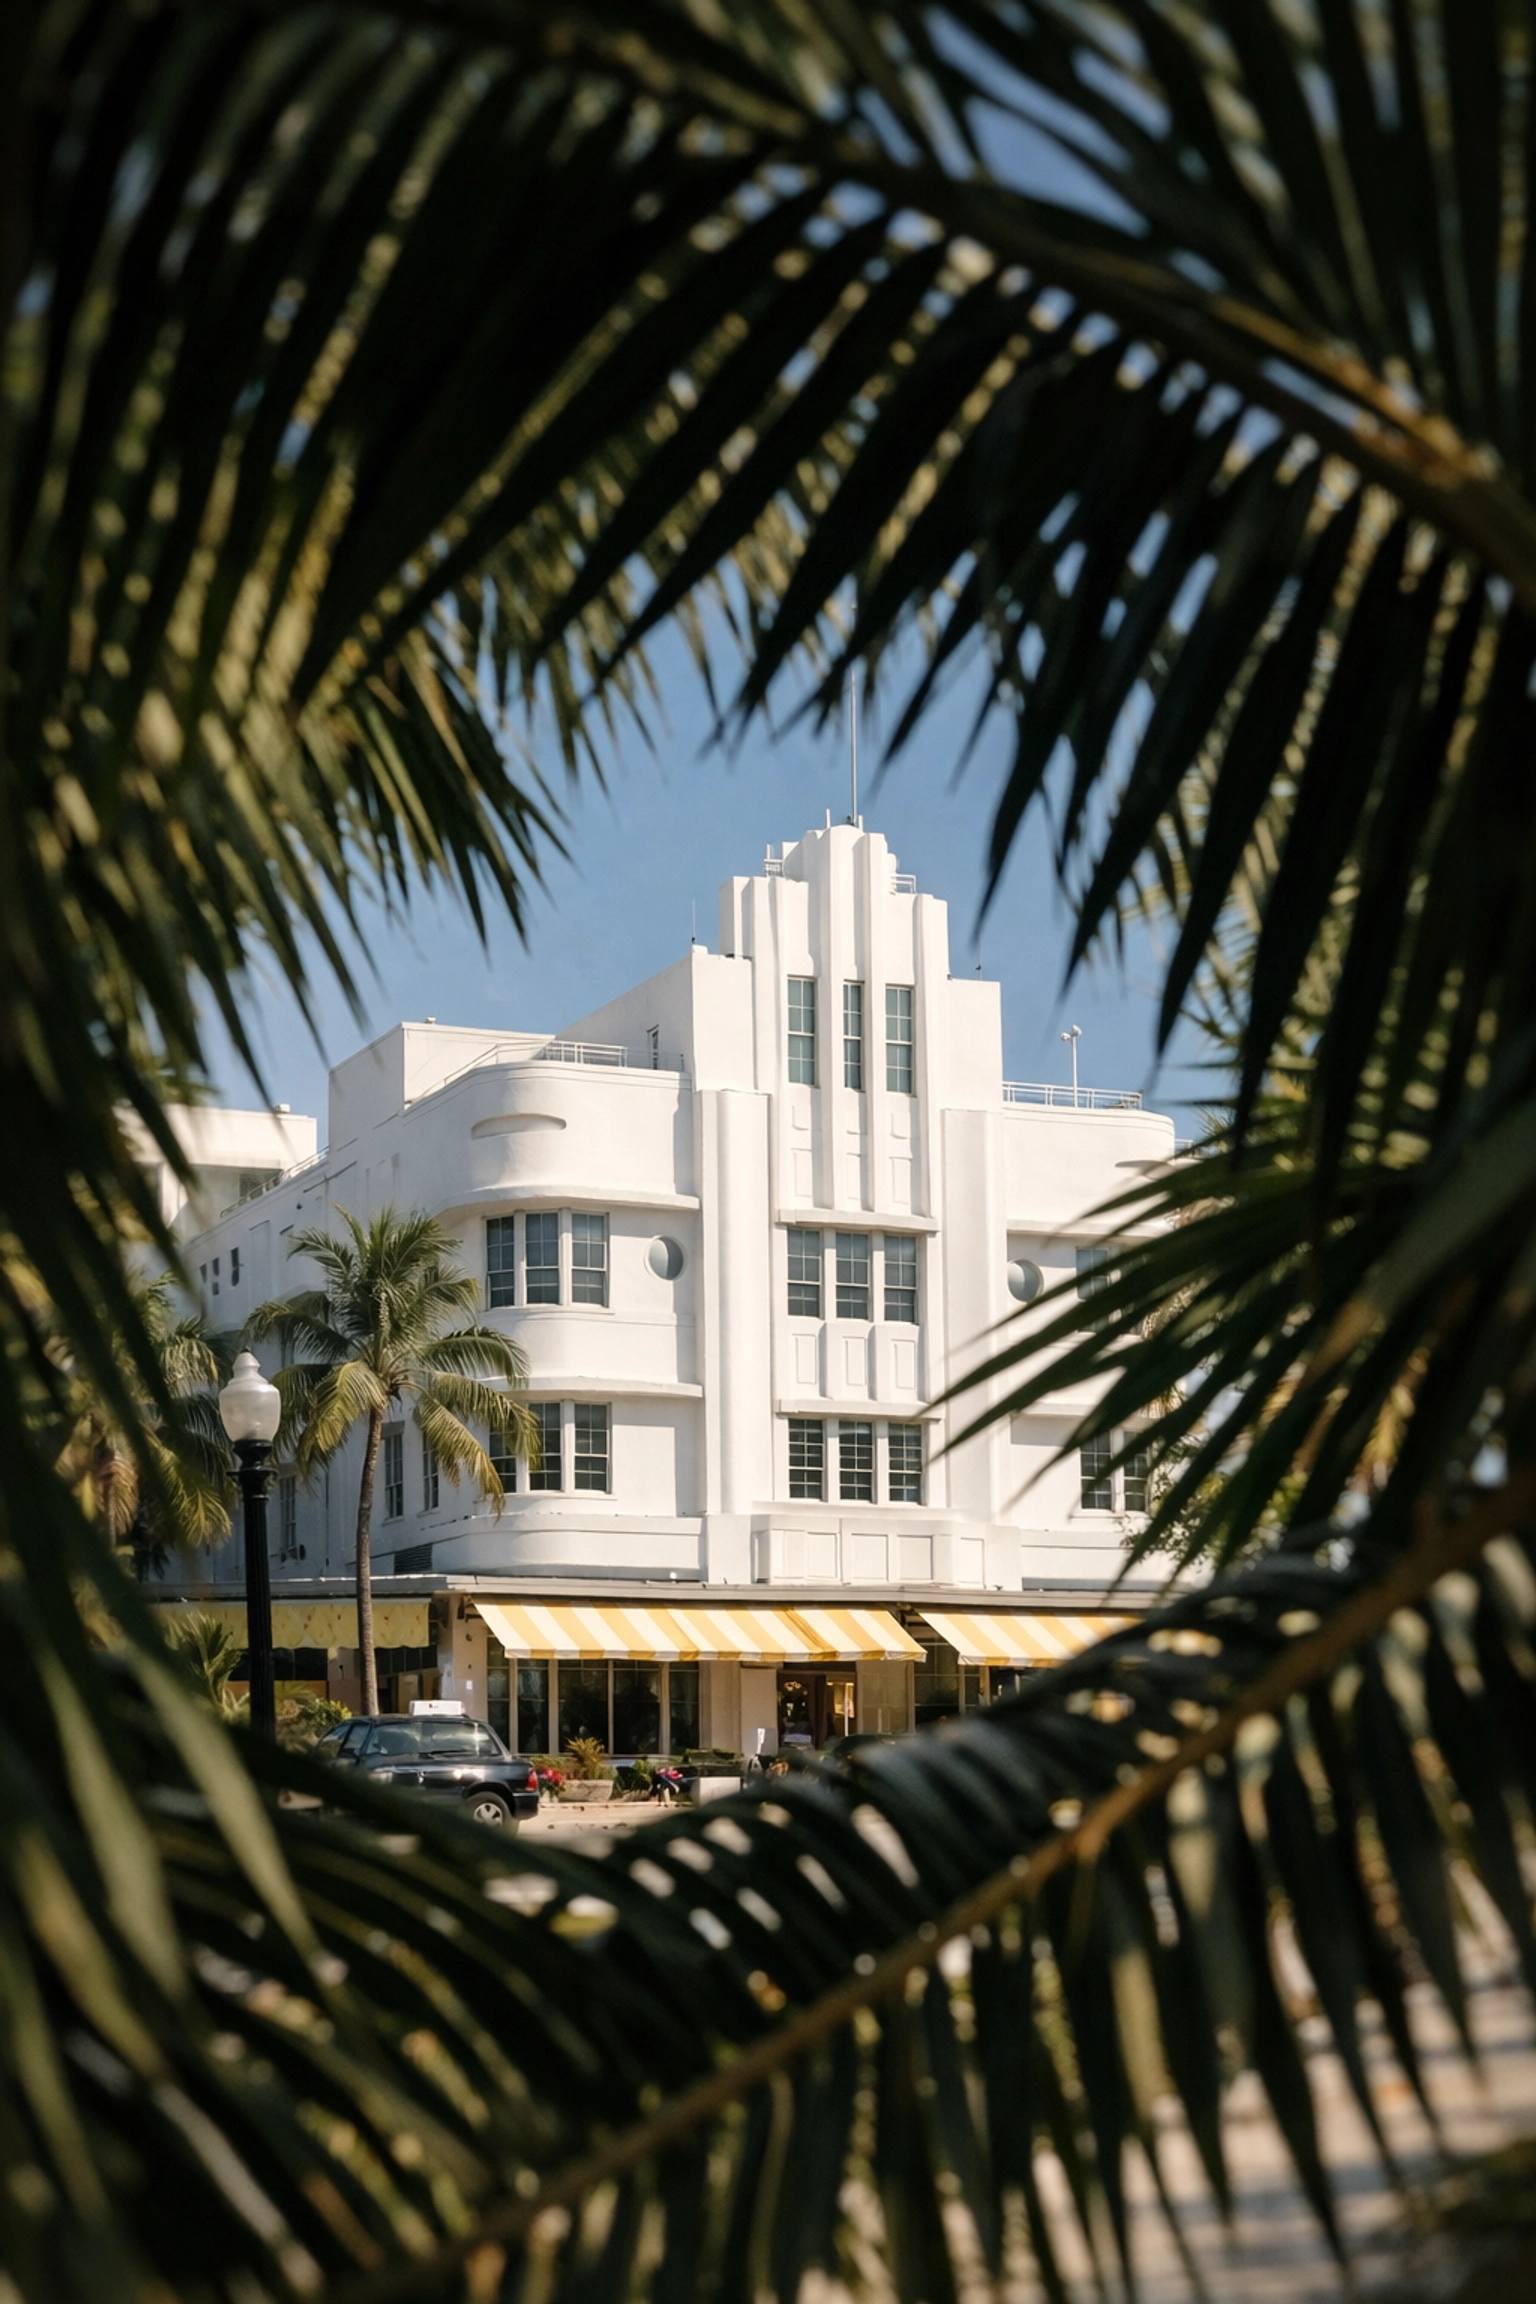
- Frame Within a Frame: Use the foliage of Lummus Park to frame the hotels across the street. This adds depth and context to your image.
Why You Need a Private Miami Photography Tour
You could spend days wandering South Beach on your own, or you could spend three hours with a pro and get better results. A miami photography tour with Edin Chavez isn't just a walking tour; it’s an intensive masterclass in composition, lighting, and storytelling.
We know the exact spots where the light hits best at 7:00 AM. We know which hotel managers will let us step inside for a quick lobby shot. We know how to help you navigate the crowds to get that "clean" look you see in fine art galleries. Most importantly, we provide personalized feedback on your shots as you take them, ensuring that you leave Miami with a portfolio you are proud of.
Visit Edin Chavez Photography to see the caliber of work you can achieve, and then head over to the Private Miami Photography Tour page to book your session. We don't just show you where to stand; we teach you how to see.
Final Thoughts for Your Photo Journey
The Art Deco District is a living museum, a testament to a time when style and glamour were the top priorities. By focusing on the details, timing your shoots for the best light, and utilizing professional guidance, you transform a simple trip into a productive creative retreat.
Whether you are capturing the neon glow of the Breakwater or the morning shadows on the McAlpin, remember that your perspective is unique. Use the tools and locations mentioned in this guide to build a foundation, then push the boundaries of your creativity. For more inspiration on the best places to shoot in Florida, browse our extensive collection of guides at blog.edinchavez.com.
With these considerations in mind, you are now equipped to tackle South Beach like a pro. We look forward to seeing you on the streets of Miami!
Just as a master chef selects the finest organic ingredients to create a Michelin-star meal, a professional photographer chooses specific materials to ensure their work stands the test of time. When you step into the world of high-end art collecting, you aren’t just buying a "picture." You are investing in a piece of history. Whether you are a seasoned curator or someone looking to buy your first high-value piece, understanding the nuances of museum quality prints is the key to building a collection that retains its soul: and its value: for decades.
At Edin Chavez Photography, we believe that art should be more than a temporary decoration. It should be a legacy. In this guide, I’m going to walk you through everything you need to know about archival standards, limited editions, and why the right paper can make the difference between a fading memory and a timeless masterpiece.
What Exactly is a Museum Quality Print?
When you hear the term "museum quality," it isn’t just marketing fluff. It refers to a specific technical standard that ensures the artwork remains vibrant and structurally sound for over 100 years. Most standard prints you find at big-box retailers use dye-based inks on cheap wood-pulp paper. Within five to ten years, those colors will shift, the whites will yellow, and the image will lose its punch.
Archival prints, on the other hand, are engineered for longevity. They utilize two primary components: pigment-based inks and acid-free substrates. By choosing these materials, you are ensuring that the deep blacks, subtle shadows, and vibrant hues I captured in the field look exactly the same when your grandchildren inherit the piece as they do the day you hang it on your wall.
The Three Pillars of Archival Quality
To truly understand what you are adding to your collection, you need to look at these three factors:
- Archival Stability: This is the print's ability to resist fading, yellowing, and cracking. High-grade materials are chosen specifically for their resistance to light, humidity, and atmospheric pollutants.
- Color Fidelity: This ensures the print faithfully reproduces the original image's tones. We’re talking about smooth gradations in a Miami sunset and deep, rich textures in a black-and-white landscape.
- Premium Substrates: Whether it is 100% cotton rag paper, museum-grade canvas, or archival metal, the base material must be acid-free and lignin-free to prevent chemical degradation over time.
The Magic of Giclée: The Gold Standard
If you are looking to buy or learn how to sell fine art photography prints, you must become familiar with the term Giclée (pronounced "zhee-klay"). Derived from the French word meaning "to spray," this process involves high-resolution inkjet printers that apply millions of microscopic droplets of pigment-based ink with surgical precision.
Unlike mass-produced offset printing, Giclée printing allows for an incredible range of colors (gamut) and a level of detail that is virtually indistinguishable from the original digital file or film negative. When you view one of our prints at Edin Fine Art, you’ll notice the crisp edges and the absence of the "dot pattern" found in lower-quality reproductions.
| Feature |
Standard Print |
Museum Quality (Giclée) |
| Ink Type |
Dye-based (fades quickly) |
Pigment-based (archival) |
| Paper |
Wood pulp (acidic) |
100% Cotton Rag / Alpha Cellulose |
| Longevity |
5–15 years |
100–200+ years |
| Detail |
Lower resolution, visible dots |
High resolution (300 DPI+), smooth tones |
| Value |
Decorative/Disposable |
Collectible Investment |
Why Limited Edition Photography Prints Matter
For a collector, rarity is a primary driver of value. While open edition prints can be beautiful, limited edition photography prints are what truly build a high-value art collection. When an artist limits a run: say, to only 50 or 100 prints: they are creating scarcity. Once those 100 prints are sold, that’s it. No more will ever be produced in that size or format.
This scarcity propels the value of your investment. As an artist’s career grows and the "sold out" signs appear on certain editions, the secondary market value for those specific pieces often increases. If you’re browsing our latest collections, always look for the edition number. It tells you exactly where your piece sits in the lineage of that particular vision.
The Golden Ticket: Certificate of Authenticity for Art Prints
Never buy a high-value print without a certificate of authenticity for art prints (COA). Think of this as the title to your car or the deed to your house. A COA is a formal document signed by the artist (that’s me!) or the gallery, verifying that the work is genuine, stating the edition number, and detailing the archival materials used.
Your COA should include:
- The title of the artwork.
- The artist's name.
- The edition number (e.g., 5/50).
- The date of production.
- The specific paper and ink types used.
- The artist’s signature.
This document is essential if you ever decide to work with curators or sell your piece at auction. It provides the provenance and peace of mind that every serious art buyer requires. You can find more about how we handle these documents on our sitemap or by checking out our fine art categories.
Choosing the Right Substrate for Your Space
Not all museum quality prints are on paper. Depending on the vibe of your home or office, you might prefer different finishes. Here is how you can choose what fits your aesthetic:
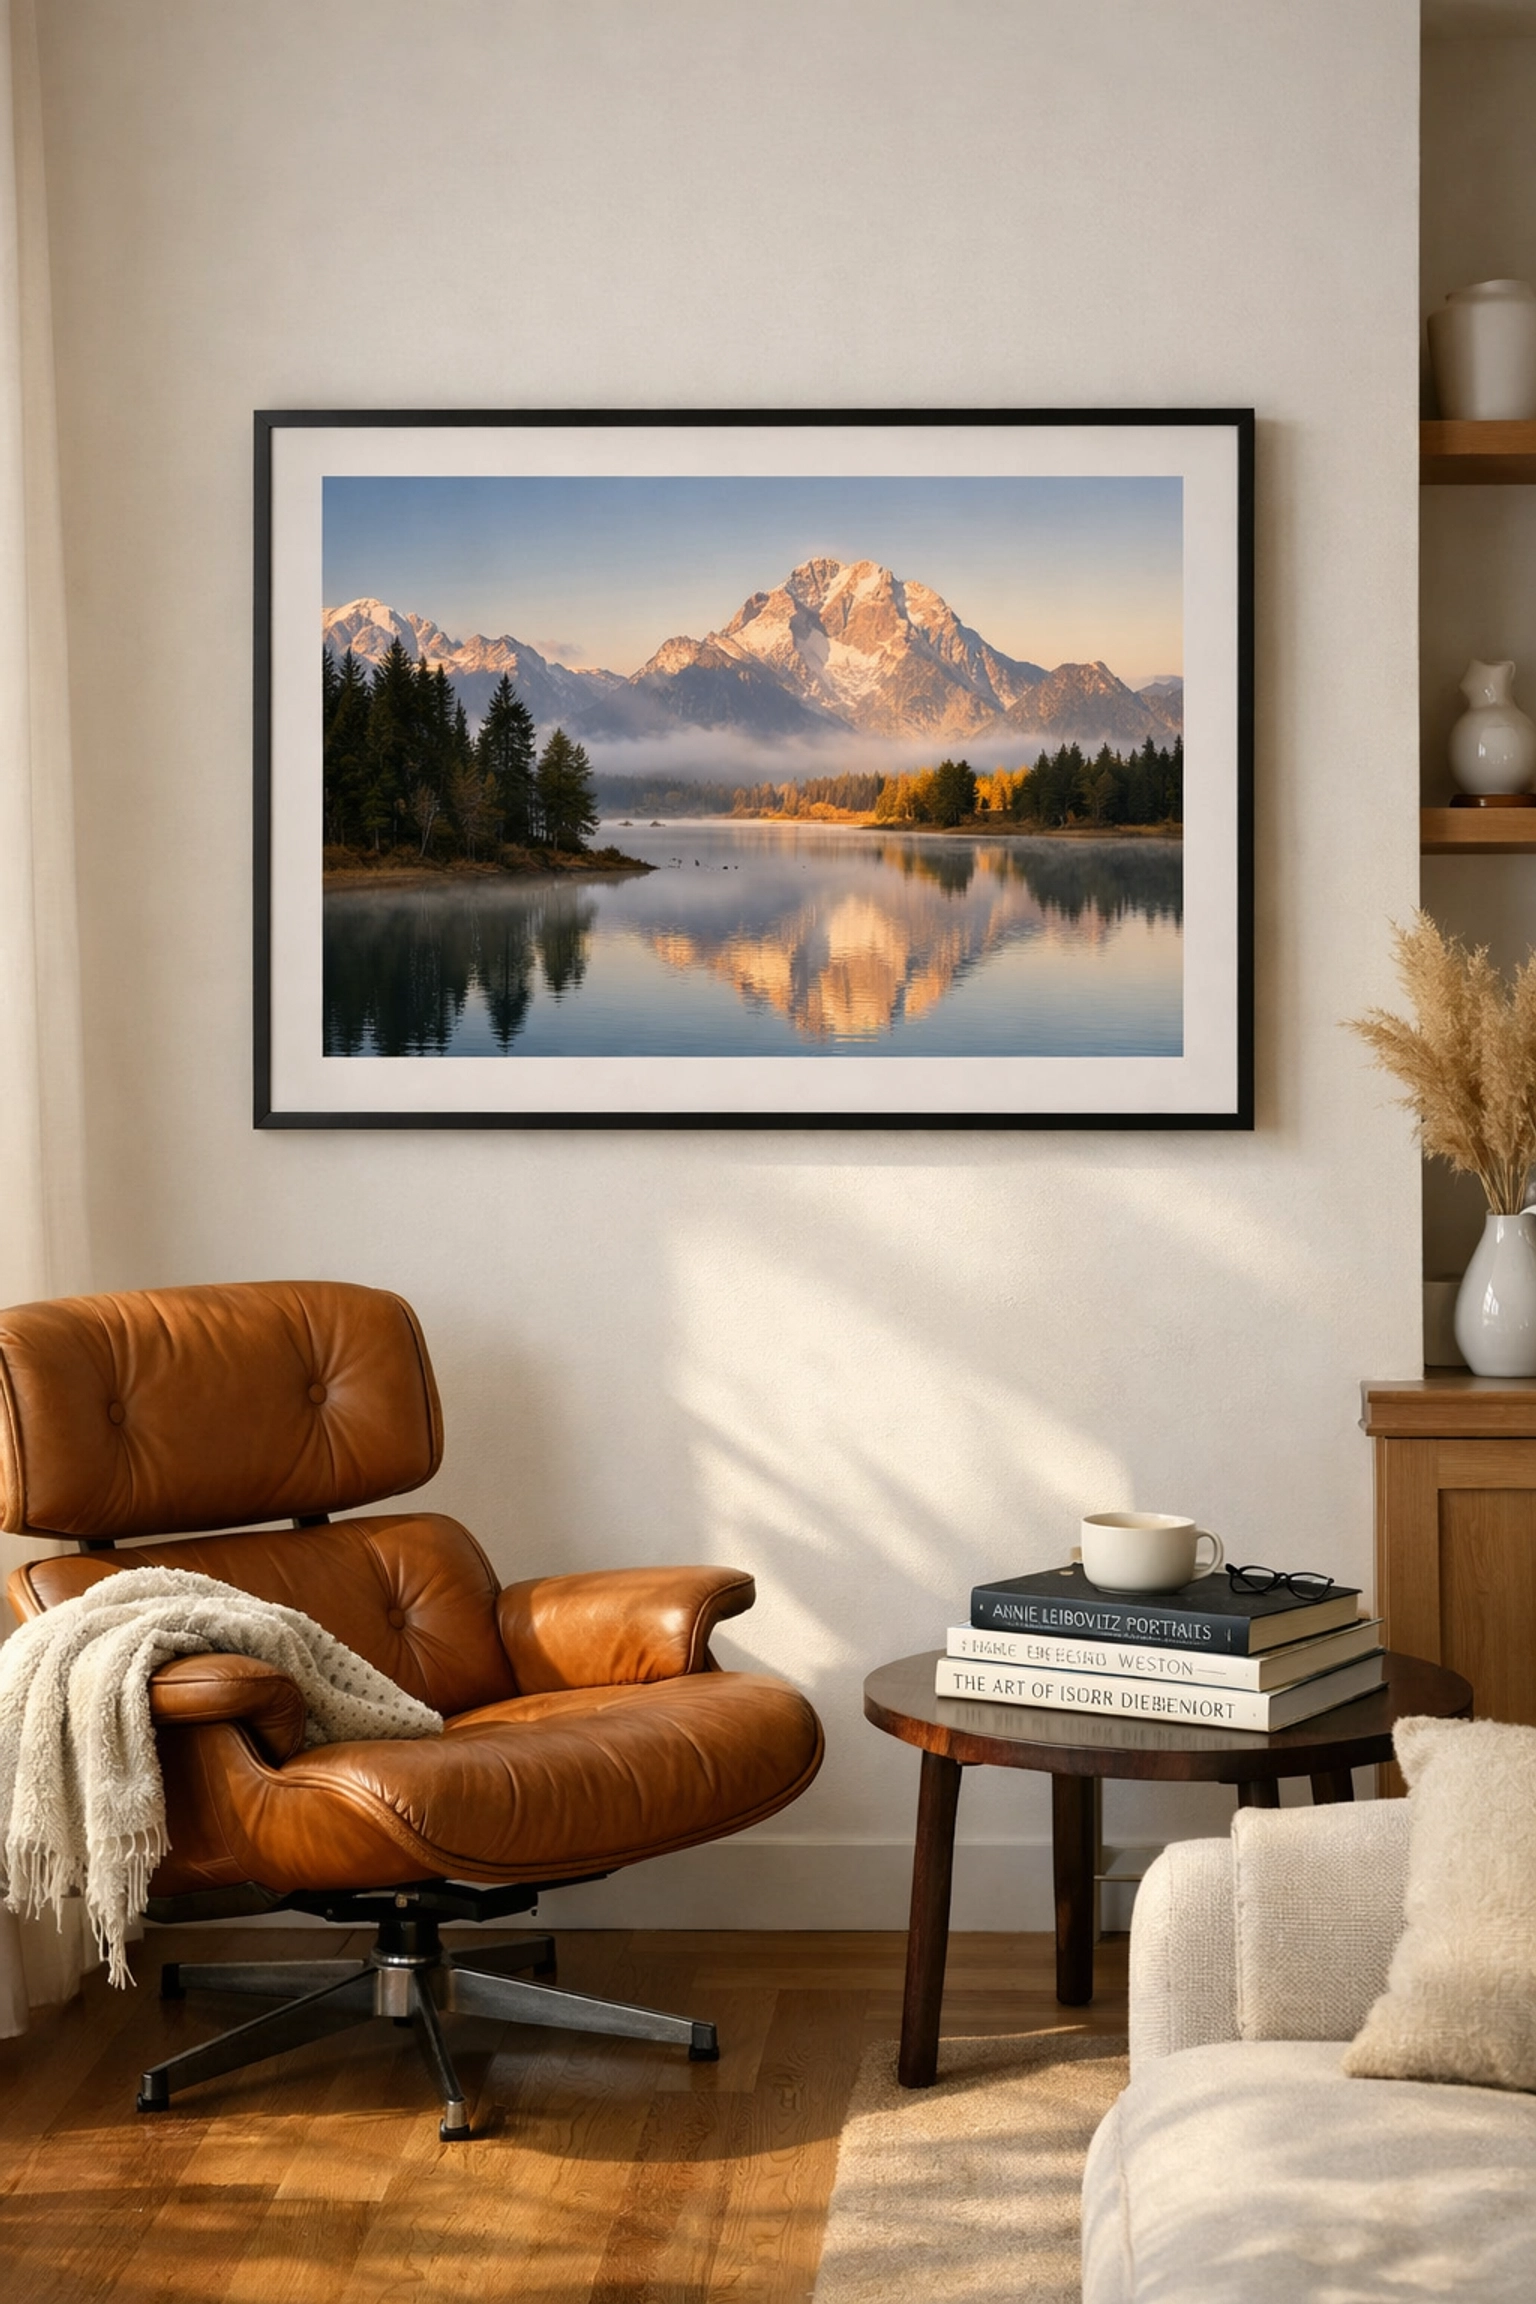
- Cotton Rag Paper: This is the classic choice. It has a matte finish, a heavy weight (usually 300gsm or more), and a tactile texture that feels expensive. It’s perfect for detailed landscapes where you want the viewer to feel like they can step into the frame.
- Archival Metal (Sublimation): For a modern, sleek look, metal prints are unparalleled. The dyes are infused directly into a specially coated aluminum sheet. They are incredibly durable, easy to clean, and offer a vibrant, almost 3D depth.
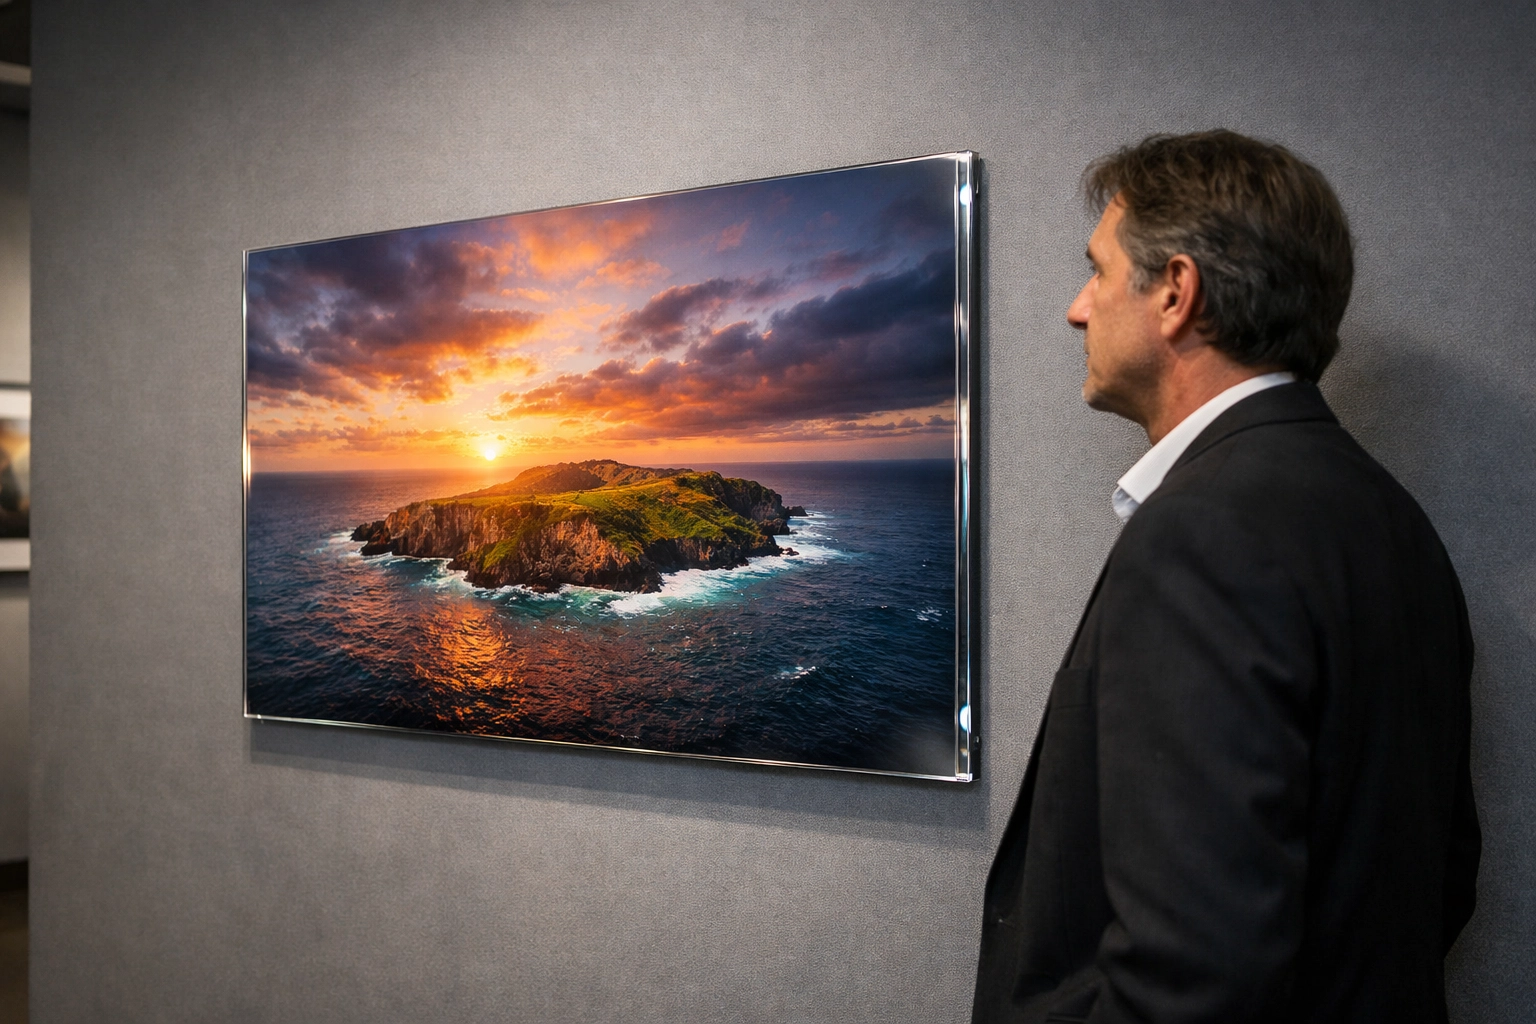
- Acrylic Face-Mount: If you want the "wow" factor, this is it. The print is mounted behind a thick layer of gallery-grade acrylic, which enhances color and provides a stunning, high-gloss finish often seen in high-end galleries in Miami and New York.
If you are looking for inspiration on where to see these types of finishes in person, check out our guide on the best photography spots in Miami.
Protecting Your Investment
Once you have acquired a museum-quality piece, your job is to protect it. Even the best archival prints can be damaged by improper handling or poor environmental conditions. Here are a few "pro tips" for your collection:
- Avoid Direct Sunlight: Even with UV-protective glass, constant direct sunlight will eventually take a toll. Position your art on walls that receive indirect light.
- Use Museum Glass: If you are framing a paper print, ask for Tru Vue Museum Glass. It’s virtually invisible and blocks 99% of harmful UV rays.
- Control the Climate: Extreme shifts in humidity and temperature can cause paper to "ripple" (cockling). Keep your art in a stable, climate-controlled environment.
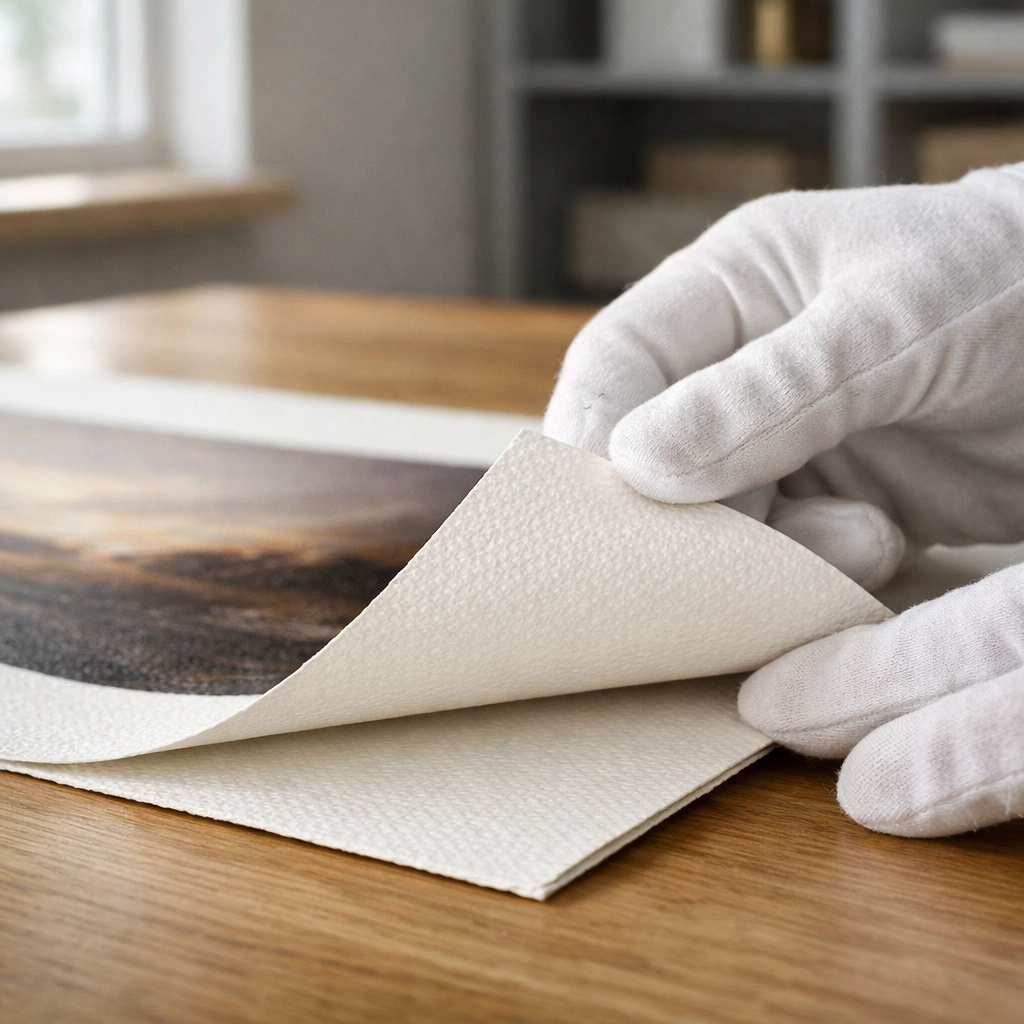
- Hands Off: The oils on your skin can actually damage fine art paper. Always handle your prints with white cotton gloves until they are safely behind glass.
How to Sell Fine Art Photography Prints (The Secondary Market)
If you’ve built a collection and are considering liquidating a few pieces, or if you’re an artist looking to break into the market, you need to understand the ecosystem. Selling high-value prints isn't about hitting "post" on social media; it’s about relationship-building and provenance.
To sell successfully, you must have all your documentation (the COA) and the print must be in pristine condition. Working with reputable galleries or platforms like Edin Chavez Photography ensures that your work is positioned in front of the right curators and collectors who value quality over a bargain.
Building Your Legacy
Collecting art is a journey that reflects your personal taste and your appreciation for the finer things in life. By focusing on museum quality prints, you aren’t just decorating a wall; you are curating an experience that will last for generations. From the technical precision of Giclée printing to the security of a certificate of authenticity, every detail matters.
Whether you are looking for a striking centerpiece for your living room or a strategic investment for your portfolio, always demand the best materials. Your art: and your legacy: deserve nothing less.
Explore our latest limited editions and start your collection today at Edin Fine Art or dive deeper into the world of photography on our blog.
With these considerations in mind, you are now equipped to navigate the art world like a pro. Happy collecting!
As you step onto the warm, powdery sands of South Florida, you quickly realize that Miami isn’t just a destination; it’s a high-definition sensory experience. Whether you are looking for the electric energy of the city or a quiet corner to capture the perfect sunrise, the coastline offers an unparalleled variety of experiences. This post is part of our 30-day series exploring Miami travel, where we dive deep into the hidden gems, the art, and the food that make this city a global icon.
When you plan your trip, your first priority should be identifying the spots that offer the best visual and recreational ROI. While most tourists stick to the neon lights, you’re here for the authentic Miami. To ensure your camera roll is as impressive as your itinerary, you must check out our comprehensive guide on the best photography spots in Miami, which serves as the ultimate resource for capturing the city's soul.
1. Golden Hour at South Pointe Park
Your journey through the best miami beaches begins at the southern tip of the island. South Pointe Park is more than just a beach; it’s a waterfront sanctuary that offers panoramic views of the cruise ship channel and the Downtown Miami skyline. As the sun begins to set, the park transforms into a photographer's dream.
Walking along the pier provides you with a vantage point that is simply unmatched. You can watch the massive cruise ships glide past, seemingly close enough to touch. For those interested in wynwood photography and urban aesthetics, the contrast between the organic waves and the sleek, modern architecture of the nearby high-rises provides a robust composition for your shots.
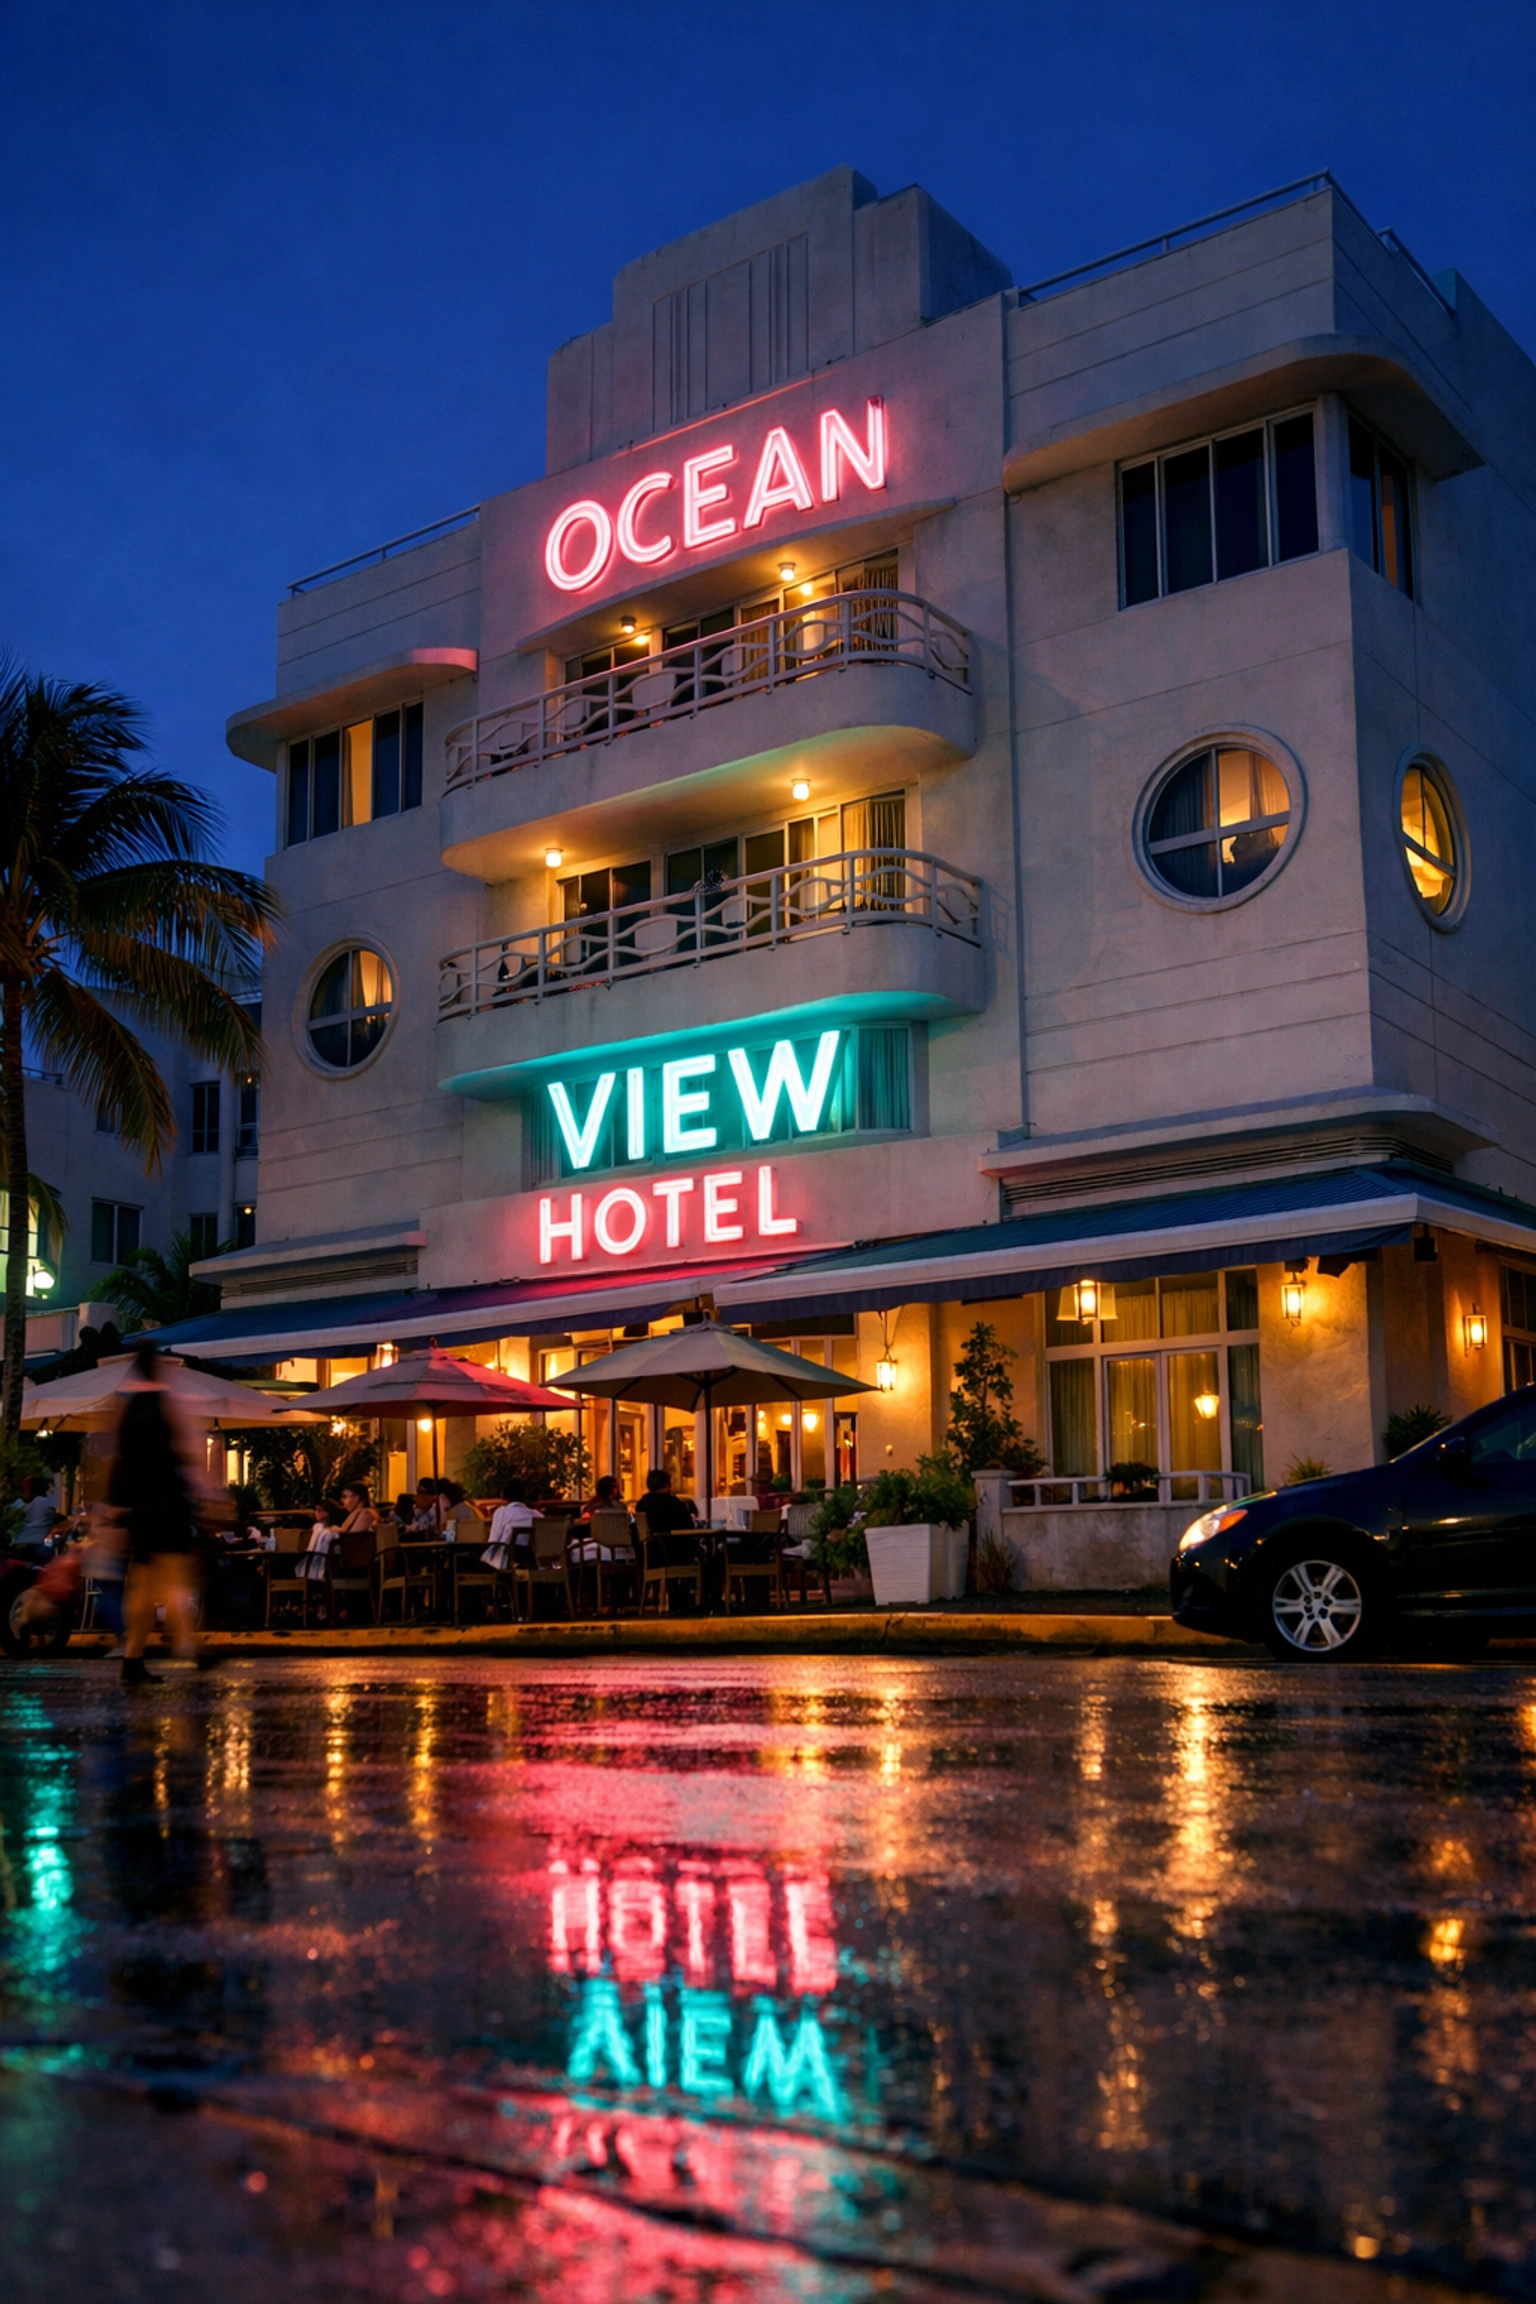
2. Step Back in Time on Ocean Drive
Just a short stroll from the shoreline, Ocean Drive represents the heart of the Art Deco District. You’ll find that the fabulous 1920s architecture provides a candy-colored backdrop that feels like a movie set. Exploring this area is one of the most fun things to do in miami if you appreciate history blended with a vibrant social scene.
By visiting our main Edin Chavez Photography blog, you can learn how to capture these neon-lit buildings during the "blue hour" to make the colors truly pop. The symmetry and pastel hues of the boutique hotels offer a masterclass in architectural design that you shouldn't miss.
3. Active Living at Lummus Park
If you crave energy and movement, Lummus Park is where you need to be. This stretch of beach runs right alongside the Art Deco buildings and features wide, paved paths perfect for biking, running, or skating. You’ll see the quintessential Miami lifestyle in full swing here: volleyball matches, outdoor "Muscle Beach" workouts, and plenty of people-watching.
This area is excellent for street photography. If you are following our 30 days of street photography, you’ll find that the diverse crowds at Lummus Park provide endless opportunities to capture candid moments of human connection and athleticism.
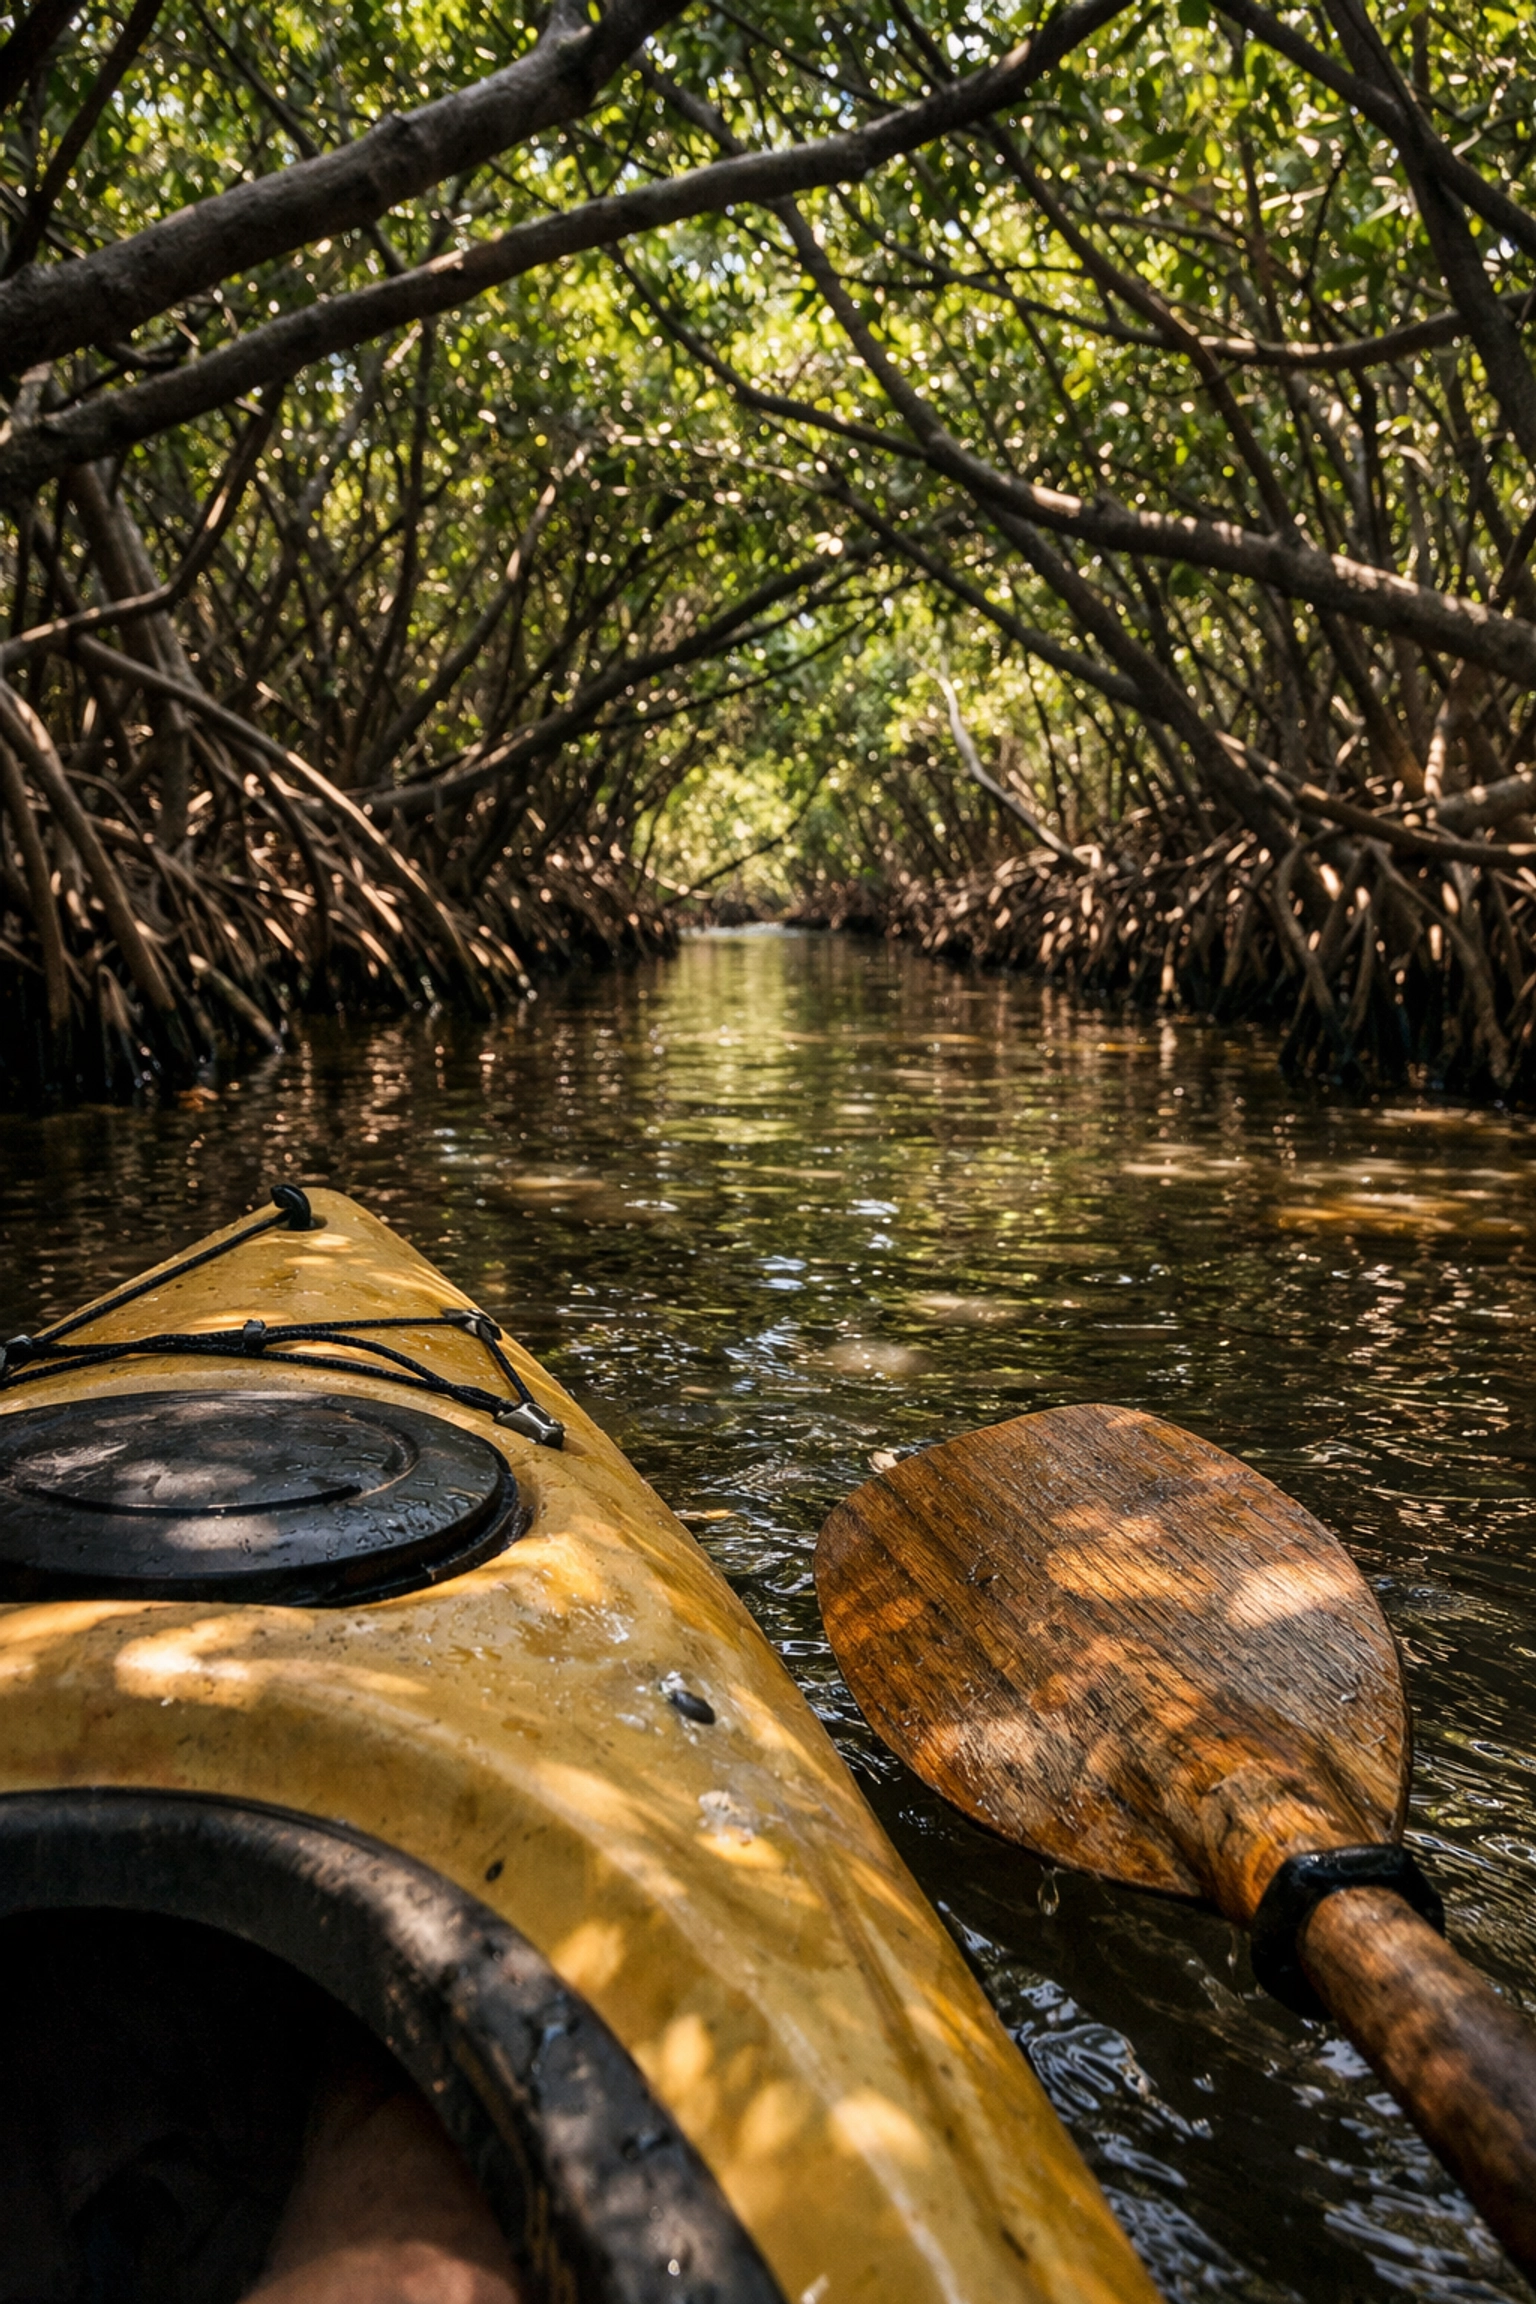
4. Discover the Hidden Gems of Oleta River State Park
While not a traditional "ocean" beach, Oleta River State Park is one of the most significant miami hidden gems for nature lovers. Located just north of the main beach drag, this park offers a lush mangrove ecosystem that you can explore via kayak or paddleboard.
By navigating the narrow channels, you immerse yourself in a world far removed from the South Beach glitter. It’s a peaceful retreat where the only sounds are the dip of your paddle and the call of local birds. This is the side of Miami that ensures you see the city’s ecological diversity, not just its nightlife.
5. Historic Charm at Bill Baggs Cape Florida State Park
At the tip of Key Biscayne lies Bill Baggs Cape Florida State Park, home to the historic 1825 lighthouse. This beach offers a more relaxed, family-friendly vibe compared to the frantic pace of South Beach. Climbing the lighthouse provides you with an elevated view of the Atlantic that is breathtaking.
For those looking to invest in high-quality prints of these iconic locations, visiting Edin Fine Art allows you to see how professional-grade equipment and an artistic eye can turn a historic landmark into a piece of timeless decor for your home.
| Feature |
South Pointe Park |
Bill Baggs State Park |
Haulover Beach |
| Vibe |
Sophisticated & Scenic |
Historic & Relaxed |
Adventurous & Free |
| Best Activity |
Sunset Walks |
Lighthouse Tours |
Kite Flying / Surfing |
| Photo Quality |
Unparalleled Skyline |
Classic Coastal |
Tropical Blue Waters |
6. High-Flying Fun at Haulover Beach
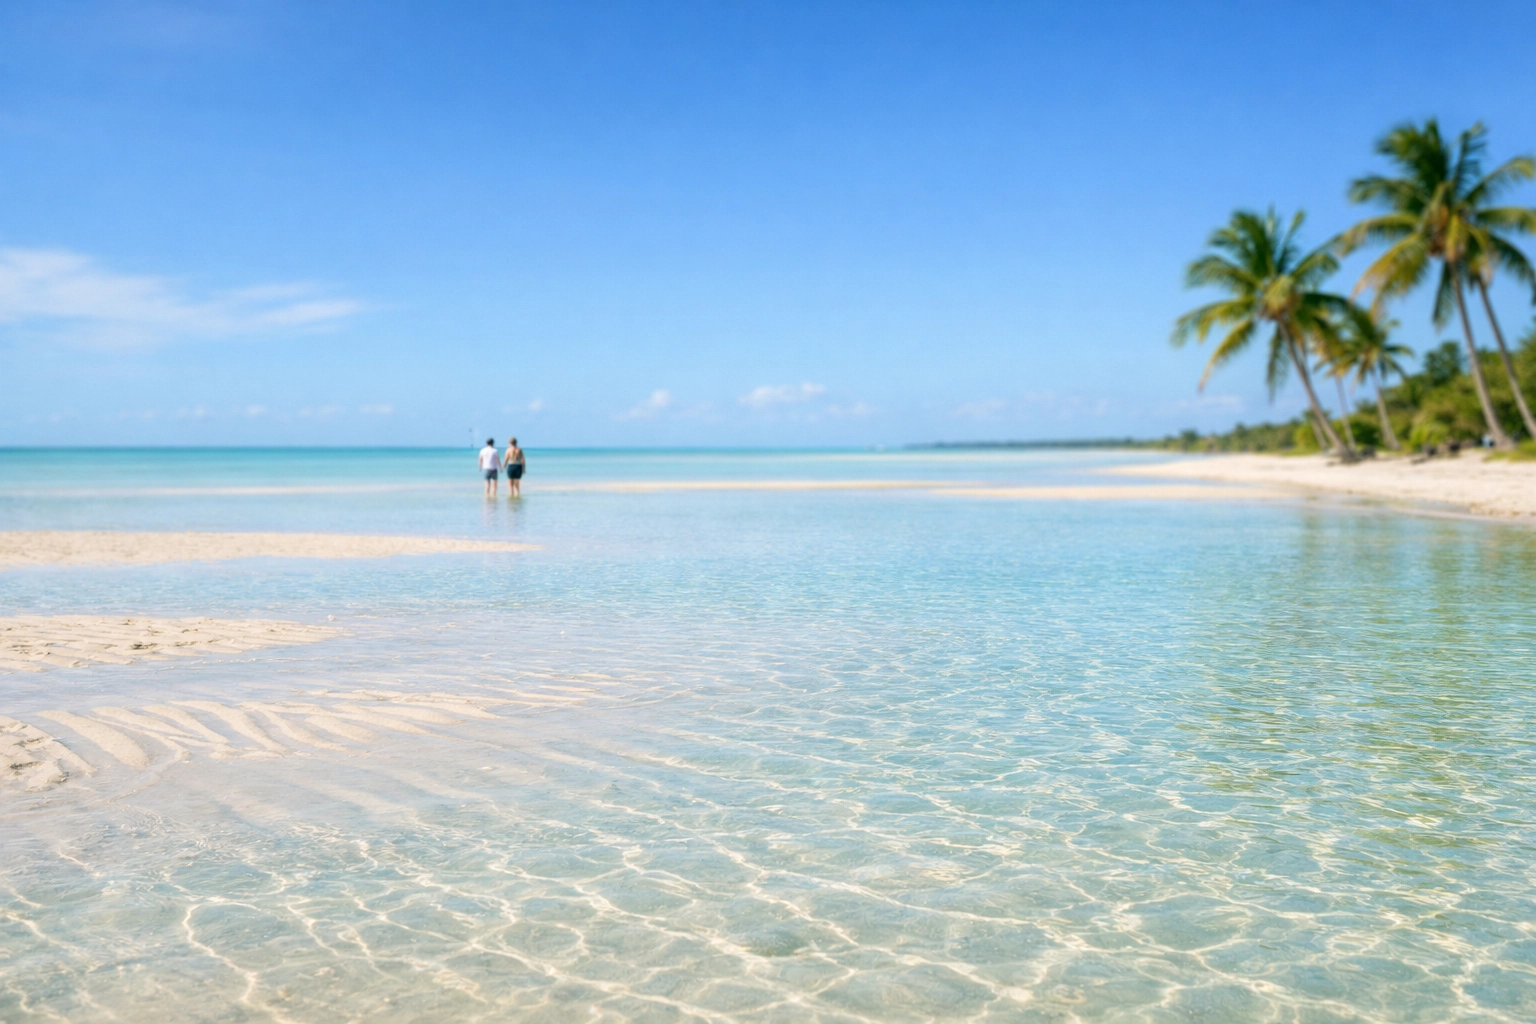
Haulover Beach is famous for two things: being the city’s only legal nude beach and having some of the best kite-flying conditions in the country. Even if you stay clothed in the designated areas, the sheer beauty of the water here: often a brilliant, crystal-clear turquoise: makes it one of the best miami beaches for landscape shots.
The park across from the beach often hosts kite festivals, filling the sky with massive, colorful wind-catchers. It’s a whimsical sight that adds a unique layer to your Miami experience.
7. Natural Wonder at Crandon Park
Crandon Park on Key Biscayne is an underrated treasure. What makes this spot stand out is its shallow sandbars. You can walk out for hundreds of yards in knee-deep, calm water, making it an ideal spot for unique portraits or simply relaxing without the heavy surf. The palm-lined shores and old-school cabanas give it a nostalgic, tropical feel that is "smooth as butter" for your travel aesthetic.
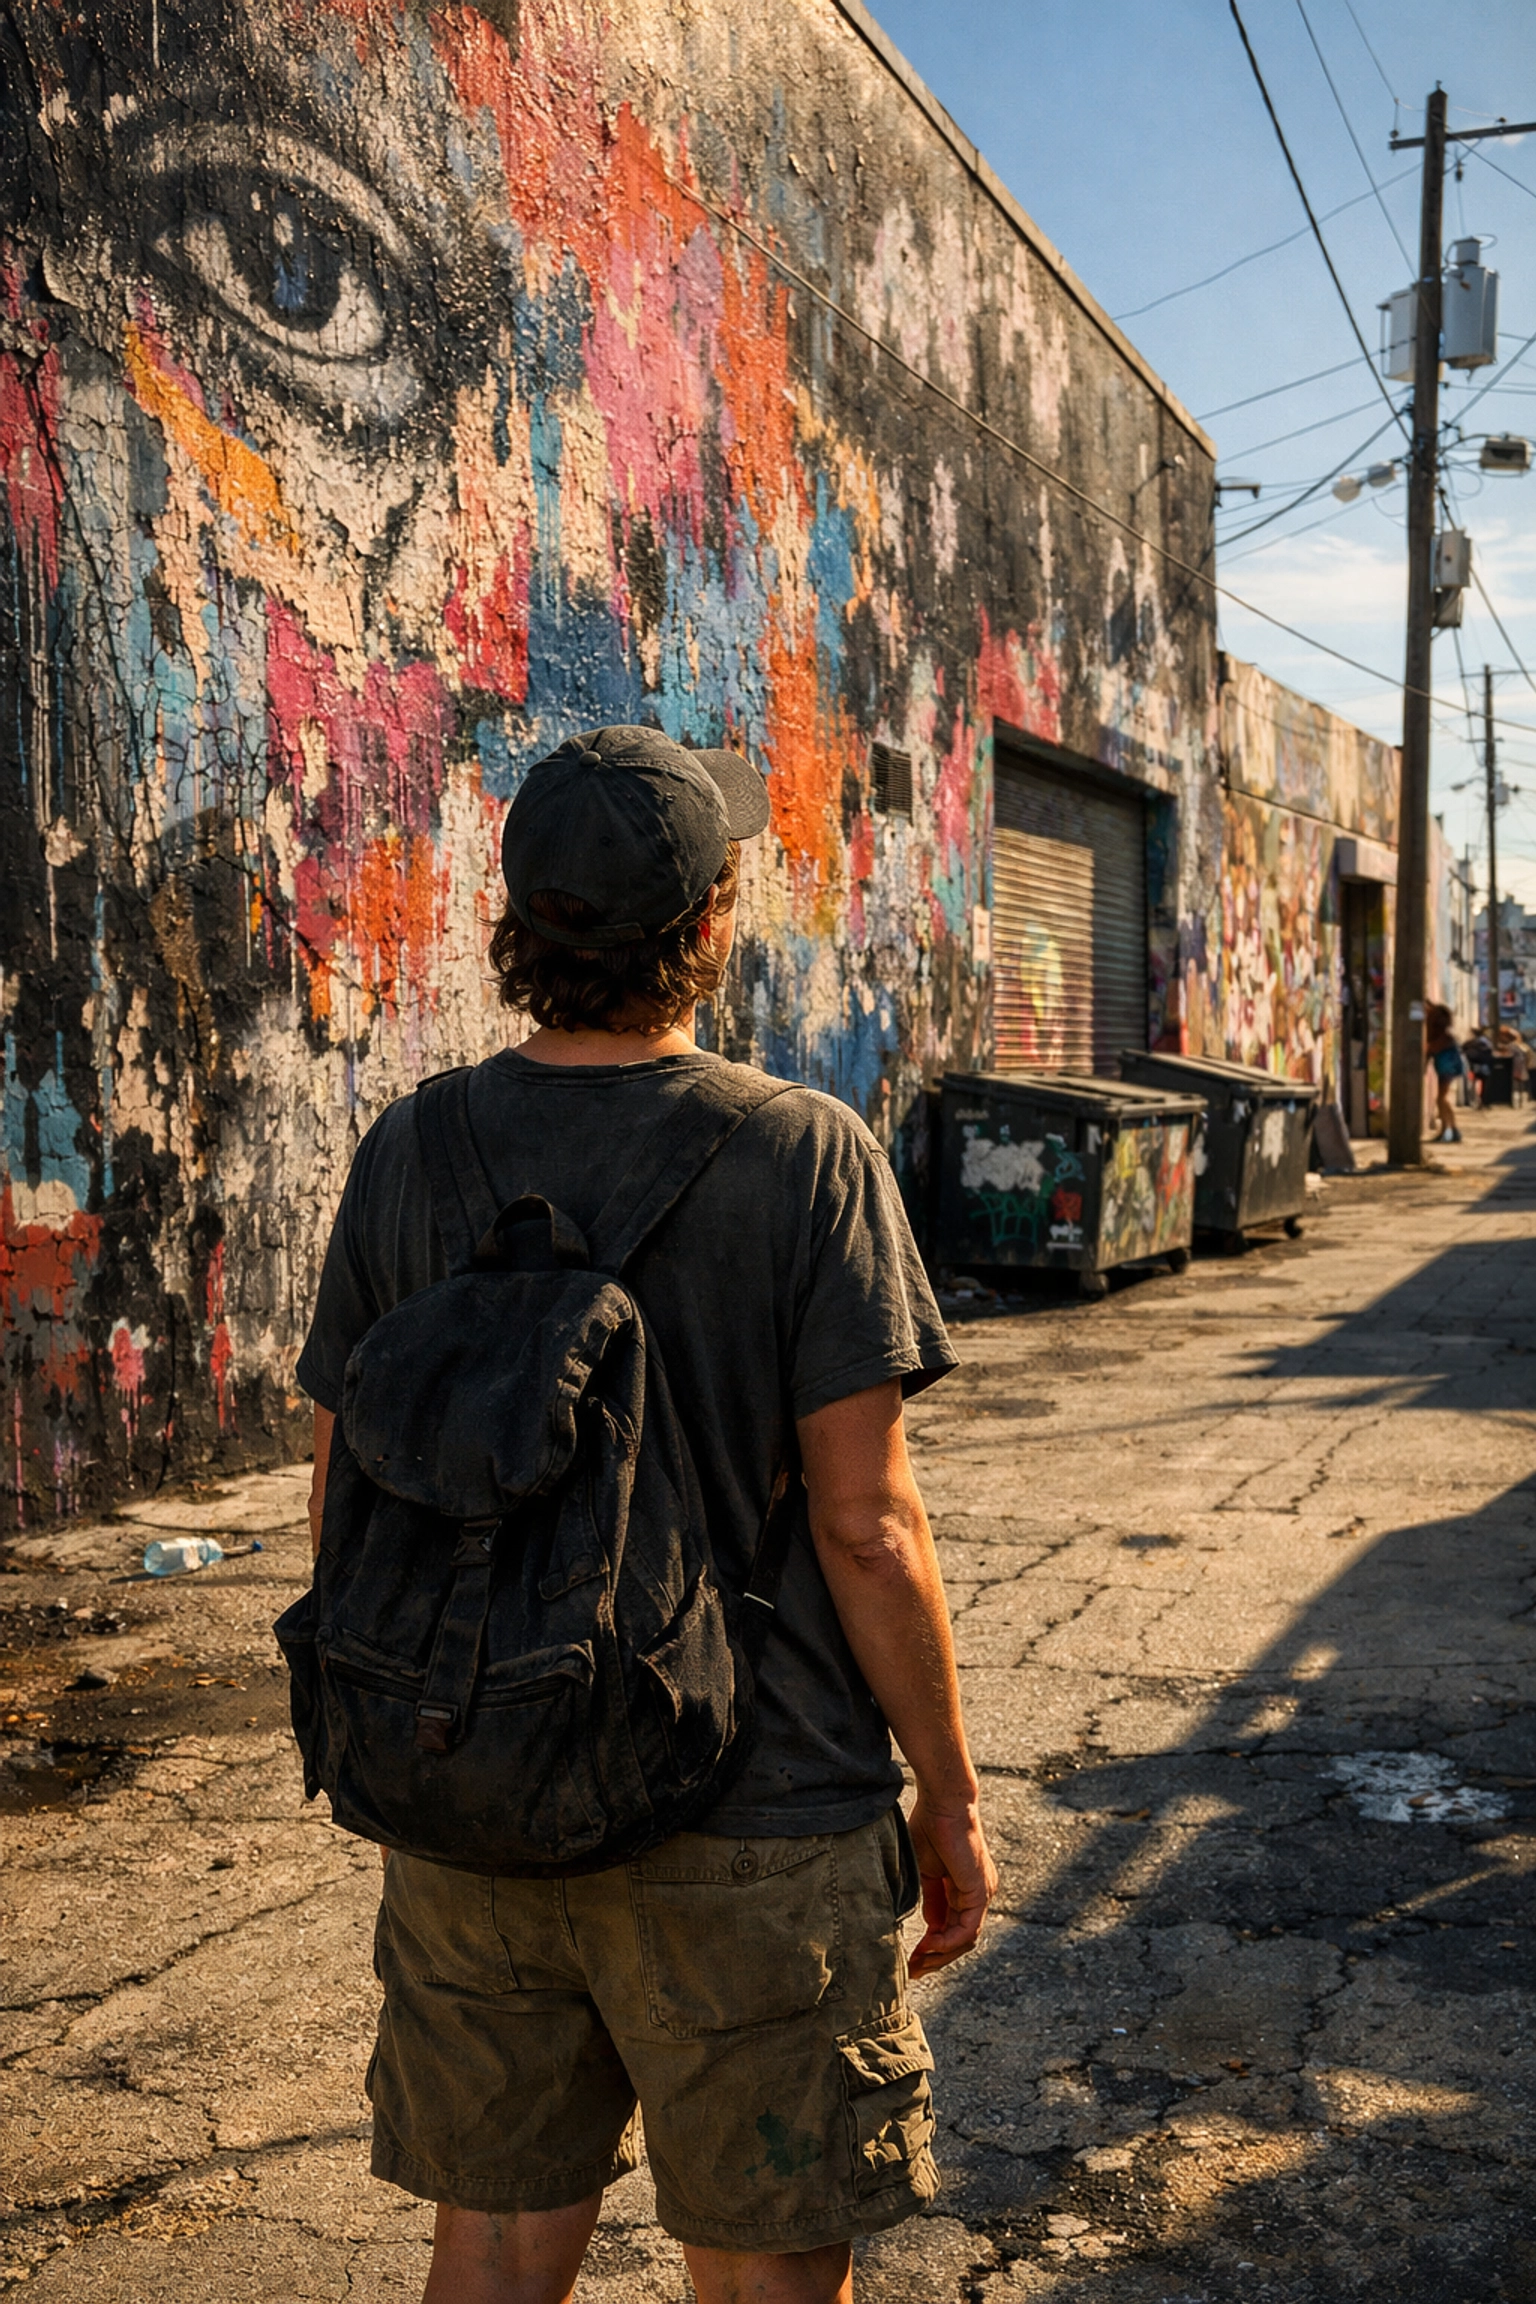
8. From Beach to Brushstrokes: The Wynwood Pivot
While your day might start on the sand, no trip to Miami is complete without the cultural injection of the Wynwood Arts District. After you’ve had your fill of the ocean, drive ten minutes inland to experience wynwood photography at its finest. The neighborhood is an ever-evolving outdoor museum of street art.
By integrating a visit to Wynwood into your beach day, you bridge the gap between Miami’s natural beauty and its human creativity. If you’re looking to level up your own photography skills, our team at Edin Studios provides the professional environment and expertise to help you master both the street and the studio.
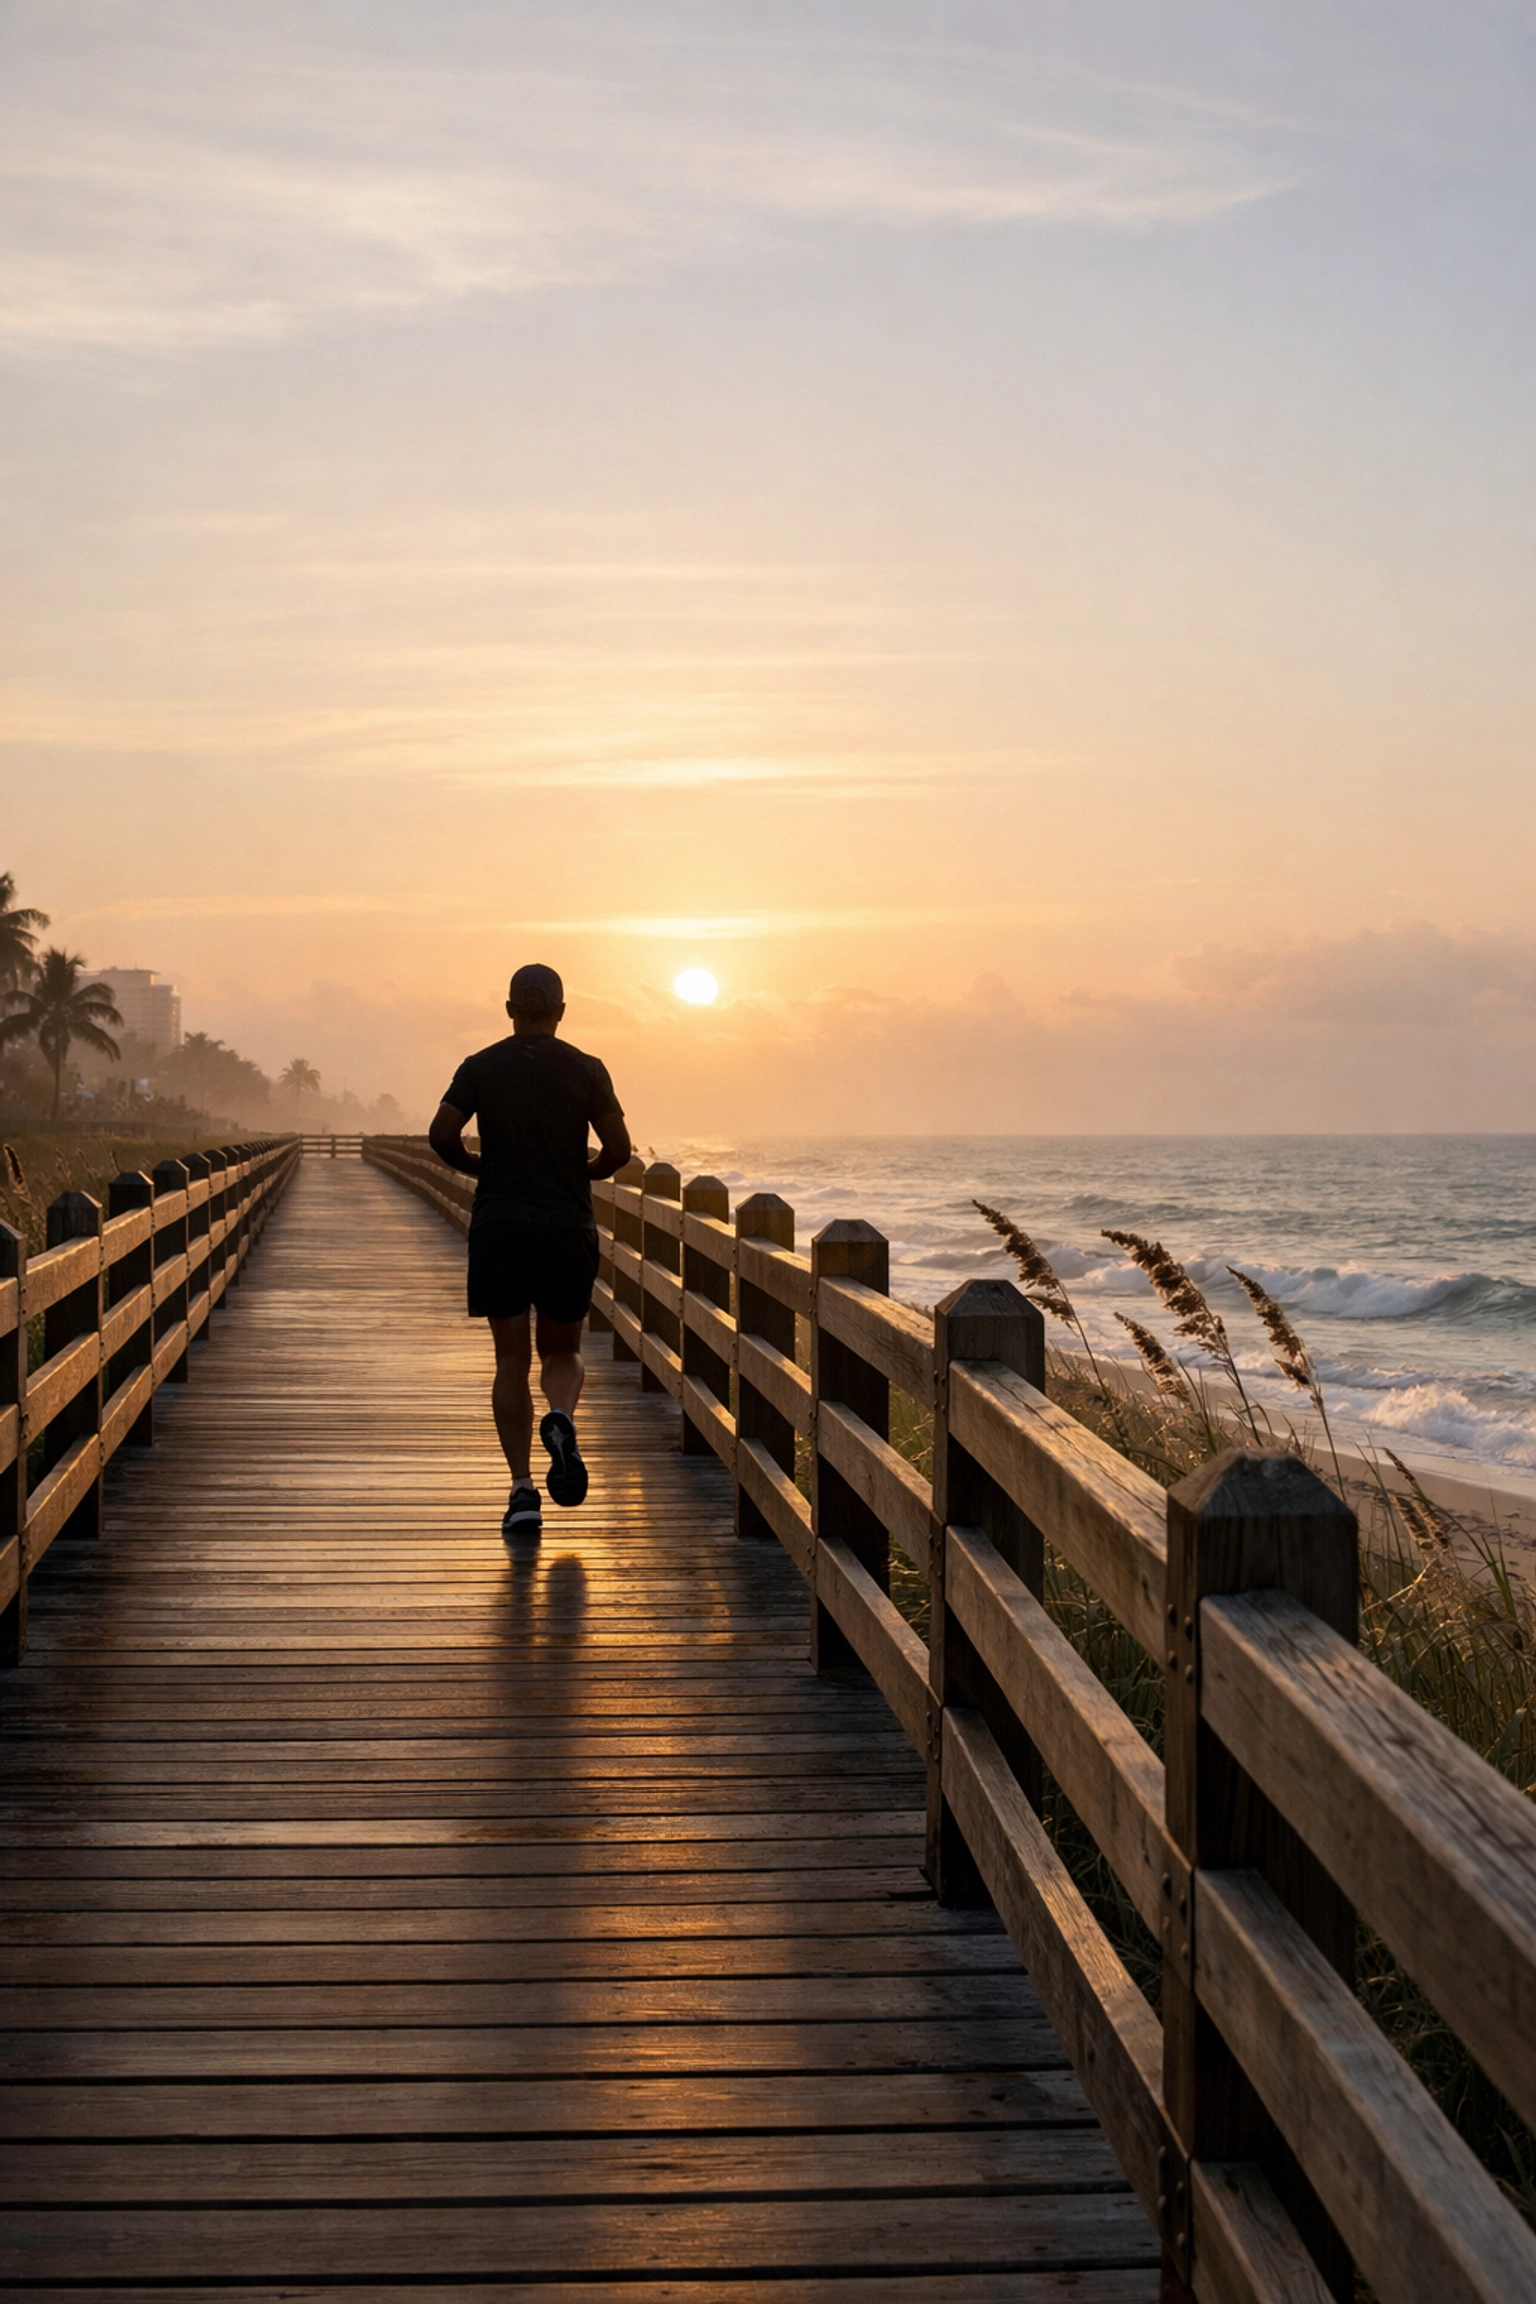
9. Morning Bliss on the Mid-Beach Boardwalk
For a more serene start to your day, head to Mid-Beach. The boardwalk here is elevated, providing a "stepping into" nature feel as you walk between the luxury hotels and the sand dunes. It’s the best place for a morning run or a quiet coffee while watching the sunrise. The lack of crowds ensures you have the space to breathe and appreciate the Atlantic’s vastness.
10. Water Sports at Key Biscayne
If you want to elevate your adrenaline, the calm waters of Biscayne Bay are your playground. From windsurfing to Hobie Cat sailing, the options are extensive. This area provides a "robust" set of activities for those who can't sit still on a towel. The view of the Miami skyline from a boat in the middle of the bay is a perspective every visitor should experience at least once.
Why Your Miami Choice Matters
Choosing the right beach determines the rhythm of your entire day. Whether you seek the "unmatched" luxury of South Beach or the "well-crafted" peace of a state park, Miami delivers. By using our photography guide, you aren't just visiting; you're documenting a world-class environment with precision and style.
Your experience in Miami is a reflection of how you choose to see the world. We encourage you to look past the surface, explore the hidden corners, and capture the light in ways others might miss. For more insights on professional gear and artistic techniques, keep exploring our resources at Edin Chavez Photography.
Hence, with these top 10 activities at your fingertips, you are now equipped to navigate the Miami coastline like a local pro. Pack your camera, grab your sunscreen, and get ready to see the best of what this city has to offer.
Just as a painter faces a blank canvas with a specific story to tell, you approach your camera not just to document reality, but to interpret it. Fine art photography is the bridge between the world as it is and the world as you imagine it to be. It is a discipline where your vision dictates the outcome, and your technical skills serve as the tools to manifest that vision. Whether you are aiming to capture the quiet stillness of a landscape or the haunting beauty of a portrait, mastering this craft requires a blend of intentionality and technical precision.
Many photographers struggle to make the jump from "good photos" to "fine art." The difference lies in the narrative. In the world of fine art photography, you are the director, the author, and the artist. This guide is designed to empower you with the technical foundations and creative editing workflows needed to elevate your work to a professional standard. By the time you finish reading, you’ll have a clear roadmap to creating images that don't just sit on a hard drive but belong on a gallery wall. For more inspiration on how to push your creative boundaries, you can always explore my latest work at Edin Chavez Photography.
Defining Your Artistic Vision
Before you even touch your shutter button, you must define what you want to say. Fine art is distinguished by its thematic consistency. Unlike commercial or editorial photography, where the goal is often to sell a product or tell a news story, fine art is about your personal perspective. You are looking for subjects that stir something inside you, whether that is a feeling of nostalgia, isolation, or wonder.
When you develop a theme, you provide your audience with a cohesive experience. This consistency is what separates a hobbyist from a professional artist. You might choose to explore environmental issues, the passage of time, or the concept of ethereal photography, where the subjects feel like they belong to a dream world rather than our physical reality. If you are looking for examples of how to build a portfolio with a strong narrative, check out the resources available on our photography blog.
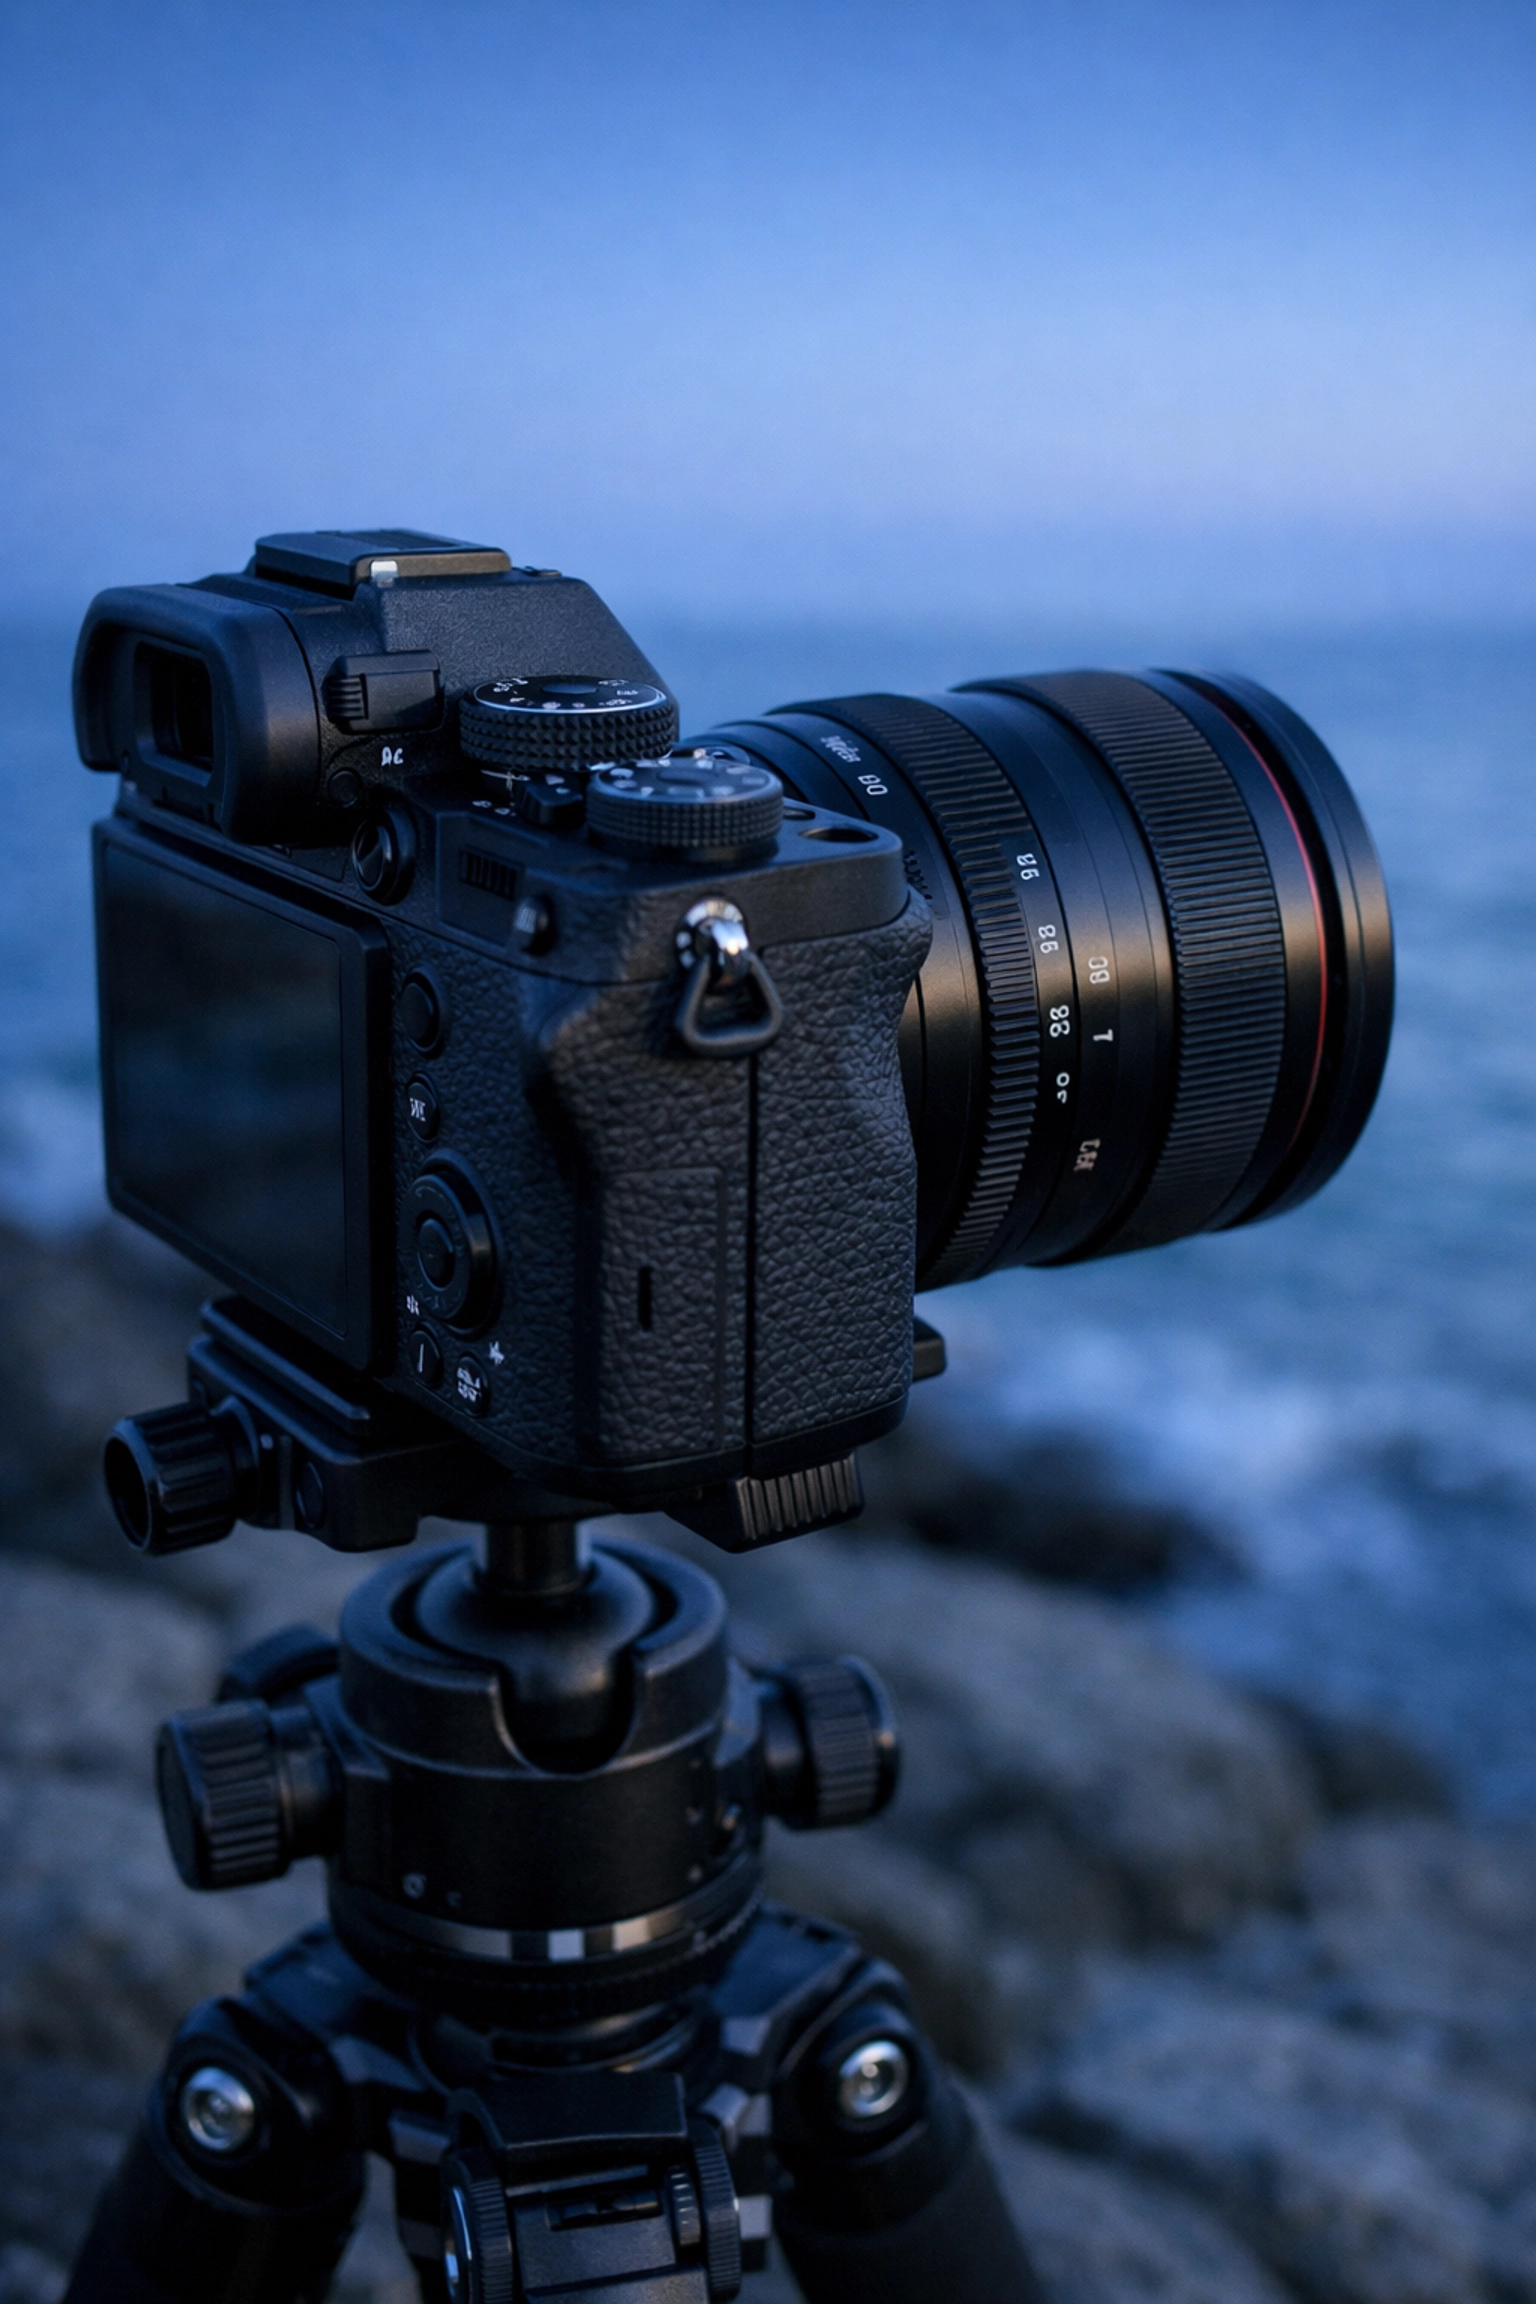
The Technical Foundation: Gear and Settings
While your vision is the soul of the image, your technical skill is the body that carries it. To succeed in fine art photography, you need a deep understanding of how your equipment manipulates light and time. You aren't just letting the camera "guess" the exposure; you are making deliberate choices to achieve a specific look.
Essential Equipment for Fine Art
Your gear should never limit your creativity. High-resolution mirrorless or DSLR cameras are the standard because they allow for large-scale printing without losing detail. When your work is eventually showcased for collectors at Edin Fine Art, every pixel counts.
| Equipment |
Why You Need It |
| High-Resolution Body |
Ensures your images retain incredible detail for large-format gallery prints. |
| Prime Lenses |
Offers unmatched sharpness and wider apertures for superior depth-of-field control. |
| Sturdy Tripod |
Essential for long exposures and achieving the sharpest possible focus. |
| Neutral Density (ND) Filters |
Allows you to use slow shutter speeds in broad daylight to create ethereal motion. |
| Remote Shutter Release |
Eliminates camera shake, which is vital for high-quality fine art captures. |
Mastering Camera Settings
To create ethereal photography, you must move beyond "Auto" mode. You need to be in total control of your exposure triangle:
- Aperture: Use wide apertures (f/1.4 to f/2.8) to isolate your subject and create a creamy, out-of-focus background. Conversely, use narrow apertures (f/11 to f/16) when you need every detail from the foreground to the horizon to be tack-sharp.
- Shutter Speed: This is your primary tool for capturing time. Slow shutter speeds (1/2 second to several minutes) transform moving water into mist and clouds into soft streaks, providing that "otherworldly" feel.
- ISO: Keep your ISO as low as possible (usually ISO 100) to ensure the cleanest image with the least amount of digital noise.
Advanced Techniques for Ethereal Photography
If you want your images to stand out, you need to master techniques that the average person can't replicate with a smartphone. Ethereal photography focuses on creating a sense of lightness, mystery, and beauty that feels almost supernatural.
Long Exposure and Motion
Long exposure is the secret sauce for fine art landscapes. By using a sturdy tripod and an ND filter, you can extend your shutter speed to blur the movement of the world. This technique simplifies the composition, removing the "clutter" of choppy waves or busy crowds, leaving behind a serene, painterly image. This process ensures your work has a signature look that is both calm and captivating.
Multiple Exposures and Focus Stacking
Sometimes, a single frame isn't enough to capture your vision. Focus stacking involves taking multiple shots at different focal points and merging them in post-processing to achieve a depth of field that is physically impossible to capture in one shot. Similarly, in-camera multiple exposures allow you to layer different textures and subjects, creating abstract art directly on your sensor.
Dreamy Photography Editing: The Final Touch
The capture is only half the battle. In fine art, the "darkroom" (or Lightroom and Photoshop) is where you breathe life into your vision. Dreamy photography editing is a specific style that emphasizes soft highlights, muted colors, and a glow that makes the viewer feel like they are stepping into a dream.
The Orton Effect
One of the most popular techniques in dreamy photography editing is the Orton Effect. This involves layering a sharp version of an image with a slightly blurred, overexposed version. The result is a photograph that maintains its detail but possesses a beautiful, radiant glow. It’s perfect for forest scenes, flowers, or soft-lit portraits.
Color Grading and Luminosity Masks
Your color palette should be intentional. Fine art photographers often use color grading to evoke specific emotions. Warm, golden tones suggest comfort and nostalgia, while cool, desaturated blues might evoke solitude or mystery. By using luminosity masks, you can target specific brightness levels in your image, ensuring that your highlights stay soft and your shadows remain deep and rich without losing detail.
| Editing Technique |
Visual Impact |
| Orton Effect |
Adds a soft, romantic glow and enhances the painterly feel. |
| Luminosity Masking |
Provides precise control over contrast, ensuring smooth transitions in light. |
| Split Toning |
Adds different colors to highlights and shadows for a stylized, artistic look. |
| Dodge and Burn |
Manually sculpts light and shadow to draw the viewer’s eye to your subject. |

Building Your Signature Style and Portfolio
Consistency is your most valuable asset. When a collector or a gallery owner looks at your work, they should be able to recognize your "hand" in the images. This doesn't mean every photo looks the same, but it does mean they share a common thread: whether it's your use of light, your preferred color palette, or your focus on ethereal photography.
As you build your portfolio, be your own harshest critic. Only include work that aligns with your ultimate vision. It is better to have five world-class images than fifty mediocre ones. If you're looking for guidance on how to curate your work or find the best locations to shoot, I've shared plenty of tips on my blog.

The Path to Professional Success
Success in fine art photography isn't an overnight achievement; it’s a journey of constant refinement. By mastering your technical skills, leaning into dreamy photography editing, and staying true to your unique vision, you elevate your work from a simple hobby to a profound art form.
You have the tools and the knowledge: now it’s time to head out and create. Remember that every master was once a beginner who refused to stop learning. Whether you are capturing the vibrant streets of Miami or the quiet isolation of a mountain peak, keep your vision at the forefront of everything you do.
With these considerations, you are well-equipped to dominate the fine art space. Your journey is just beginning, and the world is waiting to see through your eyes. For continued education and to see how I apply these principles in the field, visit Edin Chavez Photography and let's keep pushing the boundaries of what's possible with a camera.


