
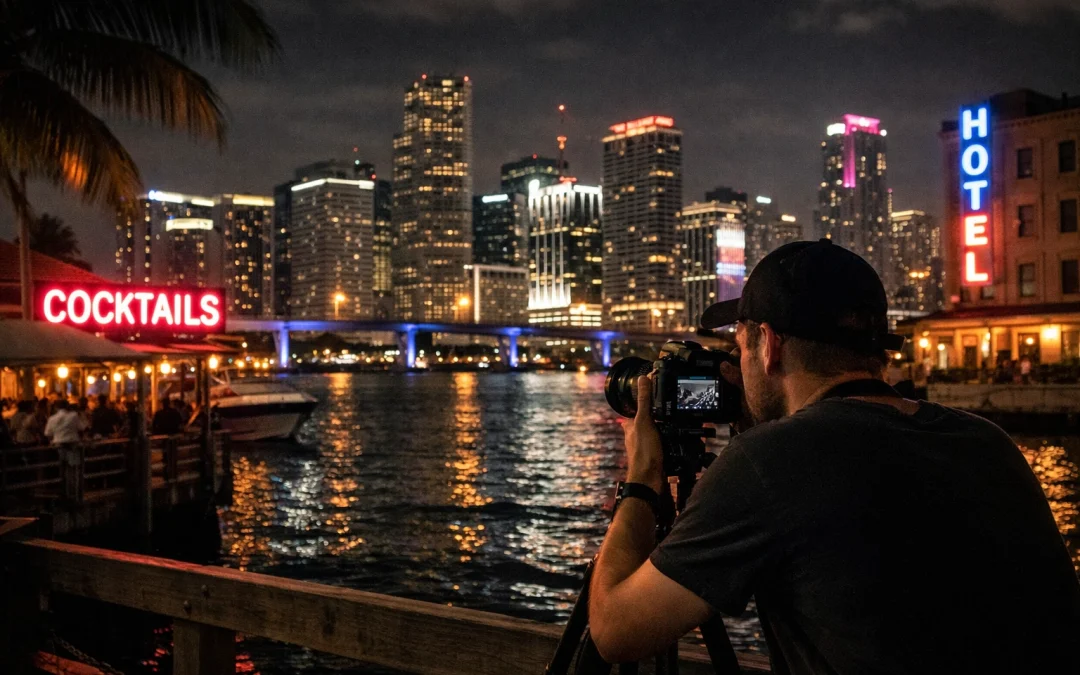
As the sun dips below the Everglades and the humidity begins to soften, Miami undergoes a radical transformation. The city isn’t just a beach destination; it is a high-contrast, neon-soaked playground that offers some of the most dramatic architectural photography opportunities in the world. If you have ever struggled to capture the vibrant pulse of the Magic City after the lights come on, you are in the right place.
Mastering Miami night photography requires more than just a camera and a dream. It demands an understanding of long exposure, light balancing, and knowing exactly where to stand when the skyline ignites. Whether you are aiming for the perfect reflected glow of the downtown skyline or the kitschy brilliance of South Beach neon, this guide will elevate your technical skills and ensure your portfolio stands out from the crowd.
The Essential Kit for Your Nighttime Expedition
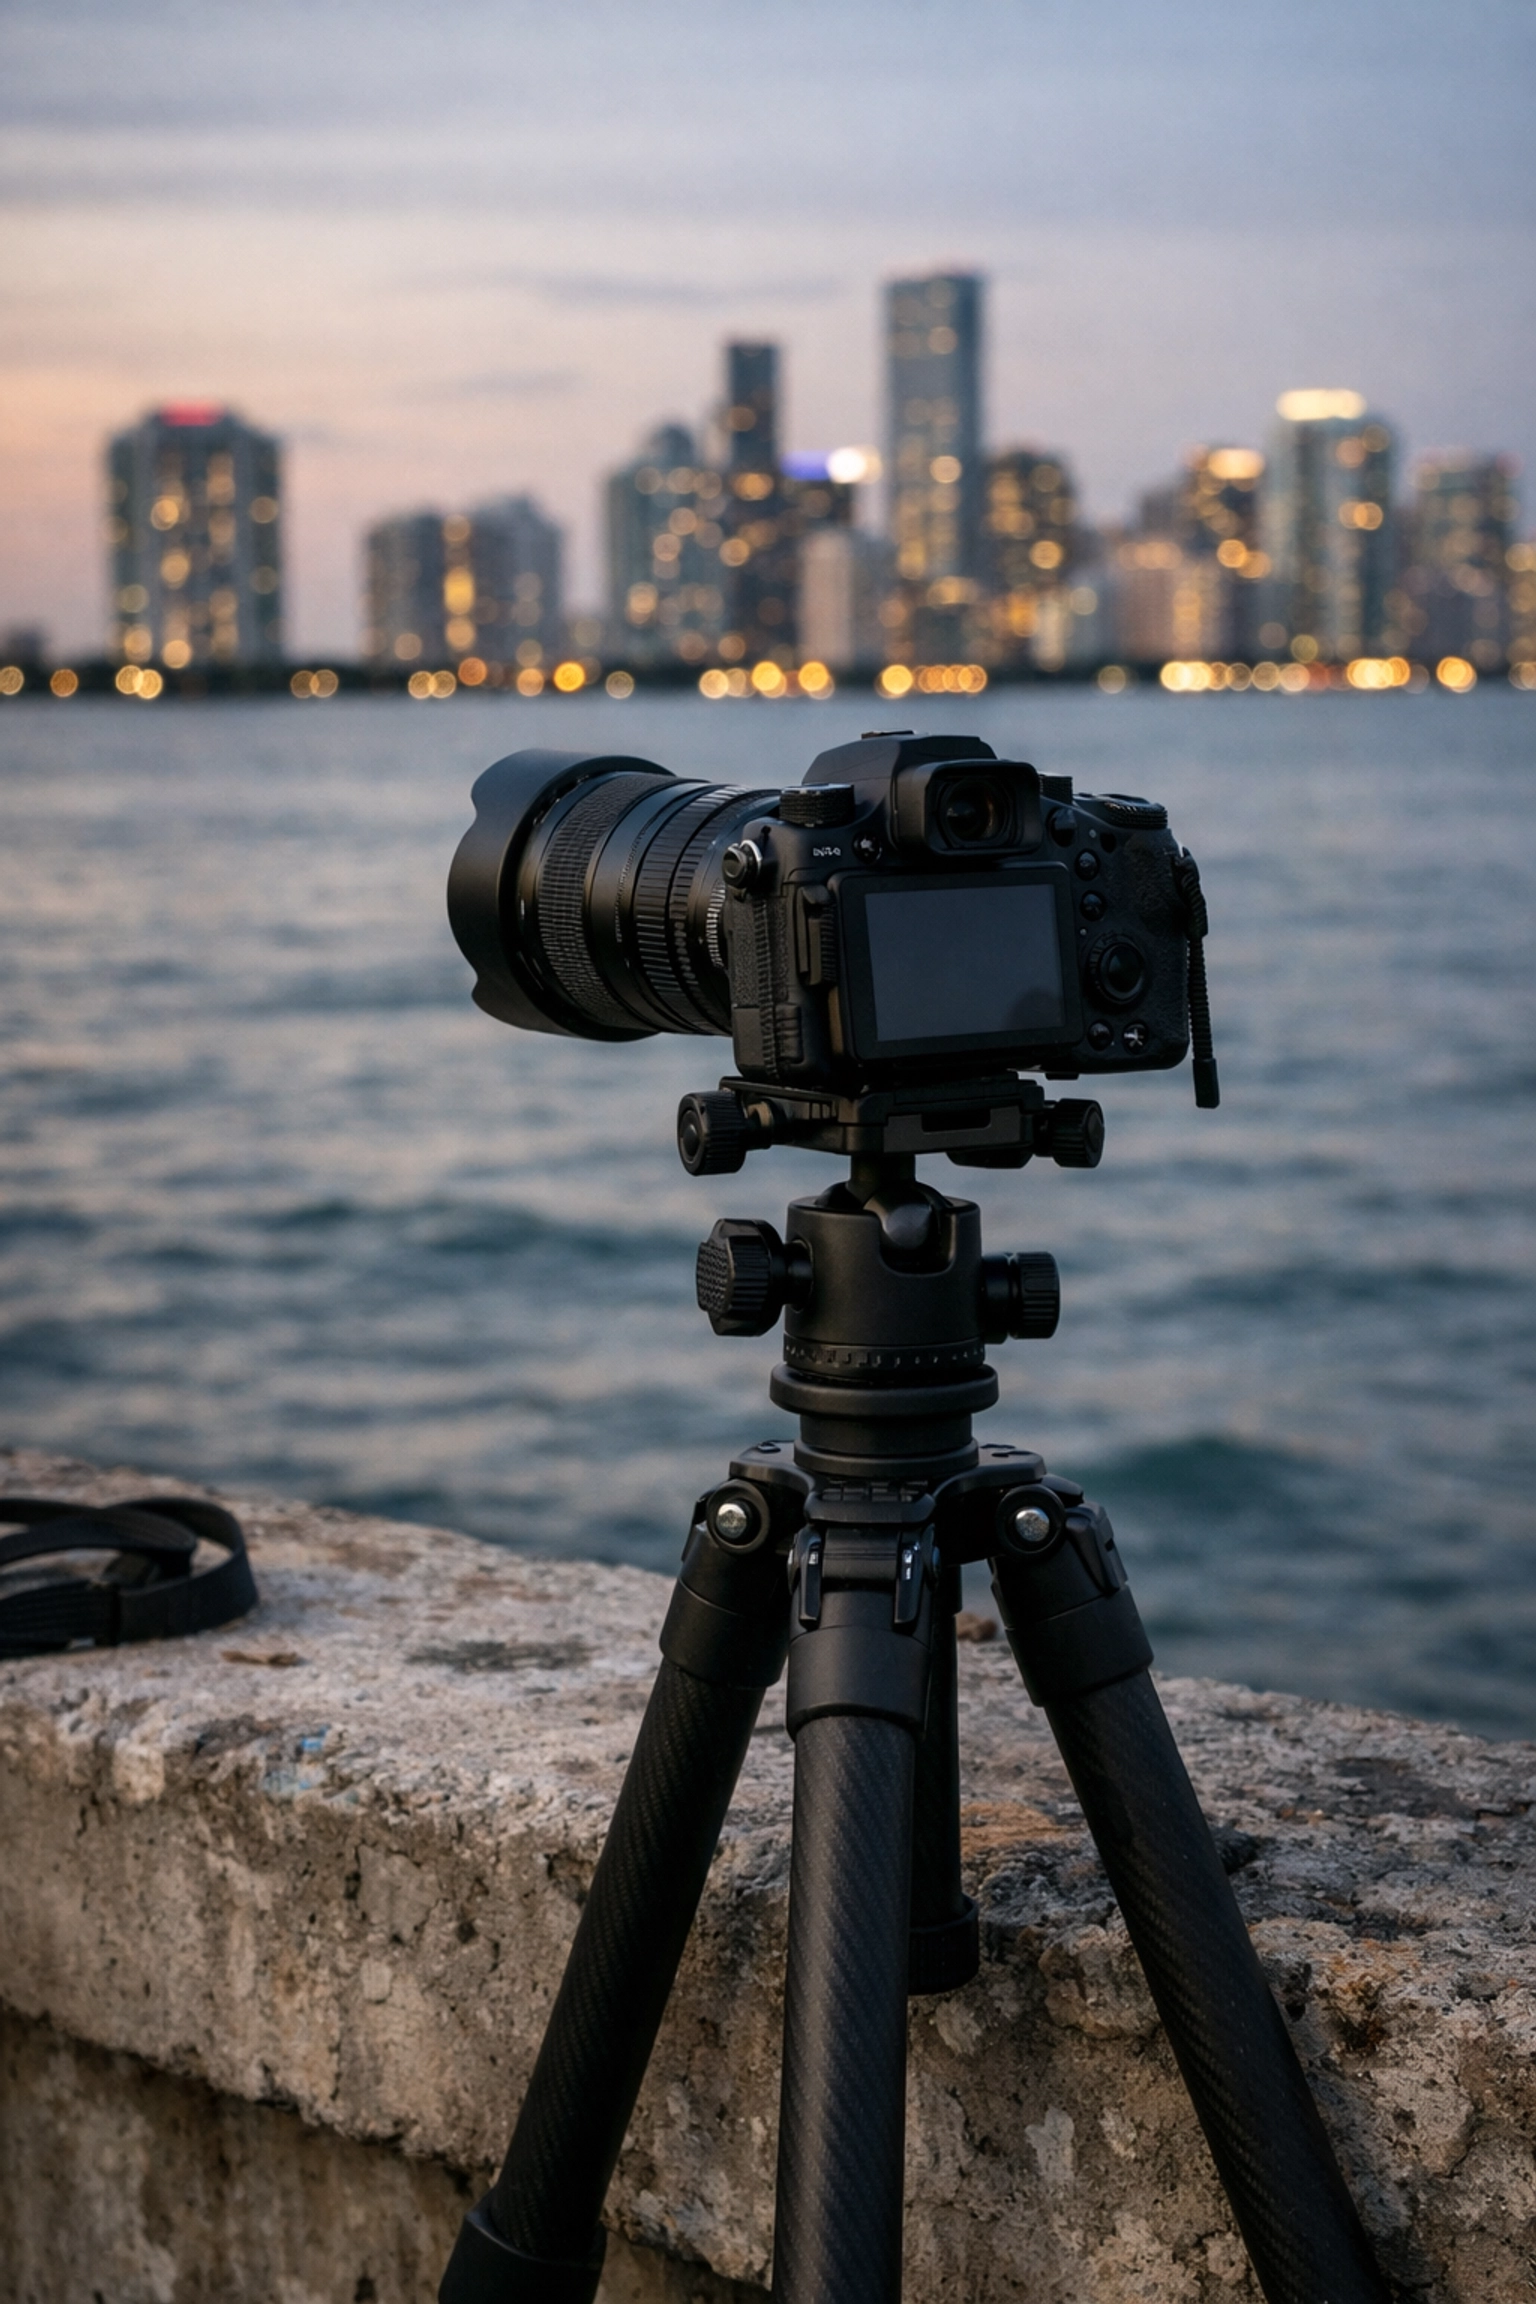
Before you head out to the MacArthur Causeway or the neon corridors of Ocean Drive, you must ensure your gear is up to the task. Night photography is unforgiving; any shortcut you take in your setup will be magnified in your final image. By investing in the right tools, you ensure that your long exposures remain tack-sharp and your colors stay true to the vibrant Miami atmosphere.
The Foundation: Stability is Non-Negotiable
You cannot shoot professional-grade night photography without a sturdy tripod. When you are dealing with exposures ranging from 5 to 30 seconds, even the slightest vibration from a passing car or a gust of wind off the bay will ruin your shot. For the best results, use a carbon fiber tripod that offers a balance of weight and stability.
Glass and Filters
While you might be tempted to bring every lens in your bag, a 24-70mm f/2.8 is your workhorse for Miami’s skyline. It allows you to capture the sweeping breadth of the city while giving you enough reach to compress the buildings. If you want to focus on architectural details or the cruise ships at PortMiami, a 70-200mm is indispensable.
Interestingly, a circular polarizer remains useful even at night. It helps you manage the reflections on the water of Biscayne Bay and cuts through the glare on the glass facades of the Brickell skyscrapers.
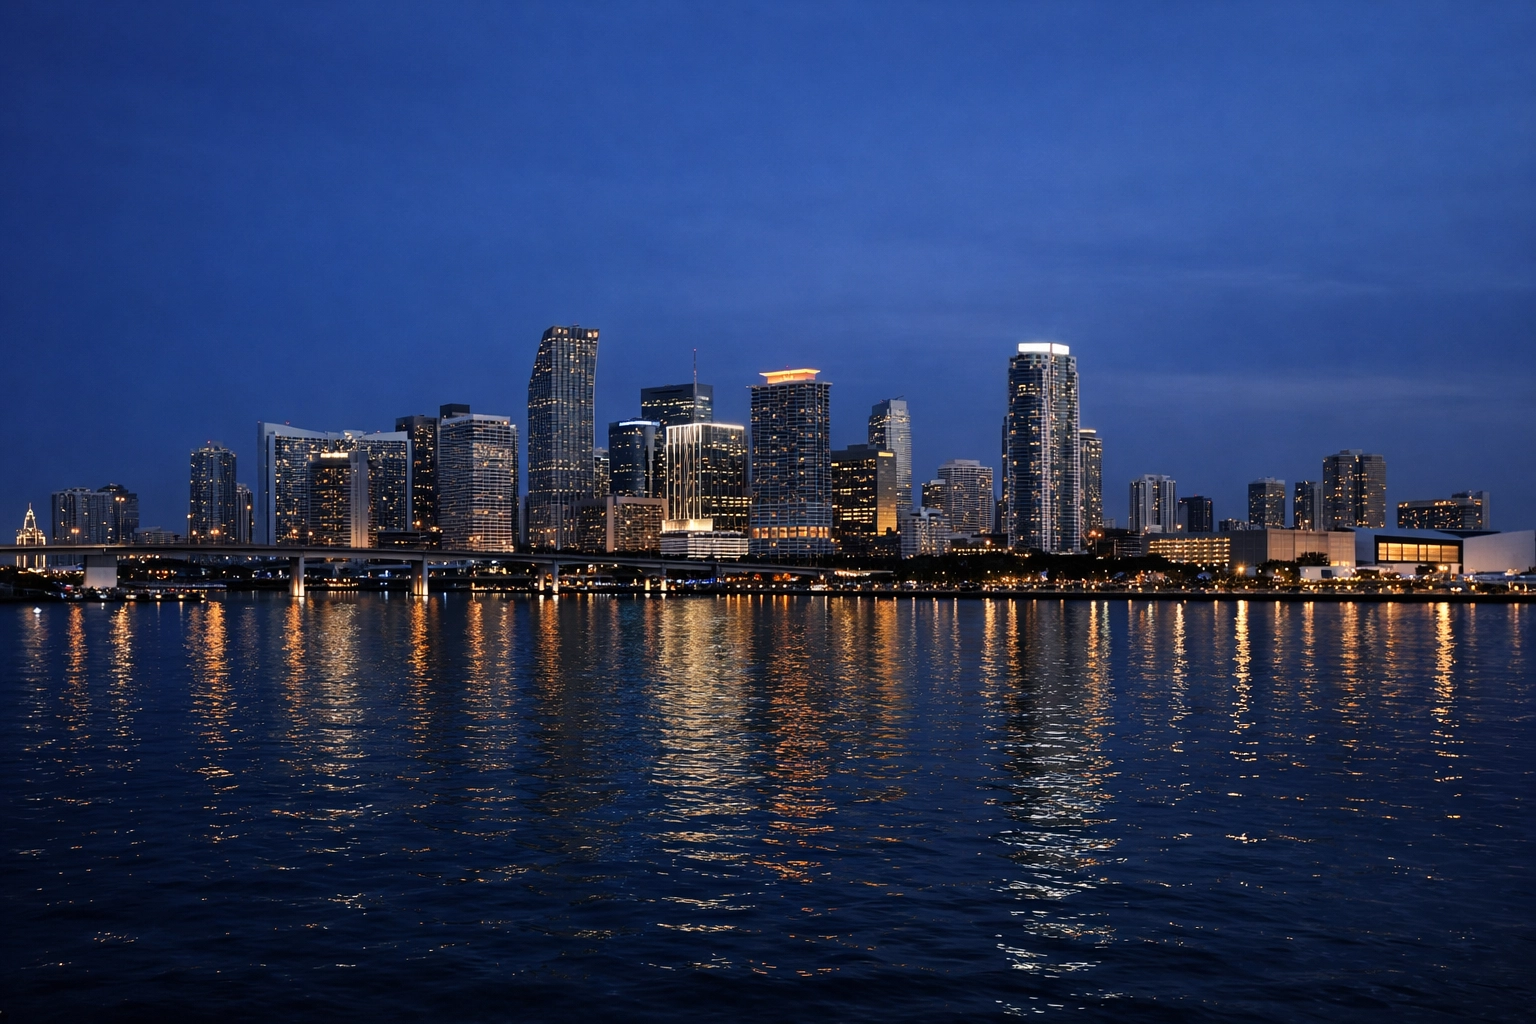
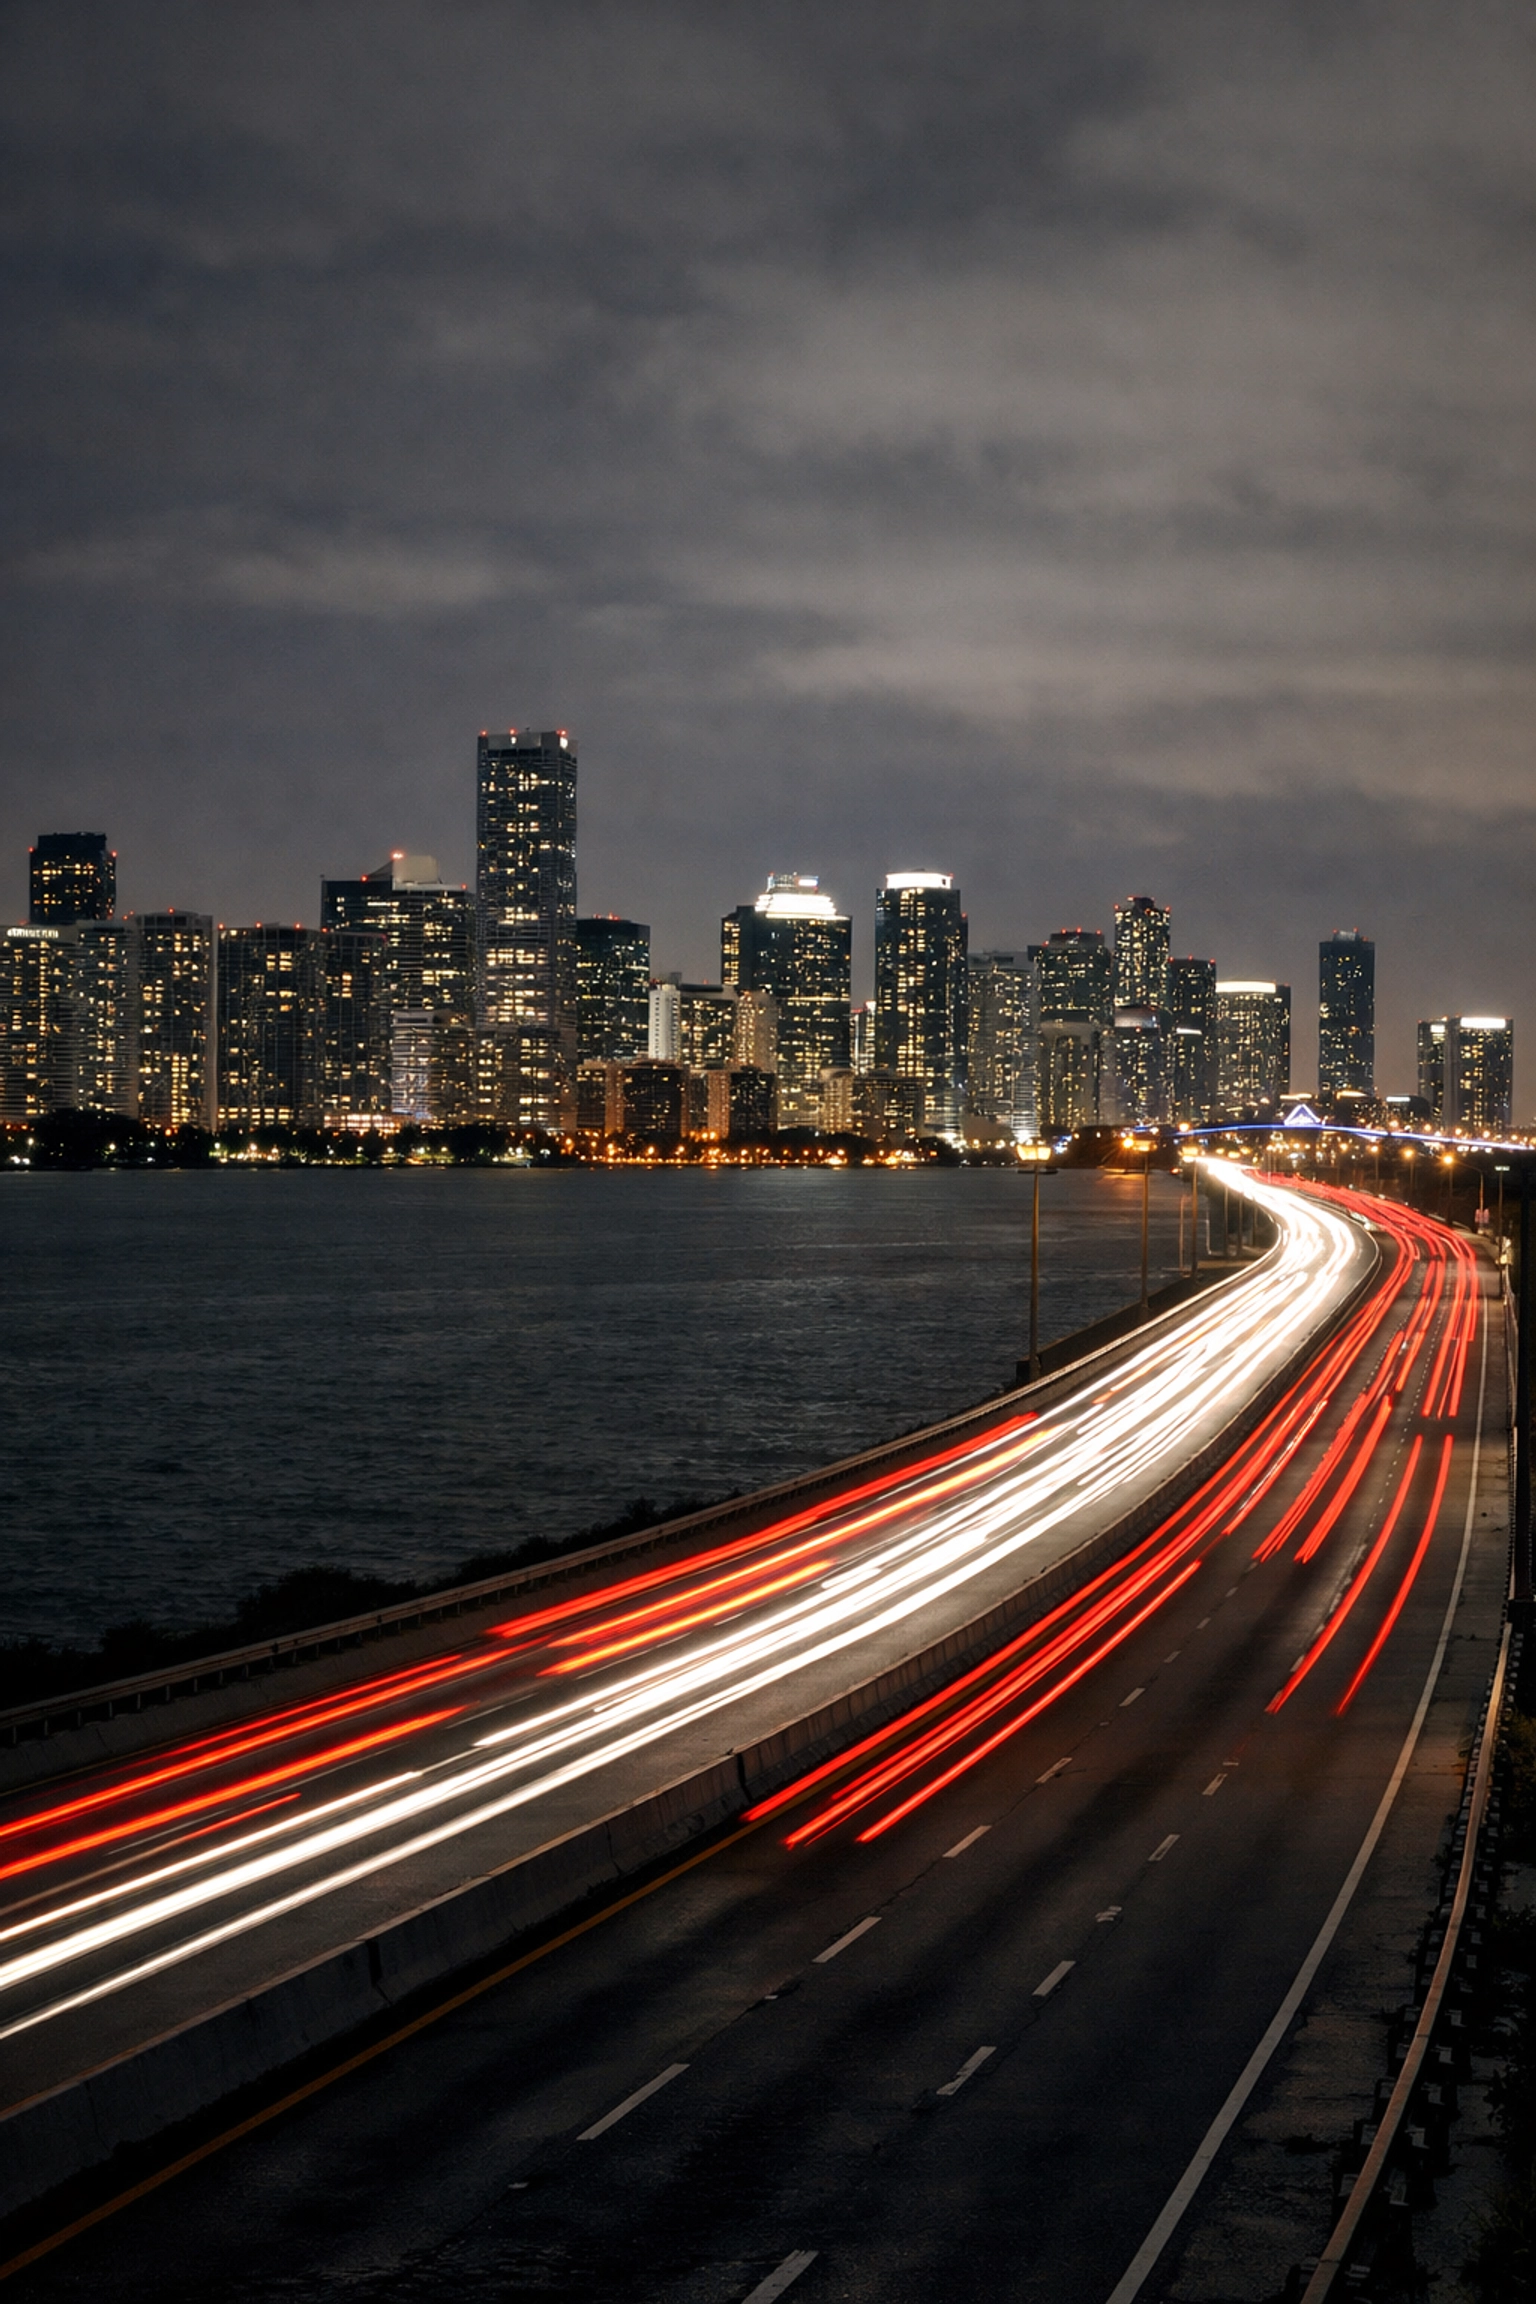
The MacArthur Causeway: The Premier Vantage Point
If you only have one night to shoot in Miami, you head to the MacArthur Causeway. This is the definitive spot for capturing the iconic "postcard" view of the downtown skyline. Just as the blue hour begins, the buildings start to glow, and the water of the bay acts as a giant mirror for the city lights.
How to Get the Shot
To reach the best vantage point, take the 395 bridge heading east toward Miami Beach. You will want to exit at the Miami Children’s Museum and loop under the bridge. There is a manmade island midway out on the causeway that offers an unobstructed view of the skyline.
When you arrive, position your tripod to include the moving traffic on the causeway in your foreground. By using a long exposure, you can turn those headlights and taillights into streaks of white and red gold, providing a dynamic leading line that propels the viewer’s eye toward the towering skyline. This technique adds a sense of motion and energy that static shots often lack.
| Scenario | Recommended Lens | Key Technique |
|---|---|---|
| Downtown Skyline | 24-70mm | Long exposure for water smoothing |
| Light Trails | 16-35mm | Wide-angle to capture traffic flow |
| PortMiami Ships | 70-200mm | Compression to stack the ships |
| Neon Signage | 35mm or 50mm | Metering for highlights to prevent clipping |
Mastering the Technicals: Exposure and Timing
Your success in Miami night photography depends heavily on your timing. There is a narrow window, roughly 45 minutes long, starting just after sunset. This is the "Blue Hour," where the sky retains a deep cobalt hue that perfectly complements the warm artificial lights of the city. Once the sky turns pitch black, the contrast often becomes too high for your sensor to handle effectively without blowing out the highlights.
Dialing in Your Settings
To achieve that professional, clean look, you must keep your ISO as low as possible (ISO 100 or 64 aperture-preferred). This minimizes noise in the shadows. Set your aperture to the "sweet spot" of your lens, typically between f/8 and f/11. This ensures edge-to-edge sharpness and creates beautiful starburst effects on the streetlights.
Use a remote shutter release or your camera’s built-in timer to trigger the shot. Even the act of pressing the shutter button with your finger can introduce enough vibration to blur a 10-second exposure.
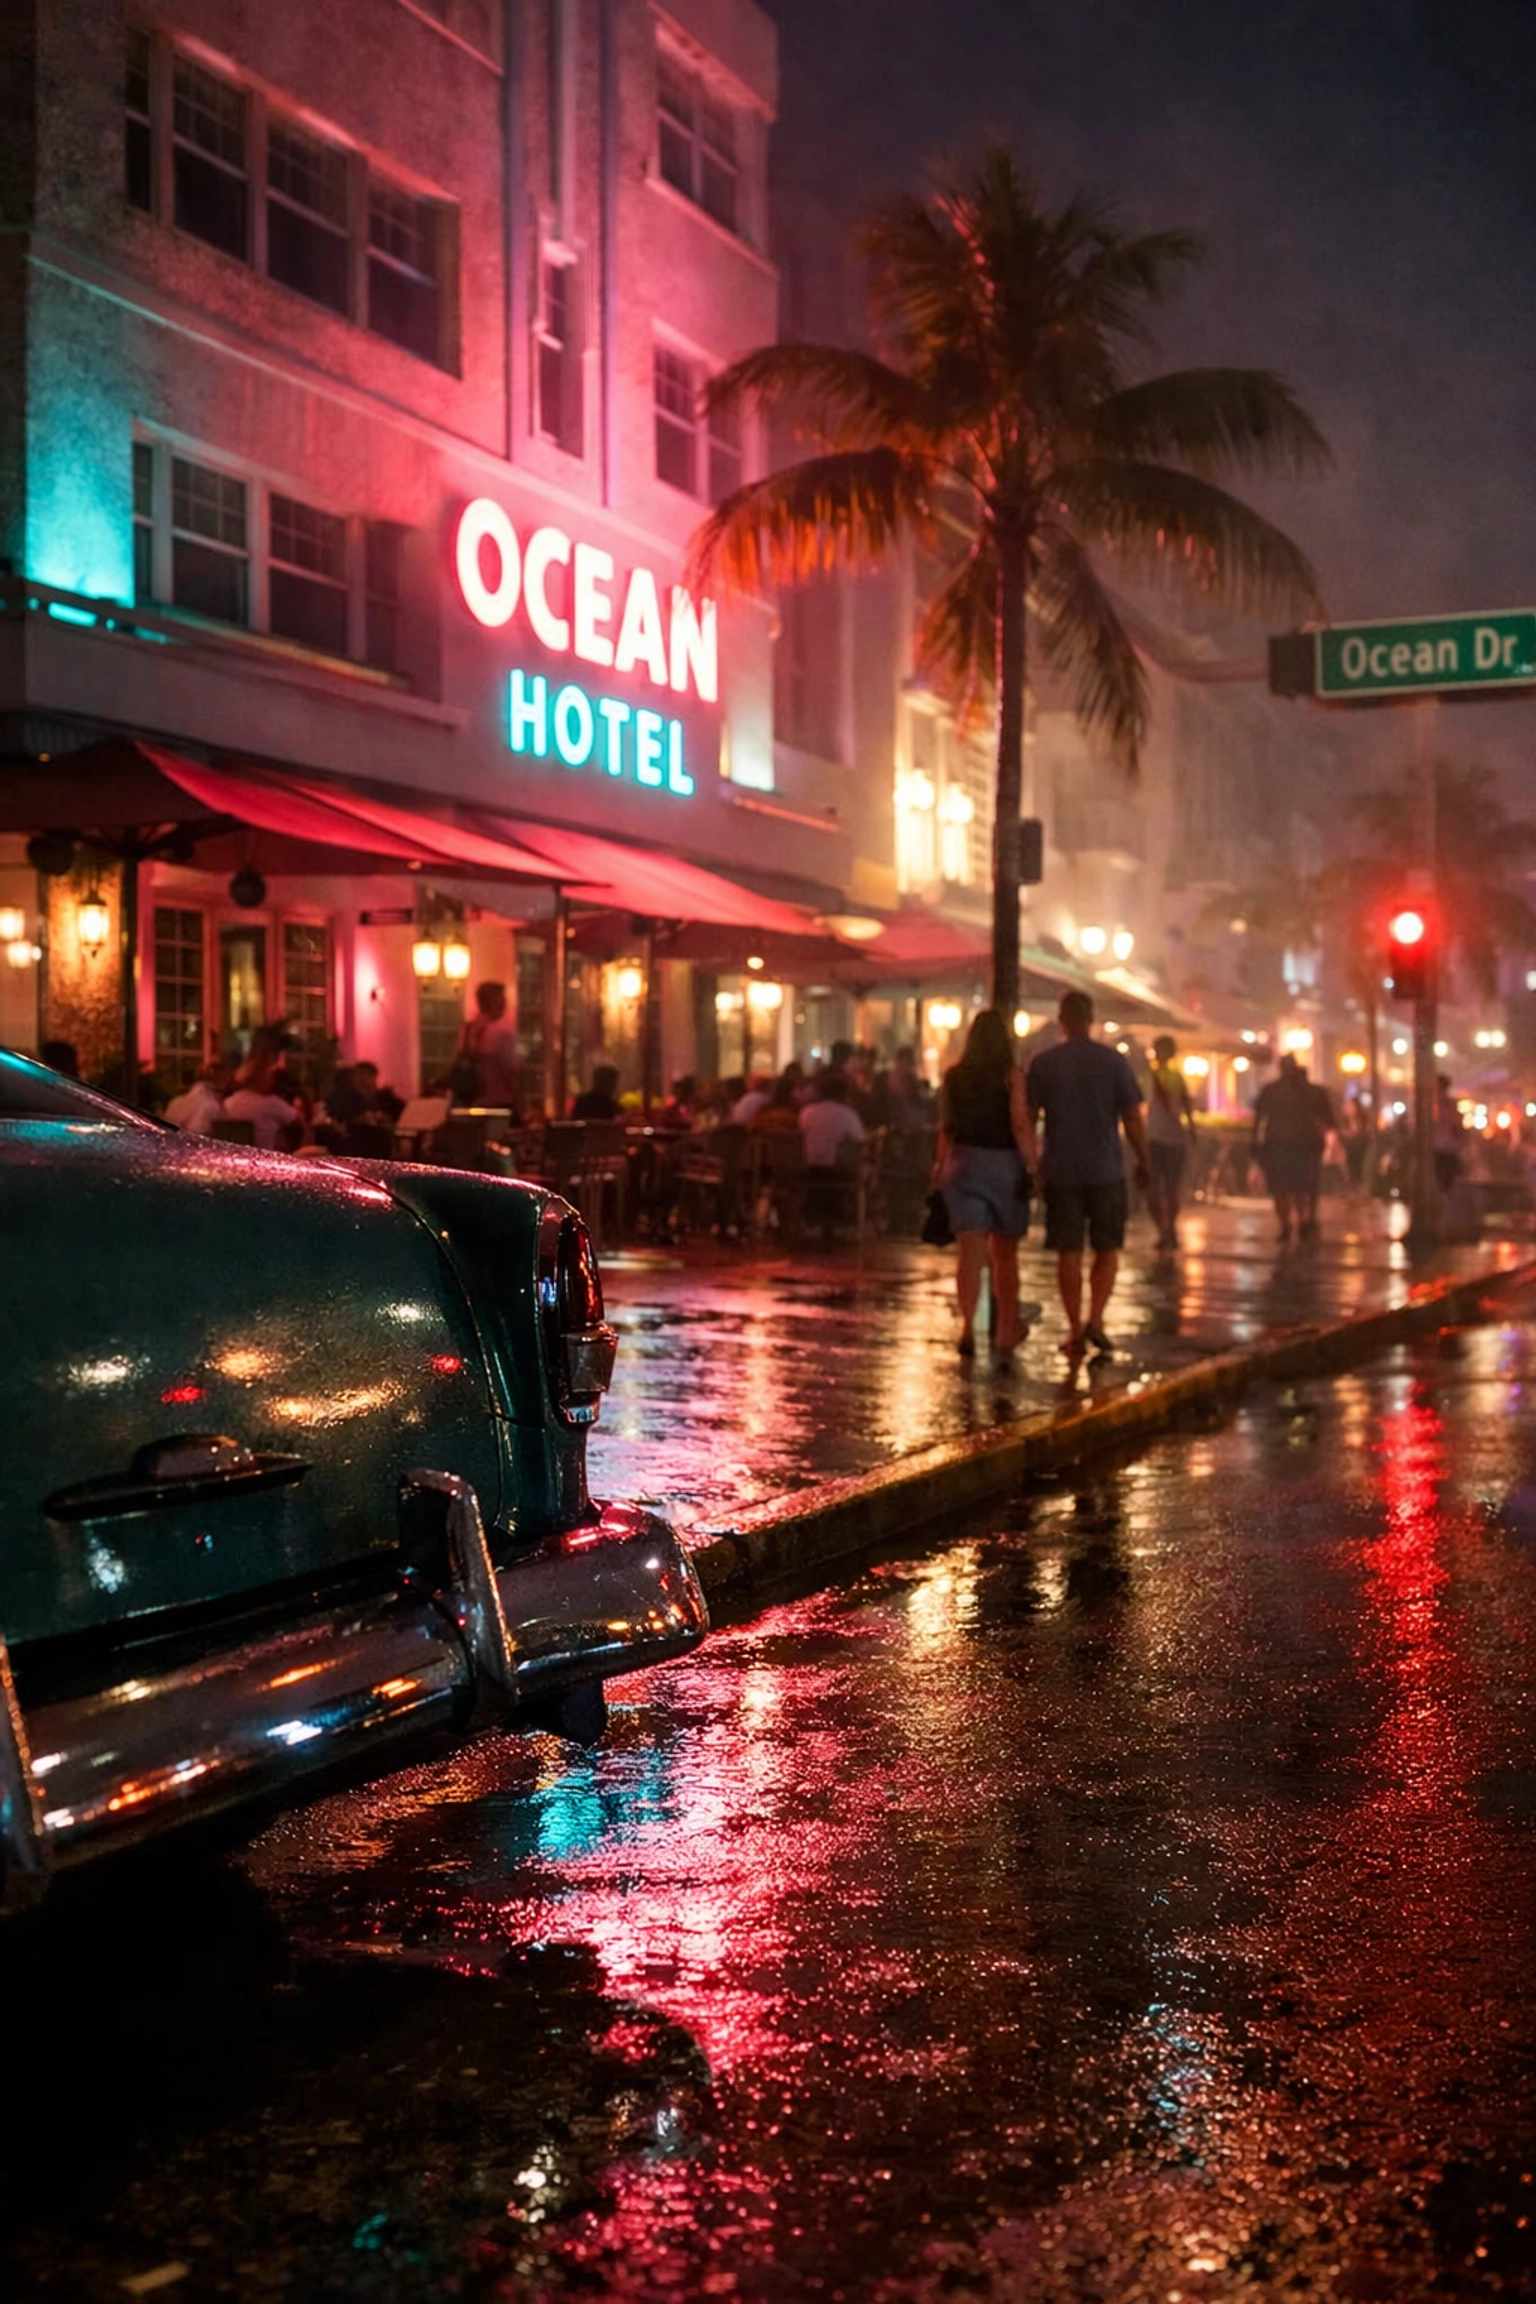
The Neon Soul of South Beach
While the skyline offers scale, the neon lights of South Beach offer character. Walking down Ocean Drive at night is like stepping into a vintage film set. However, neon is notoriously difficult to photograph because of its intensity and the way it affects white balance.
Capturing the Glow
When shooting neon, your biggest enemy is overexposure. If you blow out the highlights of a neon sign, you lose the color, leaving you with a white, featureless glow. You should meter specifically for the brightest part of the neon. This might make the rest of the image look dark on your LCD, but it ensures you retain the rich pinks, blues, and greens that define the Art Deco district.
Don't be afraid to experiment with street photography techniques here. Using a wider aperture (like f/2.8) and a slightly higher ISO allows you to freeze the motion of the crowds and the classic cars cruising the strip, all while bathed in that unmistakable neon light.
Beyond the Obvious: South Pointe and Key Biscayne
To truly round out your Miami night portfolio, you need to look beyond the MacArthur Causeway. South Pointe Park provides a sophisticated perspective where the modern lighthouse and the pier provide foreground interest against the backdrop of the city and the ocean. The way the pier lights interact with the crashing waves creates a surreal, ethereal atmosphere when captured with a 30-second exposure.
Alternatively, head over to Key Biscayne for a "reverse" view of the city. From the Rickenbacker Causeway, you can capture the skyline from a distance, allowing the lights to reflect across a larger expanse of water. This spot is particularly effective during a full moon, which can illuminate the water and add a natural glow to the entire scene.
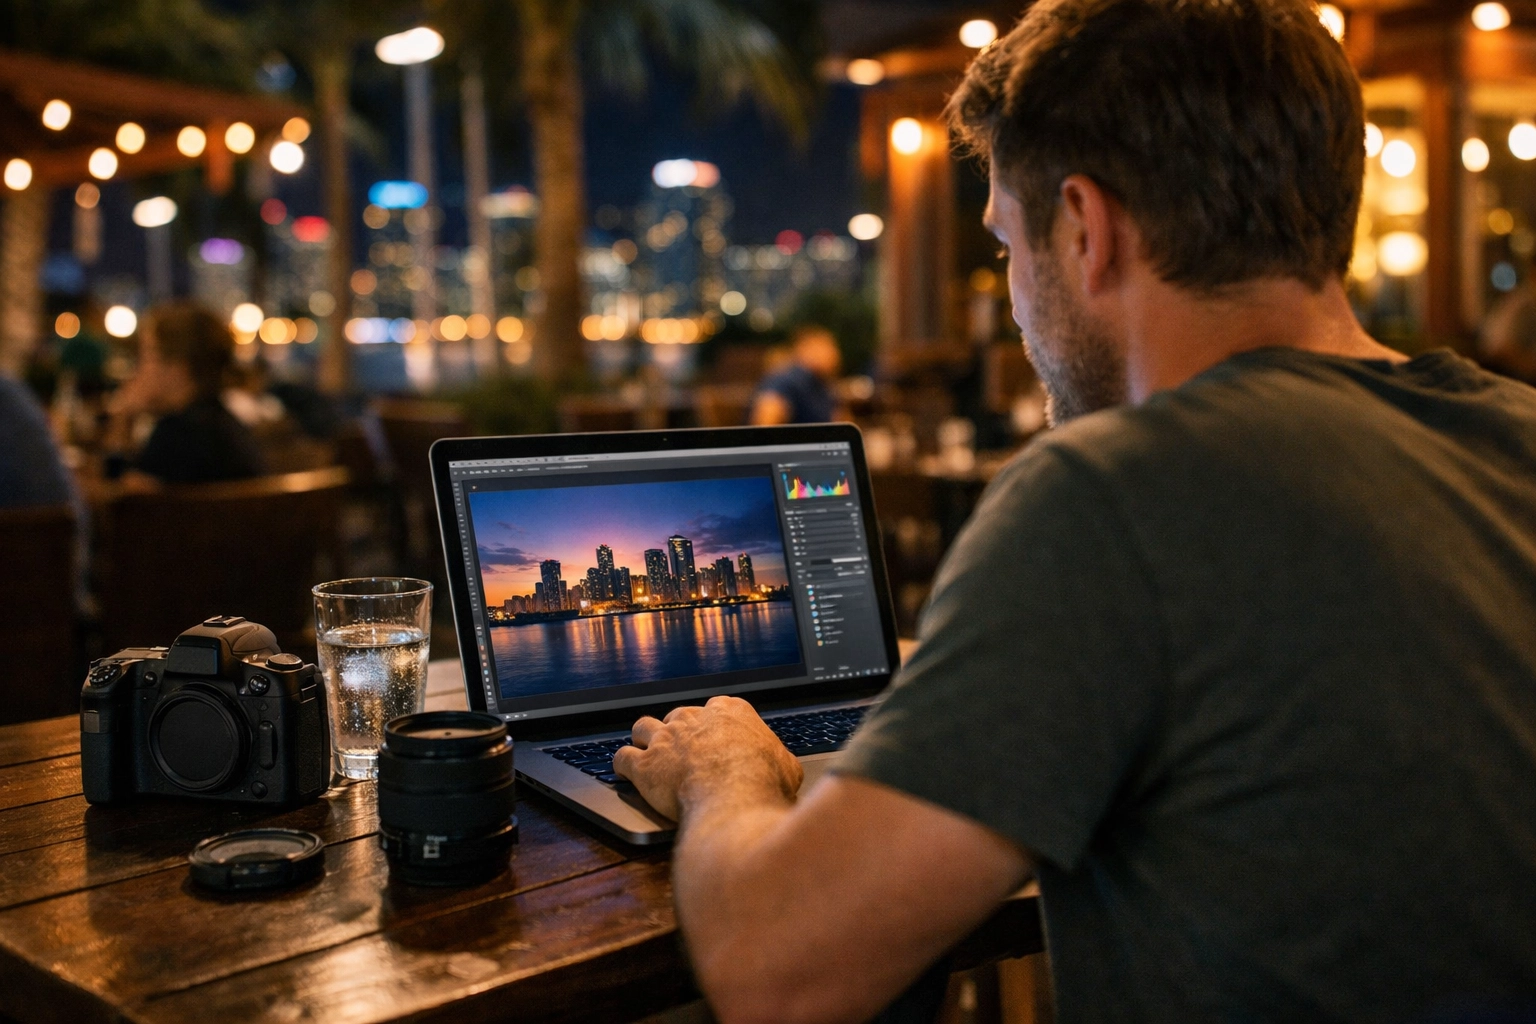
Post-Processing: Bringing the Night to Life
Your work isn't finished once you pack up your tripod. Night photos, especially those from a vibrant city like Miami, require careful post-processing to truly shine. When you bring your RAW files into Lightroom or Capture One, your primary focus should be on White Balance and Shadow Recovery.
The mixture of sodium vapor streetlights, LED building accents, and neon signs creates a chaotic white balance environment. You will likely need to use adjustment brushes to "cool down" certain areas while keeping the warmth in others. This is where dreamy photography editing becomes your unfair advantage: you preserve highlight color in the neon, smooth the sky without turning it into plastic, and keep the shadows rich instead of crunchy. If you want a consistent, gallery-ready starting point for that look, the Ultimate Lightroom Preset Collection gives you a clean baseline for night color, contrast, and highlight control so your Miami files stay punchy without getting crunchy. Enhancing the "Clarity" and "Dehaze" sliders can help cut through any tropical humidity that might have softened your shots.
If you are looking to take your photography to the next level, I highly recommend checking out my Miami Photography Guide or booking a hands-on Private Miami Photography Tour when you want real-time coaching on location. If you want the full scouting cheat-code, you’ll also love my 2026 roundup of the best locations in this Miami photography spots guide—it stacks perfectly with this after-dark playbook. There is no substitute for being on the ground with a pro who knows exactly when the light is going to hit the buildings just right.
Elevating Your Fine Art Vision
For those of you looking to create museum-quality prints, night photography offers an unparalleled opportunity. The deep blacks and vibrant pops of color in a well-executed Miami skyline shot make for incredible fine art photography pieces. If you’re building a collection (or you want your living room to stop looking like a default Zoom background), my limited edition photography prints deliver that gallery-grade impact with provenance and craftsmanship you can actually feel. If you're a collector looking for the perfect statement piece for your home or office, you can explore my latest limited edition night captures at Edin Fine Art.
Miami is a city that never truly sleeps, and as a photographer, neither should you. By mastering these long exposure techniques and scouting these iconic locations, you transition from someone who just takes pictures to someone who captures the soul of the city.
Summary Checklist for Your Next Shoot:
- Arrive Early: Be on location 30 minutes before sunset to scout your composition.
- Check Your Tripod: Ensure all legs are locked and you are on stable ground.
- Shoot RAW: You need the dynamic range to handle the bright lights and dark shadows.
- Watch the Histogram: Don't let those neon highlights clip into pure white.
- Be Patient: Sometimes you have to wait for the right car or boat to pass to get the perfect light trail.
With these tools and techniques, your next night in Miami will be your most productive yet. For more tips on mastering the craft and discovering the best spots around the world, keep following Edin Studios and check back regularly on our blog. For more insights on how to elevate your work, explore our site (linking to https://blog.edinchavez.com/) for a deep dive into hundreds of tutorials and guides.
Hence, by integrating these technical protocols with your unique creative eye, you ensure that your Miami night photography isn't just a record of a place, but a powerful, artistic statement. Now, grab your gear and get out there( the neon is waiting for you.)


