
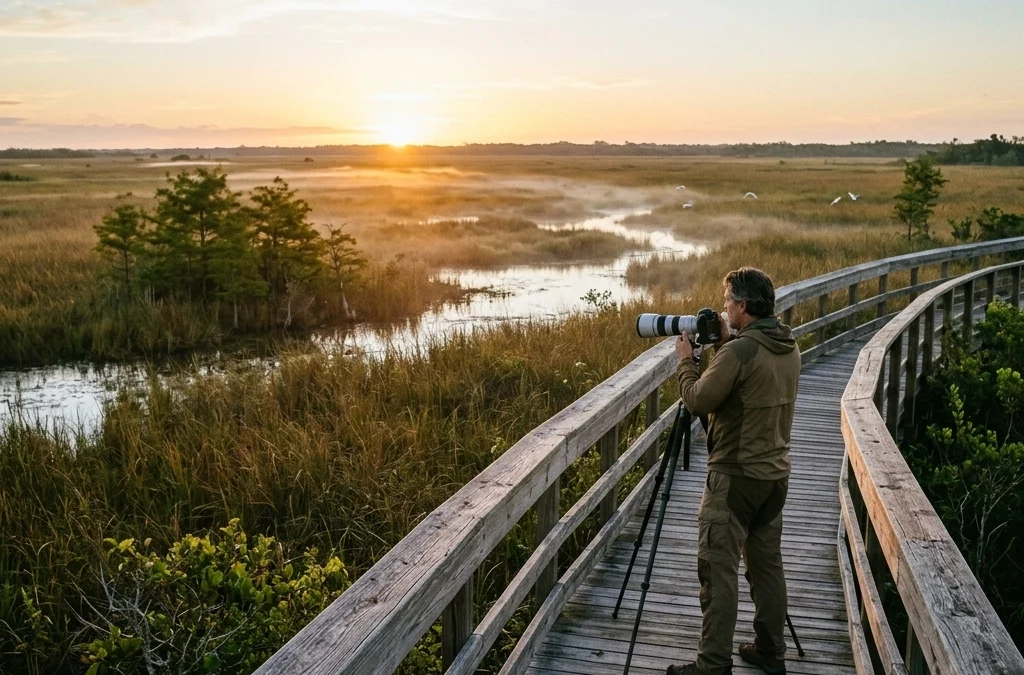
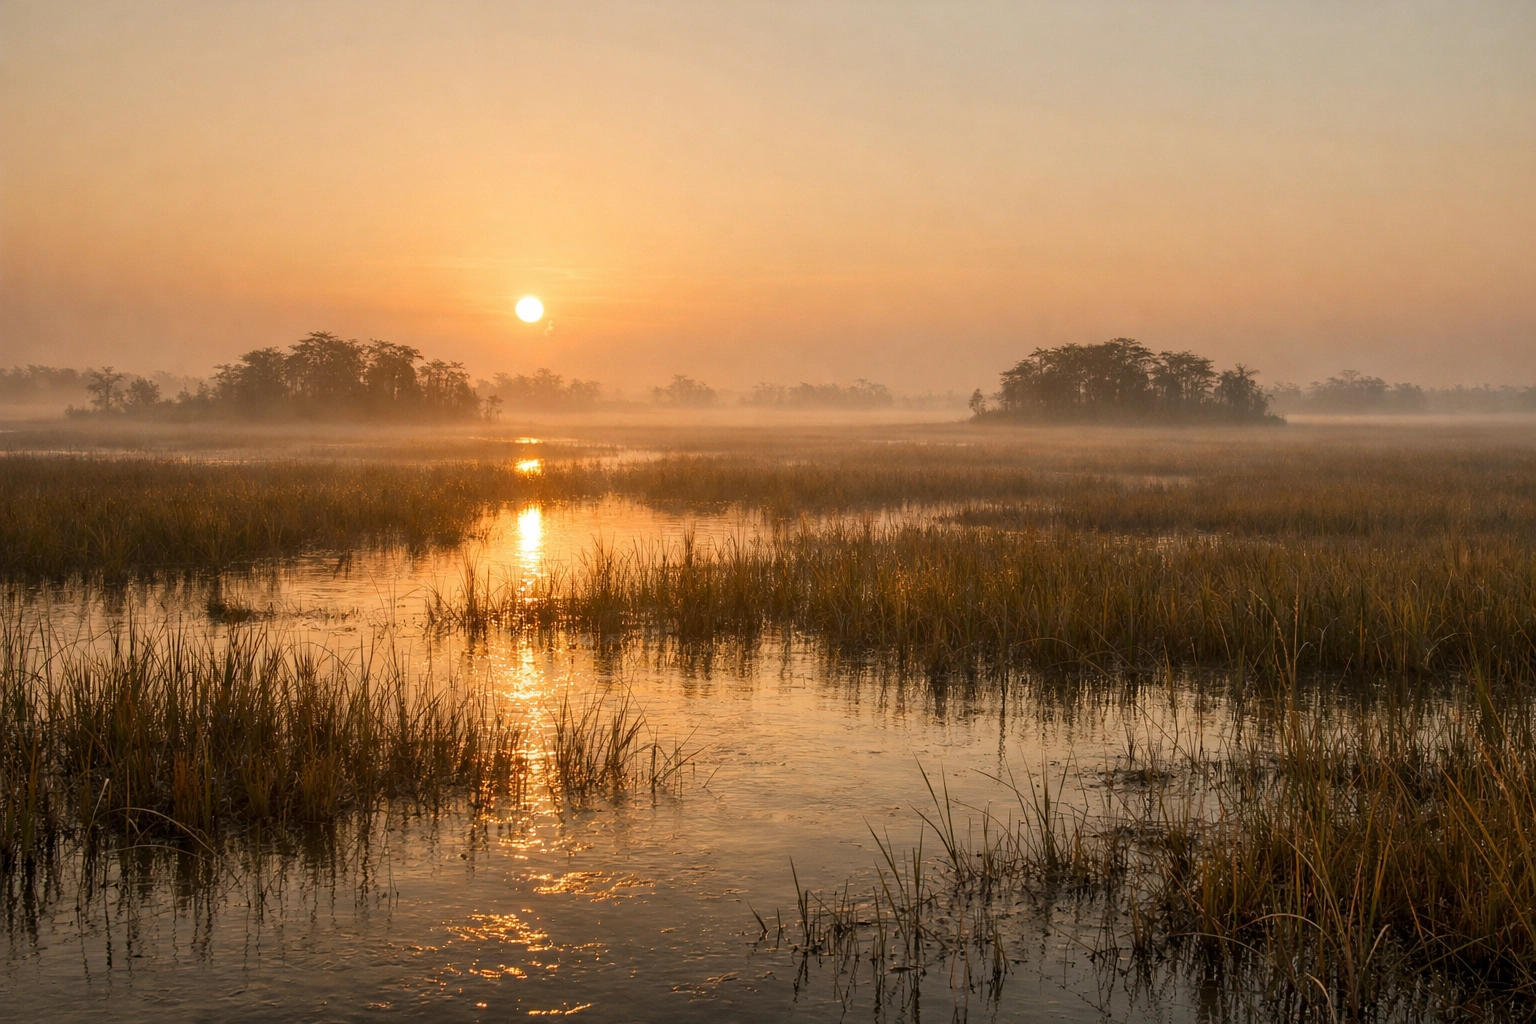
Just as the first light of dawn begins to bleed across the horizon, painting the sawgrass in shades of liquid gold, you realize that the Everglades isn't just a swamp: it’s a living, breathing masterpiece. Many photographers make the mistake of thinking this ecosystem is a monotonous flatland, but once you step into the "River of Grass" with your camera in hand, you’ll discover a world of intricate textures, prehistoric predators, and some of the most dramatic light on the planet.
As a photographer, your goal is to capture the soul of this landscape, and I’m here to guide you through the maze of mangroves and cypress domes. Whether you are hunting for the perfect wildlife photography Everglades moment or aiming for a fine-art landscape photography Everglades shot, your success depends on knowing exactly where to stand when the light hits.
Why the Everglades is a Fine Art Photographer’s Dream
The Everglades is unparalleled in its diversity. It’s the only place on Earth where alligators and crocodiles coexist, and it serves as a vital sanctuary for hundreds of bird species. But beyond the biological wonders, it offers a unique challenge: capturing depth in a landscape that is famously horizontal.
When you master the Everglades photography locations outlined in this guide, you aren’t just taking snapshots; you are creating legacy pieces. To truly elevate your work, you need to understand the rhythm of the water and the movement of the light. If you’re looking to skip the trial and error, I highly recommend picking up my Everglades Photography Guide to have all these secrets in your pocket.
1. Anhinga Trail: The Wildlife Photography Hub
If you’re looking for high-impact wildlife shots without a five-mile hike into the backcountry, the Anhinga Trail is your first stop. Located at the Royal Palm Visitor Center, this boardwalk trail is arguably the most famous of all Everglades photography locations.
You’ll find anhingas (hence the name) drying their wings on the railings, alligators lounging just inches from the path, and a variety of herons and egrets. The best part? The animals here are relatively accustomed to humans, allowing you to get those intimate, tight portraits that usually require a 600mm lens and a lot of patience.
- Pro Tip: Arrive at sunrise. The mist rising off the Taylor Slough creates a moody, ethereal atmosphere that transforms a standard bird photo into a piece of fine art.
- Key Subjects: Alligators, Turtles, Purple Gallinules, and Anhingas.
2. Shark Valley: The Heart of the Glades
Located off the Tamiami Trail, Shark Valley offers a 15-mile loop that propels you into the heart of the freshwater marl prairies. While you can rent a bike or take the tram, your best bet for photography is walking the first mile or two or taking the tram to the observation tower.
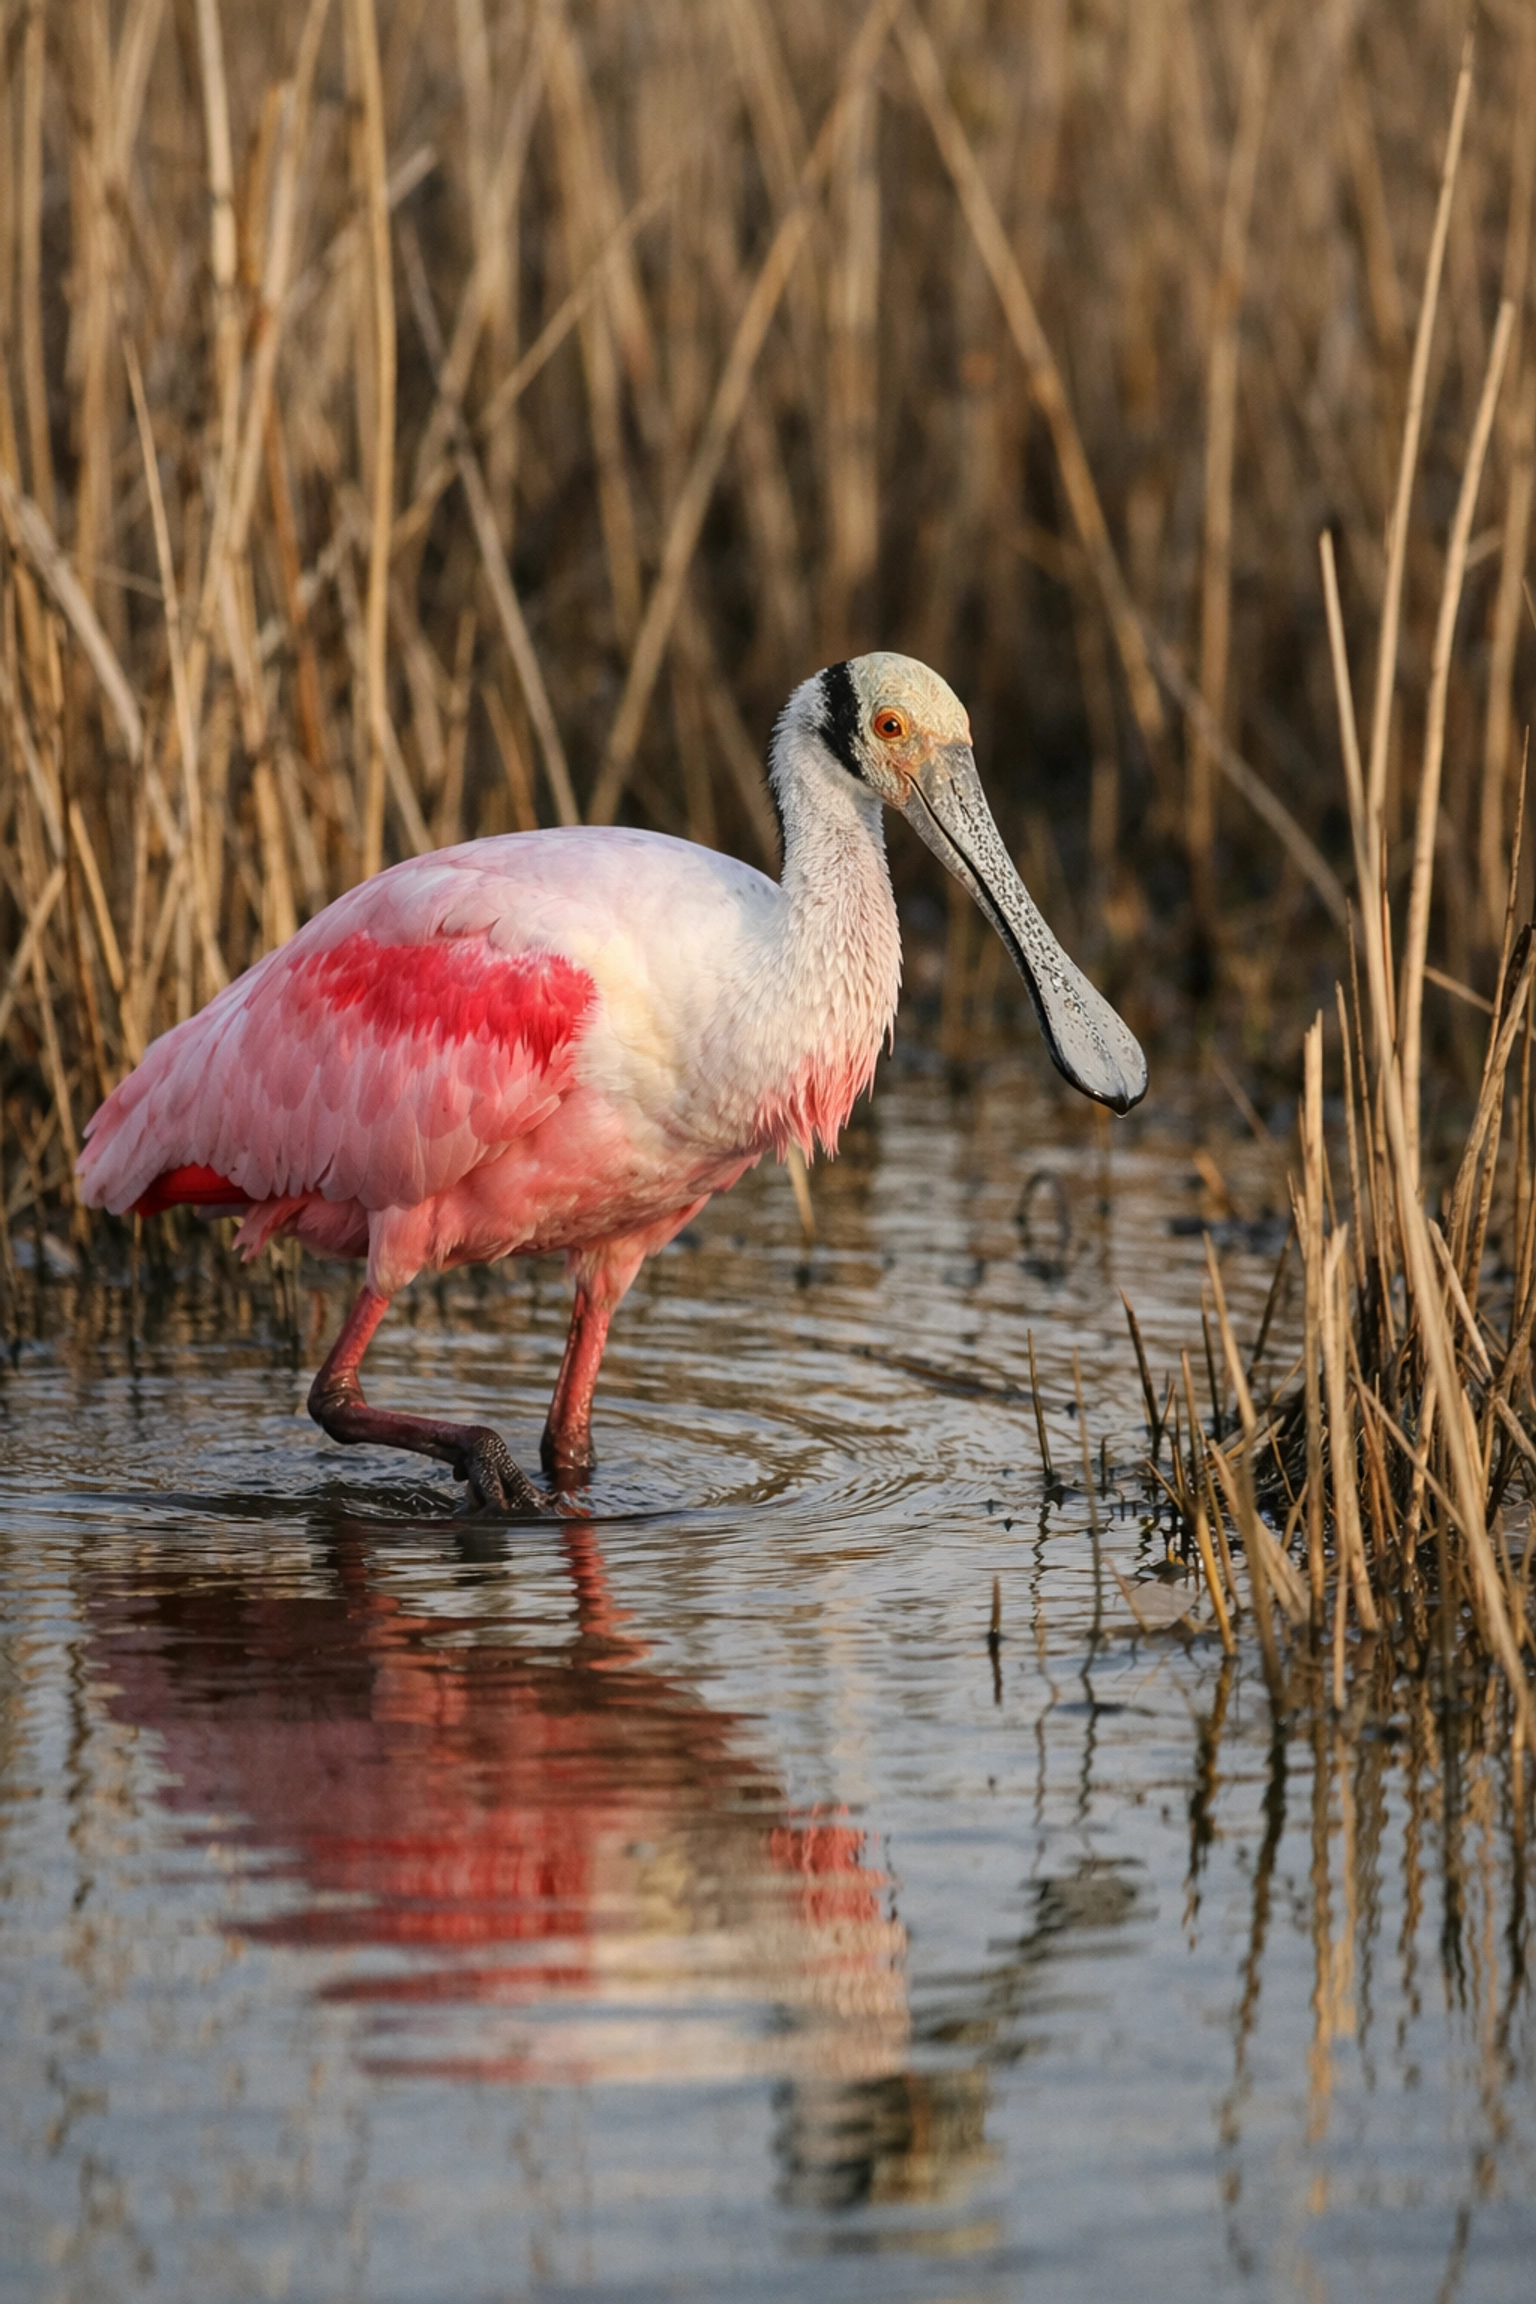
The observation tower provides an unmatched panoramic view of the landscape, perfect for capturing the vastness of the "River of Grass." During the dry season, the water holes along the trail become a magnet for wading birds. You’ll find Wood Storks and Roseate Spoonbills congregating in massive numbers.
3. Pahayokee Overlook: Landscape Photography Perfection
For the landscape purist, Pahayokee Overlook is a sanctuary. This elevated boardwalk offers a sweeping view of the endless sawgrass prairie dotted with cypress "islands."
This is your go-to spot for sunset. As the sun dips low, the cypress trees create stunning silhouettes against the vibrant Florida sky. If you use a wide-angle lens and a sturdy tripod, you can capture the immense scale of the park. This is where you truly feel the "River of Grass" philosophy. To ensure your colors pop as much in print as they do in person, you might want to explore the Ultimate Lightroom Preset Collection to bring that professional finish to your raw files.
Photography Location Comparison Table
To help you plan your trek, here is a breakdown of what to expect at the primary locations:
| Location | Primary Focus | Best Time | Recommended Lens |
|---|---|---|---|
| Anhinga Trail | Wildlife (Close-up) | Sunrise / Late Afternoon | 70-200mm |
| Shark Valley | Wading Birds & Vistas | Early Morning | 100-400mm / Wide Angle |
| Pahayokee | Landscape Silhouettes | Sunset | 16-35mm (Wide Angle) |
| Mahogany Hammock | Owls & Ancient Trees | Before Sunset | 24-70mm / 400mm |
| Big Cypress | Rugged Swamps & Gators | All Day (Overcast is best) | 70-200mm |
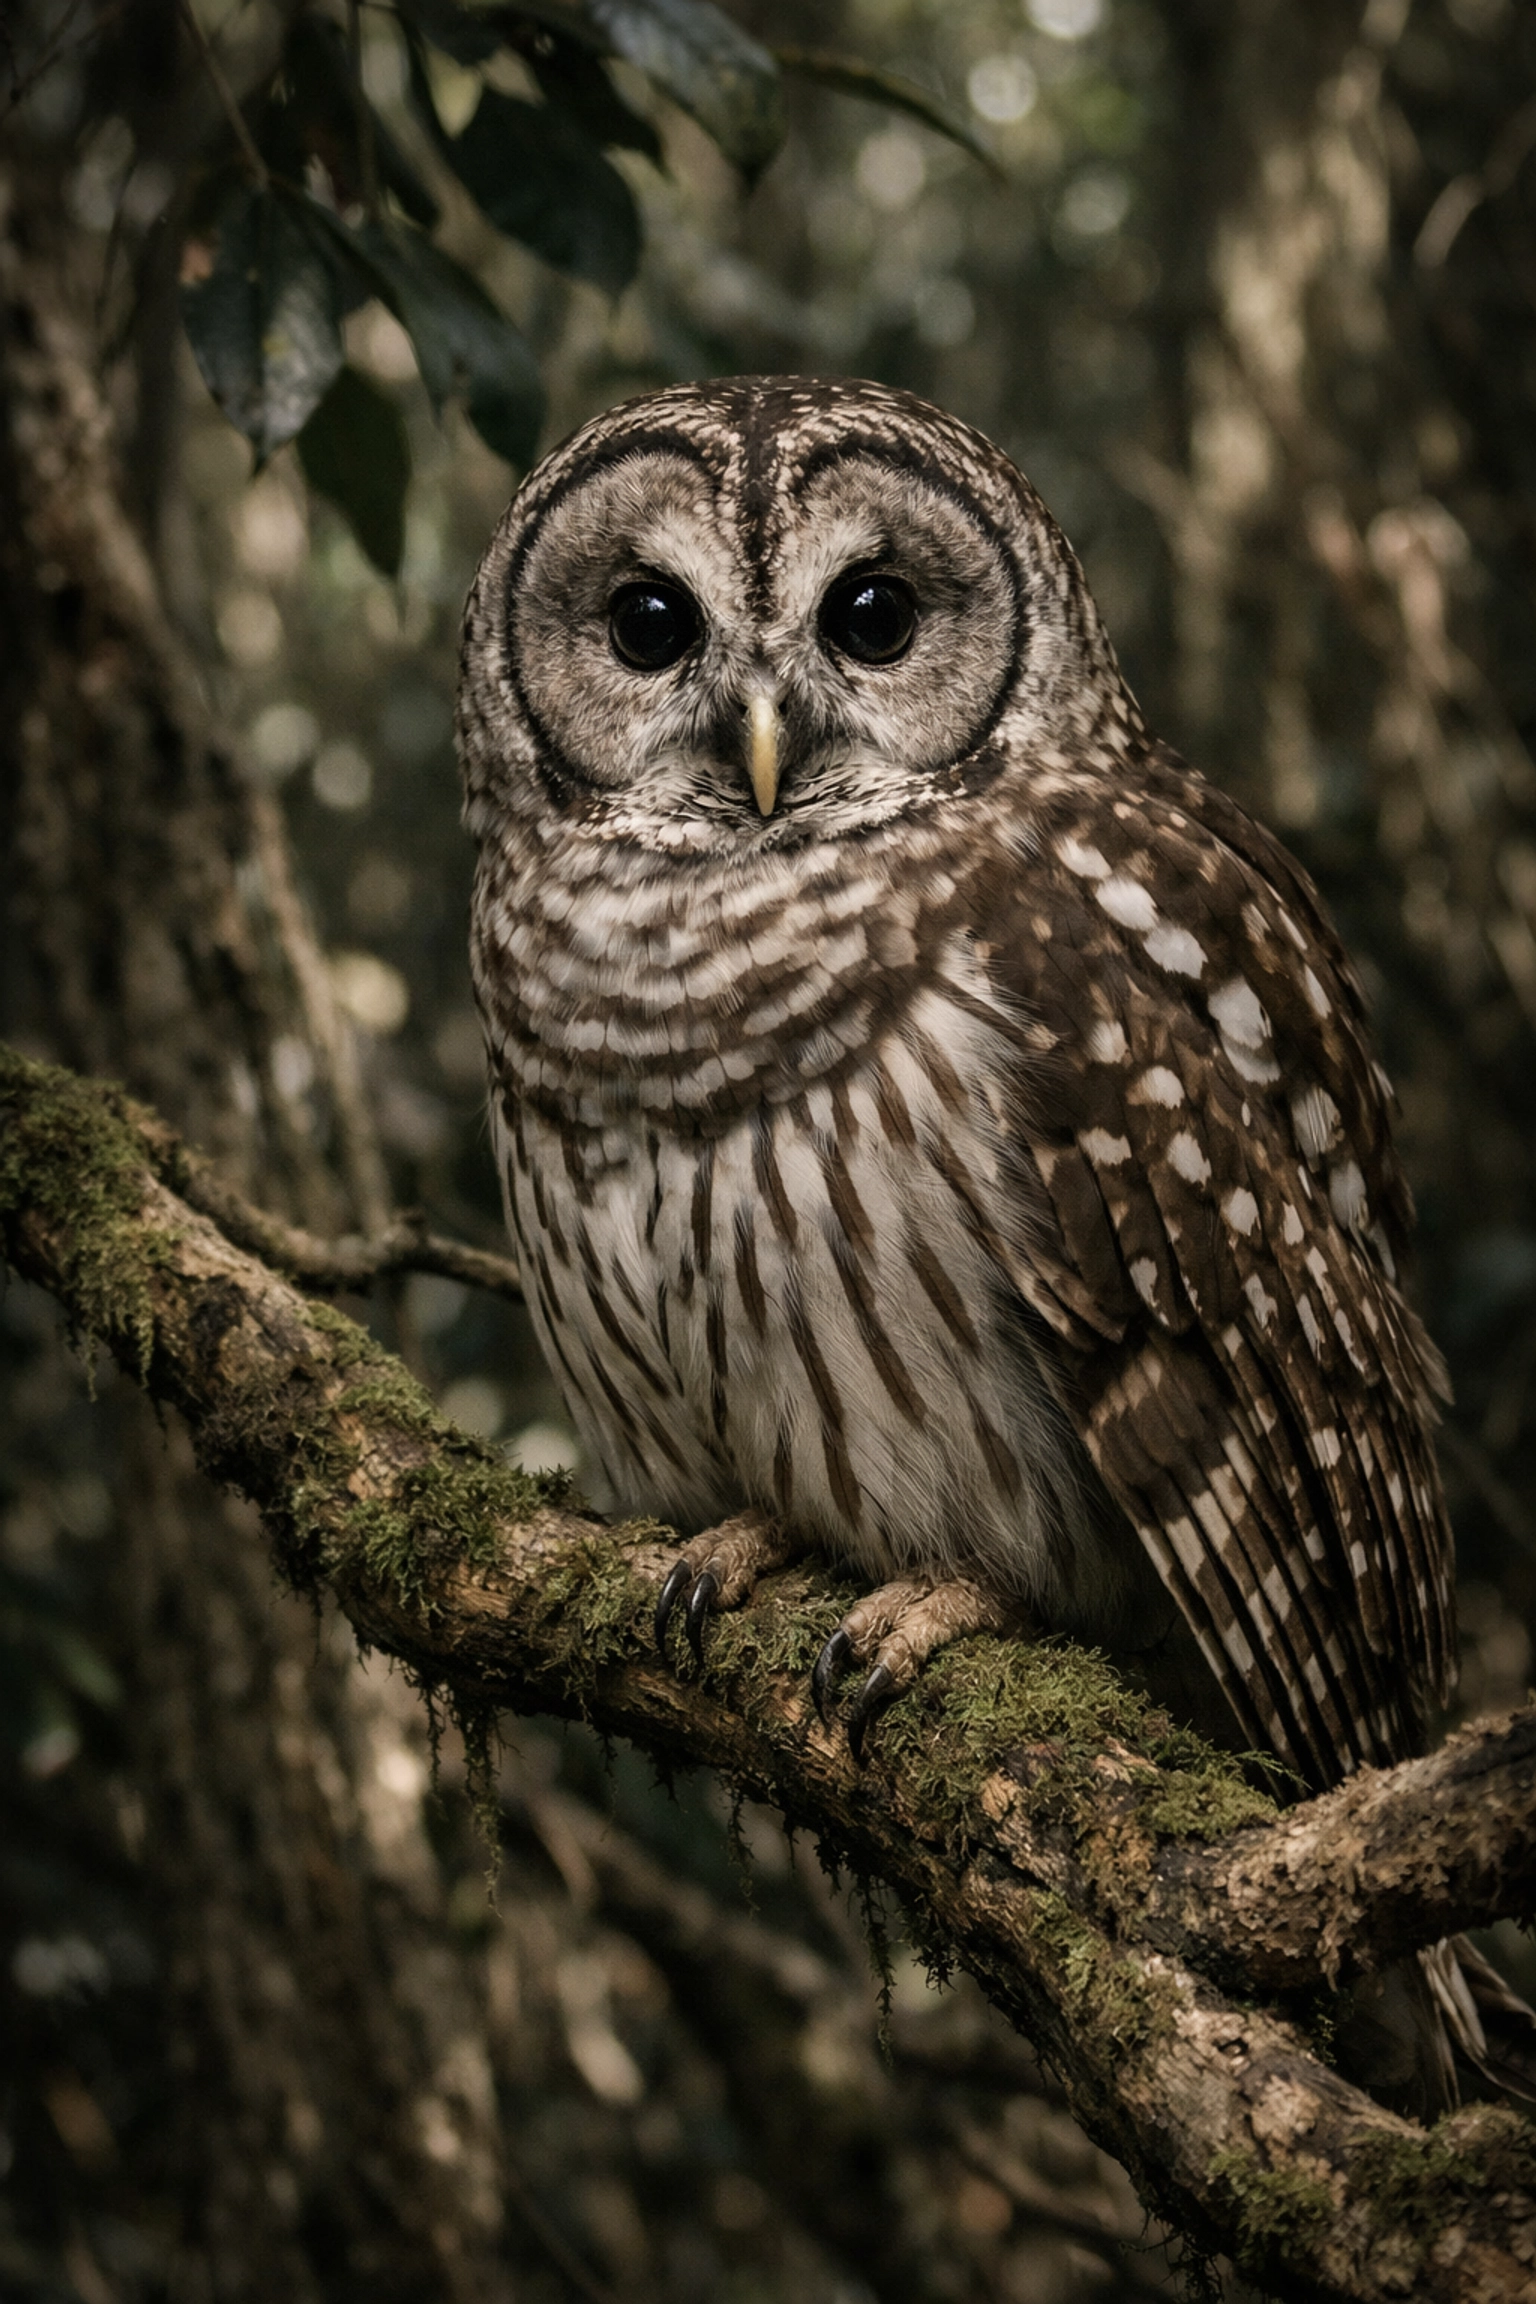
4. Mahogany Hammock: The Mystery of the Owls
Stepping into Mahogany Hammock feels like entering a different world. It’s a dense "island" of trees, including the largest living mahogany tree in the United States. The canopy is thick, and the air is still.
For you, the draw here is the Barred Owl. These magnificent birds are often perched just off the boardwalk. Because the light under the canopy is dim, you’ll need a fast lens and a steady hand. This location demands a more quiet, contemplative approach to wildlife photography Everglades.
5. Big Cypress National Preserve: The Rugged Alternative
Just north of the main park entrance lies Big Cypress. While technically a separate preserve, it is an essential part of the Everglades ecosystem. The Loop Road is a 24-mile gravel stretch that offers some of the most "raw" photography opportunities in Florida.
Here, you’ll find deep cypress strands and an abundance of air plants and orchids. It’s more rugged than the National Park, and you’re likely to have the place to yourself. If you’re coming from the city, don’t forget that this area is just a short drive away. I often recommend my clients check out the Miami Self-Driving Photography Guide to help navigate the transition from the neon lights of South Beach to the deep swamps of Big Cypress.
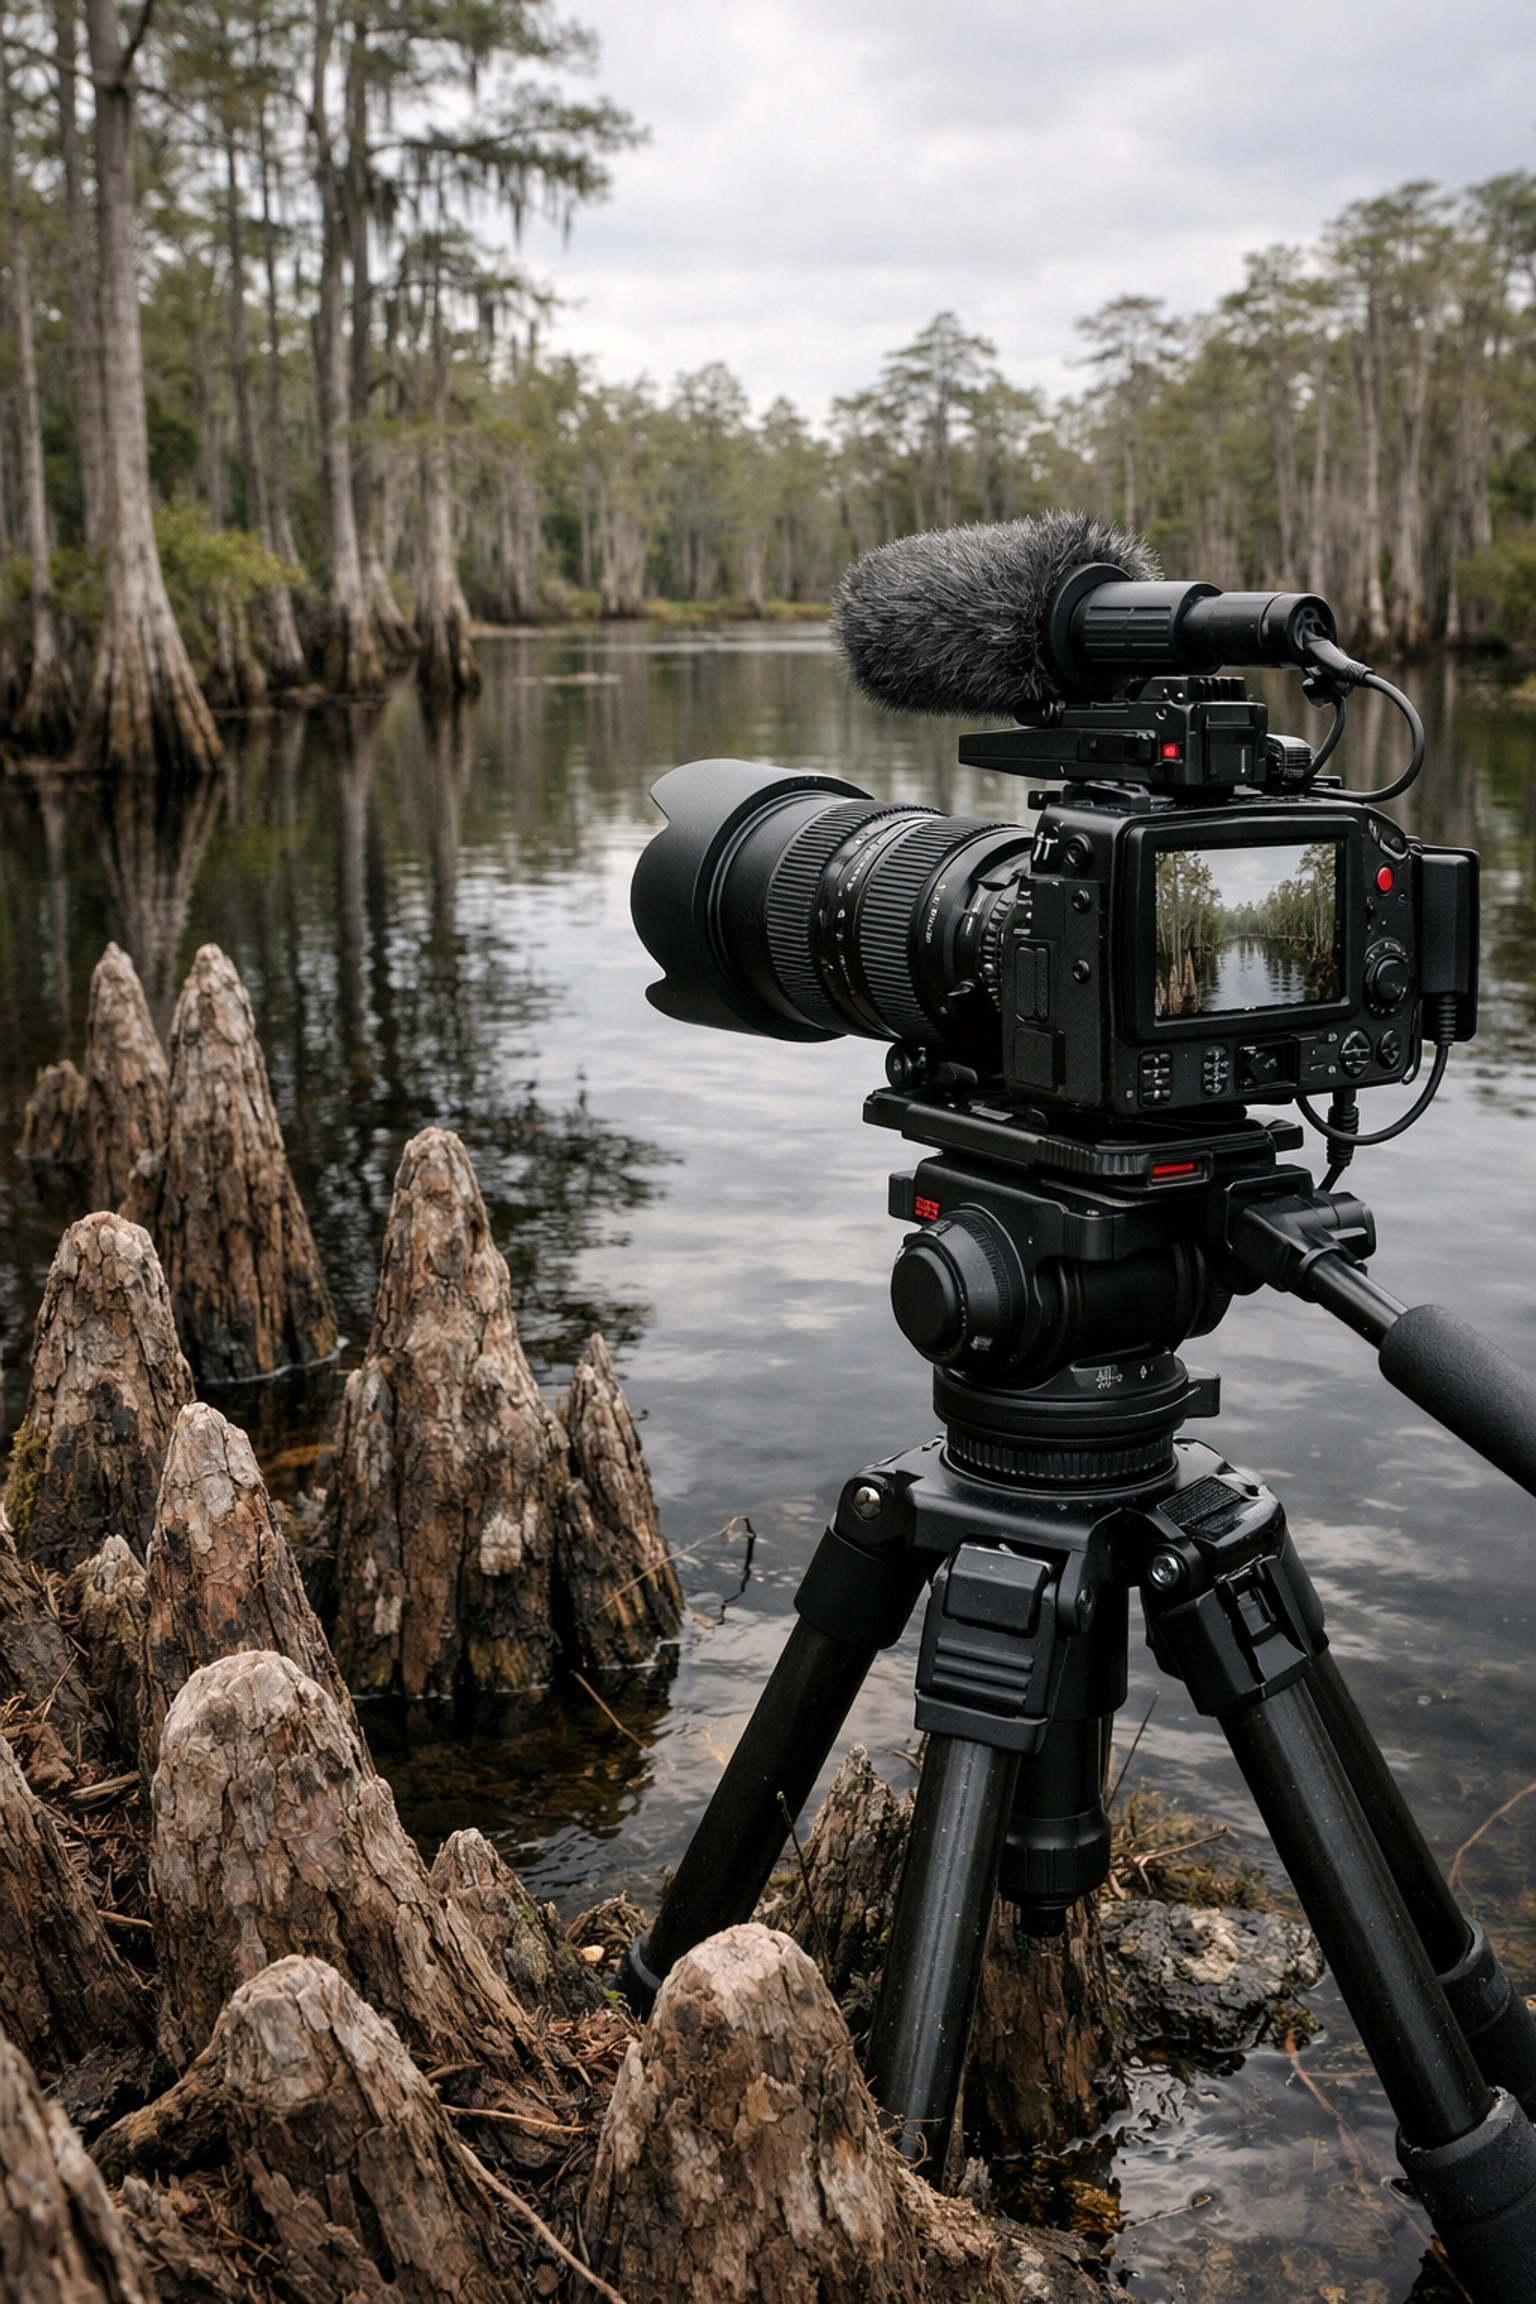
Essential Gear for the Everglades
You wouldn't show up to a black-tie gala in flip-flops, so don't show up to the Everglades under-geared. Your kit needs to be versatile and protected.
- The Long Lens: A 100-400mm or 150-600mm is your bread and butter for bird and alligator shots. It keeps you safe and keeps the animals relaxed.
- Wide-Angle Lens: For those epic Pahayokee sunsets.
- Circular Polarizer: This is non-negotiable. It cuts the glare off the water and brings out the deep greens of the vegetation and the blues of the sky.
- Tripod: Essential for low-light landscape shots and for supporting heavy telephoto lenses.
- Protection: Bring a rain cover for your camera and plenty of bug spray for yourself.
If you want to see how these tools translate into high-end art, take a look at my Fine Art Gallery to see the Everglades through a professional lens.
Mastering the Light: When to Go
Your success in Everglades photography locations is dictated by the seasons.
- Dry Season (November – April): This is the "Golden Age" for photographers. As the water levels drop, wildlife congregates around the remaining deep-water holes. The weather is cooler, and the mosquitoes are manageable.
- Wet Season (May – October): This is for the bold. The storms are dramatic, providing incredible cloud formations for landscape photography. However, the wildlife is more dispersed, and the heat (and bugs) can be punishing.
Regardless of the season, your best work will happen during the "Golden Hours": the hour after sunrise and the hour before sunset. This is when the light is soft, the shadows are long, and the "River of Grass" truly glows.
Elevate Your Experience
If you’re visiting from out of town and want to maximize your time, you don't have to go it alone. I offer a Private Miami Photography Tour that can be tailored to include the best spots in and around the Everglades. It’s the fastest way to ensure you walk away with portfolio-grade images rather than just snapshots.
By integrating these strategies into your workflow, you aren't just visiting a park; you're documenting one of the world's most endangered and beautiful ecosystems. This commitment to your craft is what separates a hobbyist from a fine art photographer.
With these considerations in mind, you are now equipped to tackle the Everglades with confidence. Remember, the best shot is often the one you waited ten minutes longer for after everyone else went back to the car.
Hence, your journey into the Florida wilderness starts now. For more insights on how to elevate your work, explore our site at Edin Chavez Blog for a deep dive into hundreds of tutorials and guides. Whether you're exploring the swamps or the streets, we've got you covered. Check out Edin Studios for more professional photography resources and services.
Ready to capture the ultimate Everglades shot? Don't leave home without the Everglades Photography Guide: your definitive roadmap to success in the River of Grass.


