
Just as the first light of dawn begins to bleed across the Sierra Nevada peaks, you’ll realize why Emerald Bay is the most photographed spot in Lake Tahoe. It’s not just a "pretty view", it’s a landscape photographer’s playground, filled with dramatic granite cliffs, the hauntingly beautiful Fannette Island, and water so clear it looks like liquid glass.
But here’s the thing: everyone and their grandmother has a photo of Emerald Bay. If you want your shots to stand out from the sea of mediocre tourist snaps, you need a plan. You need to know exactly where to park, when to click that shutter, and how to find the angles that nobody else is looking for. This is your masterclass in landscape photography Lake Tahoe style.
At Edin Chavez Blog, we believe that great photography is about more than just expensive gear; it’s about being in the right place at the right time with the right mindset. If you want to skip the trial and error, grab the Lake Tahoe Photography Guide to get the GPS coordinates for every secret spot I'm about to mention.
Why Emerald Bay is the Holy Grail of Lake Tahoe Photography Locations
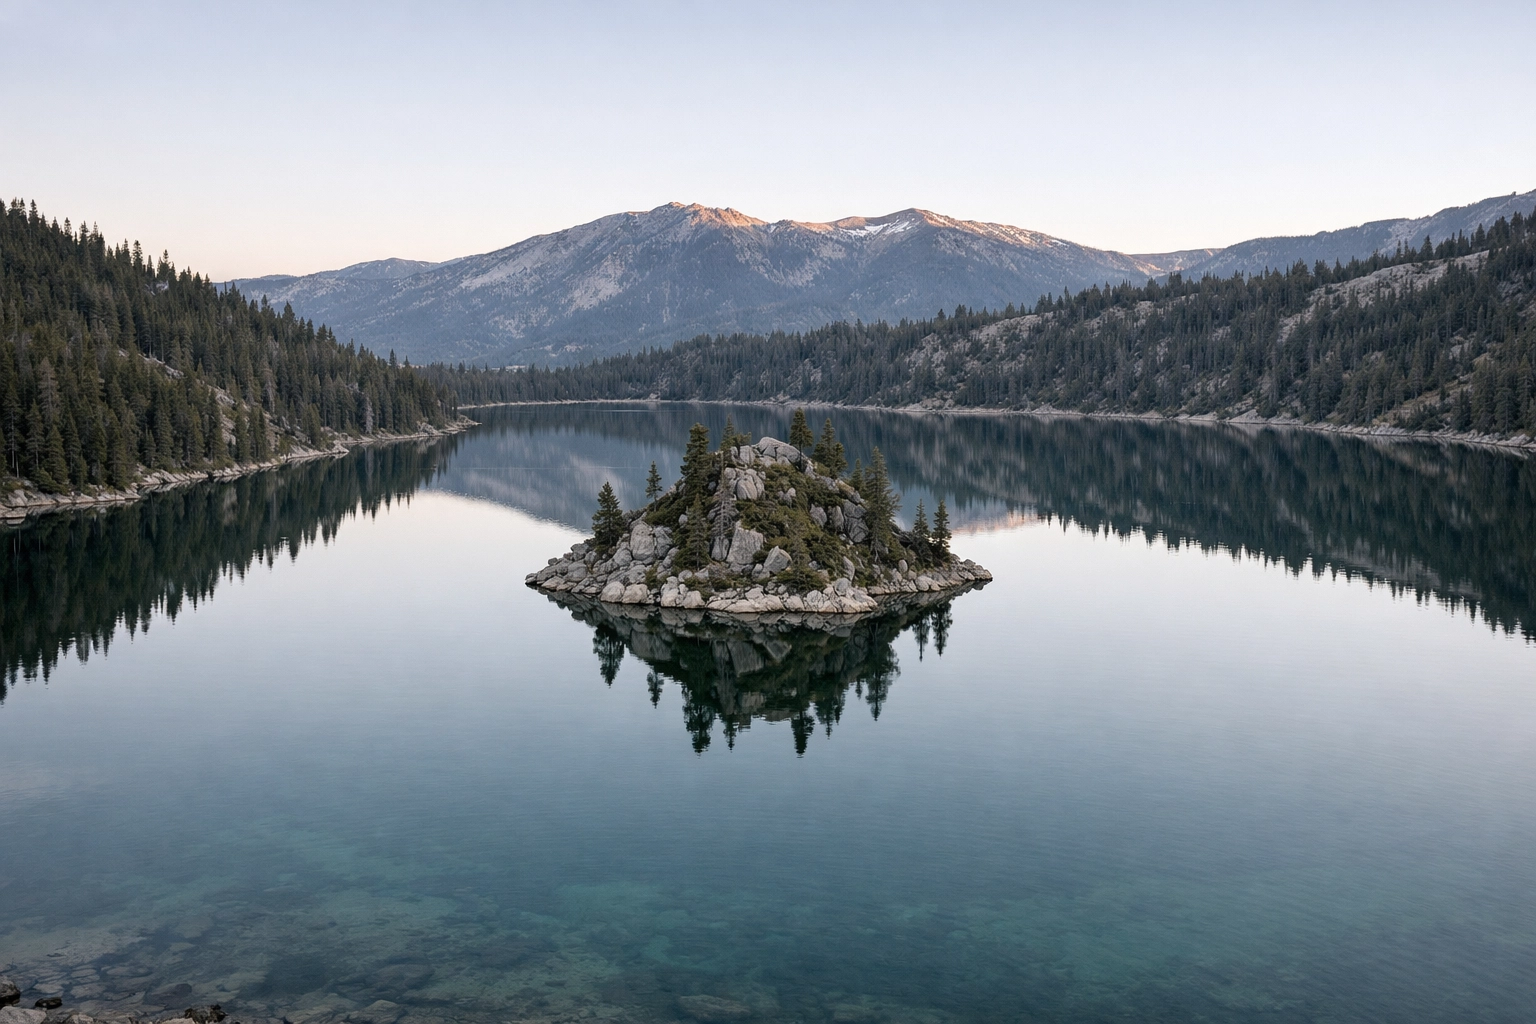
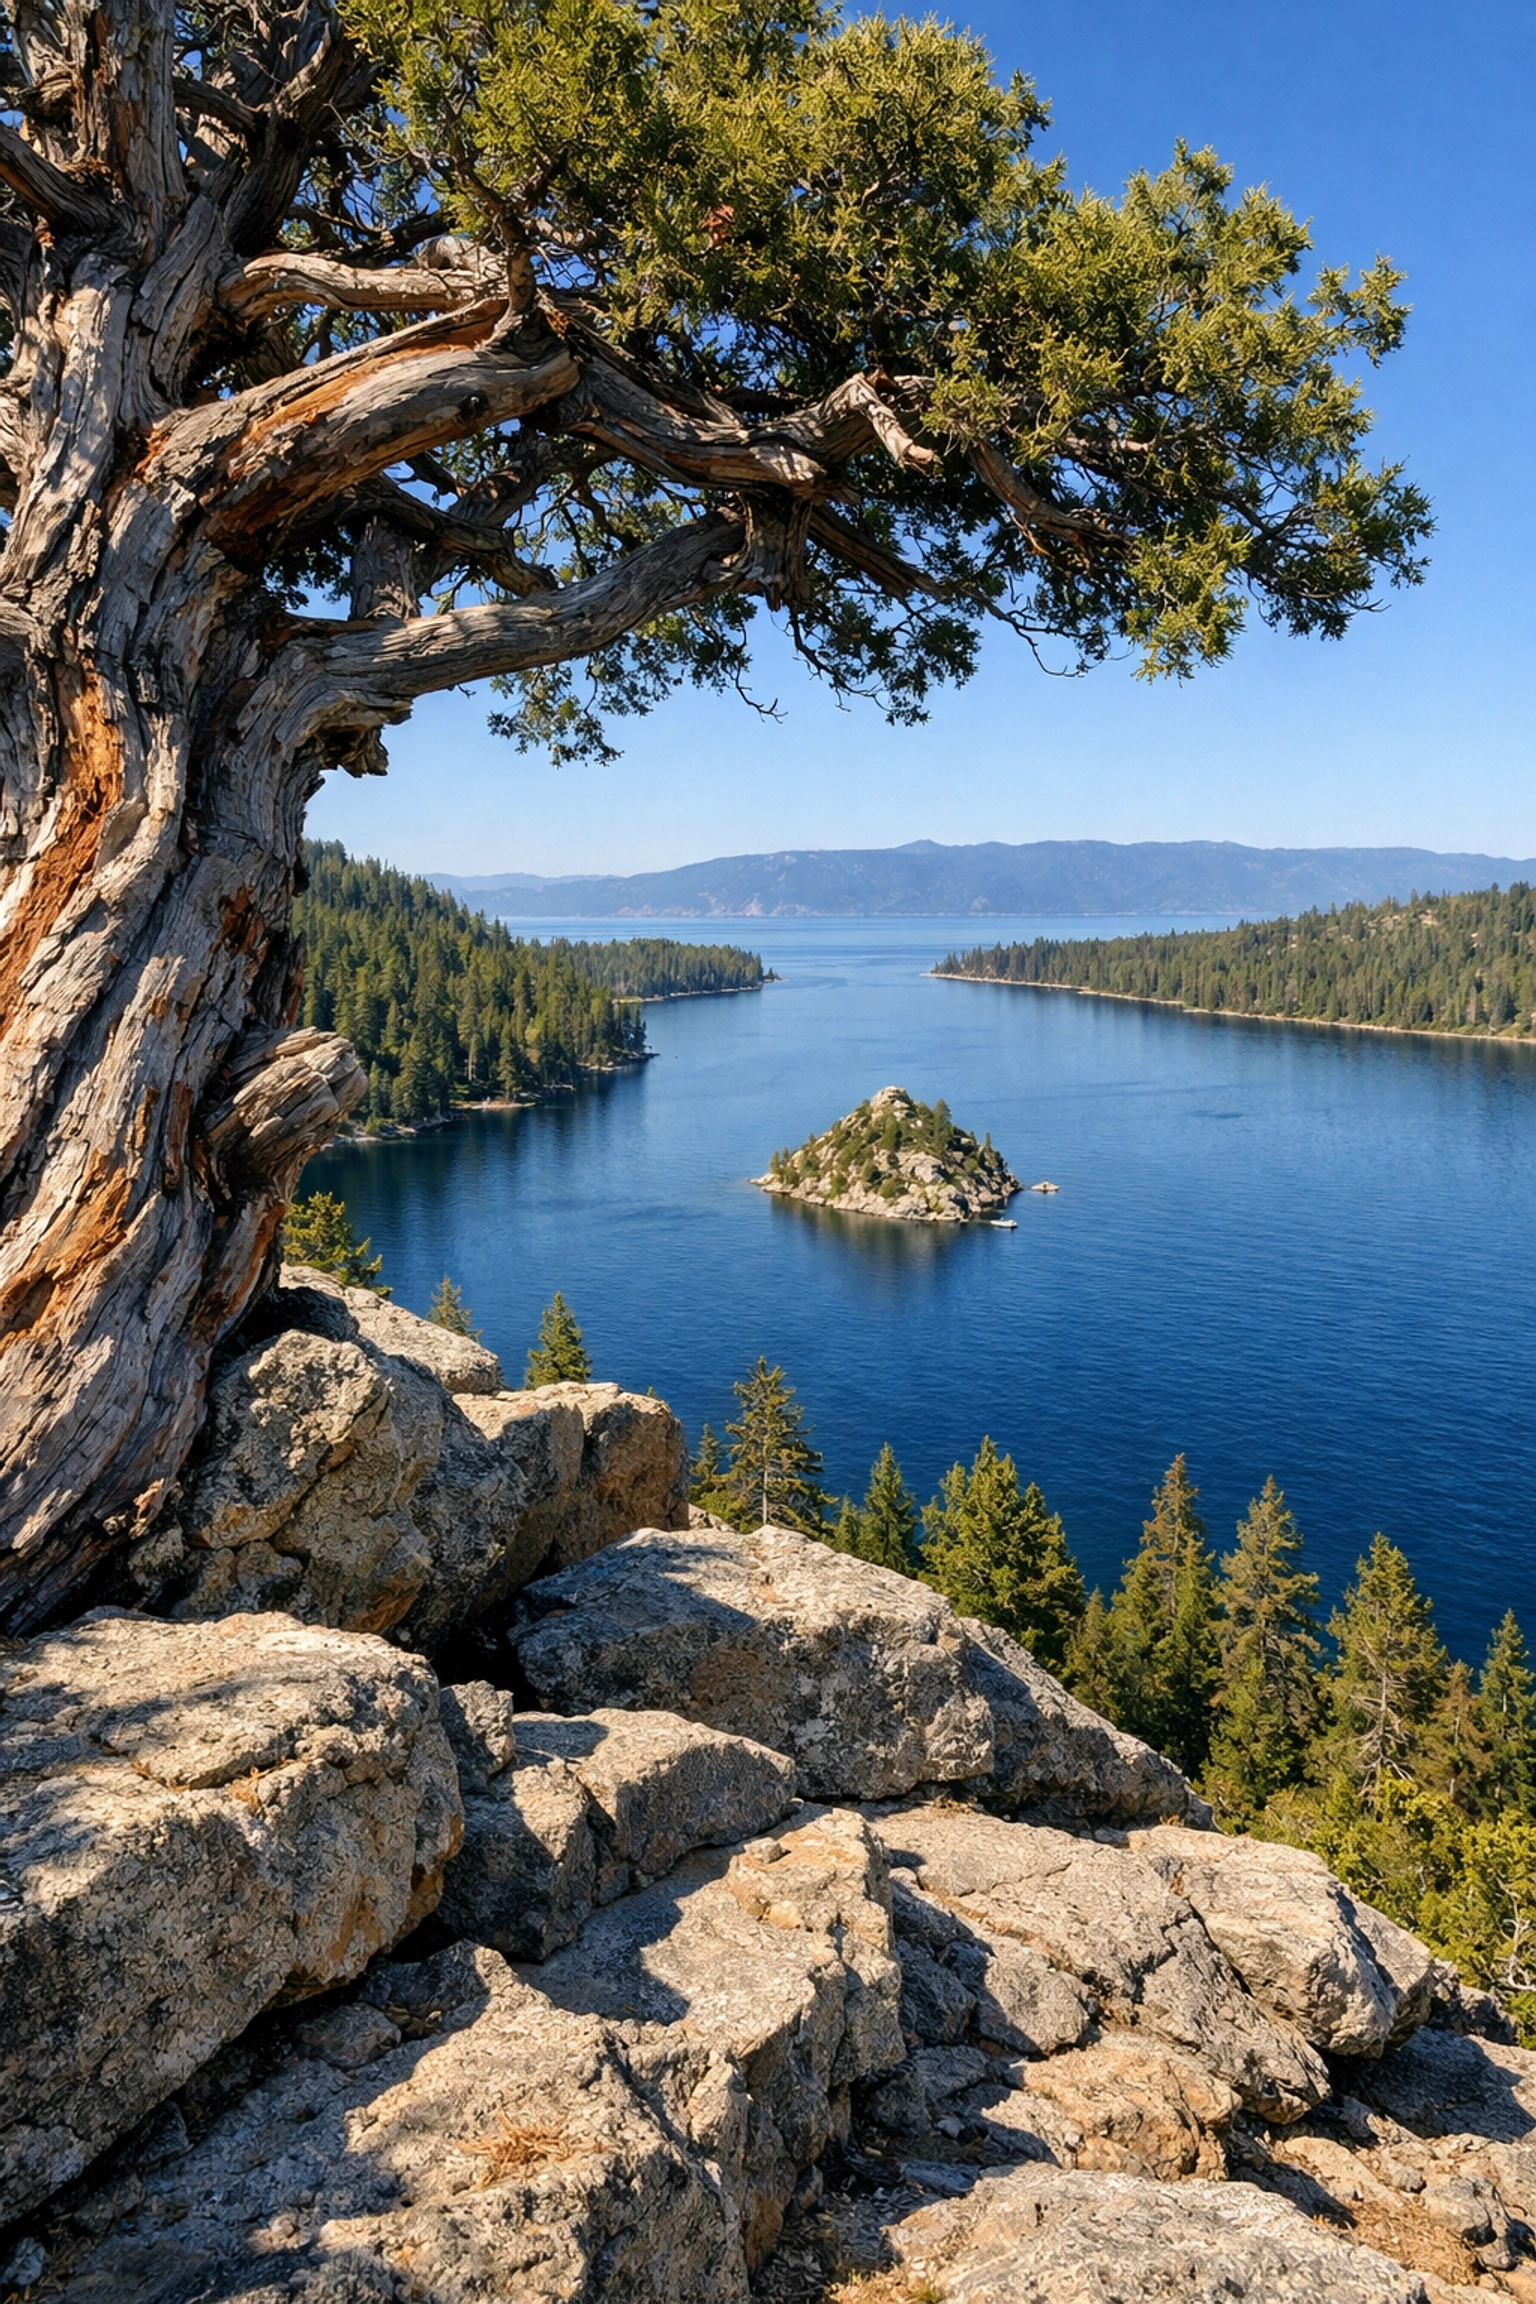
Emerald Bay is a National Natural Landmark for a reason. It’s a sunken glacial valley that creates a perfect, protected cove. The star of the show is Fannette Island, the only island in all of Lake Tahoe. Perched on top of it is a tiny stone structure called the "Tea House," which looks like something straight out of a dark fantasy novel.
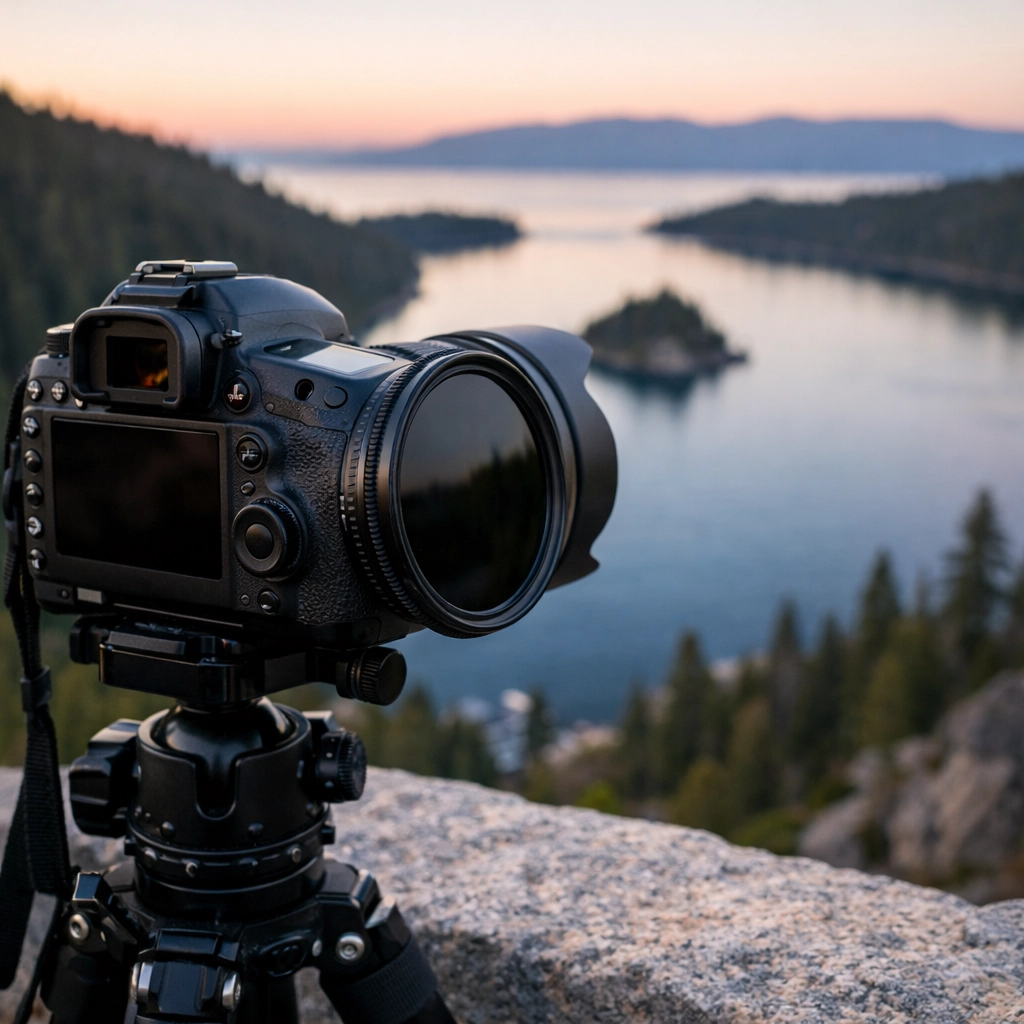
When you’re looking through your viewfinder, the composition practically builds itself. You have the curving shoreline to create leading lines, the island as a powerful focal point, and the surrounding peaks of the Desolation Wilderness providing a massive, majestic backdrop. It’s one of the best photo spots Lake Tahoe has to offer because it works in almost every season, from the lush greens of summer to the stark, snow-dusted granite of winter.
Timing Your Shoot: Why You Should Lose Sleep for the Sunrise
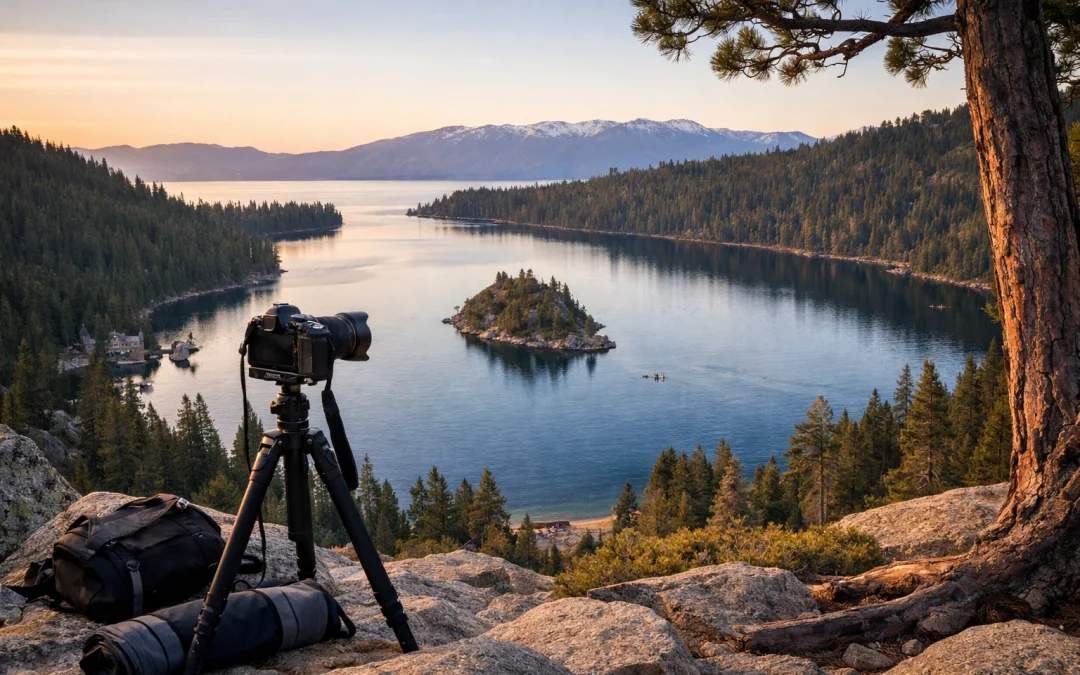
If you’re a fan of sleeping in, Emerald Bay is going to be your worst enemy. While the bay looks great at midday, the real magic happens at sunrise.
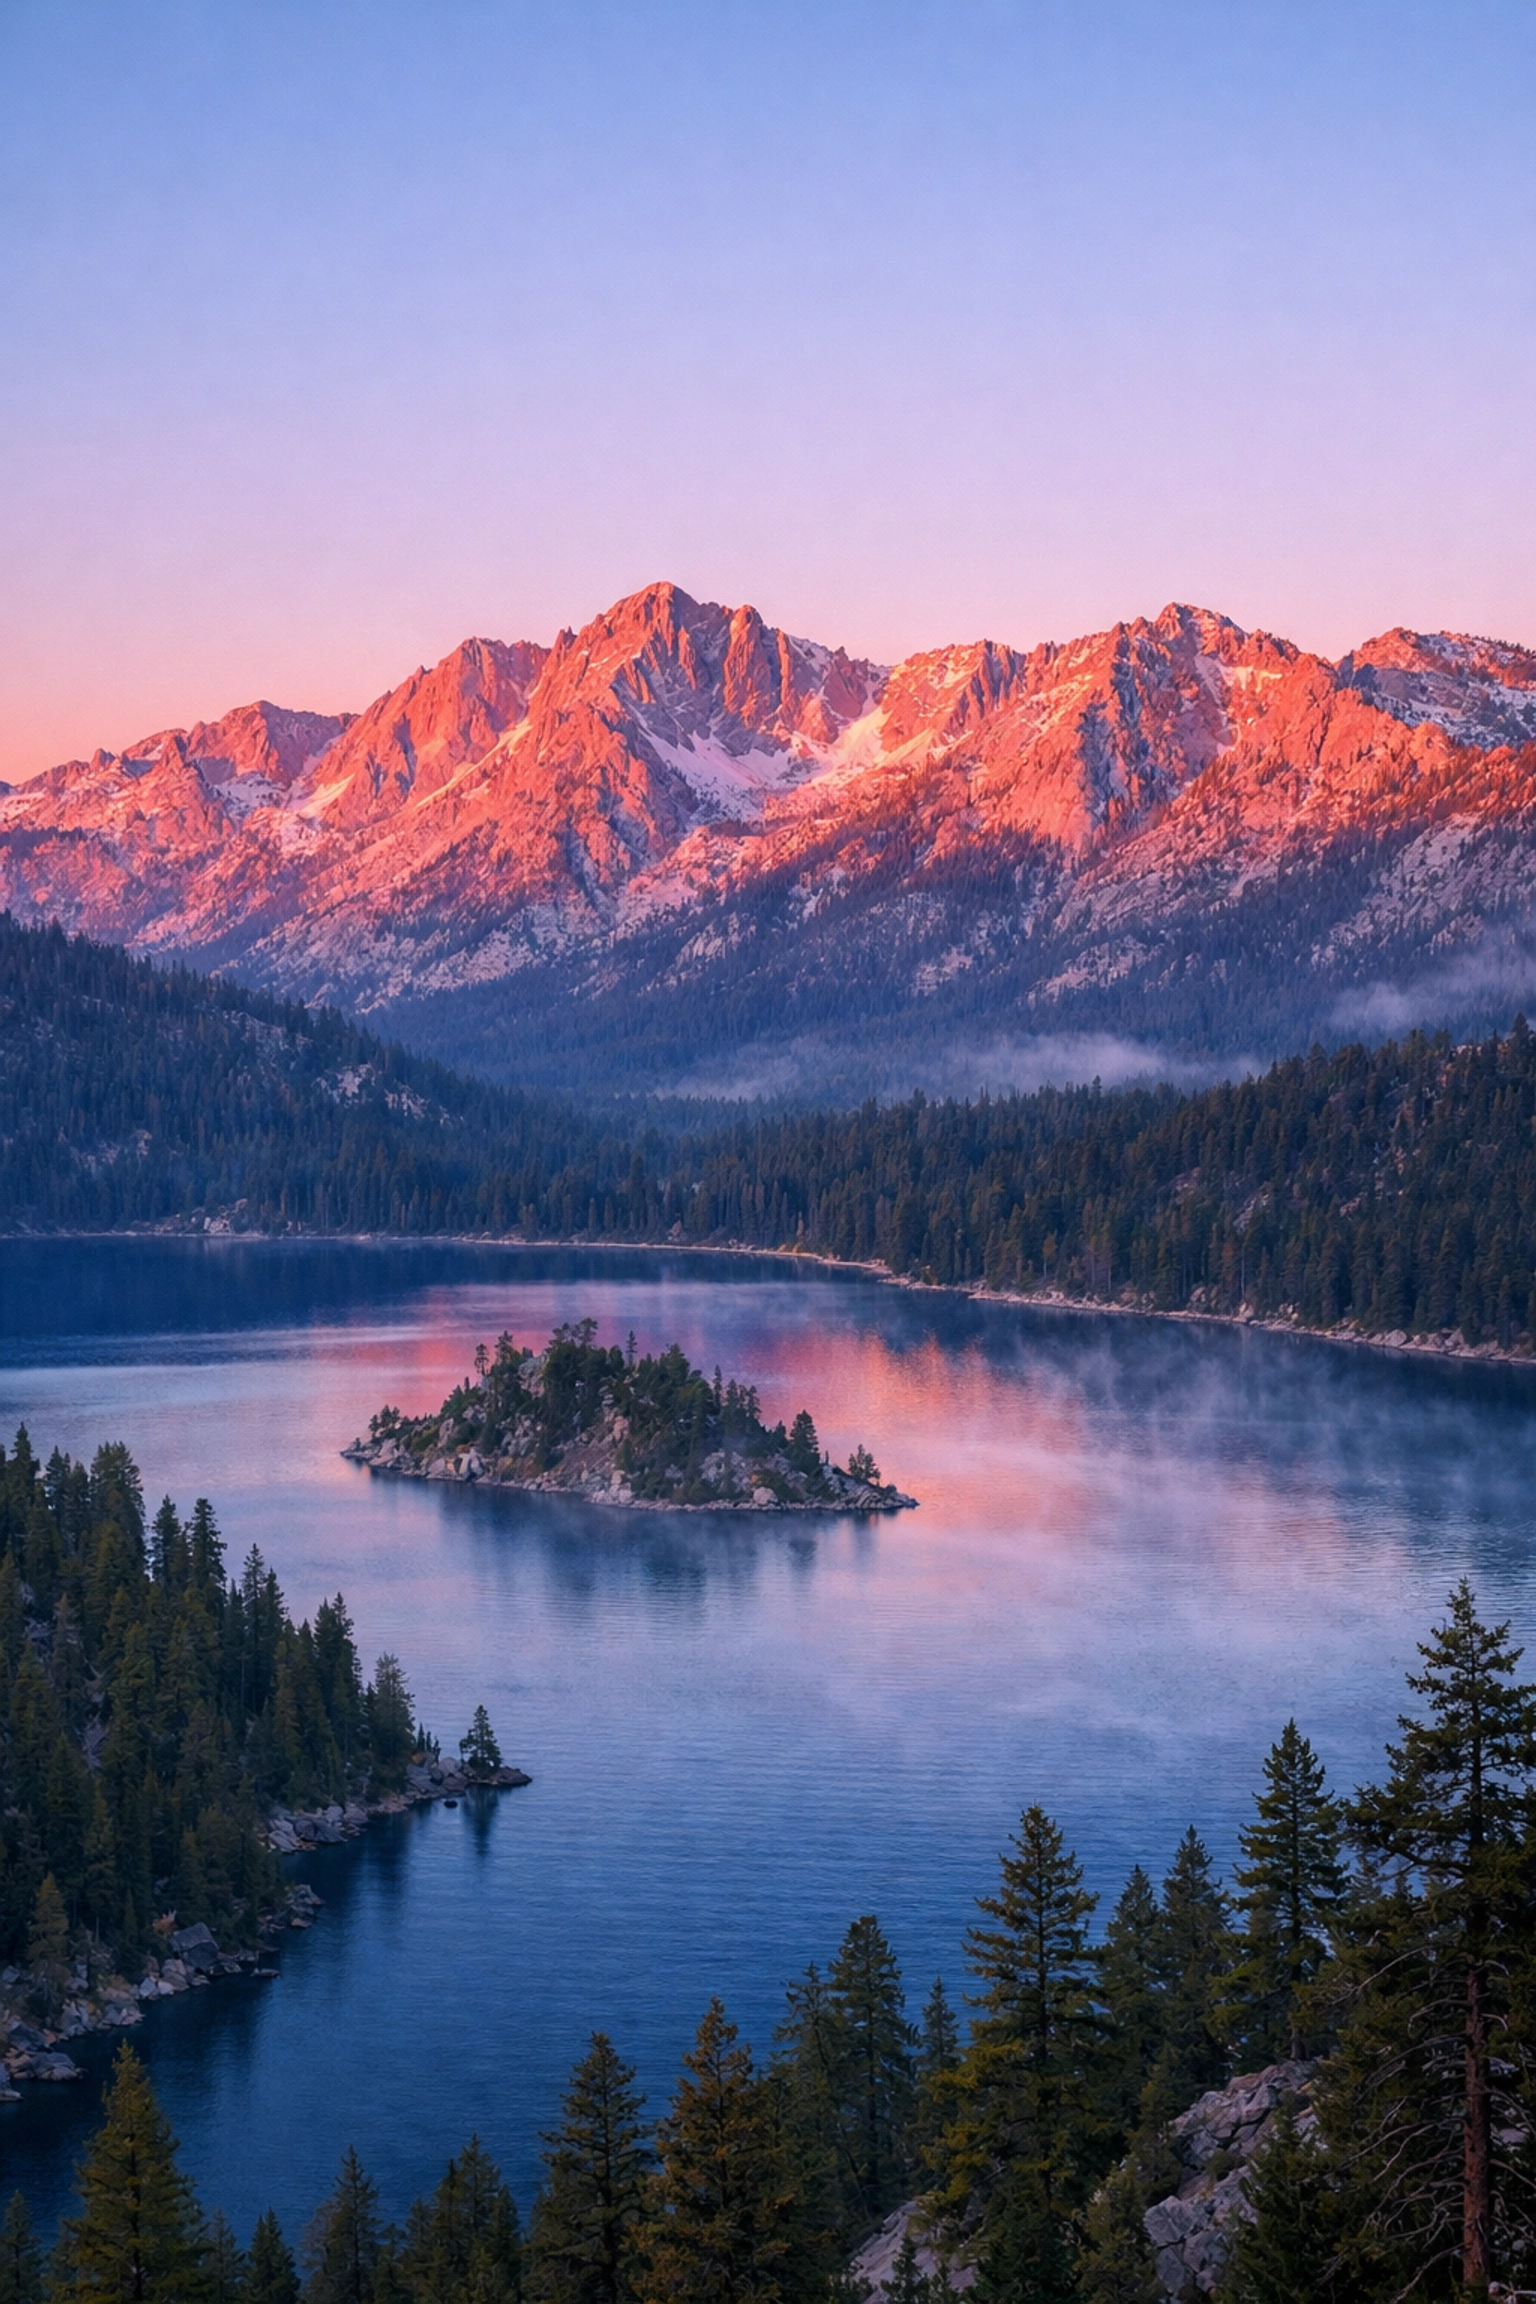
Because Emerald Bay is tucked into the southwest corner of the lake, it faces east. This means as the sun crests over the Nevada side of the lake, it illuminates the bay with a warm, golden glow. The light hits the mountains behind the bay first, creating a stunning "Alpenglow" effect before the sun even clears the horizon.
Why Sunrise Wins Every Time:
- The Reflections: The water is usually at its calmest in the early morning. This is your best shot at getting that mirror-like reflection of Fannette Island.
- The Crowds: During the day, the parking lots are a nightmare. At 5:30 AM? It’s just you and a few other dedicated (and caffeinated) photographers.
- The Atmosphere: Early morning mist often rolls off the water, adding a layer of mystery and depth to your images that you just won't get at 2:00 PM.
To make sure your colors pop as much as the scene deserves, I highly recommend using the Ultimate Lightroom Preset Collection. It’s designed to enhance those natural Sierra tones without making your photos look "fake."
The Best Viewpoints: Beyond Inspiration Point
Many people pull over at "Inspiration Point" and think they’ve found the best spot. They haven't. Don’t get me wrong, it’s a nice view, but the trees often obstruct the best parts of the bay. If you want the "money shot," you need to explore the pullouts along Highway 89.
Here is a quick breakdown of where you should actually be setting up your tripod:
| Location | Perspective | Pro Tip |
|---|---|---|
| Pullout #4 (0.7 miles north of Inspiration Pt) | Unobstructed, wide-angle view of the entire bay and Fannette Island. | Use the granite wall at the edge to stabilize your gear if you forgot your tripod (but please, don't forget your tripod). |
| Pullout #5 (0.8 miles north of Inspiration Pt) | Incredible foreground interest with boulders and twisted Sierra Junipers. | This is where you find the depth. Use a small aperture (f/11 or f/16) to keep those rocks and the island in sharp focus. |
| Eagle Falls Overlook | A view looking down into the bay with the waterfall in the foreground. | Great for long exposures. Use an ND filter to blur the water while keeping the bay crisp. |
| Bayview Trail | Elevated, sweeping vistas of the bay and the main body of Lake Tahoe. | Hike up about half a mile to find a perfectly placed rock that overlooks the whole scene. |
Hiking for the Ultimate Perspective
If you’re feeling adventurous, don’t just stay on the pavement. Some of the most unique Lake Tahoe photography locations require a little sweat.
Eagle Lake Trail & Maggie's Peak
Start at the Eagle Falls trailhead (directly across from Emerald Bay). If you hike toward Eagle Lake, you’ll find several vantage points that look back over the bay from a much higher elevation. If you have the lungs for it, continue up to Maggie’s Peak. From the summit, you get a bird’s eye view that makes Fannette Island look like a tiny emerald dropped into a sapphire bowl.
The Shoreline Hike
Want to get close to the water? Take the 1-mile trail down to Vikingsholm. This historic "castle" is a feat of Scandinavian architecture and makes for a fantastic subject itself. Once you're at water level, walk the shoreline to find driftwood and crystal-clear turquoise water to use as your foreground.
For more inspiration on how to capture these grand landscapes, check out some of the fine art prints at Edin Fine Art. Seeing how the pros frame these shots can give you ideas for your own compositions.
Essential Gear for Emerald Bay
You don’t need a backpack full of gadgets, but a few key pieces of gear will make your life much easier:
- Wide-Angle Lens: A 16-35mm is the gold standard here. You need that wide field of view to capture the scale of the bay.
- Circular Polarizer (CPL): This is non-negotiable. A CPL will cut the glare off the water, allowing you to see the rocks beneath the surface and making the "Emerald" color truly pop.
- Sturdy Tripod: Especially for those pre-sunrise long exposures. The wind can pick up quickly at the overlooks, so you need something that won't budge.
- Neutral Density (ND) Filters: If you want that silky smooth water or if you're shooting the falls, a 6-stop or 10-stop ND filter is your best friend.
Master the Composition: Leading the Eye
When you're at Emerald Bay, it's easy to get overwhelmed by the beauty and just "point and shoot." Resist the urge! Take a second to build your frame.
Try to find a "leading line." This could be the curve of the shoreline, a fallen log on the beach, or even the line of the mountains. Point these lines toward Fannette Island. This guides the viewer's eye through the photo and creates a sense of journey.
Also, watch your horizon. There is nothing that ruins a professional-looking landscape photo faster than a tilted lake. Use the level tool in your camera or on your tripod to keep things straight.
Logistics: Parking and Permits
Let's talk about the boring stuff so it doesn't ruin your trip.
- Parking: The main lots (Inspiration Point and Vikingsholm) require a fee. The small pullouts along the highway are free but fill up incredibly fast. If you're shooting sunrise, arrive at least 45 minutes before the sun actually hits the horizon.
- Road Conditions: Highway 89 is notorious for closing during heavy snow. Always check the Caltrans website before heading out in the winter.
- Permits: If you are shooting a commercial gig (like a paid elopement or a brand shoot), you must have a permit from California State Parks. Don't risk a heavy fine; just send the email and get the paperwork.
For a deeper dive into the logistics of the entire region, our Lake Tahoe Photography Guide covers everything from weather patterns to the best coffee shops to hit after your morning shoot.
Elevate Your Landscape Photography Lake Tahoe Game
Emerald Bay is more than just a destination; it’s an experience. There is something deeply peaceful about standing on a granite cliff in the dark, waiting for the world to wake up and reveal one of the most beautiful sights on Earth.
Whether you’re a seasoned pro or just starting your journey into landscape photography Lake Tahoe, Emerald Bay will challenge you and reward you in equal measure. Remember to look for the foreground, respect the light, and don't be afraid to wander off the beaten path.
For more insights on how to elevate your work, explore our site for a deep dive into hundreds of tutorials and guides at blog.edinchavez.com. If you want to see the heights that landscape photography can reach, visit Edin Studios to see our latest projects and fine art collections.
Now, pack your bags, charge your batteries, and go get that shot. I'll see you at the bay!


