As you stand on the edge of the Sierra Nevada mountains, the crisp, thin air filling your lungs, you realize that Lake Tahoe isn't just a destination: it’s a masterpiece waiting for your lens. Whether you are a seasoned professional or a hobbyist looking to level up your portfolio, finding the best photo spots Lake Tahoe has to offer is the difference between a snapshot and a work of art.
At Edin Chavez Photography, we believe that capturing the world in its most pristine state requires more than just showing up; it requires a roadmap. With decades of experience in landscape photography Lake Tahoe, I’ve scouted every inch of these shores to bring you the definitive guide to the most breathtaking Lake Tahoe photography locations.
Before you pack your tripod, make sure you have the ultimate companion for your trip: the Lake Tahoe Photography Guide. It’s packed with GPS coordinates, secret timing tips, and gear recommendations that ensure your shots stand out from the crowd.
1. Emerald Bay State Park: The Crown Jewel
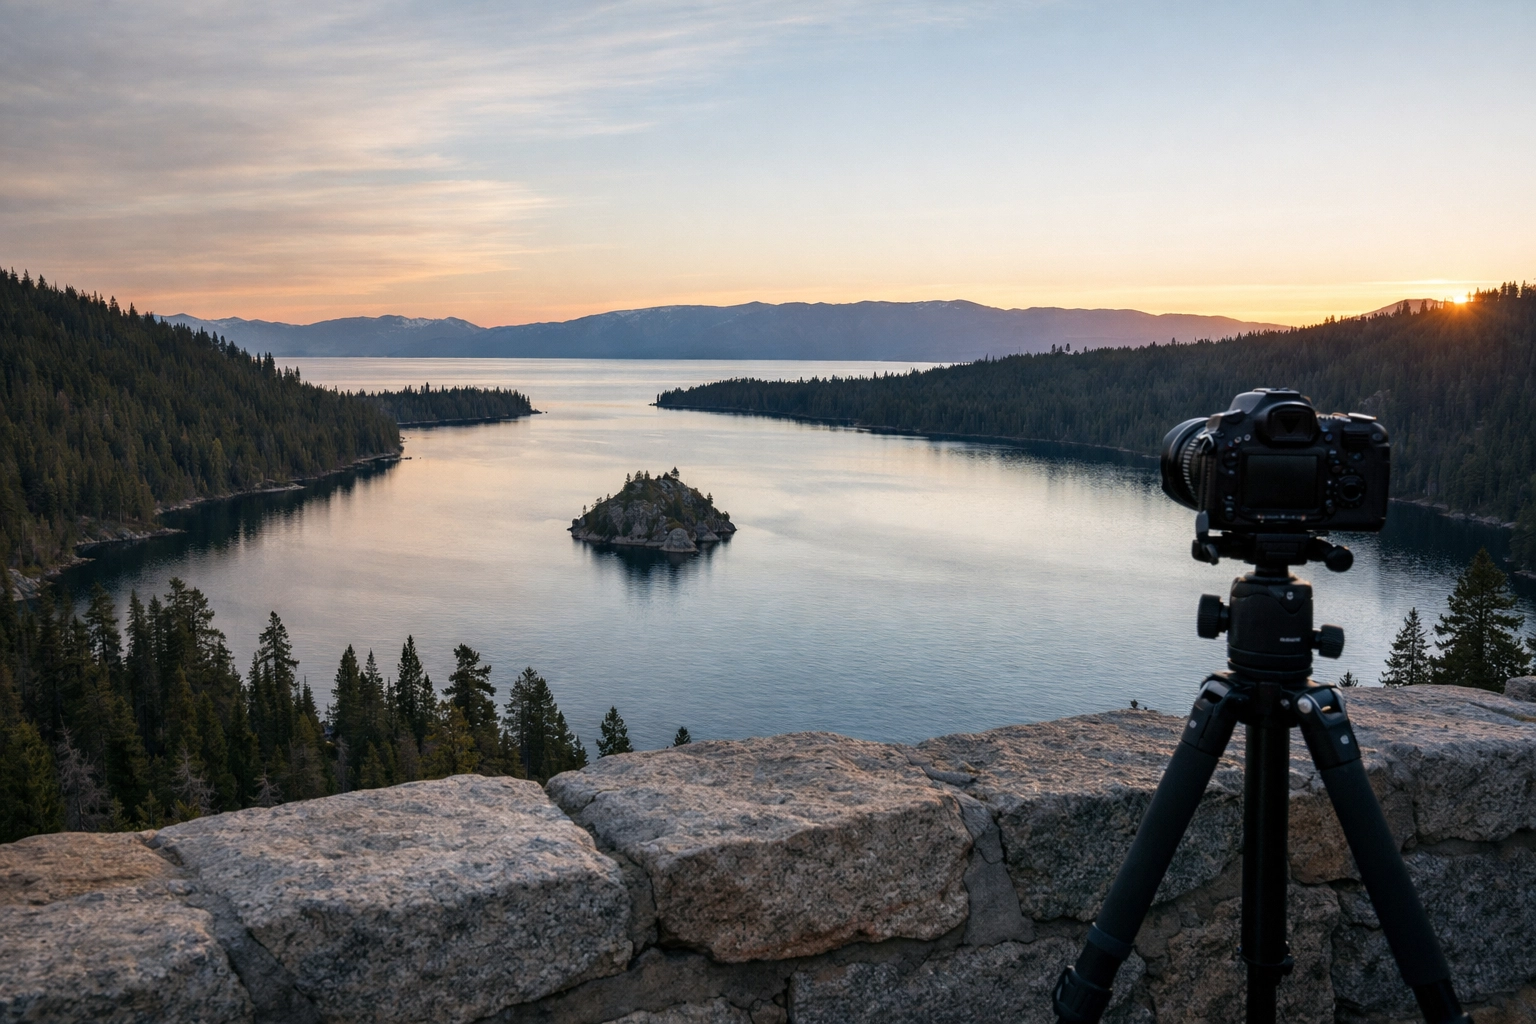
Just as the first light of dawn begins to purple the sky, you’ll find yourself at the Emerald Bay overlook. This is arguably the most photographed spot in the entire Sierra Nevada, and for good reason. The deep greens of the surrounding pines contrast sharply with the cobalt blue of the water, while Fannette Island sits perfectly in the center of the bay like a natural focal point.
To get the most out of this location, you need to arrive early. Position yourself near the stone wall for a panoramic view that encompasses the entire bay. If you’re feeling adventurous, hike down the Vikingsholm Trail to get eye-level with the water. The way the light hits the granite cliffs here is nothing short of magical, ensuring your images have a depth and clarity that is simply unmatched.
2. Bonsai Rock: The Icon of the East Shore
If you’ve seen a viral photo of a solitary tree growing out of a massive boulder in turquoise water, you’ve seen Bonsai Rock. Located on the Nevada side, this spot is a dream for landscape photography Lake Tahoe. As the sun dips below the mountains on the California side, the sky turns into a canvas of oranges and pinks, reflecting perfectly in the glass-like water.
Reaching Bonsai Rock requires a short but steep scramble down from Highway 28. Once you’re at the water’s edge, use a long exposure to smooth out the ripples around the boulders. The result is a surreal, ethereal image that looks like it belongs in a fine art gallery. For those who want to take their work to the next level, check out our fine art collection to see how we’ve captured this iconic location over the years.
3. Secret Cove: Turquoise Dreams
Many photographers overlook Secret Cove because of its reputation as a "clothing-optional" beach, but as a dedicated creator, you know that the scenery here is unparalleled. The water is so clear it looks like the Caribbean, framed by massive, smooth granite boulders that provide incredible leading lines for your compositions.
The best time to shoot Secret Cove is during the mid-morning when the sun is high enough to illuminate the underwater rock formations but not so high that it creates harsh shadows. This location is a staple in our Lake Tahoe Photography Guide, where we detail the exact sun angles you need to capture that glowing turquoise hue.
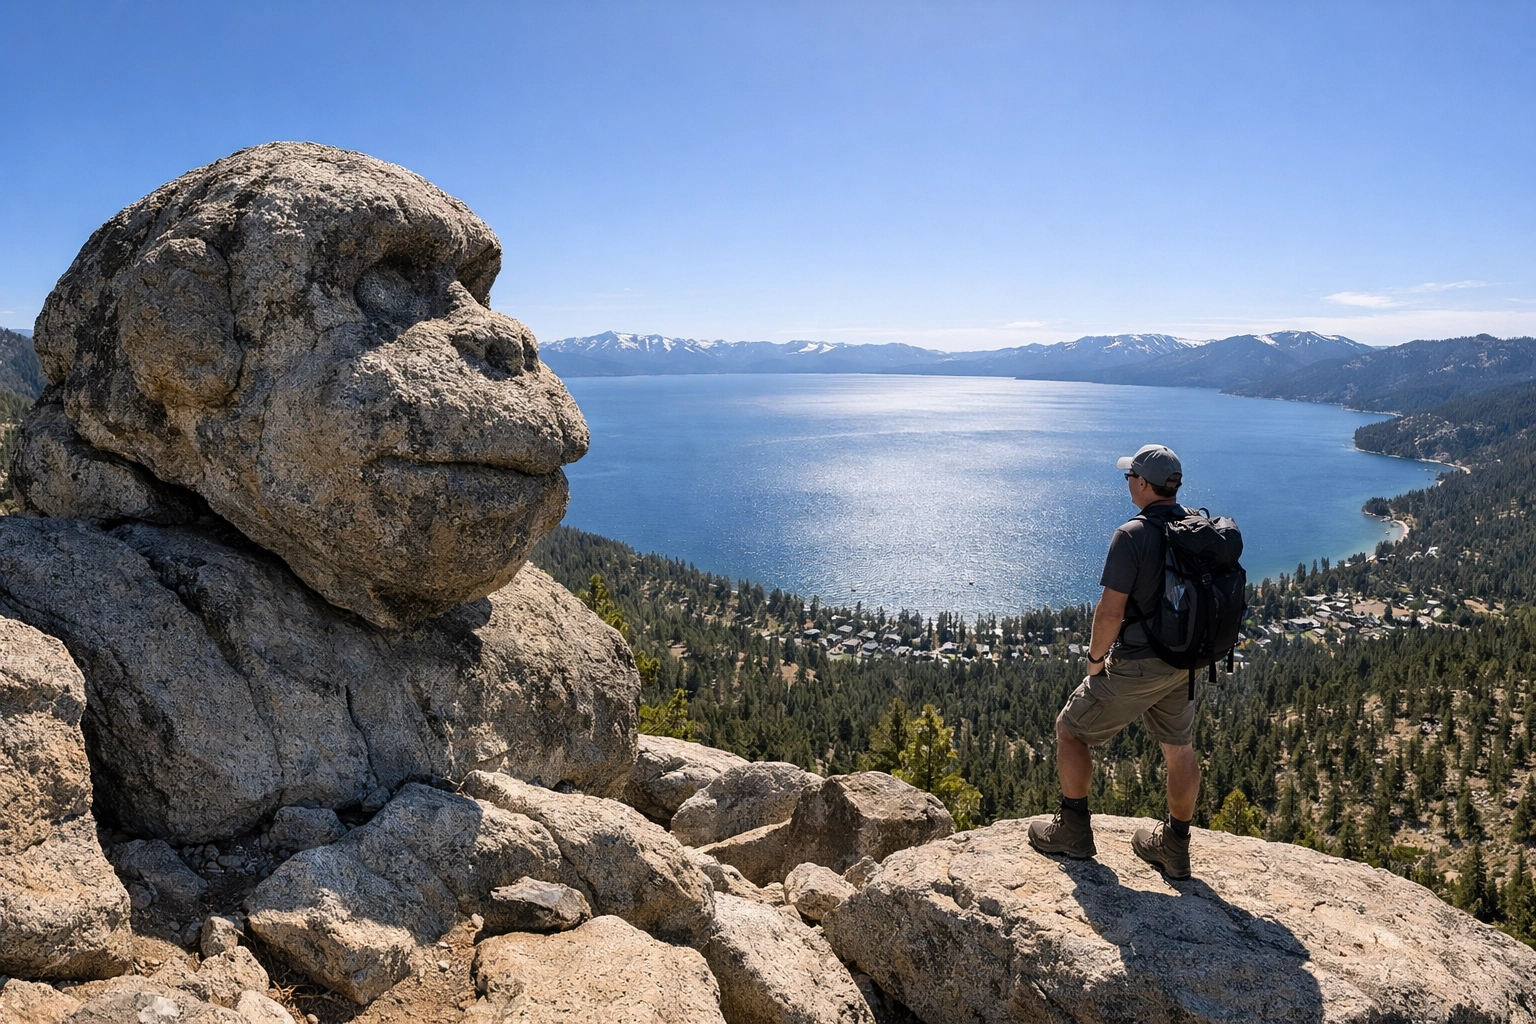
4. Monkey Rock: The Panoramic Masterpiece
For a perspective that elevates your portfolio literally and figuratively, a hike to Monkey Rock is mandatory. Located near Incline Village along the Flume Trail, this spot offers a 180-degree panoramic view of the lake. The "monkey" is a rock formation naturally shaped like a primate’s head, providing a fun foreground element for your wide-angle shots.
As you look out over the vast expanse of blue, you’ll see the curve of the shoreline stretching for miles. This is an excellent location for drone photography (where permitted) or for capturing high-resolution panoramas that you can later print as large-scale fine art pieces.
5. Sand Harbor: The Versatile Legend
Sand Harbor is widely considered one of the best photo spots Lake Tahoe offers because of its accessibility and variety. You have everything here: sandy beaches, rocky points, and boat docks that add a human element to your landscapes. The boardwalks provide great geometric lines, while the "rock garden" just offshore is a playground for long-exposure enthusiasts.
Because Sand Harbor is a popular state park, it can get crowded. Your best bet is to visit during the "shoulder season" or very late in the evening. The artificial lights from the nearby visitor centers can even provide some interesting light painting opportunities if you’re into night photography.
6. Cave Rock: The Sentinel of the South
Just as Highway 50 passes through the tunnel, you’ll find the trailhead for Cave Rock. This short, 15-minute hike rewards you with a vantage point that feels like you’re standing on top of the world. From the top of the "Lady of the Lake," you have a clear view of the entire southern basin.
Sunset here is a religious experience. The sun sets directly across the lake, casting a golden glow over the water that makes the entire landscape feel like it’s on fire. It’s the perfect place to practice your HDR techniques or use a graduated neutral density filter to balance the bright sky with the darker foreground rocks.
7. Fallen Leaf Lake: The Alpine Alternative
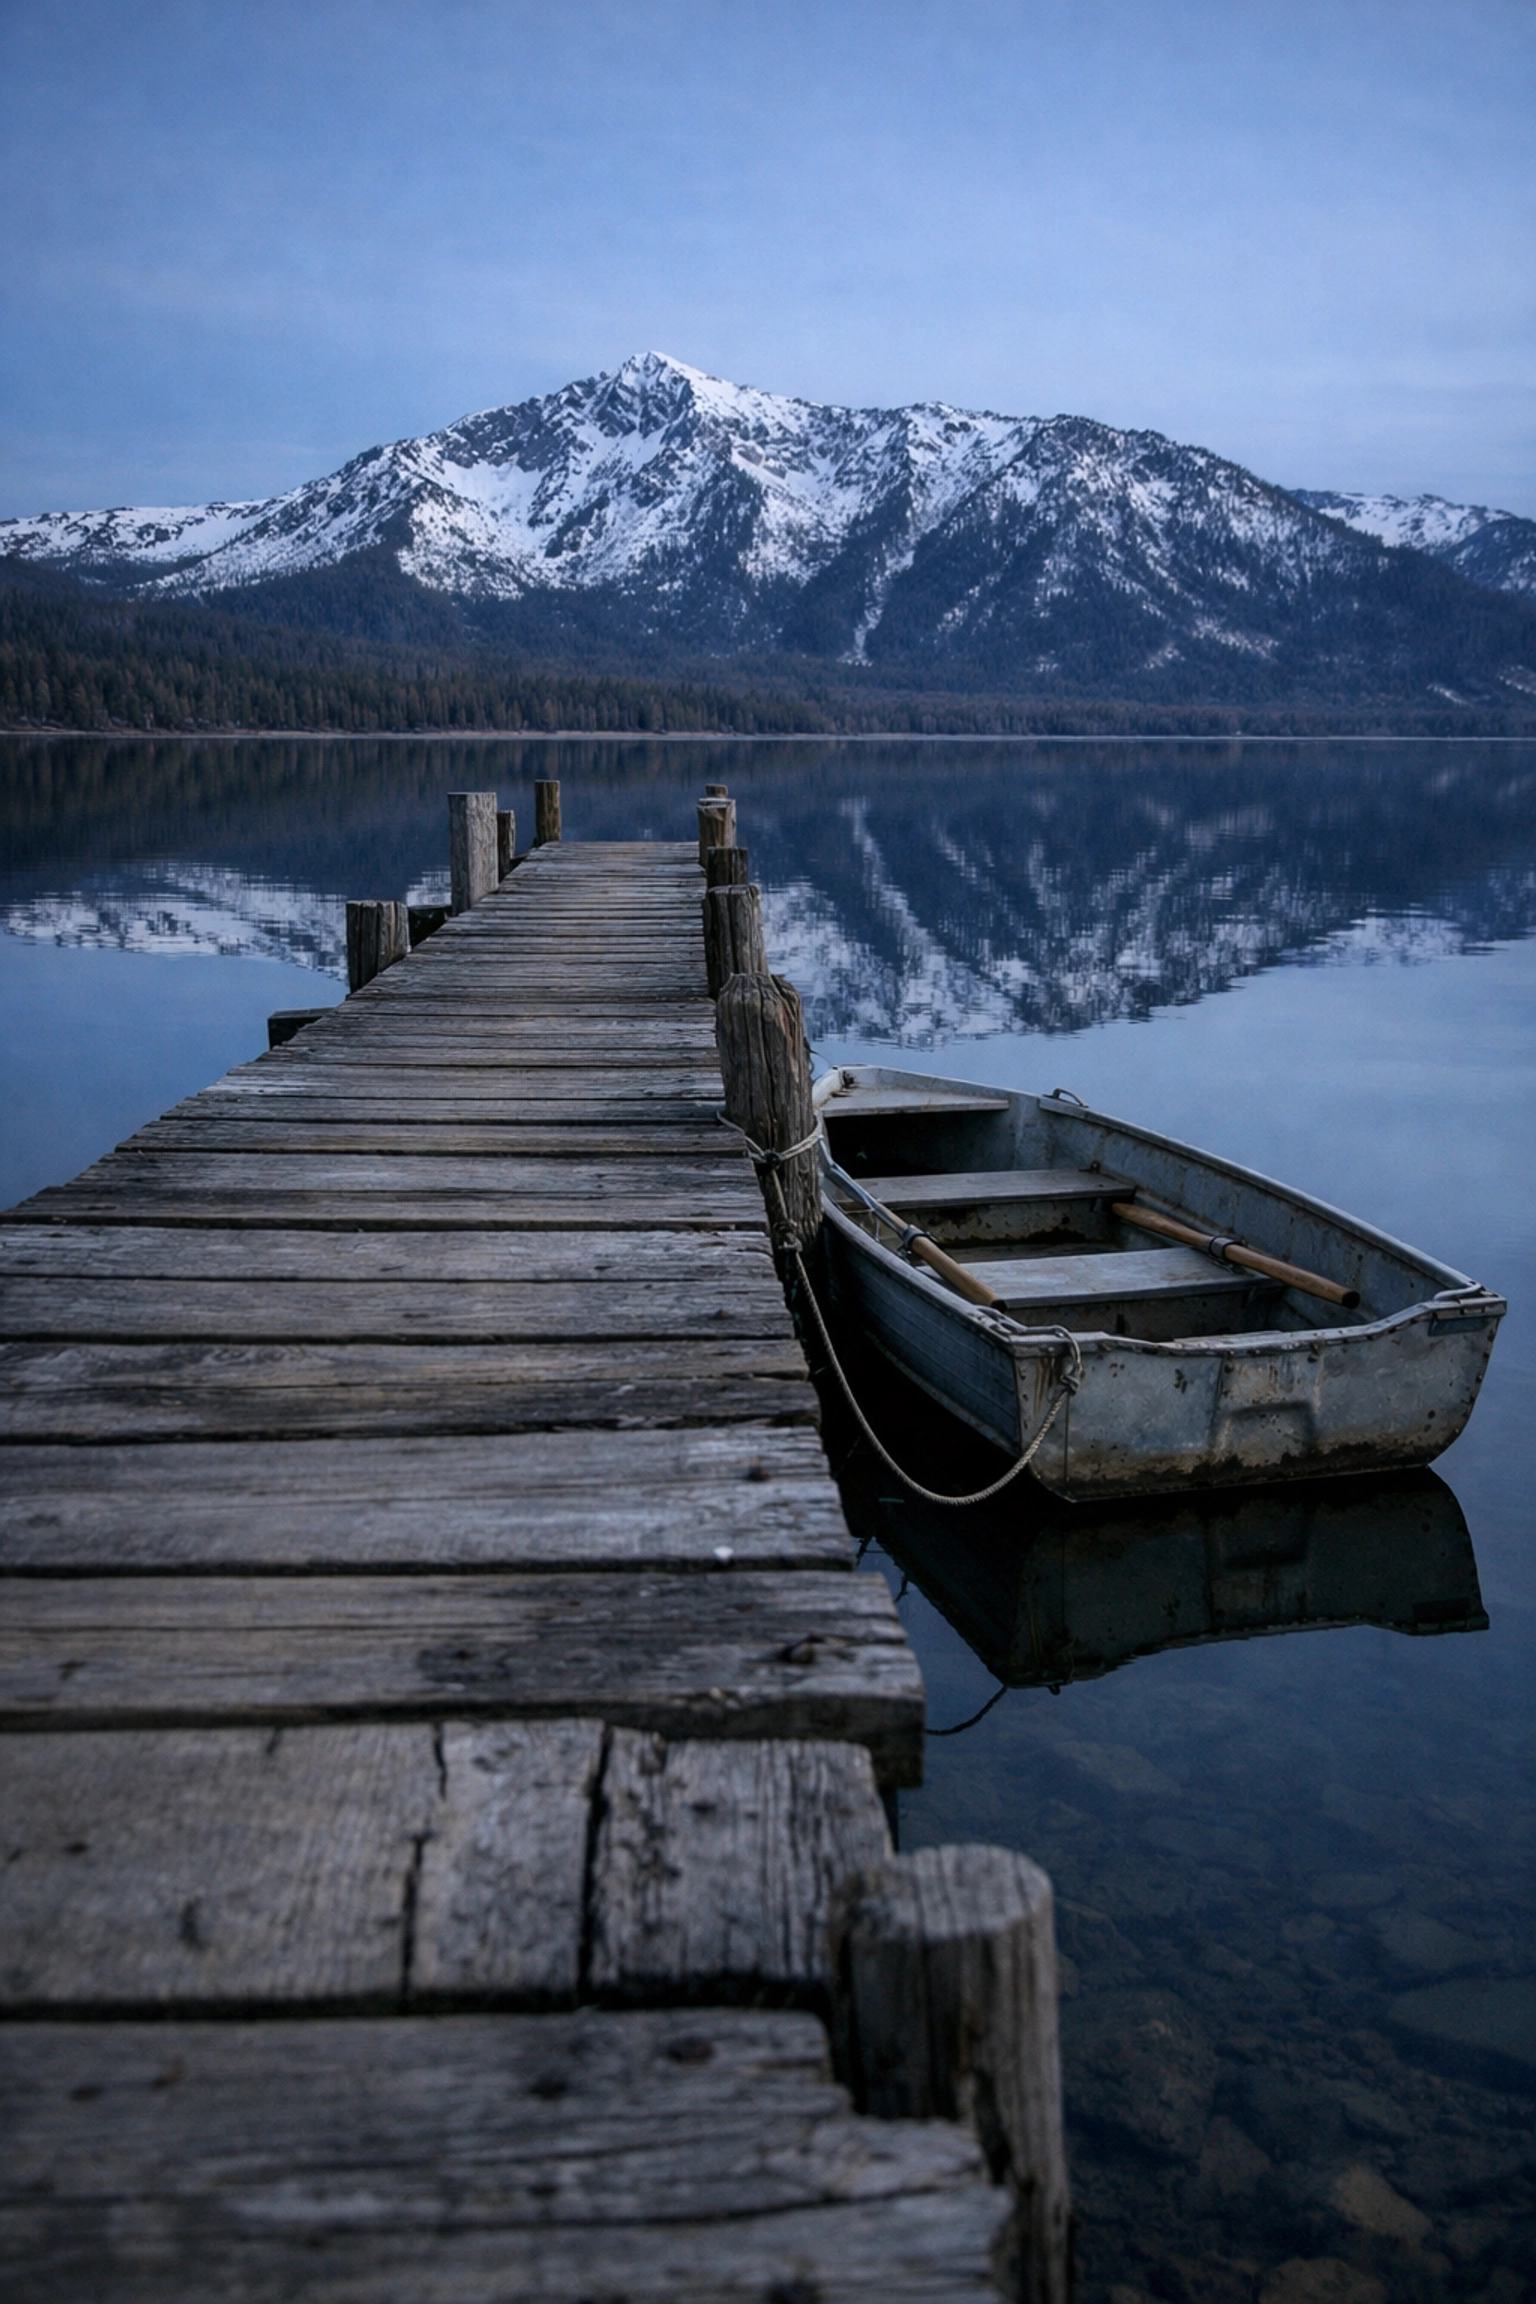
If you want to escape the main lake's crowds, head over to Fallen Leaf Lake. Situated at the base of Mount Tallac, this alpine lake offers a rugged, moody vibe that is perfect for professional landscape work. The reflections of Mount Tallac in the early morning are so sharp they look like a mirror.
You’ll find old wooden piers and rustic cabins that add a sense of history and scale to your images. By integrating these elements, you create a story rather than just a photo. For more tips on storytelling through your lens, visit Edin Studios.
8. Zephyr Cove: Sunset Symmetry
Zephyr Cove is where you go when you want to capture the drama of the Sierra Nevada mountains. The beach faces west, providing a front-row seat to some of the most spectacular sunsets in North America. The proximity of the mountains on the far shore creates a sense of scale that is hard to find elsewhere.
This is also the home of the M.S. Dixie II paddlewheeler. Capturing this historic boat against a backdrop of a burning sunset adds a classic, Americana feel to your Lake Tahoe collection.
9. Valhalla Pier: Linear Perfection
Located near Camp Richardson, the Valhalla Pier is a favorite for photographers who love symmetry and leading lines. The long, wooden pier reaches out into the blue, drawing the viewer's eye toward the distant mountains. It’s an ideal spot for sunrise, as the light hits the side of the pier, creating beautiful textures in the wood.
10. Rubicon Trail & D.L. Bliss: Rugged Beauty
Connecting D.L. Bliss State Park to Emerald Bay, the Rubicon Trail is a 7.5-mile stretch of pure photographic gold. Every turn provides a new cliffside view or a hidden cove. The water here is a deep, royal blue, contrasting with the white granite cliffs. This trail ensures that your portfolio has a variety of textures and colors that reflect the true diversity of the Lake Tahoe basin.
Photography Locations Comparison Table
To help you plan your trek, I’ve organized these locations by their primary appeal and the best time to visit:
| Location |
Best Time to Shoot |
Primary Feature |
| Emerald Bay |
Sunrise |
Fannette Island & Panoramic Vistas |
| Bonsai Rock |
Sunset |
Iconic Tree & Large Boulders |
| Secret Cove |
Mid-Morning |
Crystal Clear Turquoise Water |
| Cave Rock |
Sunset |
180-Degree Southern Lake Views |
| Fallen Leaf Lake |
Early Morning |
Mt. Tallac Reflections |
| Sand Harbor |
Sunrise/Late Evening |
Granite Rock Formations |
| Monkey Rock |
Afternoon |
High Elevation Panoramic |
| Valhalla Pier |
Sunrise |
Geometric Leading Lines |
| Zephyr Cove |
Sunset |
Mountain Silhouettes |
| Rubicon Trail |
Golden Hour |
Rugged Cliffs & Deep Blue Water |
Mastering Your Lake Tahoe Adventure
Knowing where to go is only half the battle. To truly master Lake Tahoe photography locations, you need to understand the nuances of the light, the weather, and the gear required for high-altitude shooting. The Sierras are unpredictable; a clear sky can turn into a dramatic thunderstorm in minutes: which, for a photographer, is actually a gift.
By utilizing our Lake Tahoe Photography Guide, you’re not just buying a list of spots; you’re investing in your own growth as an artist. We provide the technical specs and the local secrets that propel your work from average to extraordinary.
Lake Tahoe is a place that demands respect and rewards patience. Whether you are capturing the "Tahoe Blue" water at Sand Harbor or the jagged peaks from Cave Rock, remember that you are documenting one of the most beautiful places on Earth.
With these locations in your arsenal, your next trip to the Sierras will be your most productive yet. For more inspiration, educational resources, and fine art tips, stay tuned to the Edin Chavez Photography Blog. We are dedicated to providing you with the tools and knowledge to make every shutter click count.
Hence, don't just dream about the perfect shot: go out and take it. The light is waiting for you. For more information on our workshops and professional services, visit Edin Studios today. Your journey into the heart of Lake Tahoe starts now.
Just as a master painter selects their brush with surgical precision, your choice of light defines the very soul of your fine art photography. Many photographers spend years chasing the "perfect" shot, yet they overlook the most transformative element in their arsenal: ethereal light. This isn't just about brightness; it’s about creating a whisper-soft atmosphere that transports your viewer into a different realm.
At Edin Chavez Photography, we believe that mastering this aesthetic is what separates a standard snapshot from a gallery-worthy masterpiece. When you understand how to manipulate light to create a dreamy, otherworldly glow, you elevate your work into the high-stakes world of fine art. Whether you are capturing landscapes or portraits, the secrets of ethereal light provide you with a competitive edge that is unmatched in the industry.
By exploring the technical nuances and post-processing secrets revealed here, you will gain the confidence to stop "getting lucky" with your shots and start creating them with intent. Your journey toward becoming a fine art authority begins with mastering the light that others simply don't see.
The Foundation of Soft, Diffused Lighting
The first secret the pros won't always tell you is that harsh, direct sunlight is the enemy of ethereal photography. To achieve that signature "glow," you must prioritize soft, diffused lighting. Think of the sky as your largest softbox. When you shoot during overcast days, the clouds act as a massive diffuser, stripping away high-contrast shadows and providing you with a flat, even canvas.
This low-contrast environment is your playground. It ensures that skin tones are rendered smooth as butter and highlights don't "clip" or blow out. If you find yourself shooting in clear conditions, you must wait for the "Golden Hour": that window just after sunrise or before sunset. However, the real magic happens when the sun is just below the horizon, or "Blue Hour," where the light is naturally cool and incredibly soft.

Beyond the weather, you can control your environment using high-quality modifiers. If you're working in a studio setting, large octaboxes or scrims are essential. They mimic the natural diffusion of a cloudy sky, allowing you to wrap light around your subject. This technique provides the foundational softness required for any ethereal composition, ensuring your work carries the weight and elegance of professional fine art.
Technical Precision: The Settings That Create Depth
Your camera settings are the engine that drives your creative vision. To achieve a truly dreamy look, you must master a shallow depth of field. This technique isolates your subject while turning the background into a soft, impressionistic blur. By setting your camera to a low f-stop: ideally between f/1.4 and f/2.8: you widen your aperture and compress the focus.
When you shoot wide open, you create a sense of intimacy and mystery. The viewer’s eye is immediately drawn to the sharpest point of the image, while the rest of the world melts away. This separation is a hallmark of fine art photography. However, technical mastery doesn't stop at aperture. You should also consider the following:
| Feature |
Best Setting for Ethereal Effects |
Why It Works |
| Aperture |
f/1.4 – f/2.8 |
Creates a shallow depth of field and beautiful bokeh. |
| ISO |
100 – 400 |
Keeps the image clean and free of digital noise. |
| Shutter Speed |
Variable (Slow for motion) |
Slow speeds can blur water or clouds for a surreal feel. |
| White Balance |
Kelvin (5000K-6500K) |
Allows you to manually warm or cool the "glow" of the light. |
Advanced photographers also utilize High Dynamic Range (HDR) techniques, but not the garish, over-processed versions you might see on social media. Instead, you should capture multiple exposures to preserve detail in both the deepest shadows and the brightest highlights. This ensures that even in a high-contrast scene, such as light pouring through a narrow canyon, your image remains balanced and ethereal. For more in-depth training on these settings, you can explore our photography courses.
Using Physical Elements to Enhance the Glow
One of the most guarded secrets in ethereal photography is the use of foreground elements to create "in-camera" softness. You don't always need to wait for the editing room to create magic. By placing semi-transparent objects directly in front of your lens: such as sheer fabric, glass prisms, or even local foliage: you can introduce a natural, hazy frame that enhances the dreamy quality of your shot.
This technique, often called "shooting through," adds layers of depth that a flat image simply cannot replicate. Reflective surfaces also play a massive role. Water, mirrors, or metallic props can catch the light and bounce it back onto your subject, creating a subtle, secondary glow.

Strategic light placement, such as "base lighting" or "uplighting," can also create a surreal effect. When you light a translucent object from below, it appears to glow from within, rather than being lit from the outside. This is a favorite technique for fine art masters who want their subjects to look like they are emerging from a dream. If you are looking to master these physical setups, our workshops provide hands-on experience in various lighting environments.
Dreamy Photography Editing: The Digital Alchemy
Post-processing is where your raw data becomes a masterpiece. Dreamy photography editing is an art form that requires a delicate touch; overdoing it will ruin the illusion, but the right techniques will make your work sing. The most effective method used by experts is the "Orton Effect" or a variation of it.
To do this manually, you duplicate your main layer in Photoshop and apply a Gaussian Blur to the top layer. By changing the blending mode to "Soft Light" or "Overlay" and reducing the opacity, you introduce a soft, luminous glow while maintaining the structural integrity of the original image. This creates a "bloom" effect in the highlights that is synonymous with fine art.
Color grading is your next step. Ethereal images often lean toward a specific palette: either warm and nostalgic or cool and cinematic. You should use selective color adjustments to desaturate distracting hues and emphasize the tones that support your narrative. If you want to speed up this process, you can utilize professional-grade presets designed specifically for the fine art aesthetic.
Remember, the goal of editing in this genre is to enhance the emotion, not just the pixels. By carefully adjusting contrast and using "Curves" to lift the blacks slightly, you create a matte, film-like finish that resonates with collectors and gallery owners alike. You can find more editing tips and tricks on the Edin Chavez blog.
The Power of Strategic Shadows
It is a common misconception that ethereal photography must be bright. On the contrary, there is immense beauty in the darkness. Leading fine art photographers like Peter Lik demonstrate that the interplay between light and shadow is what creates drama. By using "negative fill" (black boards) to deepen shadows on one side of your subject, you add three-dimensionality.
Strategic shadows act as a container for your light. Without them, the light has nothing to push against, and your image can feel flat and uninspired. When you control the transition between the highlight and the shadow: known as the "feathering" of the light: you dictate the mood of the entire piece.
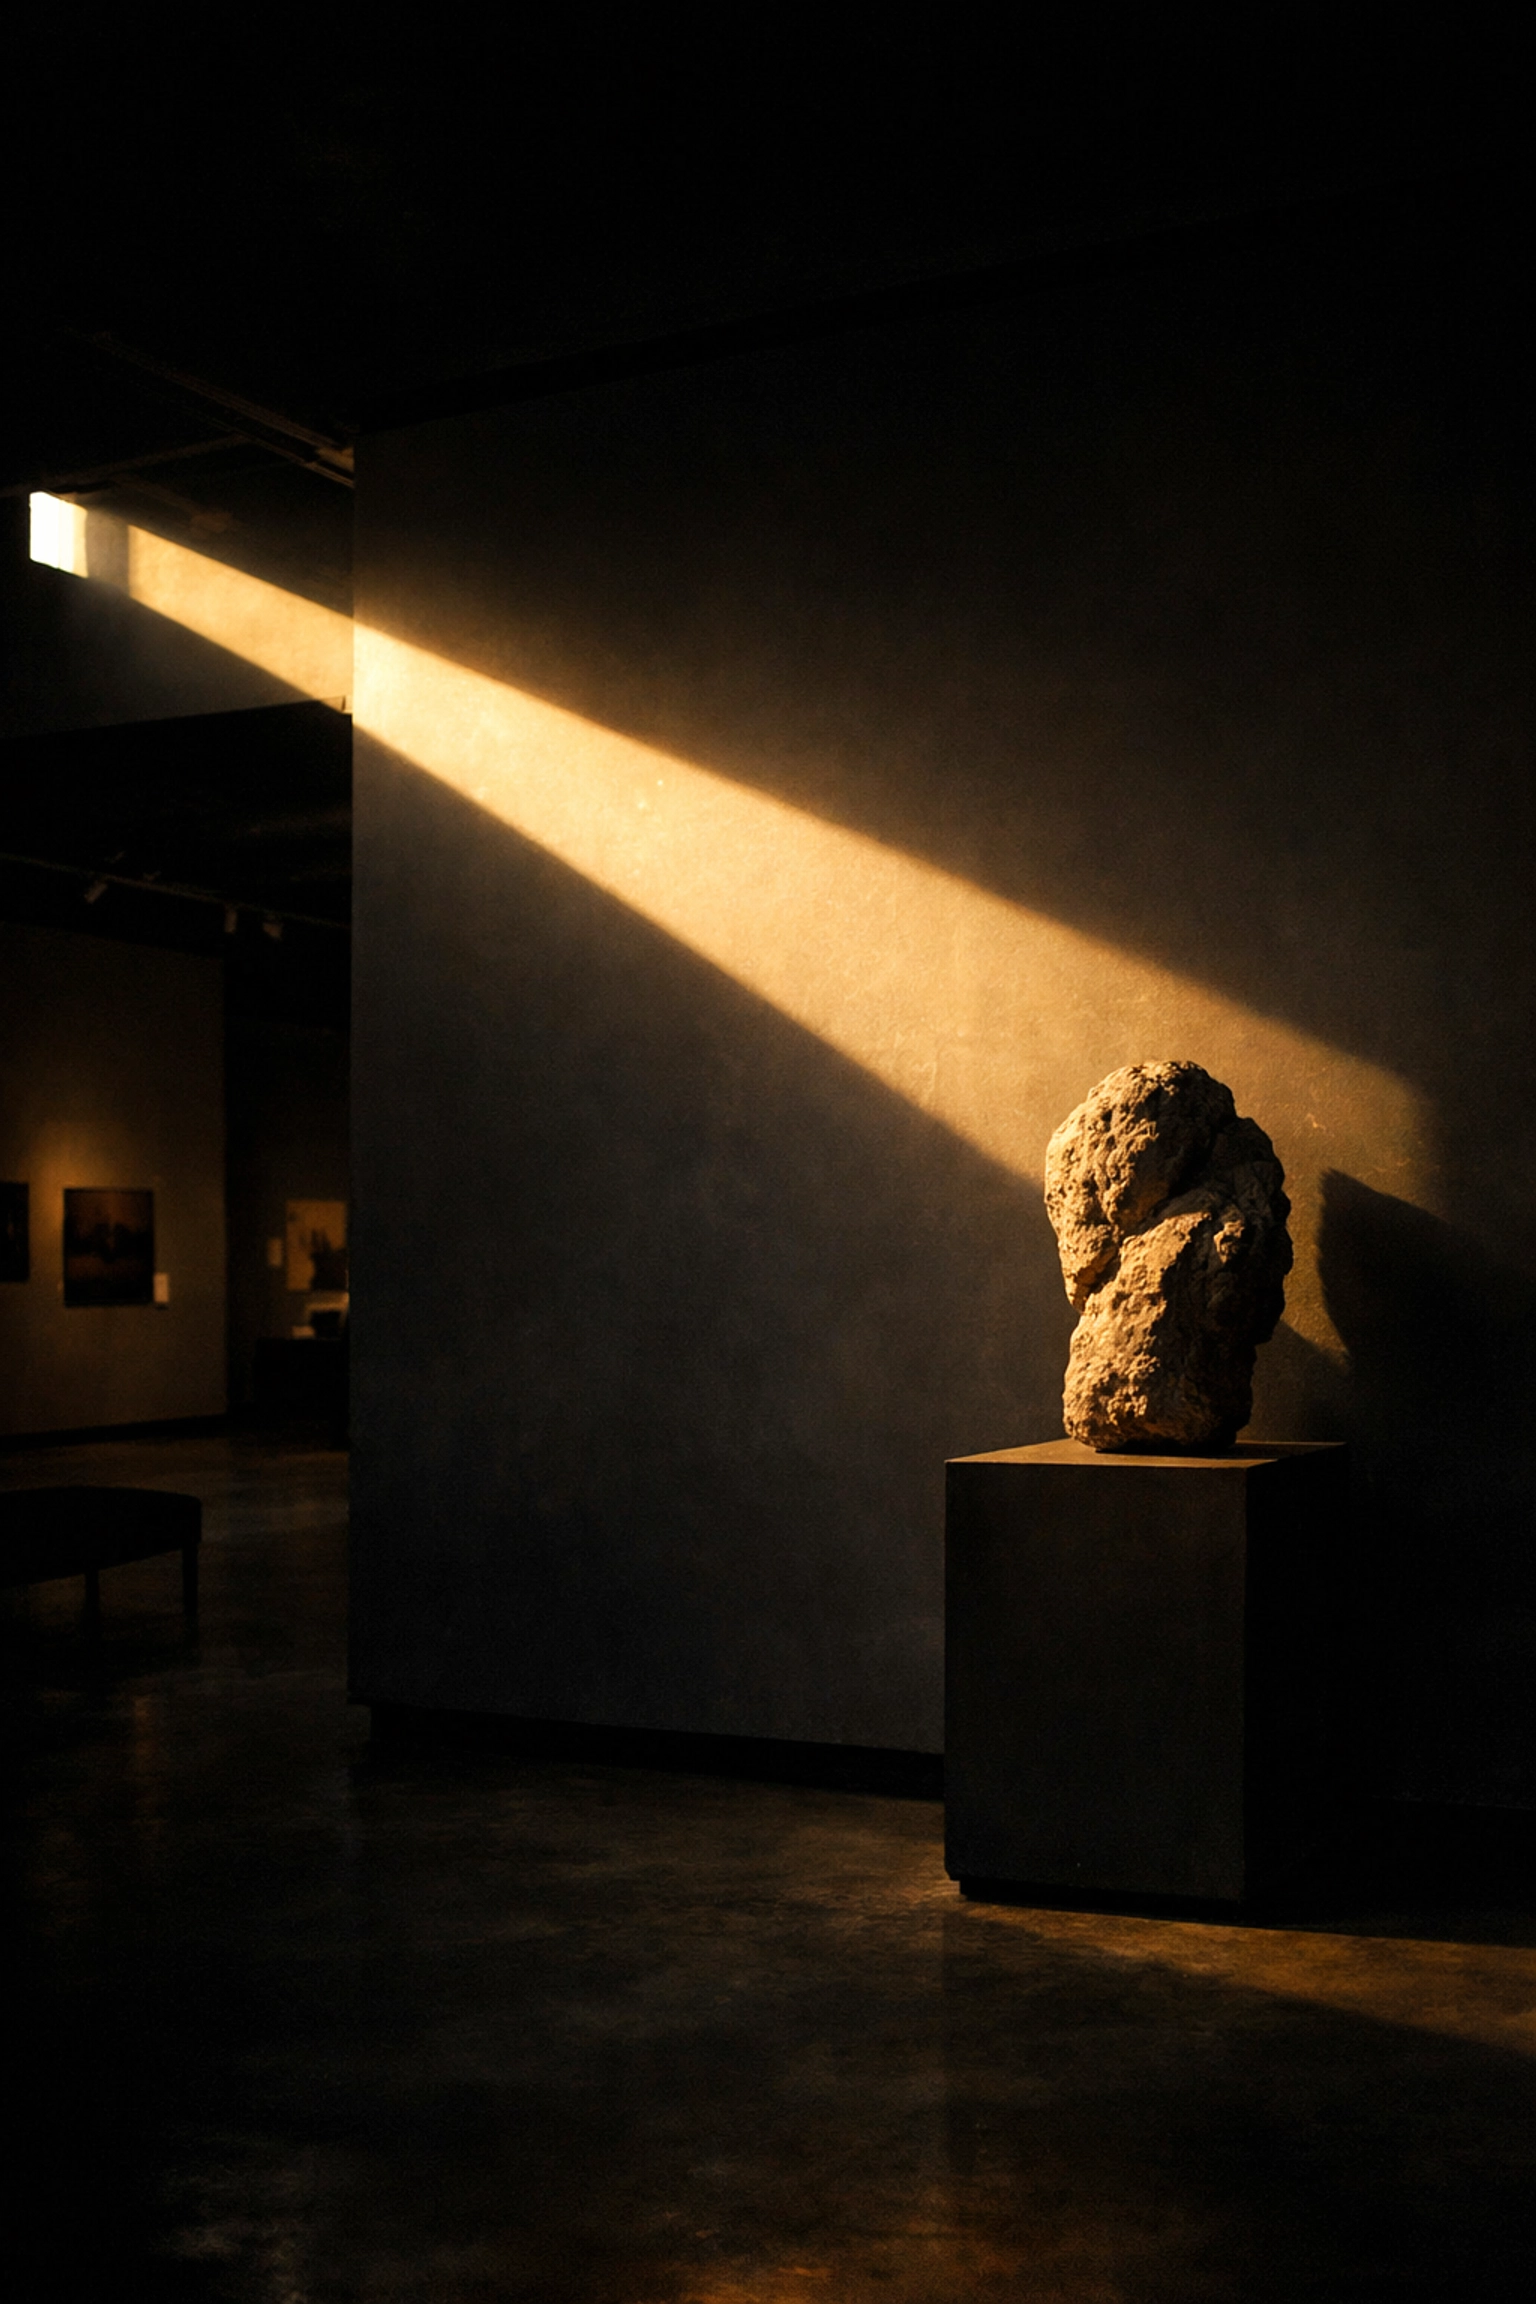
In landscape photography, this might mean waiting for a single ray of light to break through a canyon or hit a specific mountain peak. In portraiture, it means using a narrow light source to illuminate only the most essential features of your subject. This mastery of contrast ensures that your ethereal light feels intentional and powerful, rather than accidental.
Elevating Your Portfolio through Fine Art Mastery
Mastering ethereal light is about more than just technical skill; it is about developing a unique visual voice. When you apply these secrets: the soft diffusion, the shallow depth of field, the physical foreground layers, and the digital "bloom": you create a portfolio that stands out in a crowded market.
At Edin Studios, we are dedicated to helping you reach that next level of artistic expression. Fine art photography is a journey of constant refinement. By integrating these techniques into your workflow, you ensure that every image you produce carries a sense of wonder and professional polish.
Whether you are just starting to experiment with dreamy aesthetics or you are a seasoned pro looking to refine your "glow," the key is consistency. Practice these lighting setups, experiment with your post-processing, and never be afraid to embrace the shadows. Your ability to see and capture light in its most ethereal form is your greatest asset as a photographer.
Hence, with these considerations in mind, you are now equipped to go out and capture the world in a way that others can only dream of. The "secrets" are now in your hands; it’s time to show the world what you can do with them. For more inspiration and professional insights, keep following our journey at Edin Chavez Photography.
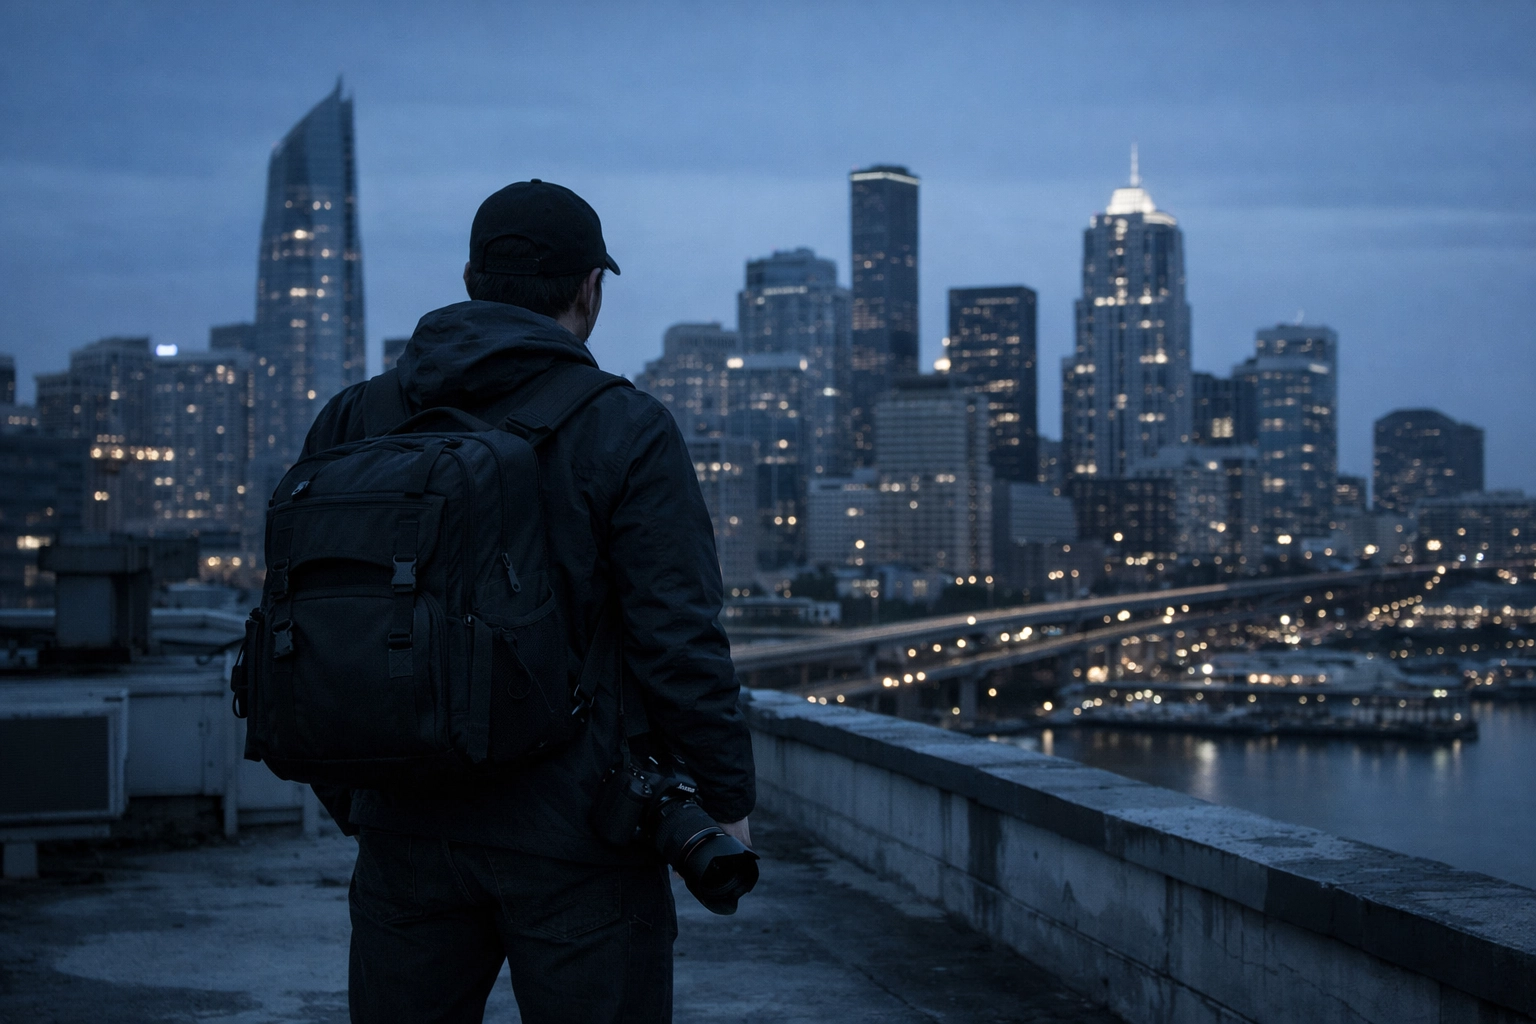
As the digital landscape for creative professionals continues to shift, the traditional methods of finding consistent, high-paying work are becoming relics of the past. You likely know the struggle of scrolling through endless social media feeds or bidding on generic gig sites where your talent is treated like a commodity. This is exactly why a dedicated marketplace like Proshoot.io is a game-changer for your career. By centralizing the search for jobs for photographers, this platform ensures you spend less time hunting for leads and more time behind the lens.
Whether you are a seasoned pro or an emerging talent looking to level up, understanding how to navigate this ecosystem is vital. You aren't just looking for any gig; you are looking for premium opportunities that respect your craft and pay what you are worth. In this guide, we will dive deep into how you can leverage Proshoot.io to build a sustainable, thriving photography business.
Navigating the New Landscape of Jobs for Photographers
Many photographers find themselves stuck in a cycle of "feast or famine," unsure of where their next client will come from. This instability often stems from a lack of a centralized hub that connects high-end clients with vetted professionals. Proshoot.io steps into this gap, providing a robust marketplace designed specifically for the visual arts. When you use a platform built by people who understand the industry, the entire process of finding jobs for photographers becomes smooth as butter.
By integrating your workflow into a dedicated marketplace, you gain immediate access to a pool of clients who are already looking for your specific skill set. Unlike general freelancer sites, the clients here are looking for quality over the lowest price. This commitment to professional standards ensures that the "race to the bottom" mentality doesn't exist here. You are empowered to showcase your unique style and negotiate terms that reflect your expertise.

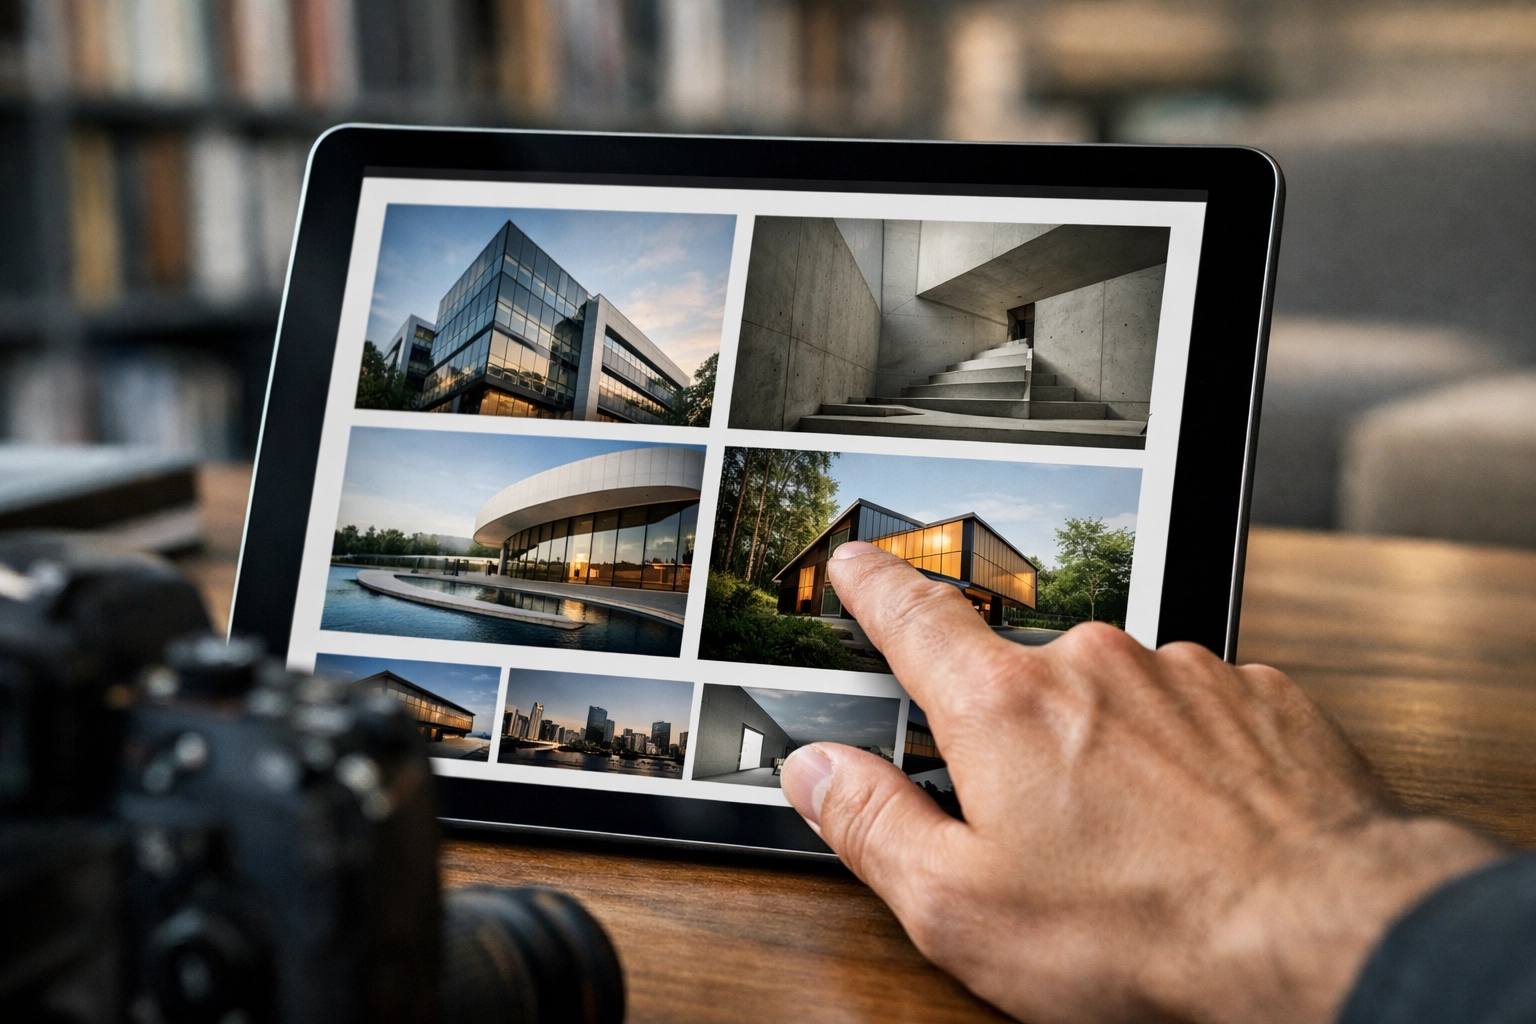
Building a Profile That Converts
Just as a gallery curator meticulously selects pieces for an exhibition, you must curate your Proshoot.io profile to act as your 24/7 digital salesperson. Your profile is often the first interaction a potential client has with your brand, and it needs to scream professionalism from the first click. Proshoot.io provides unparalleled portfolio hosting features that allow your high-resolution imagery to shine without the compression issues found on social media platforms.
When you set up your profile, you are doing more than just uploading photos; you are building a narrative of your reliability and technical prowess. You should treat your portfolio as a living document, frequently updating it with your latest and best work. For insights on how to refine your aesthetic and keep your portfolio fresh, checking out the resources at Edin Chavez Photography Blog can provide the inspiration you need to stay ahead of trends.
| Feature |
Reader Benefit |
| High-Res Portfolio Hosting |
Ensures your work looks crisp and professional to every browsing client. |
| Verified Badge System |
Instantly builds trust by confirming your identity and professional status. |
| Direct Client Messaging |
Eliminates the friction of middle-man communication, letting you close deals faster. |
| SEO-Optimized Profiles |
Helps your profile appear when clients search for specific photography niches. |
Mastering the Marketplace Bidding System
This marketplace functions on a sophisticated bidding system that allows you to proactively pursue the projects that excite you. Instead of waiting for the phone to ring, you can browse through active listings and submit proposals that highlight why you are the best fit for the job. This active approach to finding jobs for photographers puts the steering wheel of your career back in your hands.
Winning a bid isn't just about having the lowest price: in fact, on Proshoot.io, it rarely is. It is about the value proposition you present. Your proposal should address the client’s specific needs, showing that you’ve read their brief and have a clear vision for the execution. If you need a deeper look at how to position yourself as a luxury brand to win these higher-tier bids, you can find expert advice at Edin Studios, where we focus on the business of high-end visual production.

Networking and Client Relationships
By fostering a community of professionals, Proshoot.io goes beyond a simple job board and becomes a networking powerhouse. The platform allows you to connect with other creatives and clients in a way that feels organic rather than forced. Long-term success in this industry is built on relationships, and your ability to turn a one-off job into a recurring contract is what will define your career longevity.
When you deliver exceptional work through the platform, you aren't just getting a paycheck; you are earning reviews and a reputation that propels you toward even bigger opportunities. Proshoot.io tracks your performance and client satisfaction, creating a feedback loop that rewards the best photographers with higher visibility. This transparency ensures that your hard work is always recognized and leveraged for future growth.
Strategic Steps to Land Your First Premium Job
- Complete Your Bio with Precision: Don't just say you "take photos." Describe the problems you solve for your clients and the specific moods you create.
- Upload Niche-Specific Galleries: Clients looking for architectural photography don't want to dig through 500 wedding photos. Create organized, themed galleries.
- Optimize Your Keywords: Use terms like "commercial photography," "luxury real estate," or "editorial portraits" to ensure the right clients find you.
- Set Up Alerts: Be the first to know when new jobs for photographers are posted in your area or niche to give yourself a competitive edge.
- Review the Competition: See what other top-rated photographers on Proshoot.io are doing and find ways to differentiate your offering.
Why Proshoot.io Outperforms Traditional Platforms
With these tools at your disposal, the comparison between Proshoot.io and traditional social media or general gig sites is night and day. On traditional social platforms, your work is buried under an algorithm that favors engagement over artistry. On Proshoot.io, the "algorithm" is built to showcase talent and facilitate business transactions. It is a streamlined ecosystem designed to remove the noise and focus on the work.
| Proshoot.io Feature |
Traditional Social Media |
General Gig Sites |
| Niche Focus |
Specifically for photographers/videographers. |
General audience; no business focus. |
| Bidding Control |
You choose the projects and the price. |
No formal bidding; "DM for rates." |
| Client Intent |
High; clients are ready to hire. |
Low; mostly browsing or looking for freebies. |
| Portfolio Quality |
Professional, high-res display. |
Compressed, mobile-first viewing. |
Future-Proofing Your Photography Career
As you look toward the future of your business, integrating with a platform like Proshoot.io is an essential step in professionalizing your workflow. The industry is moving toward specialized marketplaces where expertise is valued over generic availability. By establishing your presence here now, you are positioning yourself at the forefront of this shift, ensuring you are the first choice for premium clients.
This commitment to your professional development shouldn't stop at the marketplace. Continuous learning is the hallmark of any successful creative. You can explore a wealth of technical tutorials and industry insights on the Edin Chavez Photography Blog to keep your skills as sharp as your business acumen. Combining world-class talent with a robust platform for client acquisition is the ultimate formula for success.
By utilizing the features of Proshoot.io: from the marketplace bidding system to the high-end portfolio hosting: you are taking a definitive step toward financial and creative independence. The platform doesn't just provide a list of jobs for photographers; it provides a comprehensive infrastructure for your entire business.
With these considerations in mind, it is clear that the path to landing premium jobs is through a dedicated, professional marketplace. Whether you are aiming to fill your calendar for the next month or looking for that one career-defining project, Proshoot.io provides the tools, the network, and the visibility you need to make it happen. Start building your profile today at Proshoot.io and take control of your professional destiny. For more information on our high-end services and fine art, visit Edin Studios.
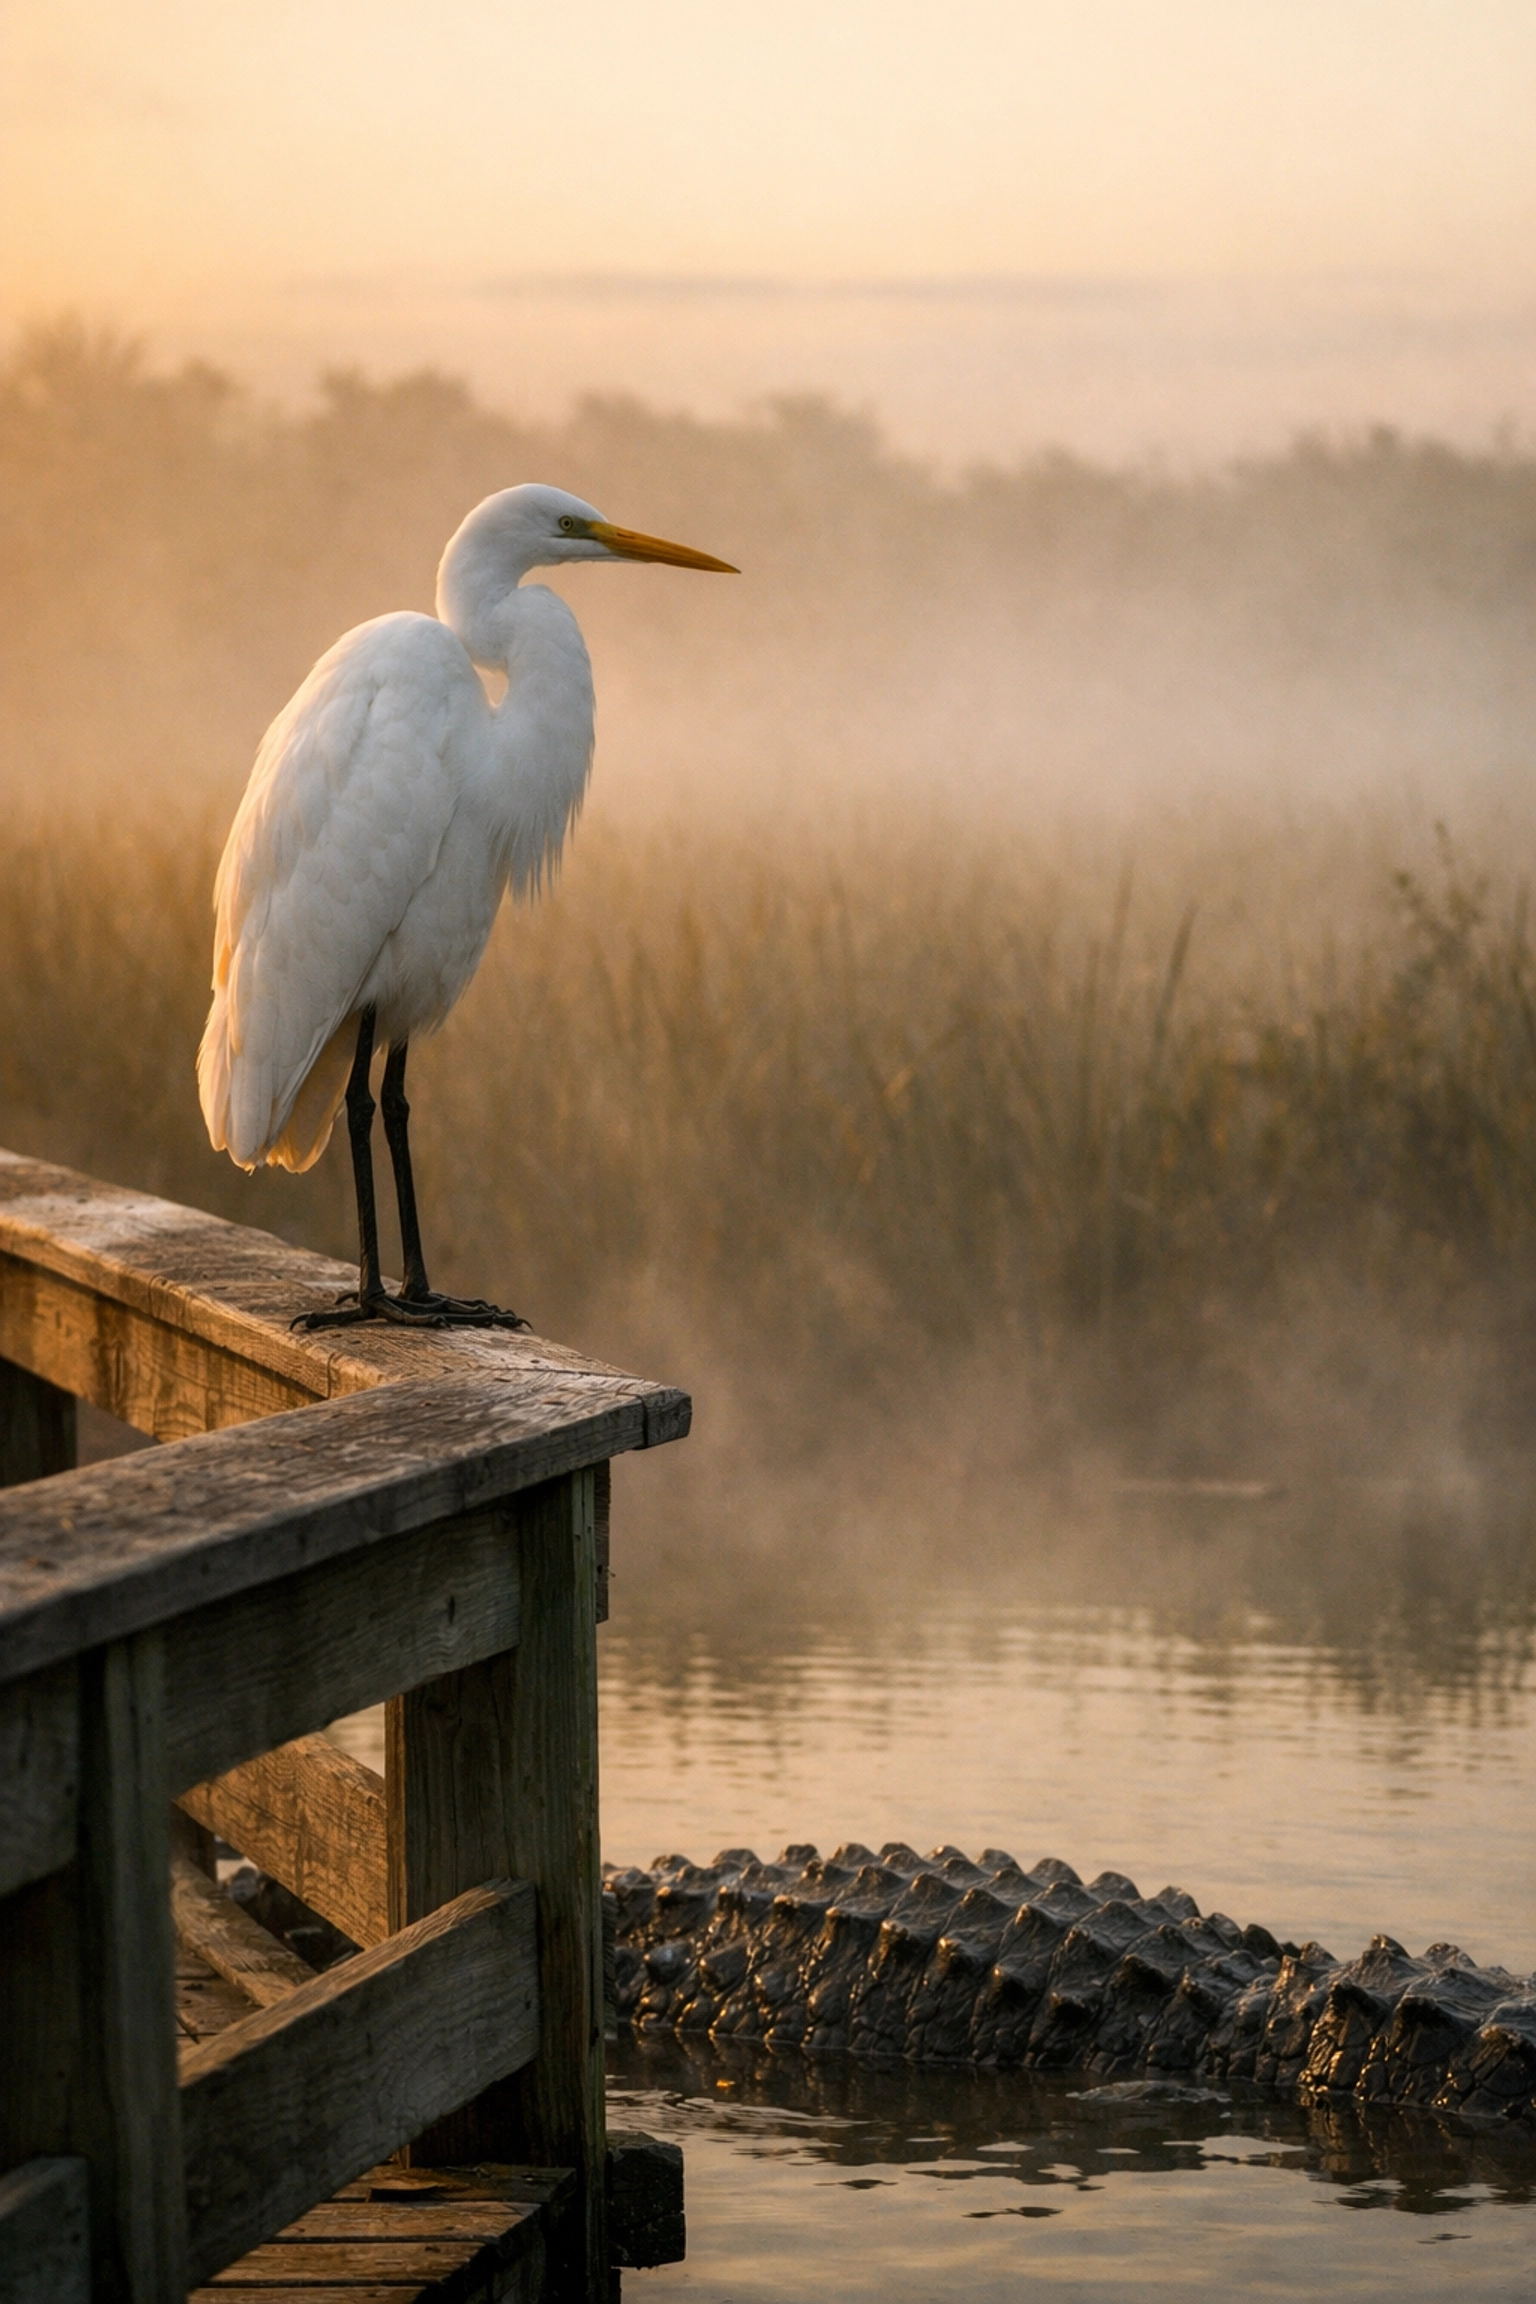
Just as the morning mist begins to lift off the sawgrass prairies, you realize that the Everglades is not just a swamp; it is a prehistoric landscape teeming with life, waiting for your lens to capture its soul. Many photographers visit Florida and stick to the coastlines, but when you venture into the "River of Grass," you unlock a world of biodiversity that is simply unmatched anywhere else on the planet. Whether you are looking for high-octane wildlife photography Everglades moments or the quiet, ethereal beauty of landscape photography Everglades scenes, this guide ensures you know exactly where to stand when the light hits.
Stepping into the Everglades can be overwhelming due to its sheer scale. To help you navigate this unique ecosystem, I have curated the absolute best Everglades photography locations based on years of field experience. This is your roadmap to success in one of the most challenging yet rewarding environments in the world.
The Iconic Anhinga Trail: Your Wildlife Hub
When you first arrive at the Royal Palm area, your primary destination should be the Anhinga Trail. This is widely considered the crown jewel of accessible wildlife photography. Because the animals here are accustomed to the boardwalk, you can get incredibly close to your subjects without disturbing their natural behavior.
You will encounter anhingas drying their wings, various species of herons and egrets, and more alligators than you can count. To truly elevate your work, arrive just before sunrise. The low-angled light creates a golden glow on the water, and if the temperature is right, a layer of mist will hang over the marsh, providing a dreamlike quality to your compositions. By positioning yourself early, you ensure your images have the depth and atmosphere that separate a snapshot from fine art.
Shark Valley: Perspective and Panoramas
Located off the Tamiami Trail, Shark Valley offers a different perspective on the glades. The 15-mile loop is a haven for birds and reptiles alike. While many tourists take the tram, you should consider renting a bike or walking the first few miles to maintain full control over your shooting angles.
The observation tower at the halfway point provides a 360-degree view of the horizon, which is essential for your landscape photography Everglades portfolio. From this height, you can capture the vastness of the sawgrass plains and the dramatic Florida cloud formations. Along the trail itself, you will find alligators lounging within feet of the path. Use a 70-200mm lens here to capture environmental portraits, showing the reptile within its grassy kingdom rather than just a tight headshot.
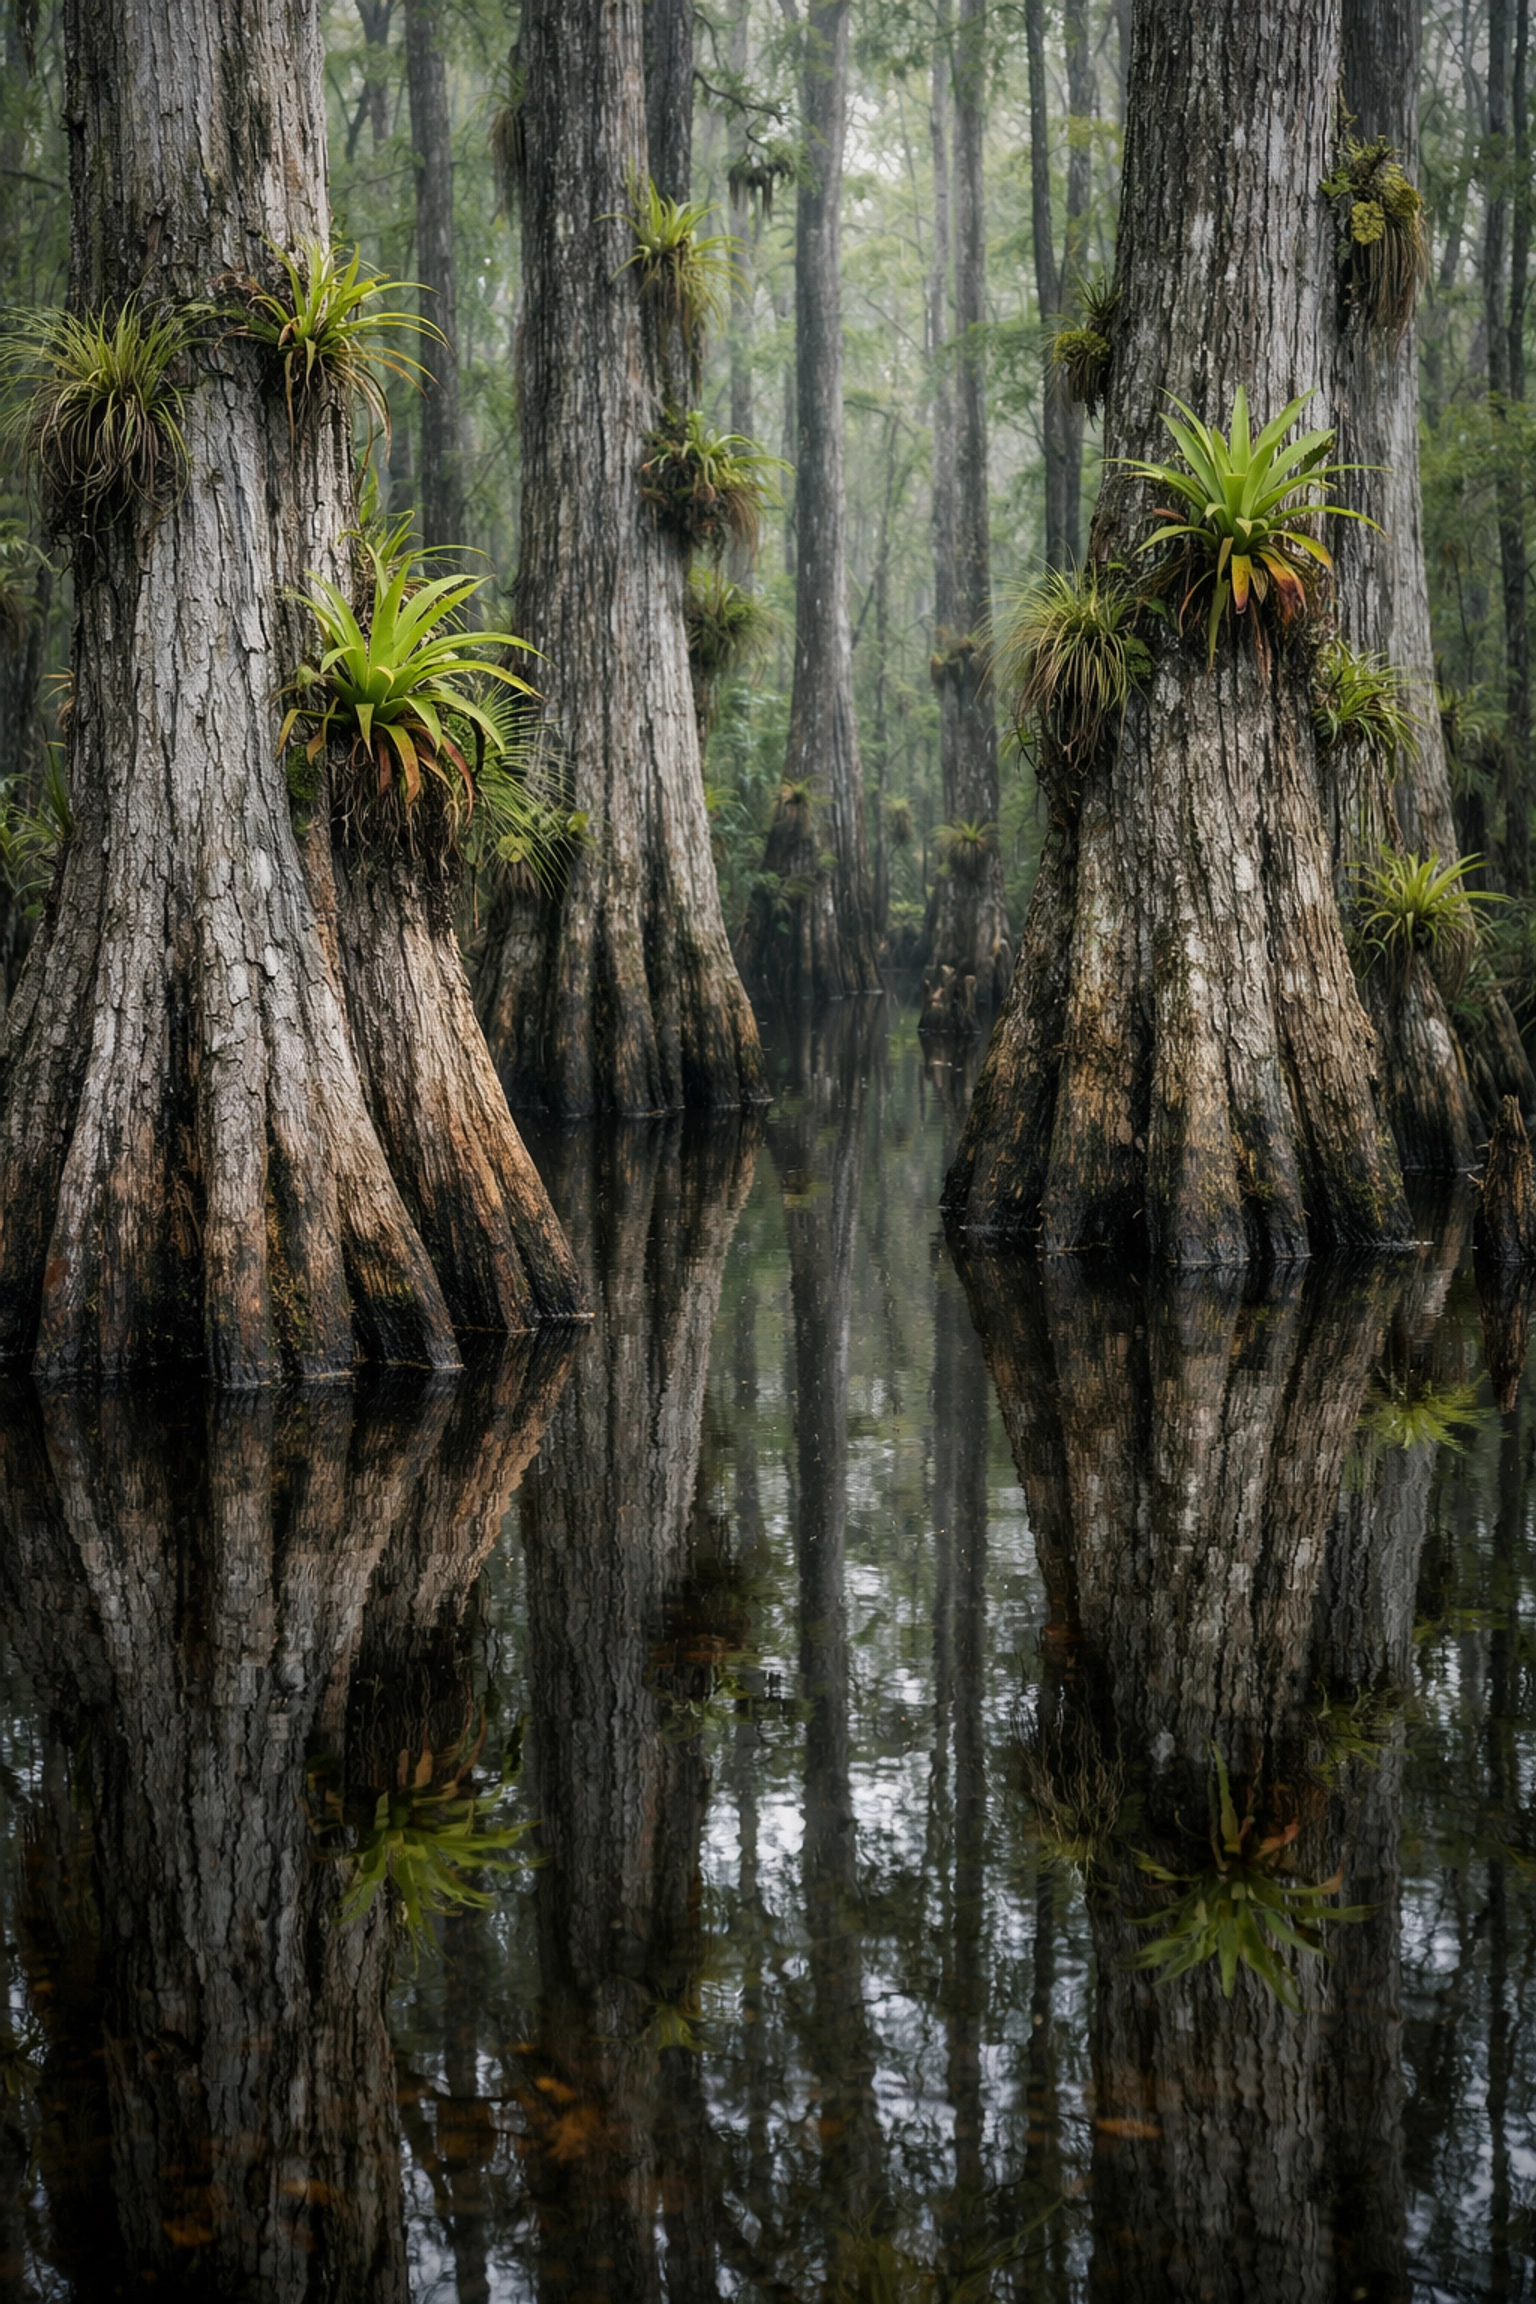
Big Cypress National Preserve and Loop Road
If you crave a more rugged, "old Florida" feel, your journey must include the Big Cypress National Preserve. Specifically, Loop Road is a legendary 24-mile stretch that takes you deep into the heart of the cypress strands. This is where you go for texture, shadow, and mystery.
As you drive slowly down this unpaved road, keep your eyes peeled for the elusive barred owl or the rare Florida panther. The cypress domes here create incredible leading lines and reflections in the tea-colored water. For the best results, look for "air plants" and orchids clinging to the ancient trees. The soft, filtered light under the canopy allows you to capture rich greens and deep browns that are often lost in the harsh midday sun.
Flamingo and the Southern Extremes
Driving all the way to the end of the park road leads you to Flamingo. This area feels like the edge of the world. Because it sits on the transition zone between fresh and saltwater, the photographic opportunities are unique. This is one of the few places in the world where you can photograph both the American Alligator and the American Crocodile in the same vicinity.
Eco Pond, located near the Flamingo visitor center, is your go-to spot for sunset silhouettes. During the dry season, Roseate Spoonbills often frequent the pond, their vibrant pink feathers contrasting beautifully against the deep blues of the water. When you set up your tripod here, focus on the "golden hour" to capture the reflections of the mangrove fringe as the sun dips below the Florida Bay.
Everglades Location Comparison Table
To help you plan your itinerary, I’ve broken down the key features of these primary locations:
| Location |
Primary Photography Focus |
Best Time of Day |
Recommended Lens |
| Anhinga Trail |
Wading Birds, Alligators, Mist |
Sunrise |
300mm – 600mm |
| Shark Valley |
Panoramic Landscapes, Bird-in-Flight |
Late Afternoon |
70-200mm |
| Loop Road |
Cypress Domes, Owls, Orchids |
Overcast or Early Morning |
24-70mm & 400mm |
| Eco Pond |
Spoonbills, Waterfowl, Sunsets |
Sunset |
500mm+ |
| Pahayokee |
Wide-open Sawgrass Vistas |
Sunrise |
16-35mm (Wide Angle) |
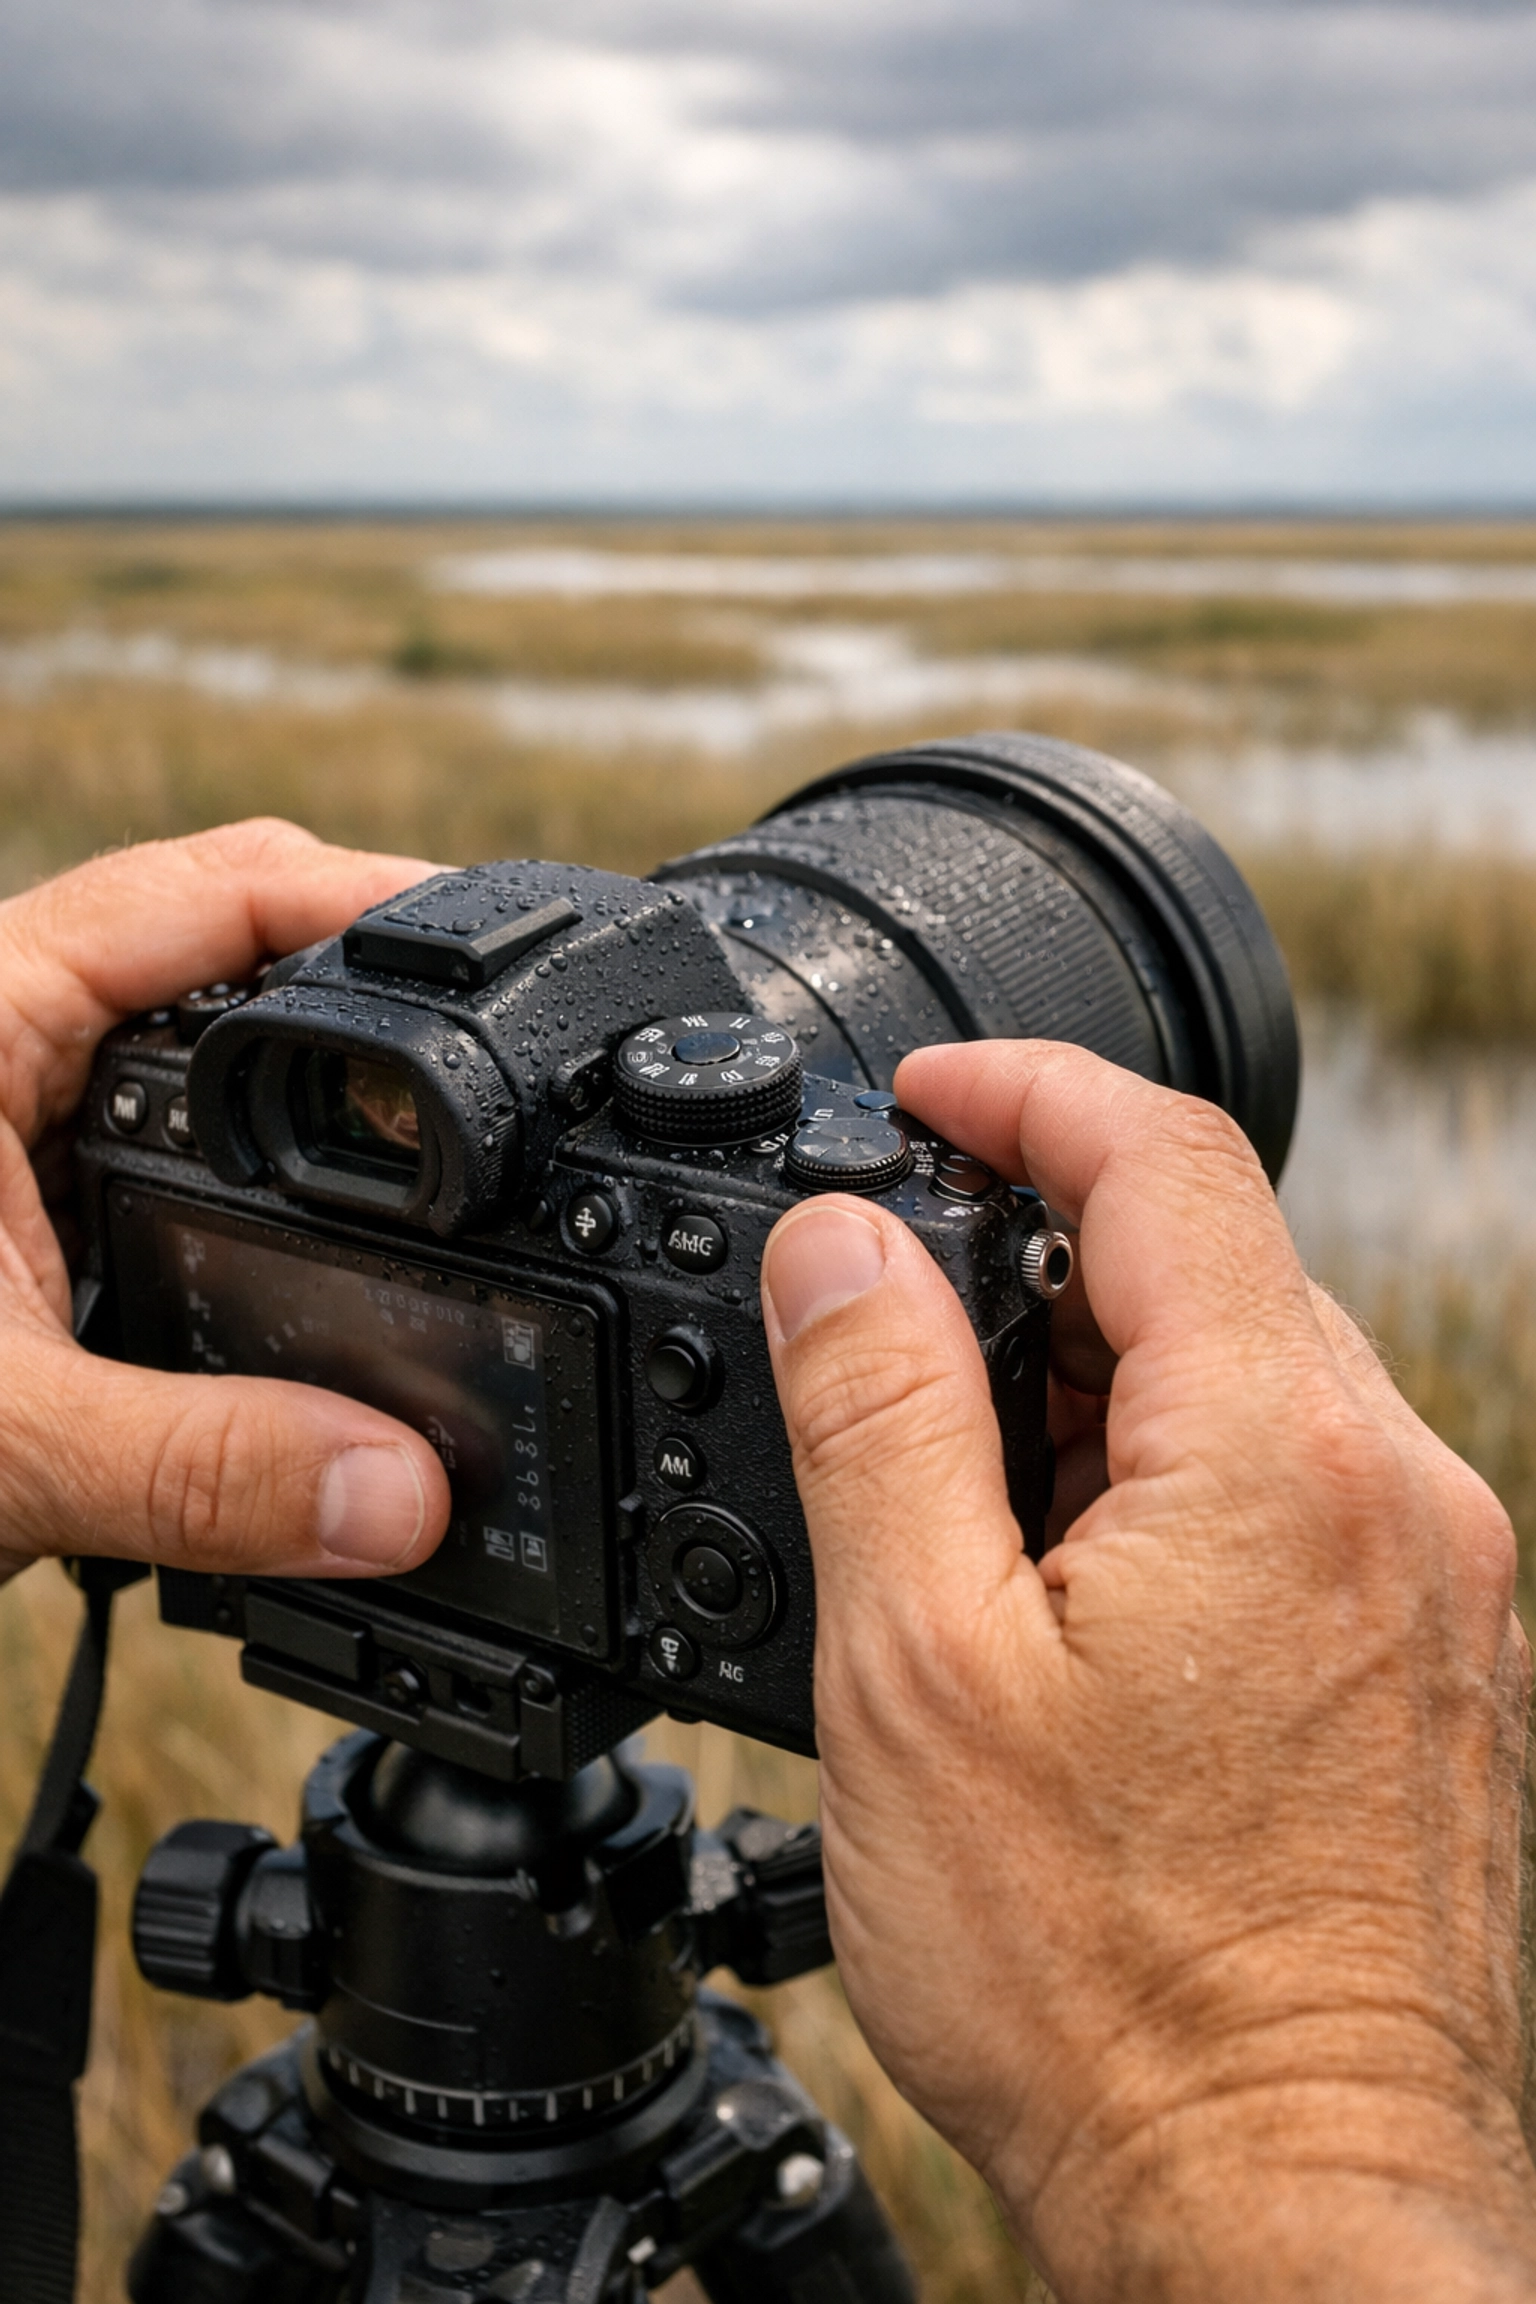
Mastering the Technical Challenges
Photographing the Everglades requires more than just showing up; it requires a strategic approach to your gear and settings. Because you are often working in high-contrast environments or dark cypress canopies, your technical proficiency is what will ensure your success.
- Manage Your ISO: In the deep shade of Mahogany Hammock or Sweetwater Strand, don't be afraid to push your ISO to 2500 or higher. Modern mirrorless cameras handle noise exceptionally well, and a sharp, slightly grainy image is always better than a blurry one caused by a slow shutter speed.
- Use a Circular Polarizer: This is non-negotiable for landscape photography Everglades work. It allows you to cut the glare off the water’s surface, revealing the hidden world of submerged vegetation and fish below, while also saturating the greens of the foliage.
- Long Glass is Key: For wildlife photography Everglades sessions, a lens with at least 400mm of reach is your best friend. While some animals are close, the most intimate behavioral shots: like a heron striking at a fish: require that extra reach to fill the frame without encroaching on the animal's space.
The Magic of the Dry Season
Timing your visit is perhaps the most critical decision you will make. While the Everglades is beautiful year-round, the dry season (late November through April) is when the magic happens. As water levels drop, wildlife concentrates around the remaining deep-water holes.
During February and March, locations like Mrazek Pond become a frenzy of activity. You might find hundreds of wading birds feeding in a single small area. This concentration makes it much easier for you to capture multiple species in a single frame. This is also the peak nesting season, meaning you can photograph chicks in the nest at the Anhinga Trail, adding a powerful narrative element to your fine art collection.
Essential Gear for Your Expedition
Your comfort in the field directly impacts your creativity. Beyond your camera and lenses, you need to protect yourself and your equipment. The Florida sun is relentless, and the mosquitoes can be formidable if you aren't prepared.
- Protection: Wear long-sleeved, moisture-wicking clothing and use a high-quality insect repellent.
- Stability: A sturdy tripod is essential for those low-light sunrise shots at Pahayokee Road.
- Safety: Always carry a waterproof dry bag for your gear, especially if you decide to take a canoe out on the Nine Mile Pond trail to find hidden rookeries.

Take Your Skills to the Next Level
You now have the foundation to explore the Everglades and bring home world-class images. However, knowing the locations is only half the battle; knowing the secret "honey holes" and the exact seasonal shifts can take years to master on your own.
If you want to skip the trial and error and start shooting like a pro immediately, I have compiled everything I know into a comprehensive resource. My Everglades Photography Guide gives you GPS coordinates, specific seasonal tips, and advanced composition techniques tailored specifically for this environment.
Purchase the Ultimate Everglades Photography Guide Here
By investing in your education, you ensure that your next trip to the River of Grass isn't just a walk in the park, but a productive expedition that yields breathtaking fine art.
For more inspiration and to see my latest work from the field, feel free to explore my galleries at Edin Chavez Photography or browse more educational articles on my Photography Blog. Your journey into the wild heart of Florida starts now: make sure you're ready for it.
Hence, with these locations and strategies in your arsenal, you are well-equipped to capture the raw, untamed beauty of the Everglades. Respect the wildlife, mind the light, and always keep your eyes open for the unexpected. The perfect shot is waiting for you just around the next bend in the boardwalk.


