Just as the first light of dawn hits the Sierra Nevada peaks, you realize why Lake Tahoe is a mecca for visual storytellers. The air is crisp, the water is a depth of blue that feels impossible, and the granite boulders look like they were placed by a master designer. When you’re looking for the best photo spots Lake Tahoe has to offer, you aren't just looking for a view; you’re looking for that perfect intersection of light, composition, and alpine magic.
At Edin Chavez Photography, we believe that capturing these moments requires more than just a camera: it requires being in the right place at the exactly right time. Whether you are a seasoned pro or a hobbyist looking to level up your portfolio, this guide to Lake Tahoe photography locations ensures you won't miss a single iconic shot. If you want the full breakdown of every hidden trail and secret angle, make sure to grab the Lake Tahoe Photography Guide.
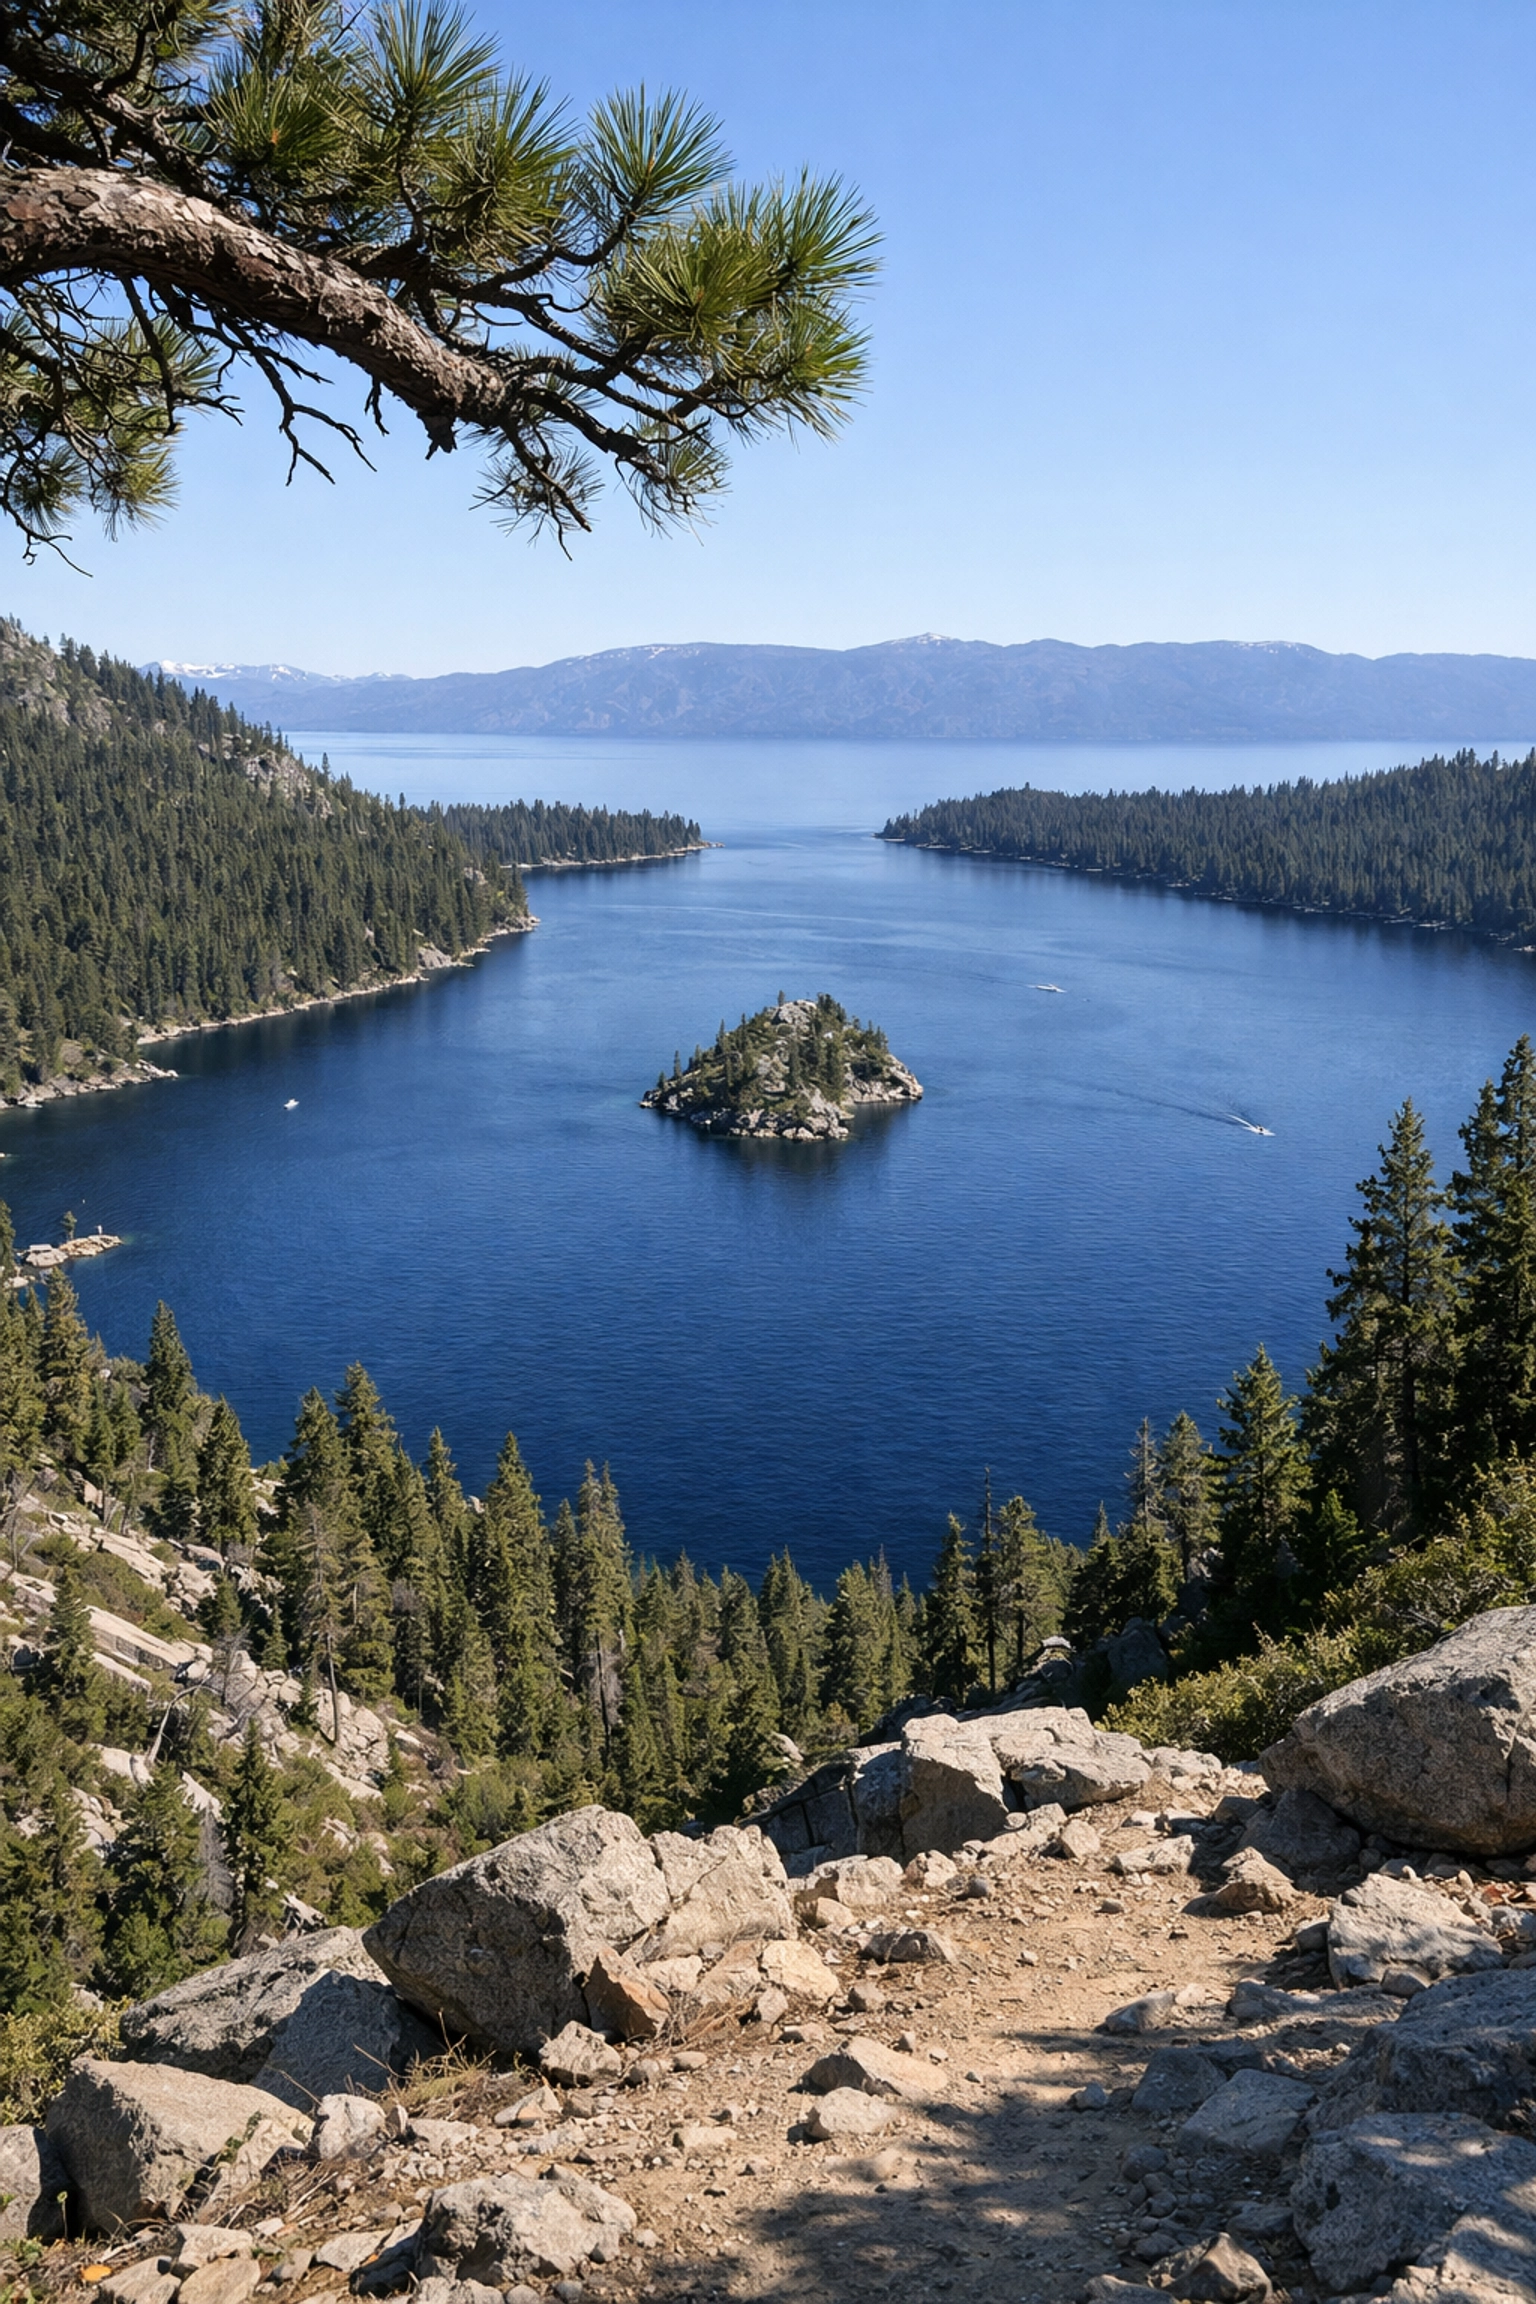
1. Emerald Bay: The Crown Jewel
Emerald Bay is, without a doubt, the most photographed location in the region, and for good reason. As you stand at the overlook, the sight of Fannette Island sitting perfectly in the center of the bay feels like a scene from a dream. The water transitions from a brilliant turquoise near the shore to a deep, royal indigo in the center.
To capture the definitive shot, you need to be there for sunrise. The bay faces east, meaning the sun will rise directly across the water, bathing the entire basin in a warm, golden glow. On a calm morning, the water turns into a perfect mirror, reflecting the surrounding peaks with such clarity that it's hard to tell where the mountains end and the lake begins.
Pro Tip: Don't just stick to the main overlook at Inspiration Point. Hike down toward the water or find the unofficial pullouts along Highway 89 for a slightly different perspective that removes the foreground clutter.
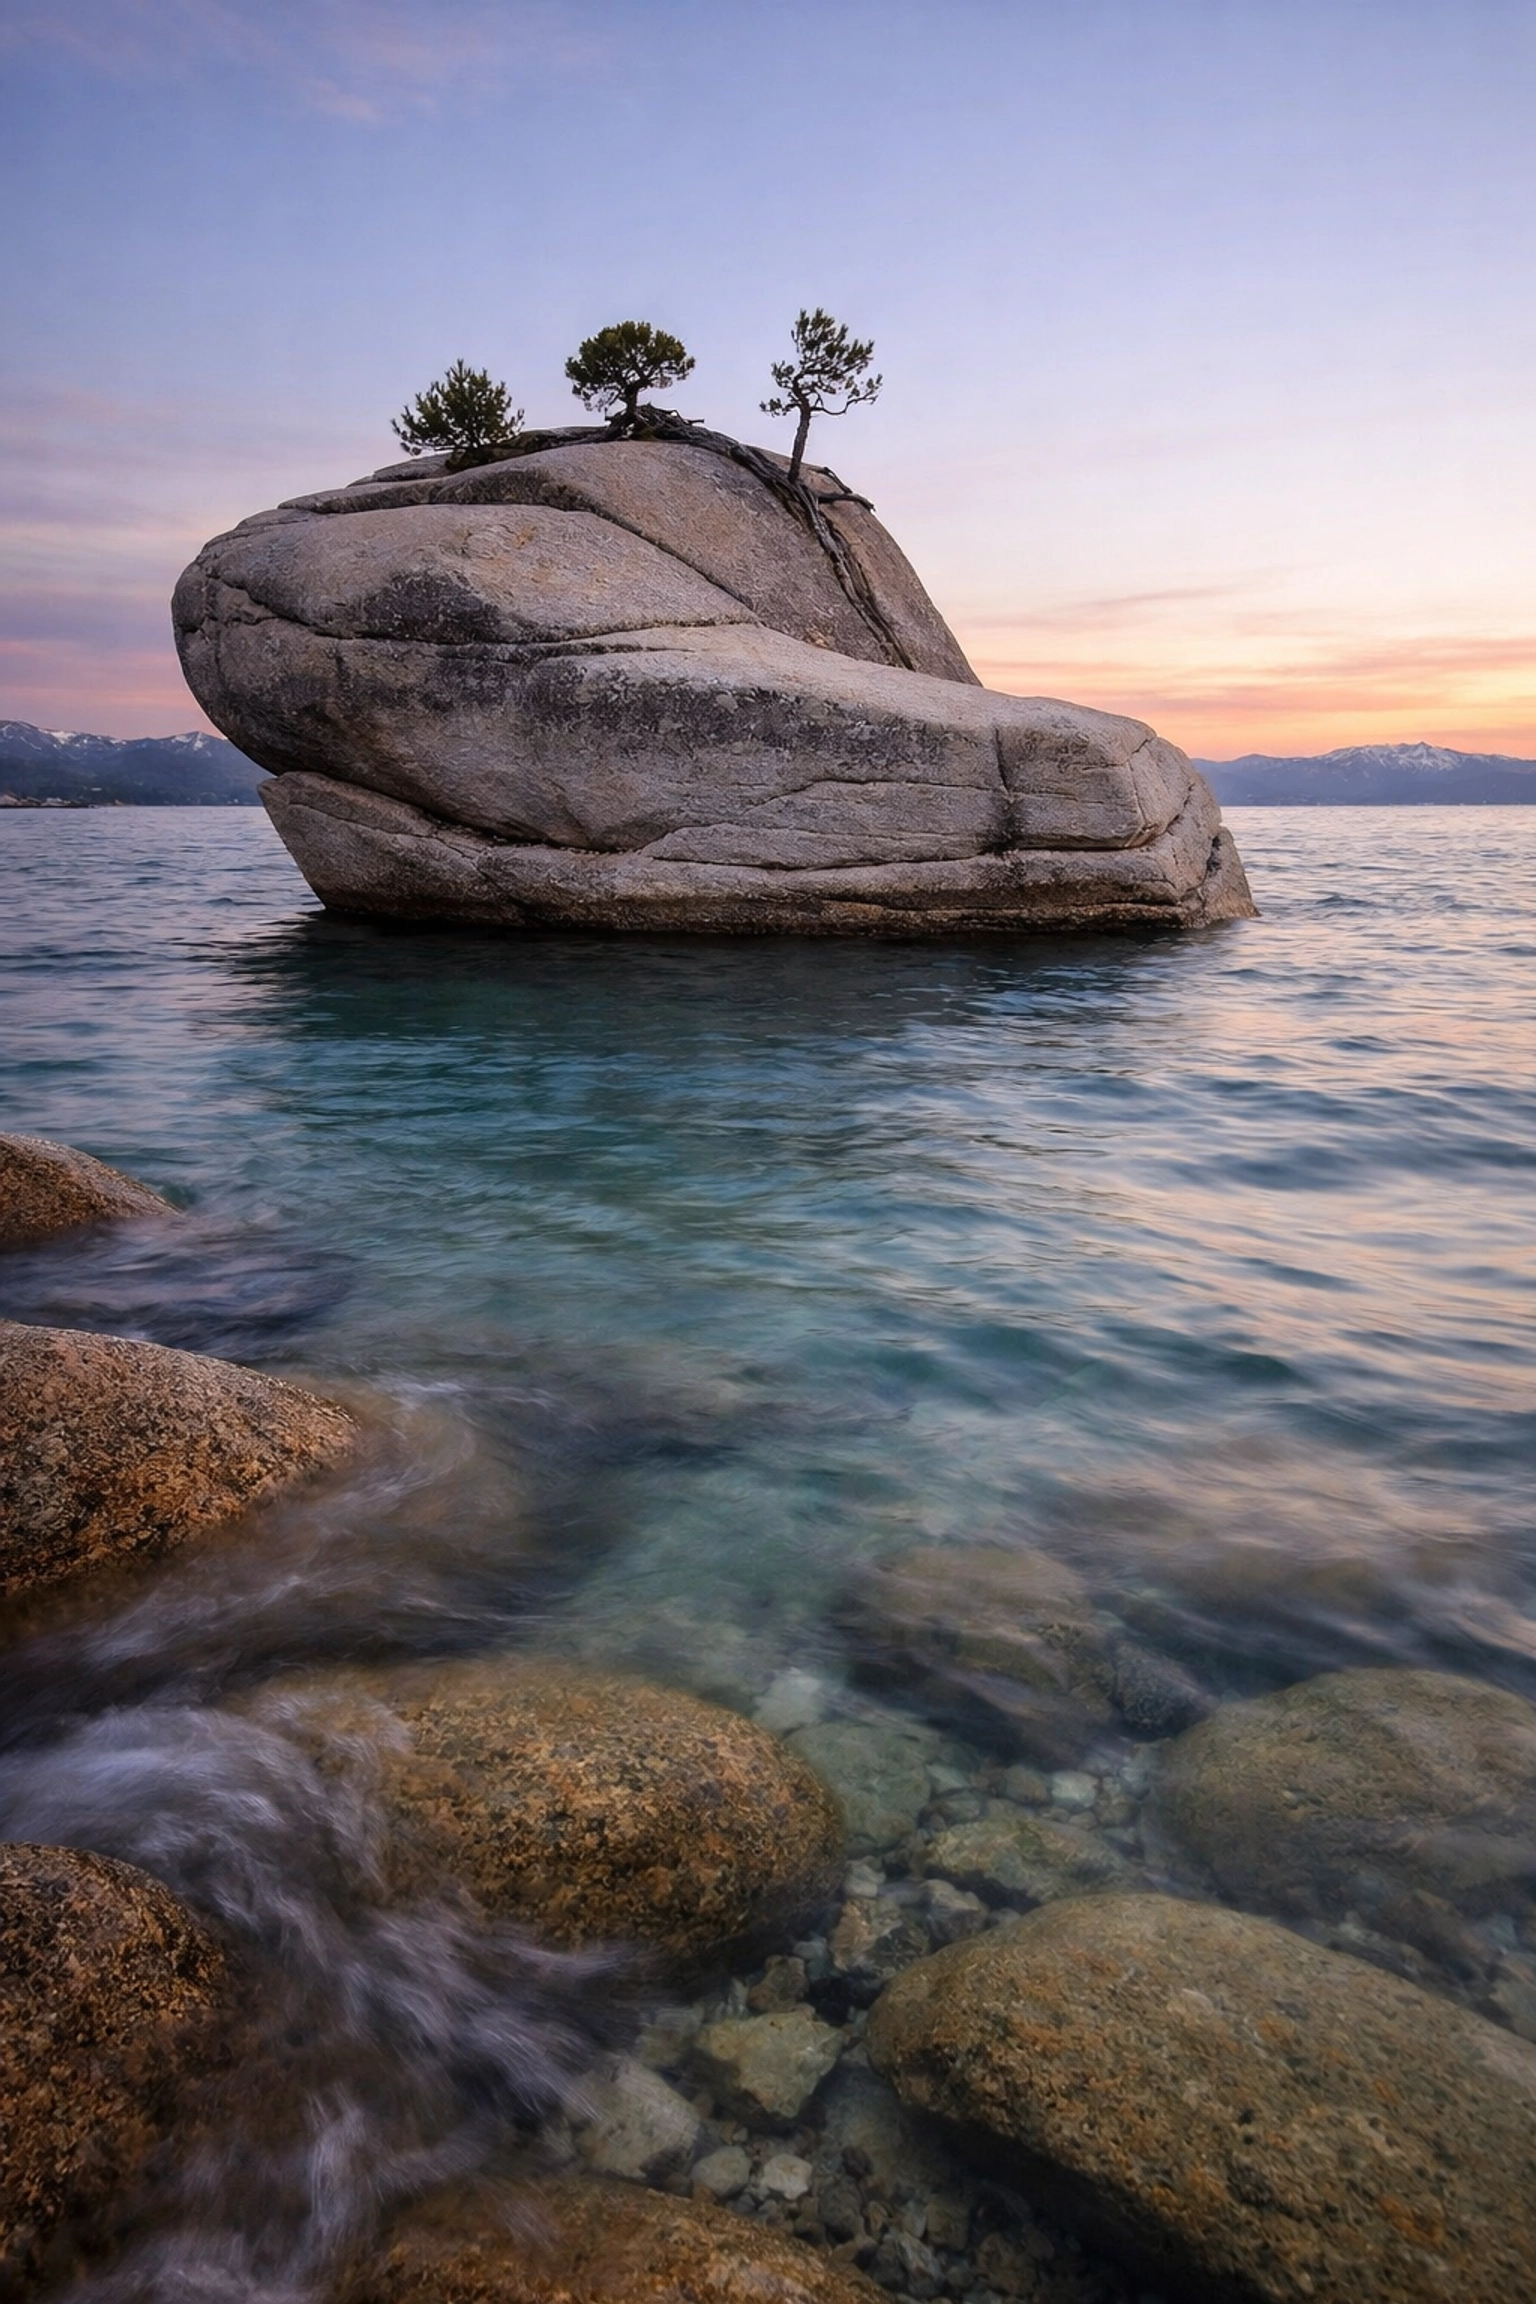
2. Bonsai Rock: The Artist’s Choice
Located on the rugged east shore, Bonsai Rock is a masterpiece of natural composition. It’s a large granite boulder with four small trees growing out of a crack in the top, looking like a giant, natural bonsai tree. This spot is one of the most essential landscape photography Lake Tahoe locations because of how the light interacts with the shallow, crystal-clear water.
Sunset is the prime time here. As the sun dips below the mountains on the west shore, the sky often explodes into hues of pink, orange, and purple. The water around Bonsai Rock is remarkably clear; you can see every individual grain of granite sand and the smaller boulders resting on the lake bed. Using a long exposure here creates a "smooth as butter" effect on the water, making the rock look like it's floating in a sea of mist.
3. Cave Rock: The High-Altitude Vantage
For a 180-degree view that will take your breath away, Cave Rock is unmatched. Located off Highway 50, a short but steep hike brings you to the top of this massive volcanic formation. From here, you are looking south and west, giving you an unparalleled view of the entire lake.
When you stand on the edge of the rock, the scale of Lake Tahoe truly hits you. This is an incredible spot for sunset, as you can watch the sun disappear behind the distant peaks, casting long shadows across the water. The rock itself provides a dramatic, dark foreground that contrasts beautifully with the vibrant sky. It’s a powerful location that empowers you to capture the vastness of the Sierra landscape.
Top Locations at a Glance
| Location |
Best Time |
Difficulty |
Vibe |
| Emerald Bay |
Sunrise |
Easy |
Iconic, Grandiose |
| Bonsai Rock |
Sunset |
Moderate |
Artistic, Zen-like |
| Cave Rock |
Sunset |
Easy/Moderate |
Vast, Panoramic |
| Secret Cove |
Mid-Morning |
Moderate |
Tropical, Secluded |
| Sand Harbor |
Golden Hour |
Easy |
Boulders, Turquoise |
4. Secret Cove: The Hidden Turquoise Paradise
If you want photos that look like they were taken in the Caribbean rather than the mountains, Secret Cove is your destination. This spot is famous for its bright turquoise water and the perfectly smooth boulders that line the shore. To get the best results, you want to arrive about 1.5 to 2 hours after sunrise. This is when the light fills the cove, illuminating the white sand at the bottom and making the water pop with color.
You should definitely use a circular polarizer here. It will cut the reflection off the surface, allowing your camera to see straight through the water to the rocks below. The contrast between the orange-toned granite and the teal water is a color palette that works every time. For more tips on gear and settings, check out our Edin Studios resources.
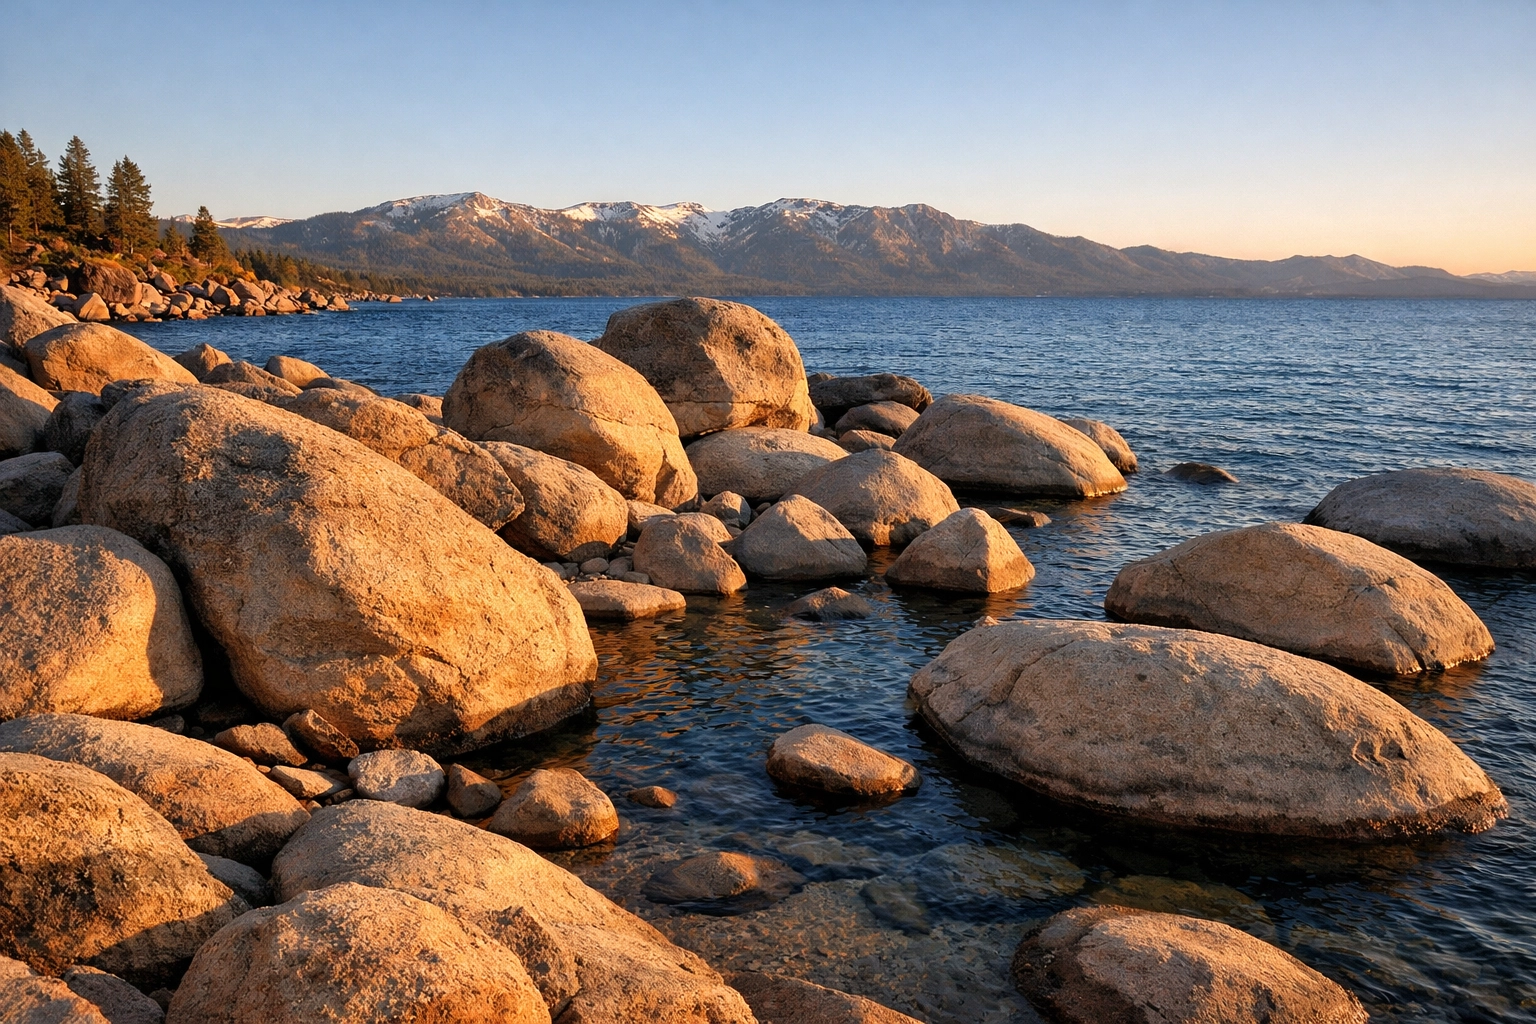
5. Sand Harbor: The Bouldering Wonderland
Sand Harbor is a playground for photographers who love foreground interest. The area is filled with massive, smooth granite boulders that emerge from the water like prehistoric whales. During the golden hour, these rocks soak up the warm light, creating a beautiful glow that complements the blue tones of the lake.
This is a great place to experiment with different focal lengths. Use a wide-angle lens to include the boulders in the foreground and the mountains in the distance, or use a telephoto lens to compress the scene and focus on the textures of the rocks against the water.
6. Flume Trail and Monkey Rock
For those who don't mind a bit of a hike, the Flume Trail offers some of the most dramatic views in the basin. Specifically, "Monkey Rock": a formation that looks remarkably like a gorilla's head: provides a fun and unique focal point. Beyond the novelty of the rock, the view from this elevation is spectacular. You are looking down at the east shore’s coves from hundreds of feet above, giving you a "bird's eye" perspective that most tourists never see.
7. Rubicon Trail & D.L. Bliss State Park
The Rubicon Trail is a 7.5-mile stretch of pure photographic gold. It hugs the cliffs between D.L. Bliss and Emerald Bay. Along this path, you’ll find sheer drops into some of the deepest, darkest blue water in the lake. The trail itself is lined with ancient cedars and pines, providing excellent "framing" opportunities for your shots. This location is best explored in the late afternoon when the light is soft and the shadows start to define the textures of the cliffs.
8. Bayview Trail Overlook
Most people go to the Inspiration Point parking lot for Emerald Bay, but if you want to elevate your game (literally), head to the Bayview Trail. A short hike up from the trailhead across the street from the bay leads you to an unobstructed, higher-altitude view of Fannette Island. From here, the perspective is much more dramatic, and you can often capture the entire bay and the lake beyond it in a single frame.
9. Valhalla Pier: Symmetry and Serenity
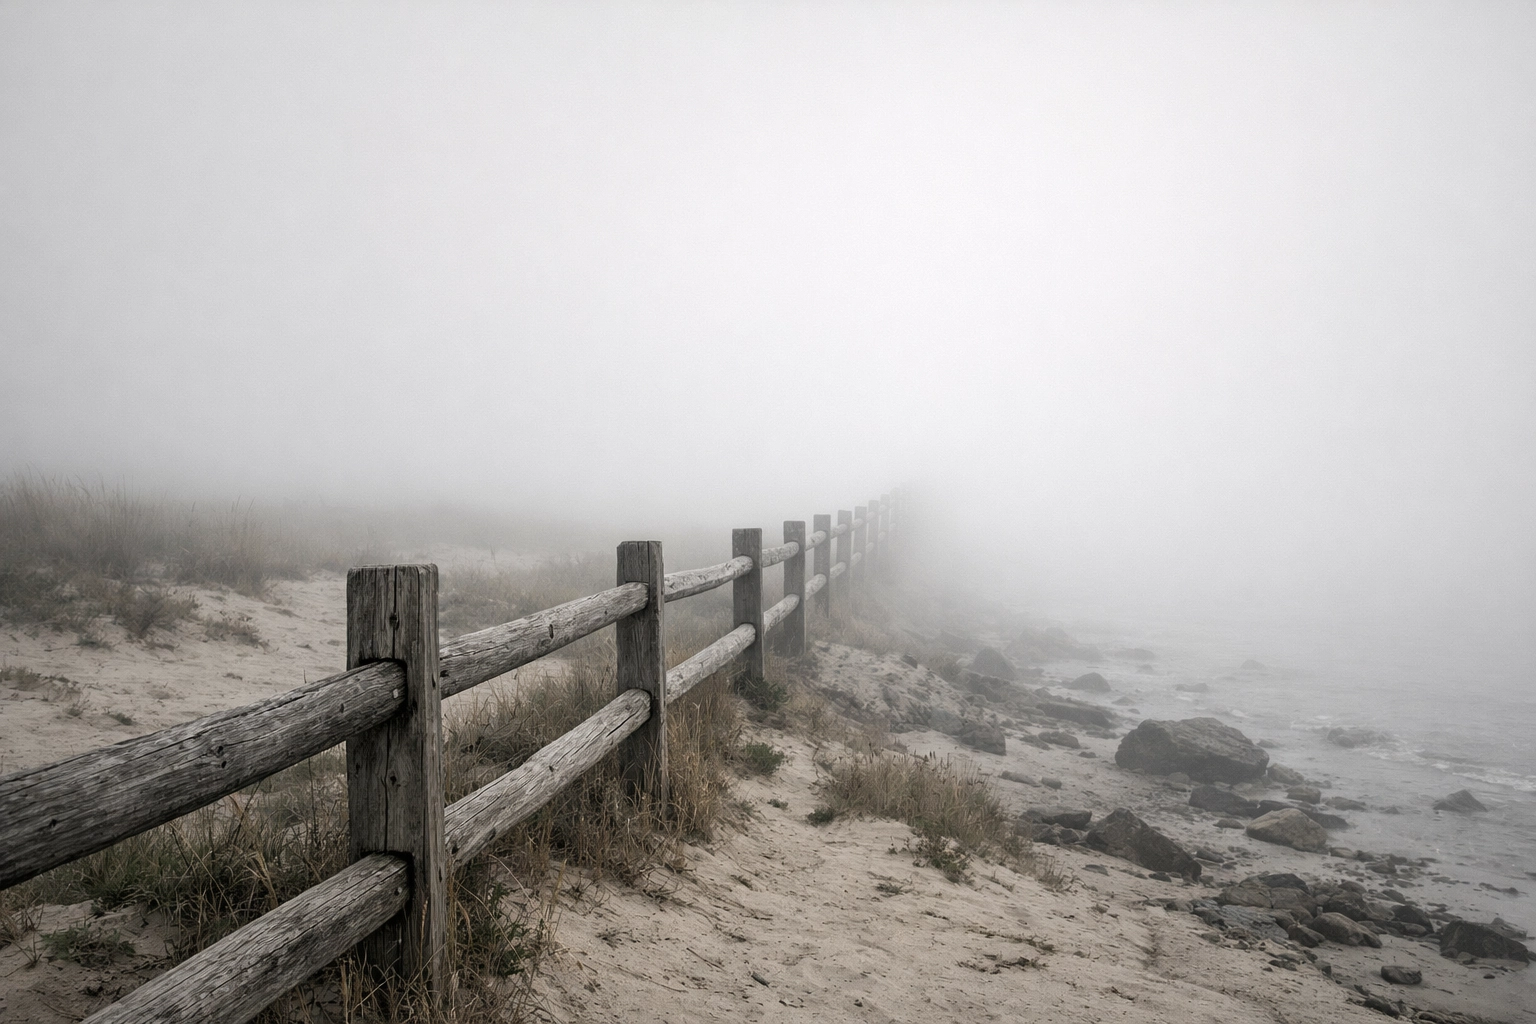
Located in South Lake Tahoe, the Valhalla Pier is one of the few public piers that offers a clean, symmetrical composition. This is a fantastic spot for a sunrise shoot. The long wooden planks of the pier create a perfect leading line that draws the viewer’s eye right out into the lake.
On a foggy or snowy morning, this location becomes incredibly atmospheric. The simplicity of the pier against a minimalist background of water and sky creates a fine art aesthetic that Edin Chavez is known for. You can see examples of this type of minimalist work on our blog.
10. Zephyr Cove: The Classic Sunset
Zephyr Cove is easily accessible and offers a quintessential Tahoe sunset experience. The beach faces west, and the mountains on the opposite side of the lake feel surprisingly close. It’s a great spot for capturing the M.S. Dixie II paddlewheeler as it cruises by, adding a sense of scale and history to your landscape shots. The combination of the sandy beach, the pine trees, and the dramatic sky makes it a reliable spot for any photographer.
Mastering the Light in Lake Tahoe
Landscape photography in Lake Tahoe is all about managing contrast. The sun is incredibly bright at high altitudes, which can lead to "blown out" highlights or deep, featureless shadows.
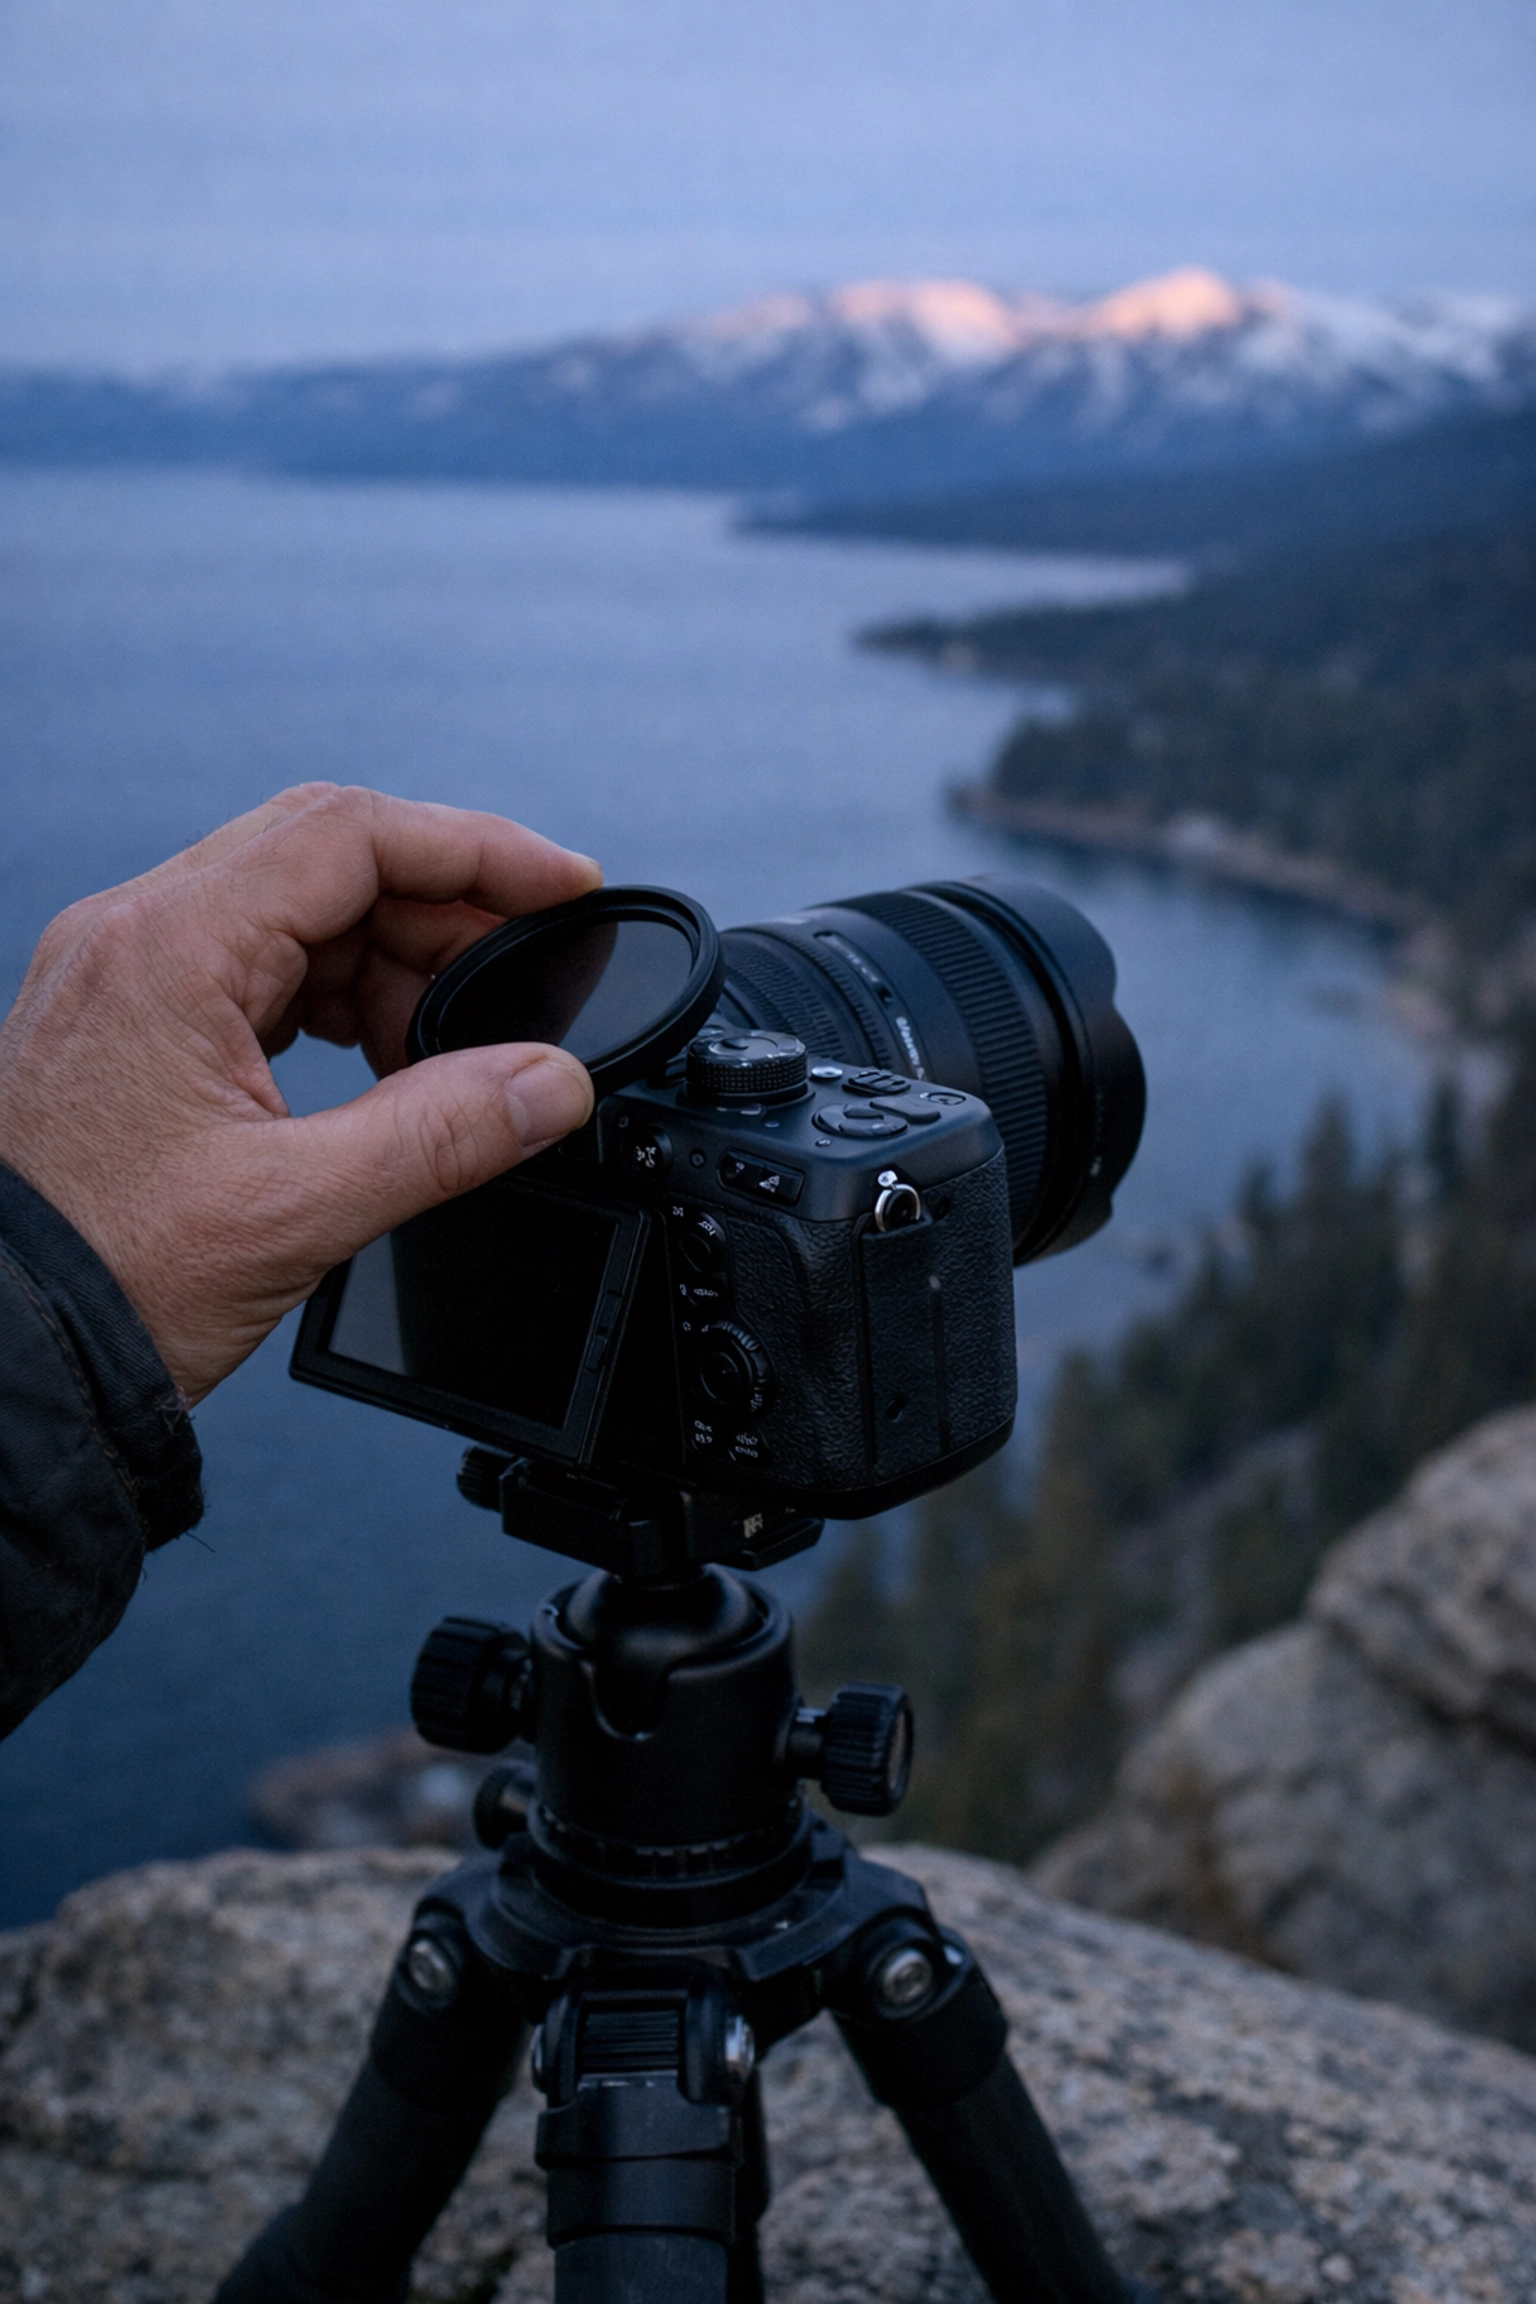
To ensure your success:
- Shoot in RAW: This gives you the dynamic range needed to recover details in the bright snow or dark trees.
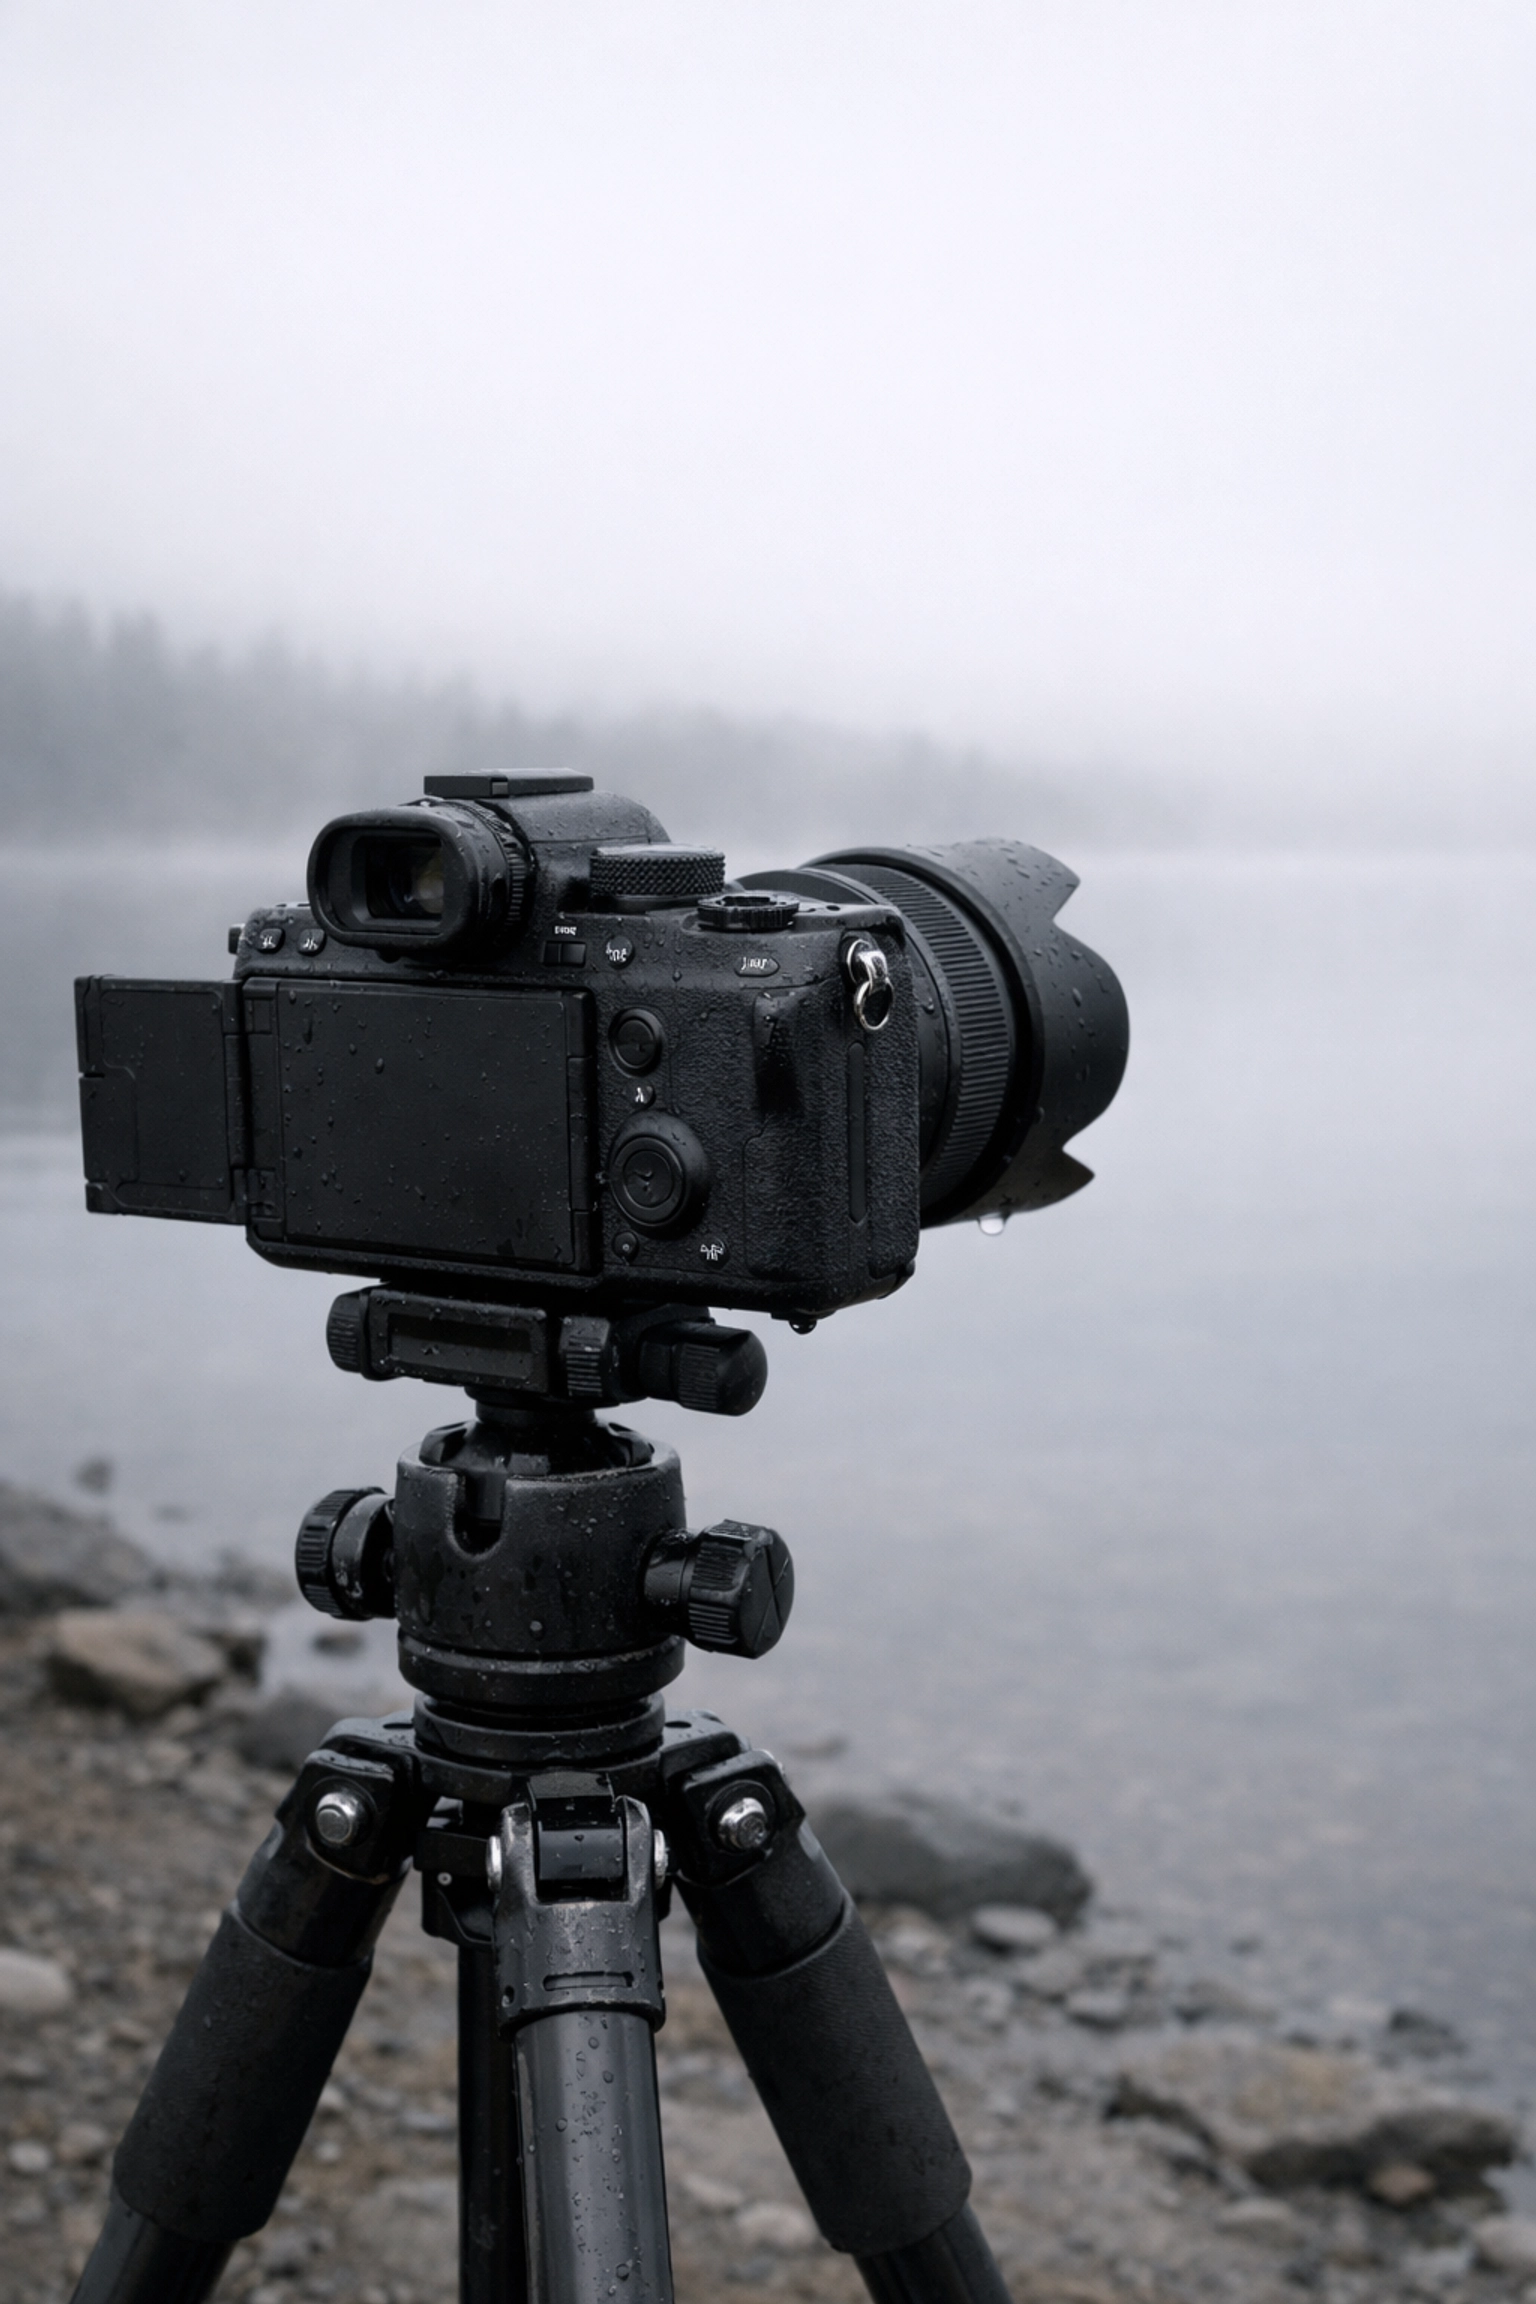
- Use a Tripod: Especially for those sunrise and sunset shots at Bonsai Rock or Emerald Bay.
- Timing is Everything: Arrive at least 30 minutes before the "ideal" time to scout your composition.
- The Polarizer is Mandatory: It is the only way to capture the true color of the water.
If you’re ready to stop guessing and start shooting like a pro, the Lake Tahoe Photography Guide is your ultimate shortcut. It includes exact GPS coordinates, the best times of year for each spot, and technical advice tailored to the unique conditions of the Sierra Nevada.
Elevate Your Portfolio
Lake Tahoe is a place of endless inspiration. Every season brings a new character to these locations: from the snow-capped peaks of winter to the crystal-clear summer doldrums. By visiting these 10 Lake Tahoe photography locations, you are setting yourself up to capture images that aren't just snapshots, but pieces of fine art.
Your journey into the wild beauty of the Sierras is just beginning. Whether you are chasing the light at Emerald Bay or finding the perfect angle at Bonsai Rock, remember that the best photo is the one that tells the story of your experience. For more educational content and professional inspiration, stay tuned to Edin Chavez Photography.
Hence, with these locations in your pocket and the right guide in your hand, you are fully equipped to master the art of Lake Tahoe. Happy shooting!
Just as a painter stands before a blank canvas, you stand behind your lens with the power to create something that transcends reality. Fine art photography isn't merely about documenting a scene or capturing a "sharp" image; it is about your personal vision, your emotions, and your unique perspective on the world. Whether you are aiming to create hauntingly beautiful landscapes or intimate, abstract portraits, mastering this craft ensures your work stands out in a crowded digital landscape.
At Edin Chavez Photography, we believe that fine art is a journey of constant refinement. You aren't just a photographer; you are an artist using light as your medium. To succeed, you need to bridge the gap between technical proficiency and creative intuition. This guide provides you with the roadmap to elevate your work, from the initial click of the shutter to the final, ethereal touch in post-processing.
The Foundation: Essential Technical Skills
Before you can break the rules of photography, you must master them. Your camera is a tool, and knowing how to manipulate its settings ensures you have total control over the final output. In fine art photography, technical mastery is the bridge that carries your vision into reality.
Mastering the Exposure Triangle
You must develop a deep, instinctive knowledge of aperture, shutter speed, and ISO. In the world of fine art, these aren't just settings: they are your brushes.
- Aperture: This controls your depth of field. A wide aperture (like f/1.4 or f/2.8) is essential for creating that soft, out-of-focus background that makes your subject pop.
- Shutter Speed: This is where you play with time. Using long exposures to blur water or clouds is a staple of fine art photography, turning a chaotic ocean into a smooth, mist-like surface.
- ISO: While modern cameras handle high ISO well, keeping your ISO low ensures your large-format prints remain crisp and free of distracting noise.
Focus and Sharpness
While many fine art images lean into a soft aesthetic, knowing where to place your focus is critical. You might choose to use manual focus to ensure the "soul" of the image: perhaps a single dewdrop or the iris of an eye: is tack-sharp, even if the rest of the frame melts away into a dreamy blur.
Lighting: The Key to Ethereal Atmosphere
Lighting is the single most important element in creating ethereal photography. It dictates the mood, the depth, and the emotional resonance of your work. You don't just "find" light; you interpret it.
Working with Natural Light
The "Golden Hour": that window just after sunrise or before sunset: provides a soft, directional glow that is unmatched for creating a sense of wonder. However, don't overlook "Blue Hour" or even foggy, overcast days. These conditions provide a flat, even light that serves as the perfect canvas for dreamy photography editing later on.
Shaping with Shadows
In fine art, what you don't show is often as important as what you do show. By using high-contrast lighting (Chiaroscuro), you can hide details in the shadows, creating a sense of mystery and drama. This technique directs your viewer's eye exactly where you want it to go, ensuring your message is clear and impactful.
| Light Type |
Effect on Fine Art |
Best Use Case |
| Backlighting |
Creates a "halo" or rim light effect |
Ethereal portraits and silhouettes |
| Side Lighting |
Emphasizes texture and three-dimensionality |
Architectural and landscape details |
| Diffused Light |
Softens features and reduces harsh shadows |
Dreamy, painterly floral photography |
| Long Exposure |
Smooths motion into a silky texture |
Waterfalls, clouds, and urban motion |
Equipment: Choosing the Right Tools for Your Vision
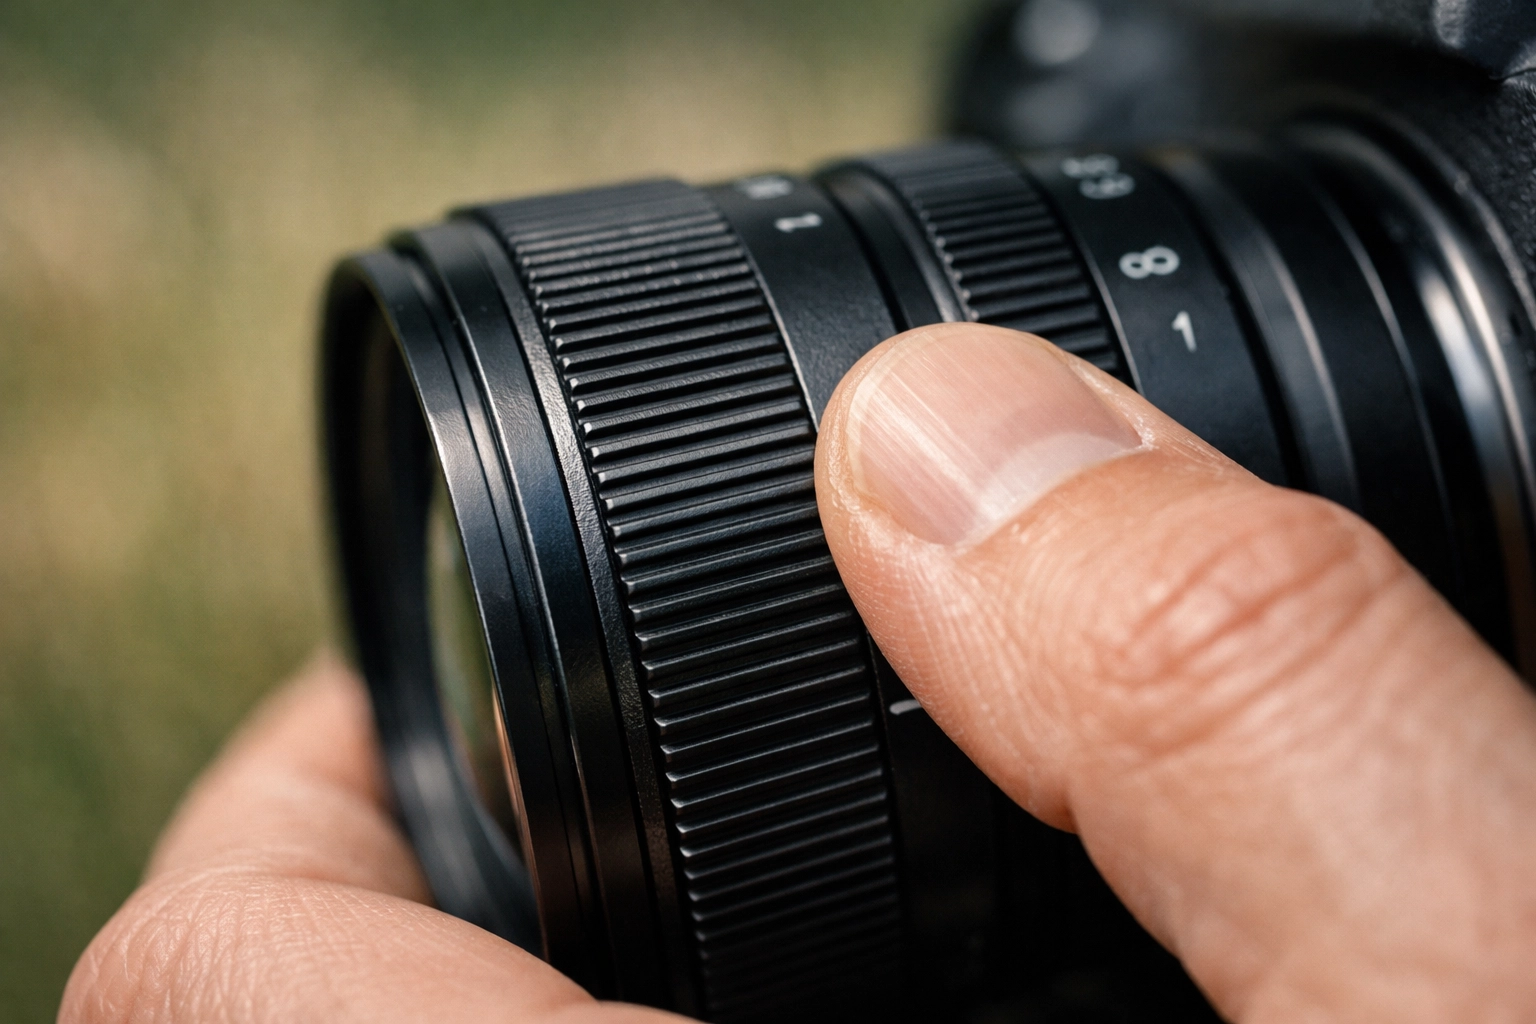
While the artist makes the art, having the right gear empowers you to push boundaries. For fine art photography, you need equipment that offers high resolution and superior glass.
- The Camera: A high-resolution full-frame mirrorless or DSLR camera is your best bet. This allows you to capture immense detail, which is vital if you plan to produce large-scale prints for galleries.
- The Lenses: Invest in prime lenses. Lenses like a 35mm, 50mm, or 85mm with wide maximum apertures provide a level of sharpness and "bokeh" (background blur) that zoom lenses often struggle to match.
- Tripods and Filters: A sturdy tripod is non-negotiable for long exposures. Additionally, Neutral Density (ND) filters are your best friend when you want to achieve that ethereal, blurred-motion look in broad daylight.
If you are looking to practice these skills in some of the most beautiful locations in the world, check out our New York City Photography Guide or join a Private Miami Photography Tour to get hands-on experience in the field.
The Magic of Post-Processing: Dreamy and Ethereal Editing
In fine art, the "out-of-camera" image is rarely the final piece. Post-processing is where you infuse your work with your specific soul. This is the stage where you transition from a standard photo to dreamy photography editing.
Achieving the Ethereal Look
To create ethereal photography, you often want to reduce the "digital" feel of an image. You can achieve this through several techniques:
- The Orton Effect: By duplicating your layer, applying a Gaussian blur to the top layer, and then blending them, you create a soft, glowing brilliance that looks like a painting.
- Color Grading: Moving away from realistic colors and toward a specific palette: like soft pastels or deep, moody blues: helps establish a cohesive "world" within your frame.
- Selective Softening: Use masks to keep your main subject sharp while adding extra blur or "mist" to the edges of the frame. This draws the viewer into a focal point that feels like a dream.
Consistency is Key
Your editing style is your signature. Whether you prefer high-contrast black and white or soft, desaturated tones, maintaining consistency across your portfolio tells the world you have a defined vision. You can explore more about developing your style on the Edin Chavez Photography Blog.
Composition: Telling a Story Without Words
Fine art photography relies heavily on composition to convey a message. You aren't just framing a subject; you are guiding a journey.
- Leading Lines: Use natural elements like paths, shorelines, or architectural beams to lead the viewer’s eye through the frame.
- Symmetry and Balance: In fine art, perfectly centered subjects can create a sense of stillness and divinity. Conversely, intentional asymmetry can create tension and curiosity.
- Minimalism: Sometimes, the most powerful statement is made with the fewest elements. A single tree in a snowy field or a lone boat on a still lake can evoke deep feelings of solitude and peace.
Building a Success-Ready Portfolio
Succeeding in the fine art world requires more than just one or two great shots. You need a body of work that demonstrates a narrative or a thematic exploration.
Curating Your Work
Be your own harshest critic. A portfolio of ten incredible, cohesive images is far more powerful than fifty "okay" ones. When you look at your work, ask yourself: Does this tell my story? Does this evoke the emotion I intended?
Printing Your Art
The true culmination of fine art photography is the print. Seeing your work on high-quality archival paper or canvas changes the relationship between the viewer and the image. It becomes a physical object, a piece of decor, and a legacy. For those looking to collect or see how high-end art is presented, visiting Edin Fine Art provides a benchmark for gallery-quality presentation.

Your Path Forward
Mastering fine art is a marathon, not a sprint. It requires you to be patient with your progress and bold with your experimentation. By combining technical mastery with dreamy photography editing and a keen eye for ethereal photography, you elevate your craft from a hobby to a professional art form.
Remember, your unique perspective is your greatest asset. No one sees the world exactly how you do. Use the tools and techniques mentioned in this guide to bring that vision to life. Whether you are capturing the neon pulse of a city using our Miami Self-Driving Photography Guide or seeking the quiet solitude of nature, every shot is an opportunity to define who you are as an artist.
With these skills in your arsenal, you are well-equipped to turn the ordinary into the extraordinary. Keep shooting, keep editing, and most importantly, keep dreaming. Hence, the only limit to your success is the depth of your imagination. For more tips, tricks, and guides on your journey, stay tuned to Edin Chavez Photography.
As the digital landscape for creative professionals continues to shift, you are likely finding that traditional methods of securing high-end clients are becoming increasingly saturated and time-consuming. Just as the transition from film to digital revolutionized the way you capture images, the rise of specialized marketplaces is transforming how you secure jobs for photographers. You no longer have to spend hours cold-emailing prospects or managing complex ad campaigns just to get a foot in the door.
With the launch of Proshoot.io, the friction between your talent and a high-paying gig has been virtually eliminated. This platform is designed specifically for professionals like you who demand efficiency and quality. By integrating a high-performance marketplace with robust portfolio hosting, Proshoot.io ensures your work is seen by the right eyes at the right time. Whether you are a seasoned veteran or an emerging talent looking to level up, this ecosystem provides the infrastructure you need to thrive.
The Evolution of Finding Jobs for Photographers
In the past, finding consistent work meant juggling multiple platforms, none of which were truly optimized for the photography industry. You might have tried general freelance sites where you were forced to compete with low-cost hobbyists, or perhaps you relied solely on word-of-mouth, which is notoriously unpredictable. This fragmented approach often leaves you with more administrative headaches than actual shooting time.
Proshoot.io stands out by creating a dedicated environment where quality is the primary currency. This commitment to professional standards means that when you are looking for jobs for photographers, you are entering a space where clients already understand the value of high-end imagery. This shifts the dynamic from you "hunting" for work to you "selecting" the best opportunities for your brand.
Why Proshoot.io is Your Ultimate Growth Engine
When you step into the Proshoot.io ecosystem, you are not just joining another job board; you are adopting a comprehensive business tool that empowers your entire workflow. The platform is built on the principle that your time is best spent behind the lens, not behind a desk. By automating the client-matching process, it propels your career forward with minimal manual effort.
A Marketplace Designed for Professionals
The core of the platform is a transparent, competitive bidding marketplace. Unlike other sites where pricing is a race to the bottom, Proshoot.io fosters an environment where your expertise and portfolio quality dictate your worth. You have full visibility into job requirements, allowing you to set rates that reflect your true value.
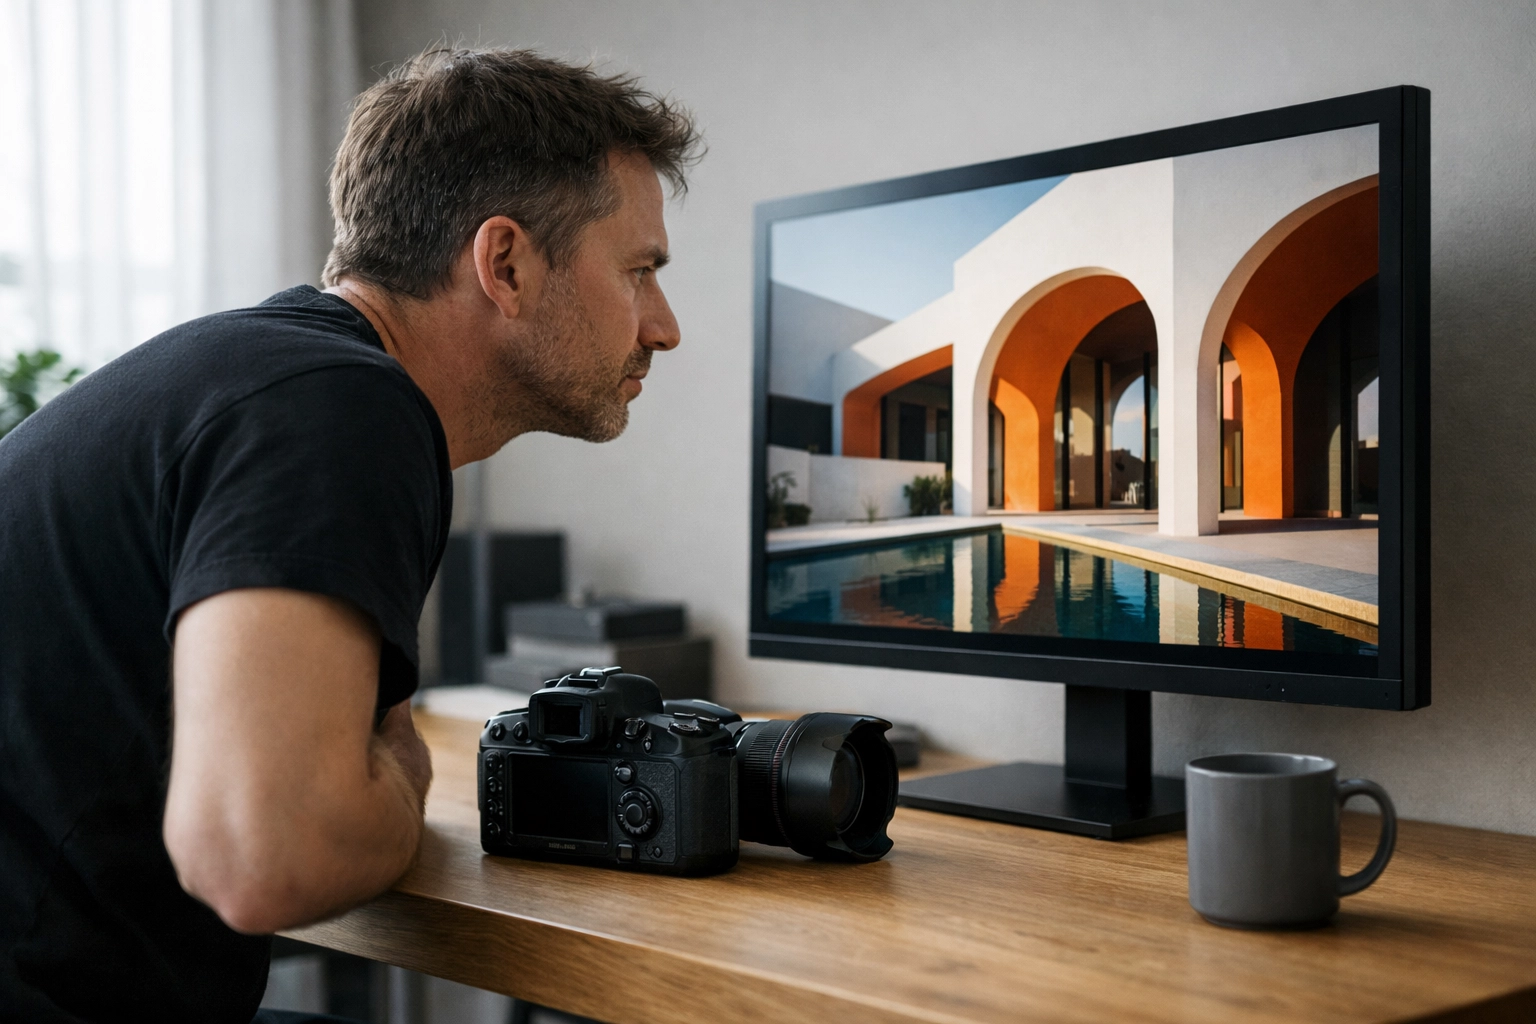
High-Performance Portfolio Hosting
Your portfolio is your most powerful sales tool. Proshoot.io provides seamless portfolio hosting that serves as a high-conversion landing page for potential clients. By showcasing your specialized skills: whether it is drone cinematography, commercial architecture, or fine art: you ensure that your first impression is both professional and persuasive. If you're looking to see how a professional portfolio should look, you can explore the work at Edin Chavez Photography to see the standard of excellence we uphold.
| Feature |
Proshoot.io Benefit |
Why It Matters for You |
| Vetting Process |
Ensures only verified pros are on the platform |
Eliminates low-quality competition and builds client trust. |
| Bidding System |
Transparent and direct communication |
Allows you to negotiate fairly and see exactly what clients need. |
| Portfolio Integration |
Built-in hosting that links to your bids |
Your best work is always one click away from a hiring decision. |
| Secure Payments |
Integrated payment protocols |
Guarantees you get paid on time for the work you deliver. |
Finding High-Paying Gigs in 5 Minutes: The Workflow
The promise of finding a job in five minutes might sound ambitious, but once you have completed your initial setup, the platform is engineered for speed. This efficiency allows you to maintain your creative momentum while ensuring your pipeline remains full.
- Instant Notifications: Once your profile is verified, you receive alerts for jobs that match your specific niche and location.
- Rapid Review: The job dashboard presents the critical details: budget, scope, and timeline: at a glance, so you can decide in seconds if it's right for you.
- One-Click Bidding: Because your portfolio and credentials are already integrated, your bid is ready to be sent with minimal typing.
- Client Networking: The platform facilitates direct messaging, allowing you to finalize details and build a rapport with the client immediately.
By following this streamlined process, you can find and apply for high-value jobs for photographers in the time it takes to grab a coffee between shoots.
The Vetting Process: Your Badge of Legitimacy
One of the most significant advantages you gain with Proshoot.io is the rigorous vetting process. In a world where anyone with a smartphone can call themselves a photographer, your status as a "Verified Pro" is a powerful differentiator. This process involves a thorough review of your portfolio and background, ensuring that the marketplace maintains a high standard of professional integrity.
This commitment to quality attracts high-tier clients: companies and individuals who have the budget for premium services but don't have the time to filter through thousands of unverified profiles. When a client sees your verified badge, it communicates that you have the gear, the experience, and the reliability to handle their project. This trust is what leads to those high-paying contracts in major markets. For instance, if you are looking to dominate in high-demand areas, check out our New York City Photography Guide or the Miami Self-Driving Photography Guide to find the best spots to build a world-class portfolio that wins these bids.
Networking and Long-Term Client Relationships
While the marketplace is excellent for finding immediate work, the platform also fosters long-term networking opportunities. Every successful job you complete on Proshoot.io enhances your reputation within the community. Clients can leave reviews, and as your rating climbs, you become a magnet for even more lucrative opportunities.
This ecosystem mirrors the educational mission we have at the Edin Chavez Blog, where we provide you with the tools and knowledge to not just take better photos, but to run a more profitable business. By combining the technical insights from our blog with the job-seeking power of Proshoot.io, you are positioning yourself at the top of the professional food chain.
Maximizing Your Earnings with Specialized Niches
To truly find the highest-paying jobs for photographers, you must position yourself as a specialist. Generalists are often seen as a commodity, but specialists are viewed as an investment. Proshoot.io allows you to categorize your portfolio so that clients looking for specific expertise: such as luxury real estate, high-fashion, or specialized travel photography: can find you effortlessly.
By focusing your bids on these high-margin niches, you ensure that every minute you spend on the platform is geared toward the highest possible ROI. Consider the difference between a standard event shoot and a high-end commercial campaign; the latter requires more skill but pays significantly better. Proshoot.io gives you the stage to prove you are worth that premium.
Comparison: General Job Boards vs. Proshoot.io
| Aspect |
General Freelance Sites |
Proshoot.io Marketplace |
| Competition |
Millions of non-specialized users |
Exclusive community of vetted photographers |
| Pricing |
Often a "race to the bottom" |
Value-based bidding and professional rates |
| Focus |
Anything from data entry to logos |
100% focused on photography and videography |
| Client Quality |
Mixed; often looking for the cheapest option |
High; looking for quality and reliability |
Securing Your Creative Future
The photography industry is more competitive than ever, but the opportunities for those who use the right tools are also greater than ever. By integrating Proshoot.io into your daily routine, you are making a conscious decision to stop struggling with outdated lead-generation methods and start leveraging a platform built for your success.
This isn't just about finding your next gig; it’s about building a sustainable, high-paying career that gives you the freedom to focus on your art. With secure payments, a transparent bidding system, and a community of peers, you have everything you need to elevate your business.
Hence, if you are ready to stop searching and start shooting, head over to Proshoot.io and create your professional profile today. The high-paying jobs are already there: you just need the right key to unlock them. By aligning yourself with the standards of Edin Chavez Photography, you are telling the world that you are a professional who delivers nothing but the best.
With these considerations, you are well on your way to transforming your passion into a powerhouse business. Keep pushing your creative boundaries, keep refining your portfolio, and let Proshoot.io handle the heavy lifting of finding your next big opportunity.
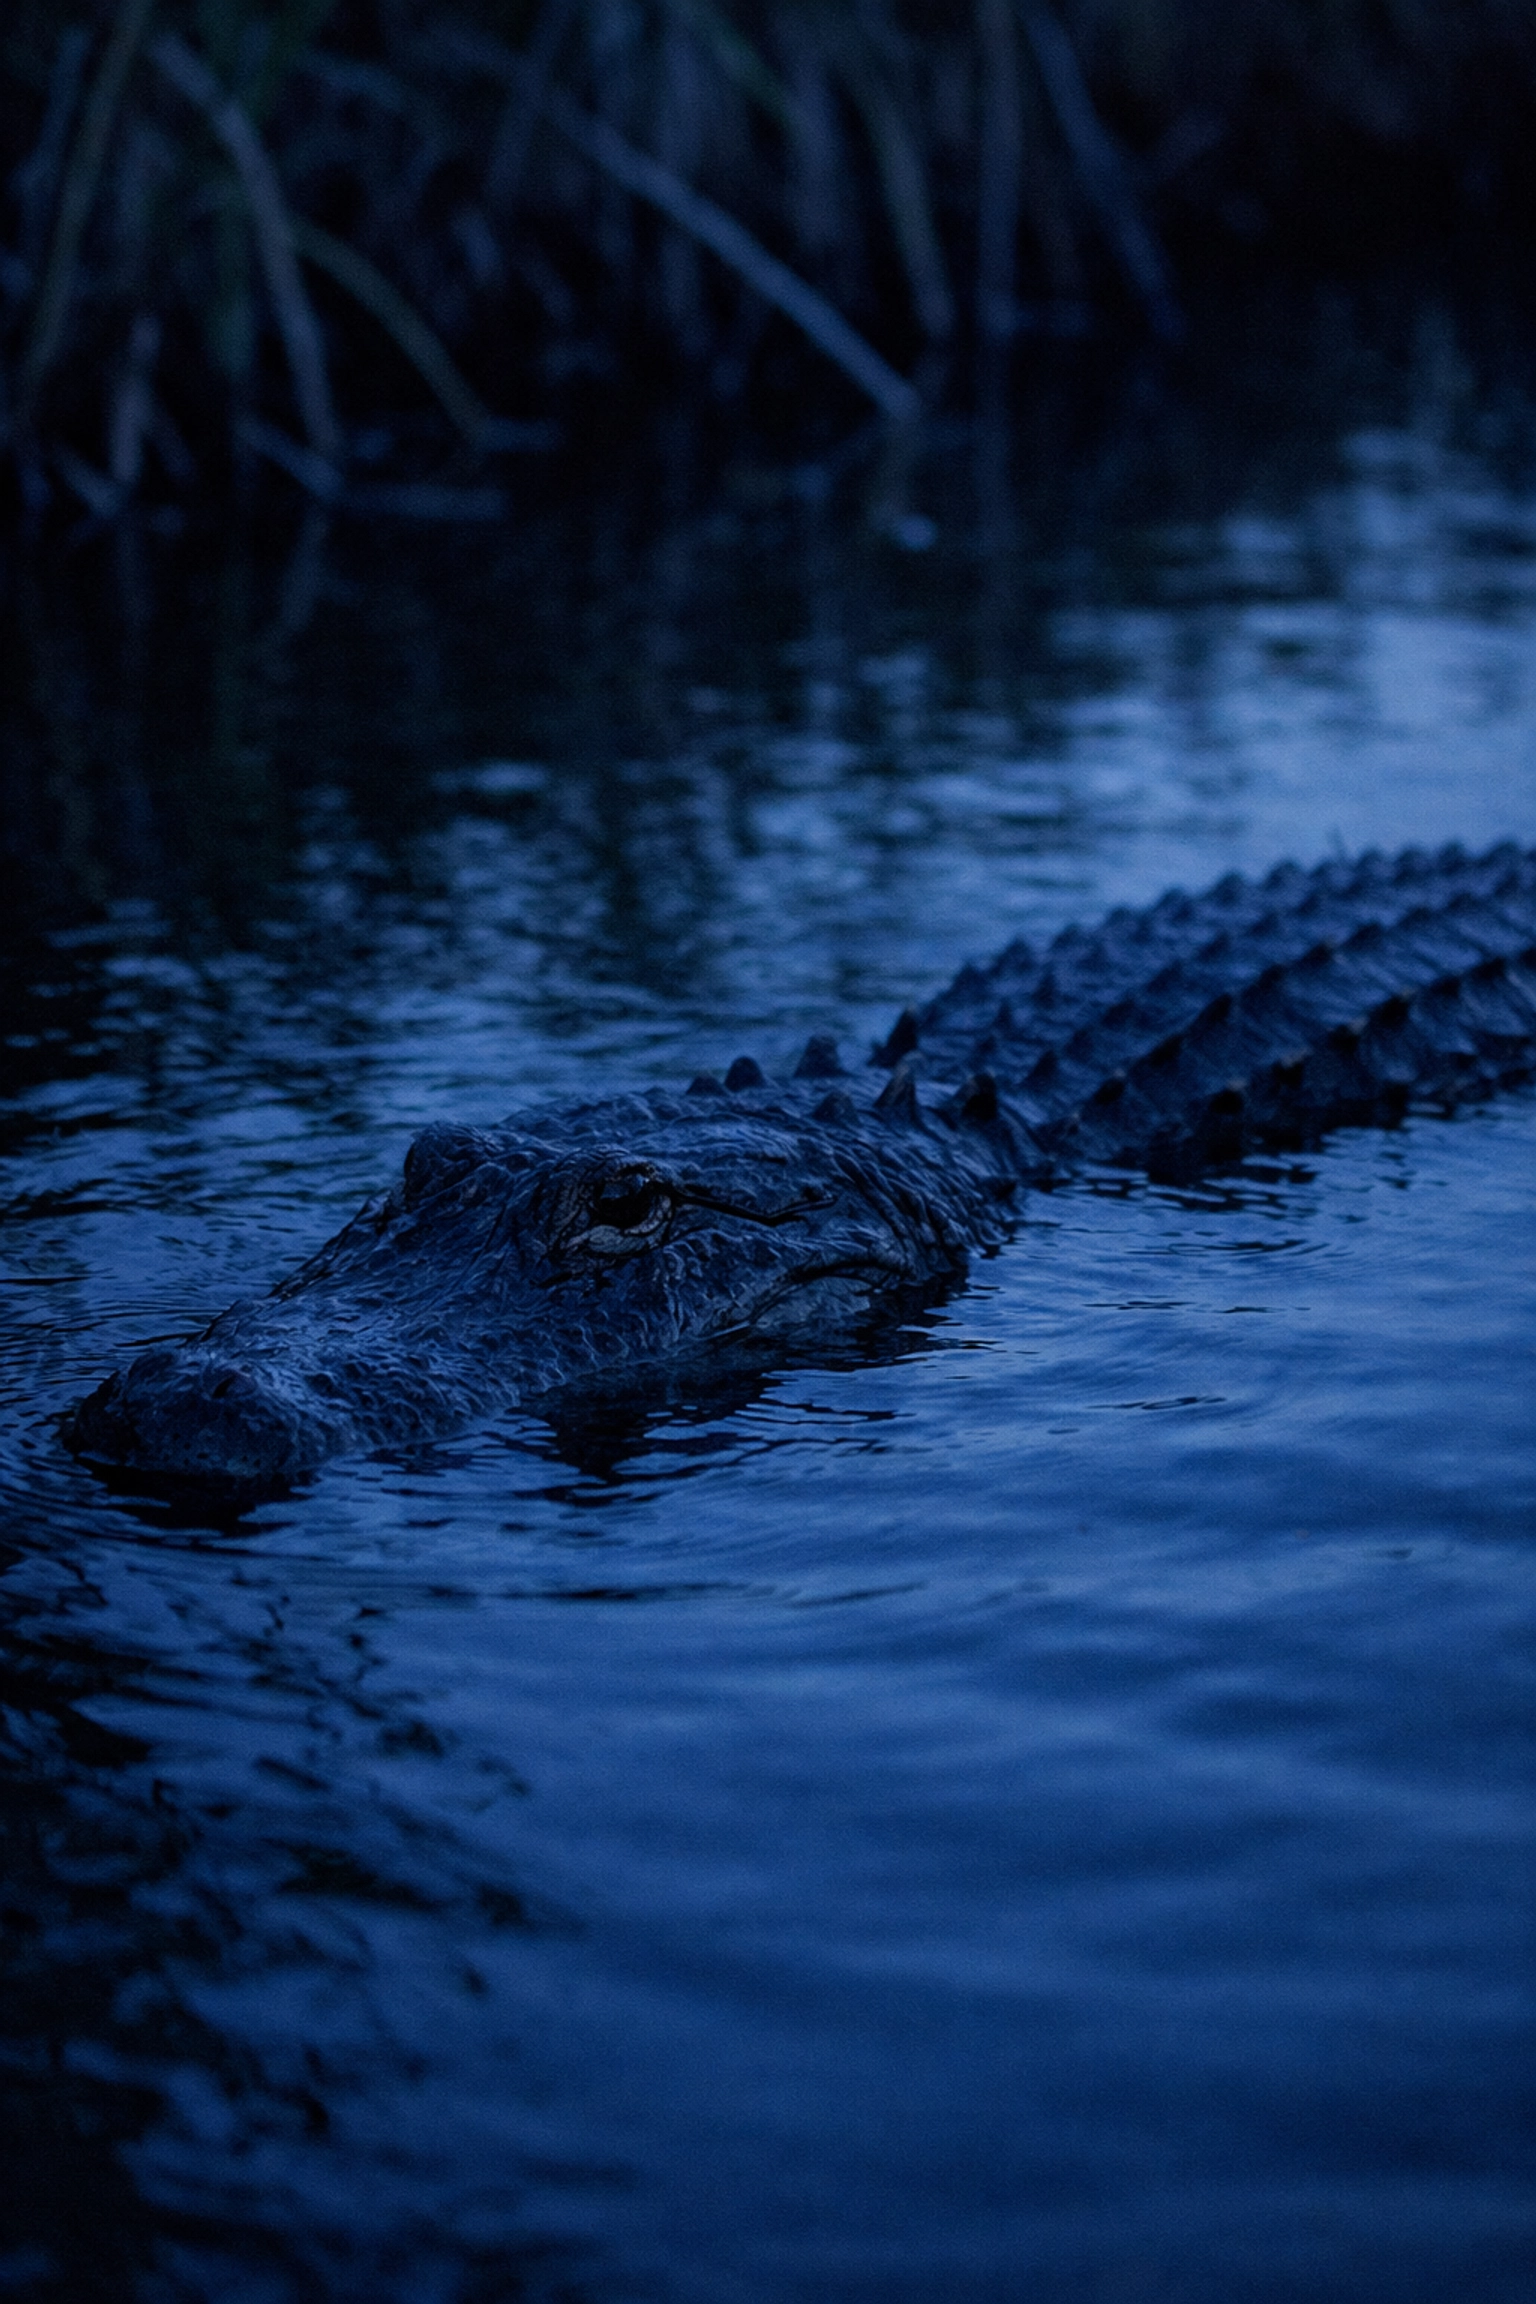
As you prepare your camera gear for a journey into the "River of Grass," you are stepping into one of the most unique ecosystems on the planet. The Everglades is not just a swamp; it is a sprawling, living canvas that demands both technical skill and creative vision. Whether you are chasing the perfect silhouette of a cypress tree against a burning sunrise or aiming to capture the prehistoric gaze of an American alligator, knowing exactly where to stand is the difference between a snapshot and a piece of fine art.
Mastering Everglades photography locations requires more than just a map; it requires an understanding of light, water levels, and wildlife behavior. By following this guide, you will bypass the trial-and-error phase and head straight to the spots that yield world-class results. Your journey toward capturing breathtaking wildlife photography in the Everglades starts here.
The Iconic Gateway: Royal Palm and Anhinga Trail
Just as every great story has an opening chapter, your photography expedition should begin at the Royal Palm Visitor Center. This area serves as the most accessible and concentrated location for wildlife photography in the Everglades. The Anhinga Trail, a self-guided boardwalk, propels you directly into the marsh, putting you inches away from the action.
When you walk this trail during the winter months, you will find anhingas, herons, egrets, and alligators in such abundance that your primary challenge will be choosing which subject to focus on first. To ensure you capture the "fine art" quality you’re after, arrive at first light. The mist rising off the sawgrass creates a soft, ethereal atmosphere that elevates a standard bird portrait into something museum-quality.

For the best results, you should utilize a versatile zoom lens like a 100-400mm or a 150-600mm. While the wildlife here is remarkably tame, the extra reach allows you to frame tight, intimate portraits of nesting birds or the intricate textures of an alligator's scales. Remember, your goal is to showcase the character of the animal, not just its presence.
Shark Valley: The Vast Horizon
If your passion lies in landscape photography in the Everglades, Shark Valley is your destination. Located off U.S. 41, this 15-mile loop offers unparalleled views of the expansive sawgrass prairies that define the park. The sense of scale here is immense, and capturing that vastness requires a strategic approach to composition.
The 65-foot observation tower at the halfway point of the loop provides a panoramic vantage point that is unmatched in the region. From this height, you can photograph the "river" as it flows southward, using the winding trails and water channels as leading lines to guide the viewer’s eye through your frame.
| Location Feature |
Photographer's Benefit |
Recommended Gear |
| Observation Tower |
360-degree panoramic vistas |
Wide-angle (16-35mm) |
| Tram Road |
Low-angle alligator shots |
70-200mm |
| Sawgrass Prairies |
Minimalist landscape compositions |
Tripod & ND Filters |
By integrating a polarizing filter into your workflow at Shark Valley, you can cut through the glare of the water and saturate the deep blues of the Florida sky. This commitment to technical excellence ensures your images possess the clarity and punch required for high-end prints. For more professional tips on capturing Florida's beauty, explore our resources at Edin Chavez Photography.
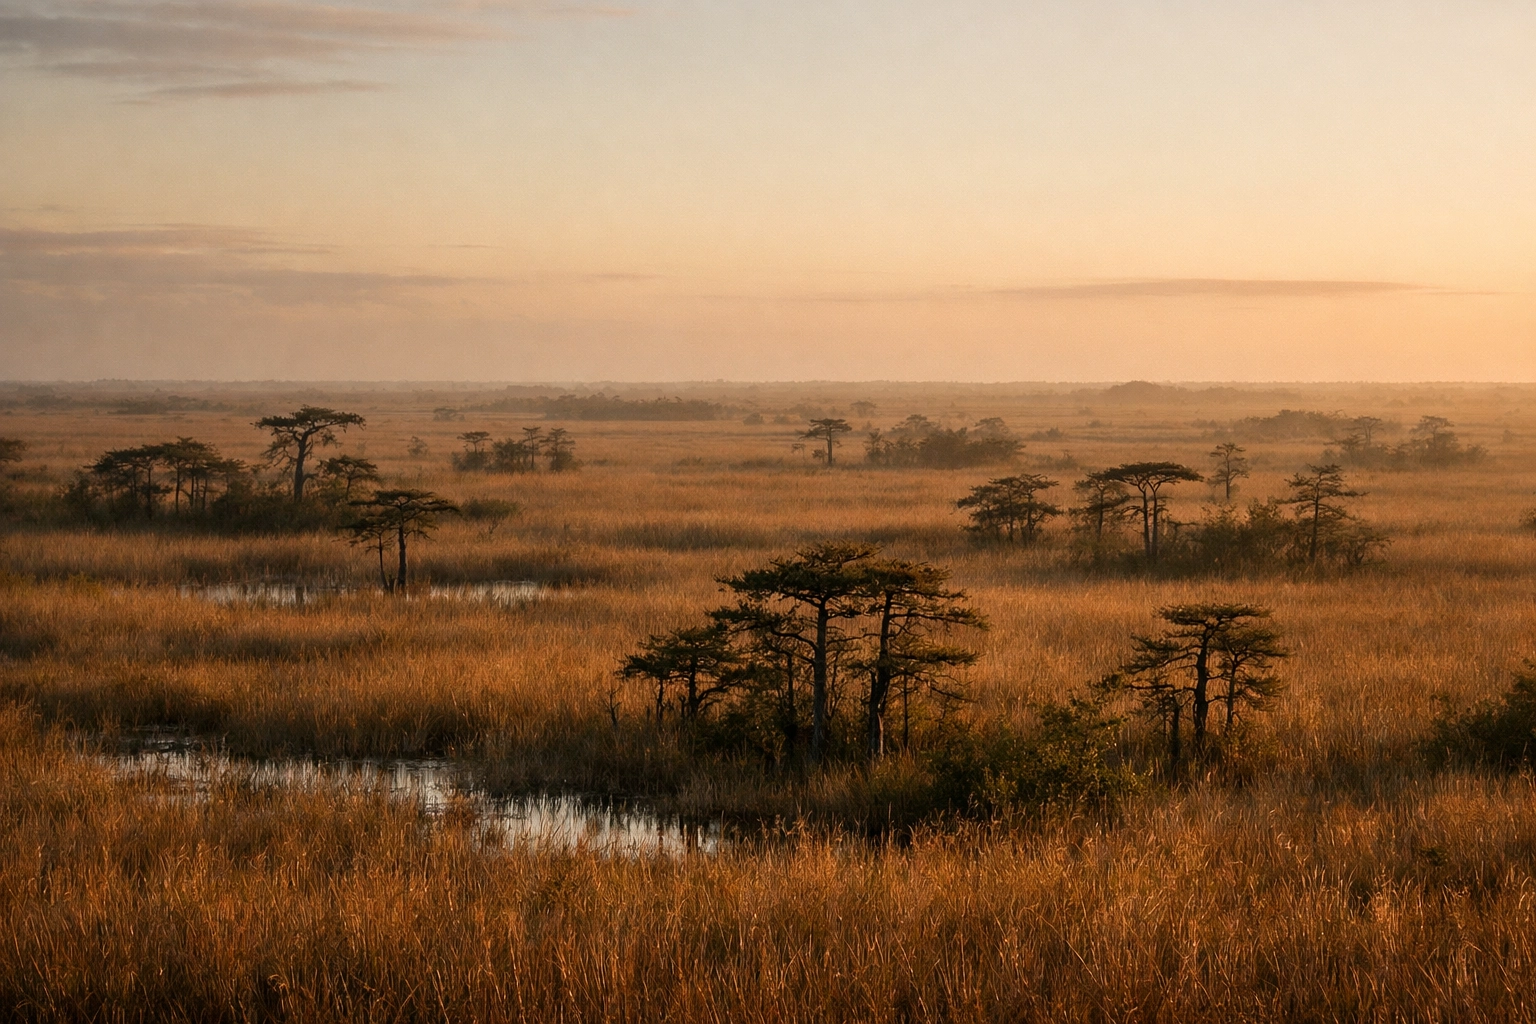
Chasing the Light: Pahayokee and Mahogany Hammock
As the sun begins to dip or rise, your presence at Pahayokee Overlook is mandatory. This location is a masterclass in minimalism. The boardwalk leads to a raised platform overlooking a sea of grass dotted with ancient cypress trees. Just as the golden hour hits, these trees become dramatic silhouettes against the vibrant oranges and purples of the horizon.
A short drive away, Mahogany Hammock offers a starkly different environment. Stepping into this lush, jungle-like island of trees feels like entering another world. This is a premier spot for those looking to photograph the elusive Barred Owl. Because the canopy is dense, the light levels are lower, requiring you to push your ISO or use a tripod to maintain sharpness. This contrast between the open prairies of Pahayokee and the dark, moody interiors of the hammock provides a well-rounded portfolio of the park’s diverse habitats.
The Rugged Frontier: Big Cypress National Preserve
While technically adjacent to the national park, Big Cypress National Preserve is an essential stop for any serious photographer. It offers a more rugged, backcountry feel with fewer crowds and more intimate swamp scenes. Janes Scenic Drive and the famous Loop Road are your gateways to the deep swamp.
In Big Cypress, you aren't just taking photos; you are documenting a prehistoric landscape. This is the place to find ghost orchids, cypress domes, and perhaps the tracks of the Florida panther. When shooting in the cypress strands, you should look for reflections. On a still morning, the water acts as a perfect mirror, doubling the visual impact of the towering trees draped in Spanish moss.

This environment can be challenging due to the high contrast between bright highlights and deep shadows. Using a tripod and bracketed exposures ensures you retain detail in both the brightest clouds and the darkest swamp floor, a technique we frequently discuss at Edin Studios.
The End of the Road: Flamingo and Mrazek Pond
Driving 38 miles south from the park entrance brings you to Flamingo, the southernmost point of the Florida mainland. This area is a transition zone where freshwater meets the saltwater of Florida Bay. For those interested in unique Everglades photography locations, Flamingo offers opportunities to shoot American crocodiles and West Indian manatees.
However, the real "secret" for bird photographers is Mrazek Pond, located just before you reach Flamingo. During the dry season (late February to March), the receding water levels concentrate thousands of wading birds into this small pond. It is not uncommon to see hundreds of Roseate Spoonbills, their pink plumage glowing in the morning sun. This is where a fast 400mm or 600mm lens becomes your best friend, allowing you to capture the frenetic energy of a feeding "blizzard" of birds.
Essential Timing and Seasonal Success
Your success in the Everglades is dictated by the seasons. The "Dry Season" (November through April) is widely considered the best time for photography because the wildlife is concentrated around shrinking water holes. However, the "Wet Season" (May through October) offers dramatic afternoon thunderstorms and the most incredible sunset clouds you will ever see.
Regardless of the season, you must be on-site at least 30 minutes before sunrise. The pre-dawn light in the Everglades is soft, blue, and incredibly peaceful. This is when the predators are most active and the light is most forgiving for your digital sensor.
Elevate Your Art with the Ultimate Guide
Capturing the Everglades is a journey that requires patience, respect for nature, and the right information. While this guide provides the foundation, there are hundreds of specific coordinates, seasonal secrets, and technical settings that can take your work from "good" to "unforgettable."
If you are ready to stop guessing and start creating high-impact fine art, you need a comprehensive roadmap. We have compiled years of professional experience into a single, easy-to-follow resource.
Unlock the full potential of your camera and discover the hidden corners of the swamp. Purchase the Everglades Photography Guide today and start capturing the images you’ve always dreamed of.
By following these professional strategies and visiting these curated Everglades photography locations, you empower yourself to produce a body of work that reflects the true majesty of this endangered wilderness. For more inspiration and to see how these locations translate into fine art, visit our main site at blog.edinchavez.com. Your next great masterpiece is waiting in the sawgrass.


