
Just as the Sierra Nevada peaks begin to glow with that first liquid gold of dawn, you realize that Lake Tahoe isn’t just a destination: it’s a playground for your lens. If you’ve ever scrolled through Instagram and wondered how photographers capture that impossible electric blue water or those perfectly placed boulders, you’re in the right place. Tahoe is a high-altitude masterpiece, and I’m going to show you exactly where to point your camera to bring home shots that look like they belong in a gallery.
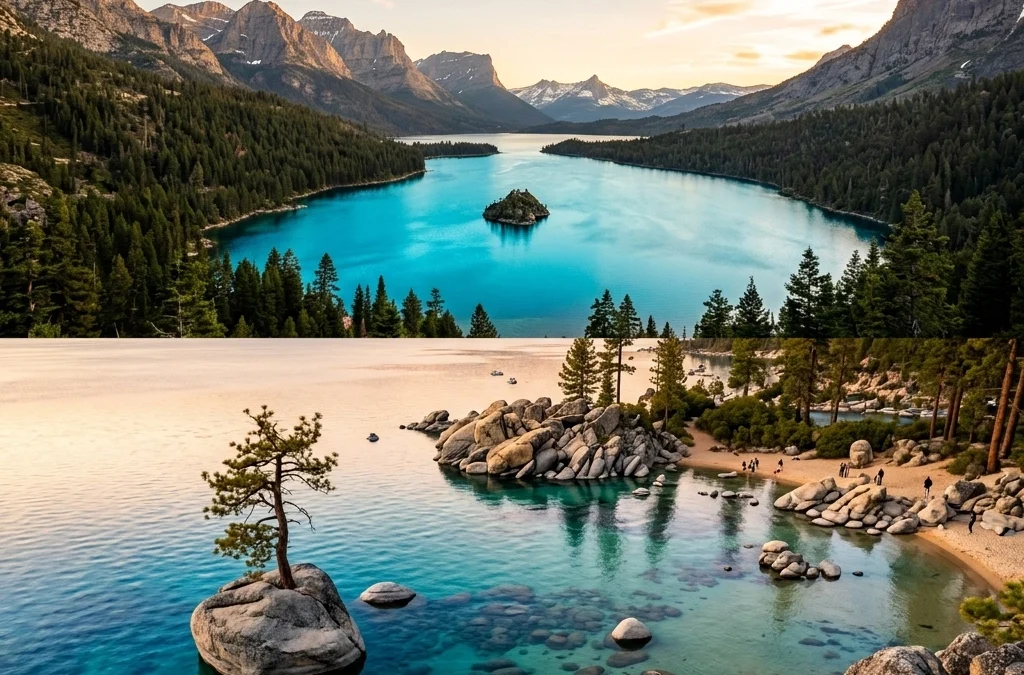
Finding the best photo spots Lake Tahoe has to offer can feel overwhelming because, let’s be honest, the whole place is a vibe. But there are three heavy hitters that every landscape photographer needs in their portfolio: Emerald Bay, Bonsai Rock, and Sand Harbor. Whether you are hunting for the perfect sunrise or a minimalist long exposure, these spots deliver every single time.
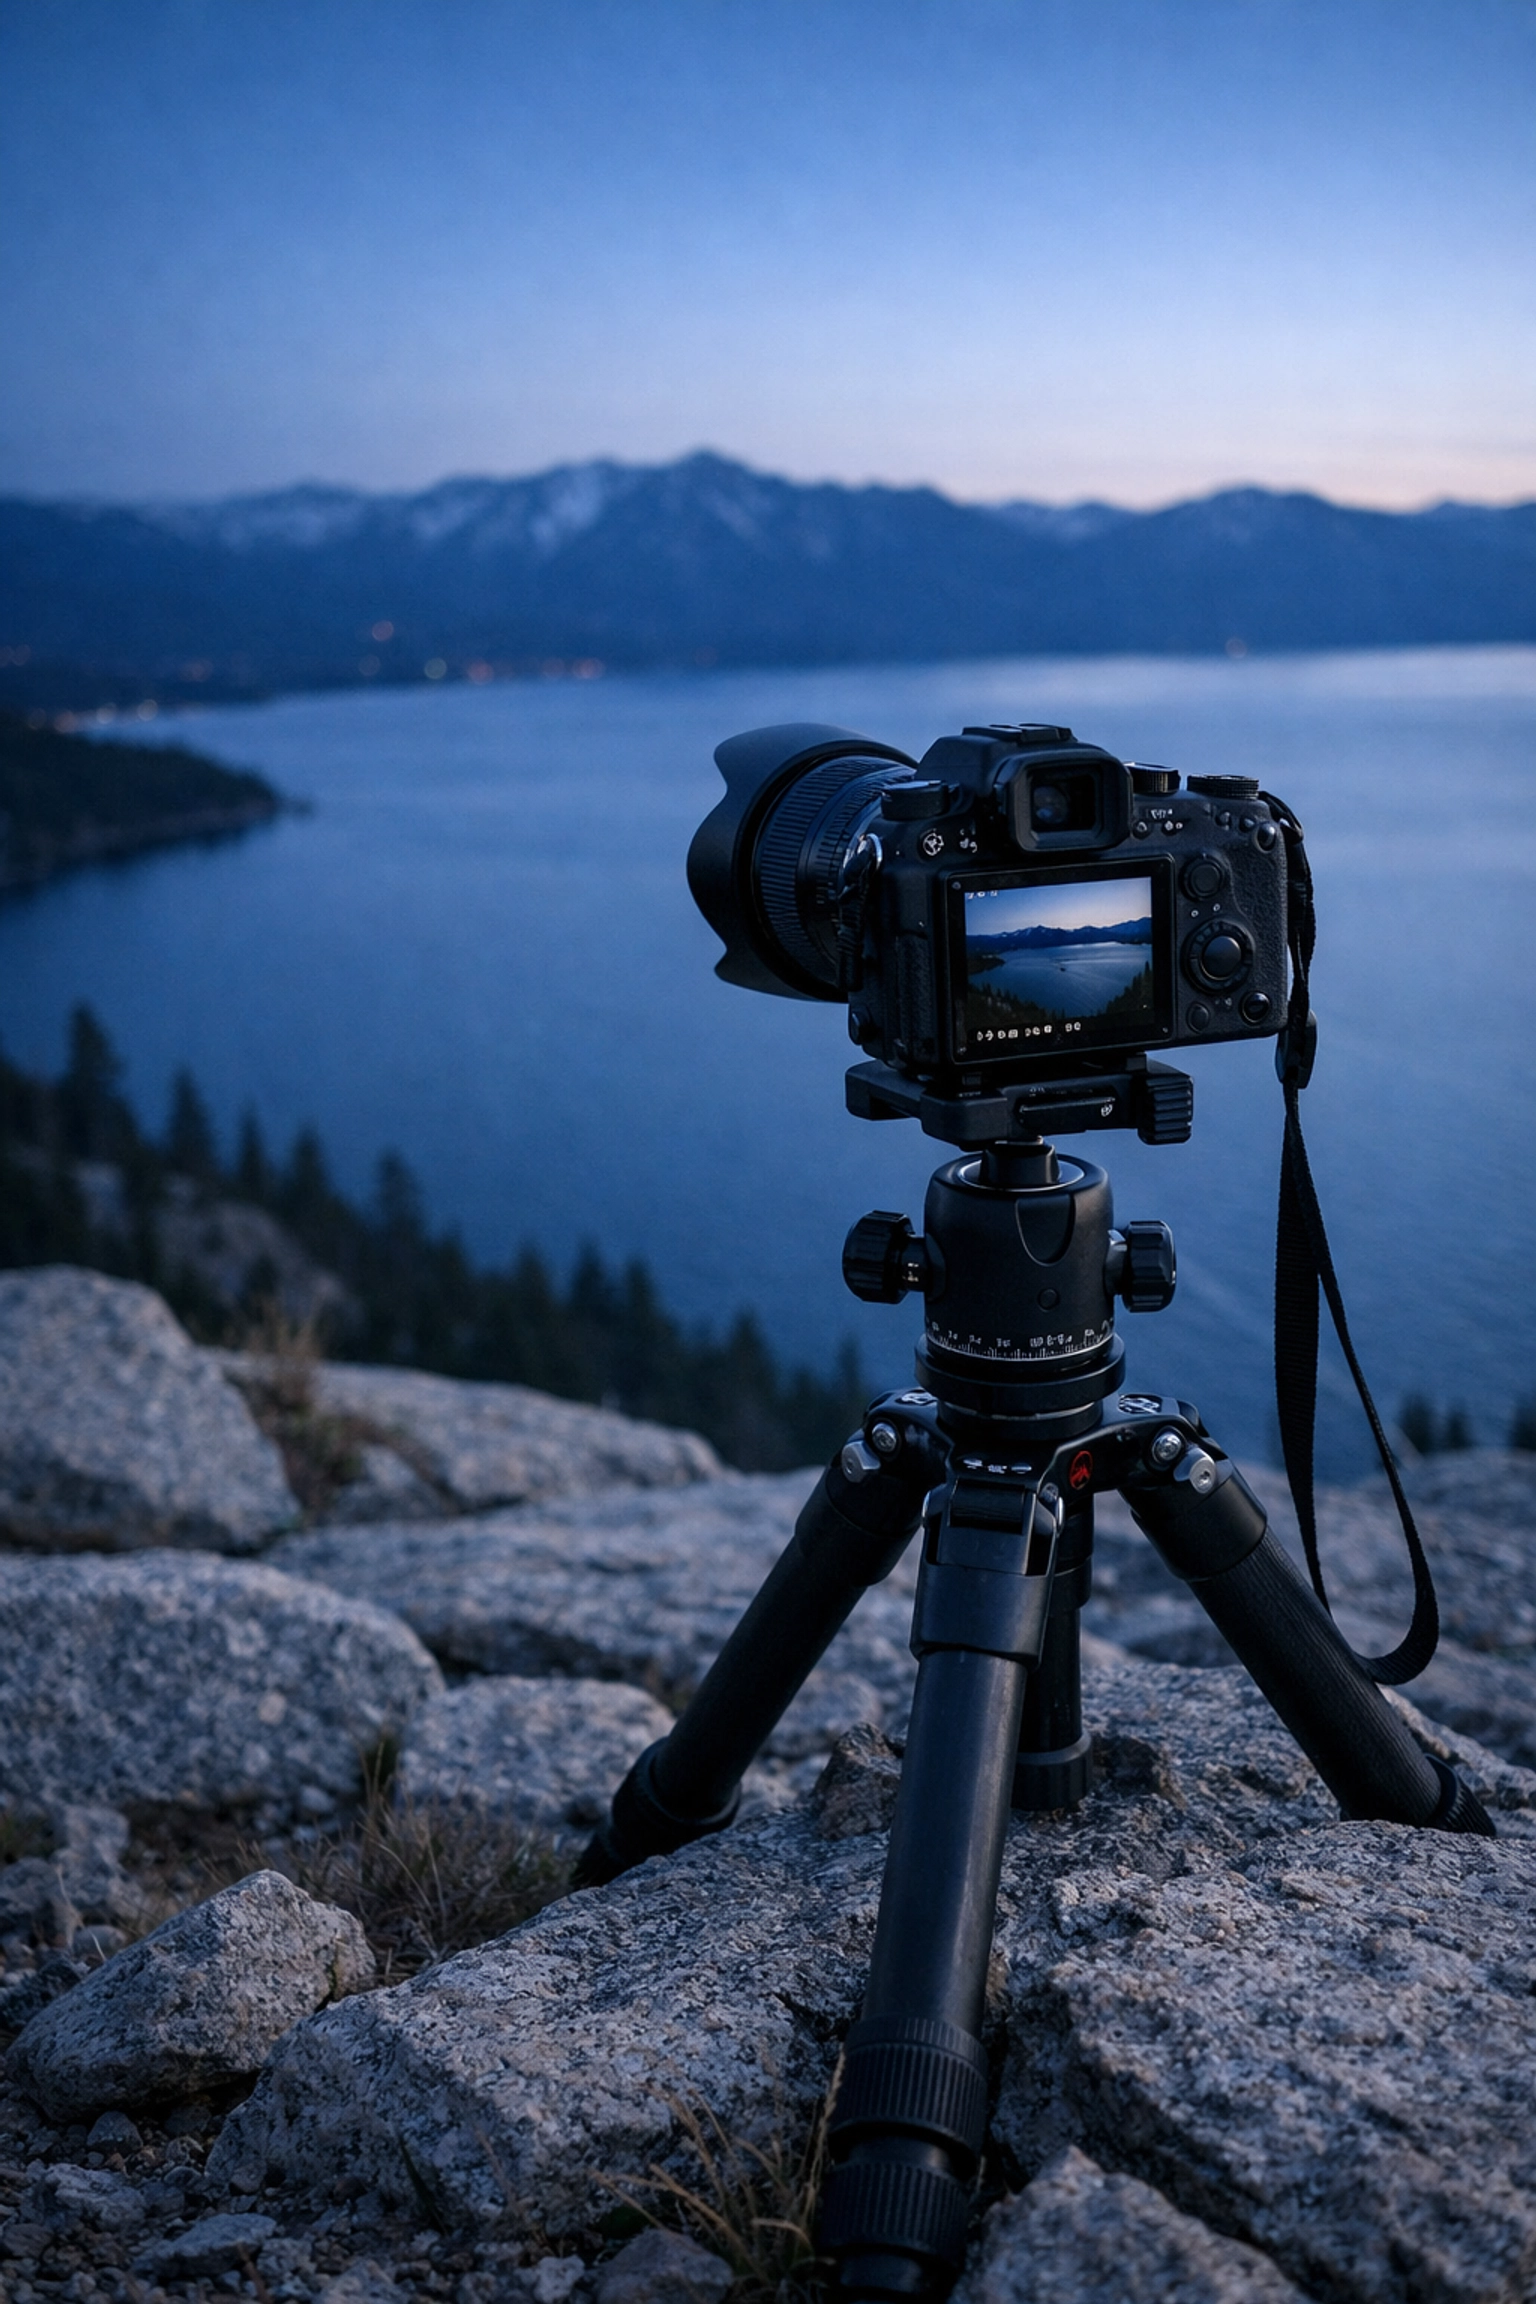
Before you pack your bags and head into the mountains, make sure you have the ultimate advantage. My Lake Tahoe Photography Guide gives you the exact GPS coordinates, secret timing tips, and gear recommendations to master this region like a local.
Emerald Bay: The Crown Jewel of the Sierras
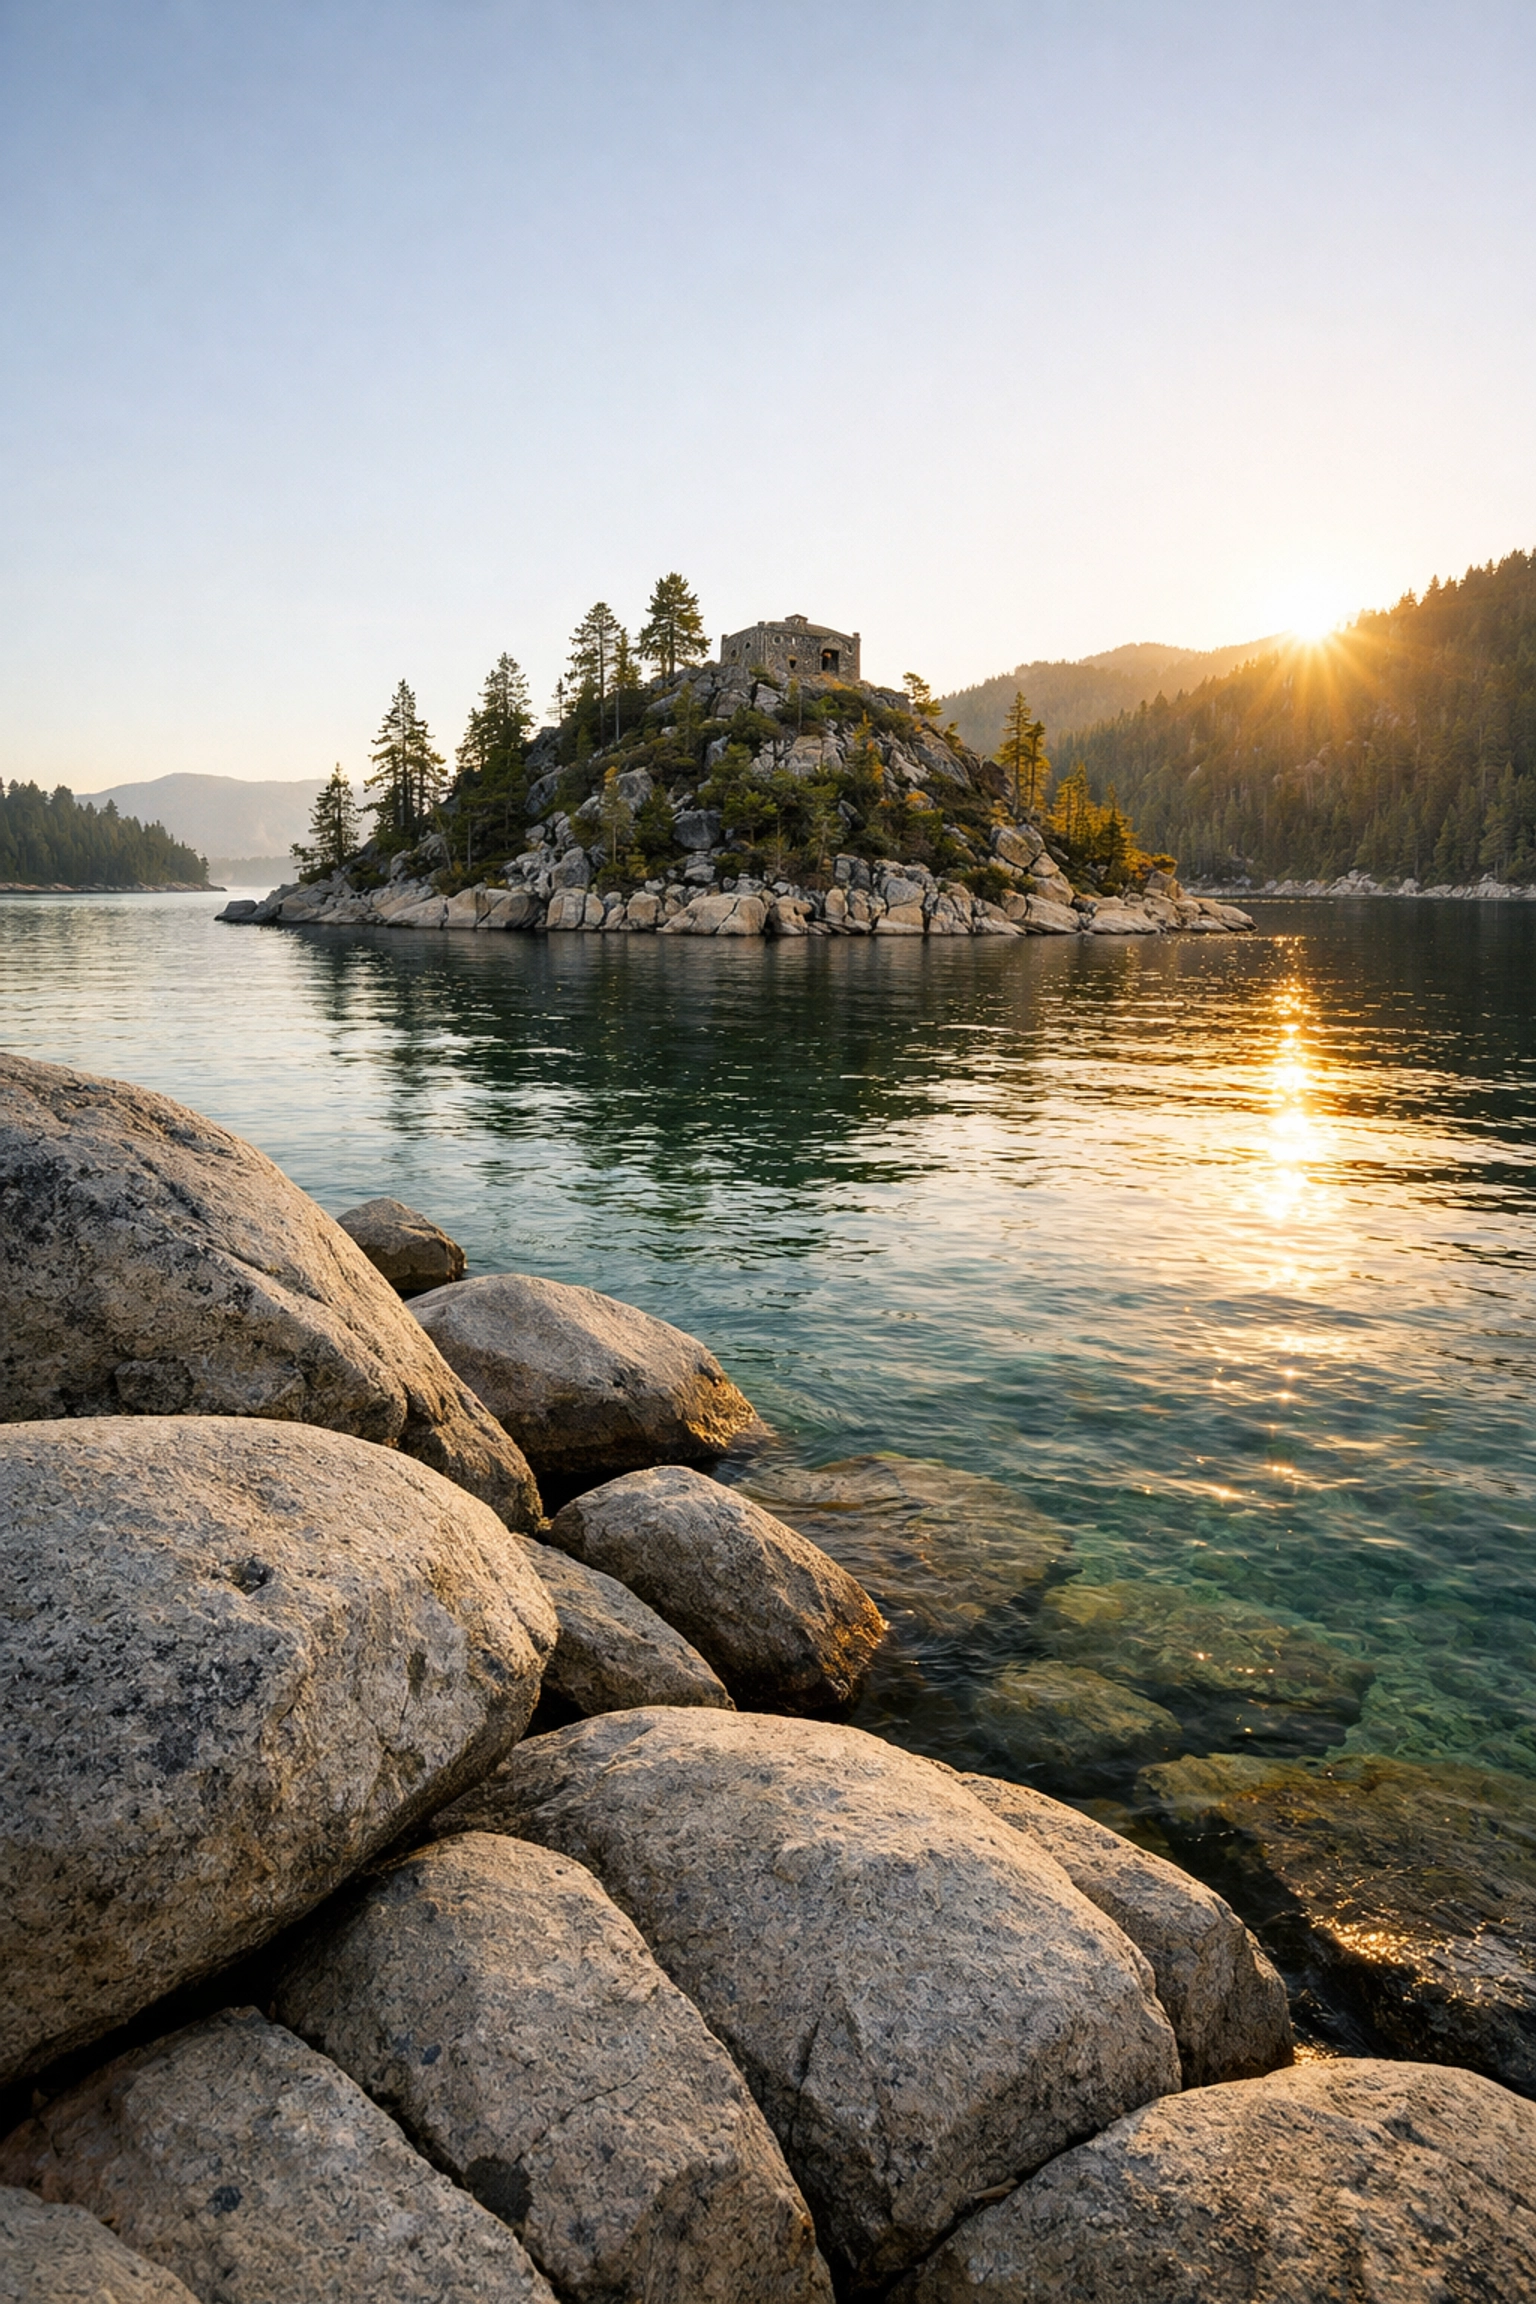
If Lake Tahoe had a monarch, Emerald Bay would be wearing the crown. This is arguably the most photographed location in the entire lake, and for good reason. The bay is a perfect crescent of deep greens and vibrant blues, with the tiny, mysterious Fannette Island sitting right in the center.
To truly capture the scale of Emerald Bay, you need to be there for sunrise. As you stand at the overlook on Highway 89, you’ll watch the sun creep over the eastern peaks, hitting the water and turning the bay into a literal emerald. The air is crisp, the silence is heavy, and the light is pure magic.
How to Nail the Shot
Your first stop should be the main parking lot overlook. It’s an easy win, but don’t just stay there. If you’re feeling adventurous, hike down the Vikingsholm Trail. It’s a steep mile down, but it puts you right at the water’s edge. From here, you can use the shoreline rocks as leading lines pointing toward the island.
Pro Tip: Bring a wide-angle lens to capture the entire sweep of the bay. If you want to make those colors pop and cut through the surface glare of the water, a Circular Polarizer (CPL) is non-negotiable. It transforms the water from a reflective sheet into a window showing the submerged boulders below. If you want that "pro-level" finish in your edits, my Ultimate Lightroom Preset Collection is the secret sauce you need to make those blues and greens sing.
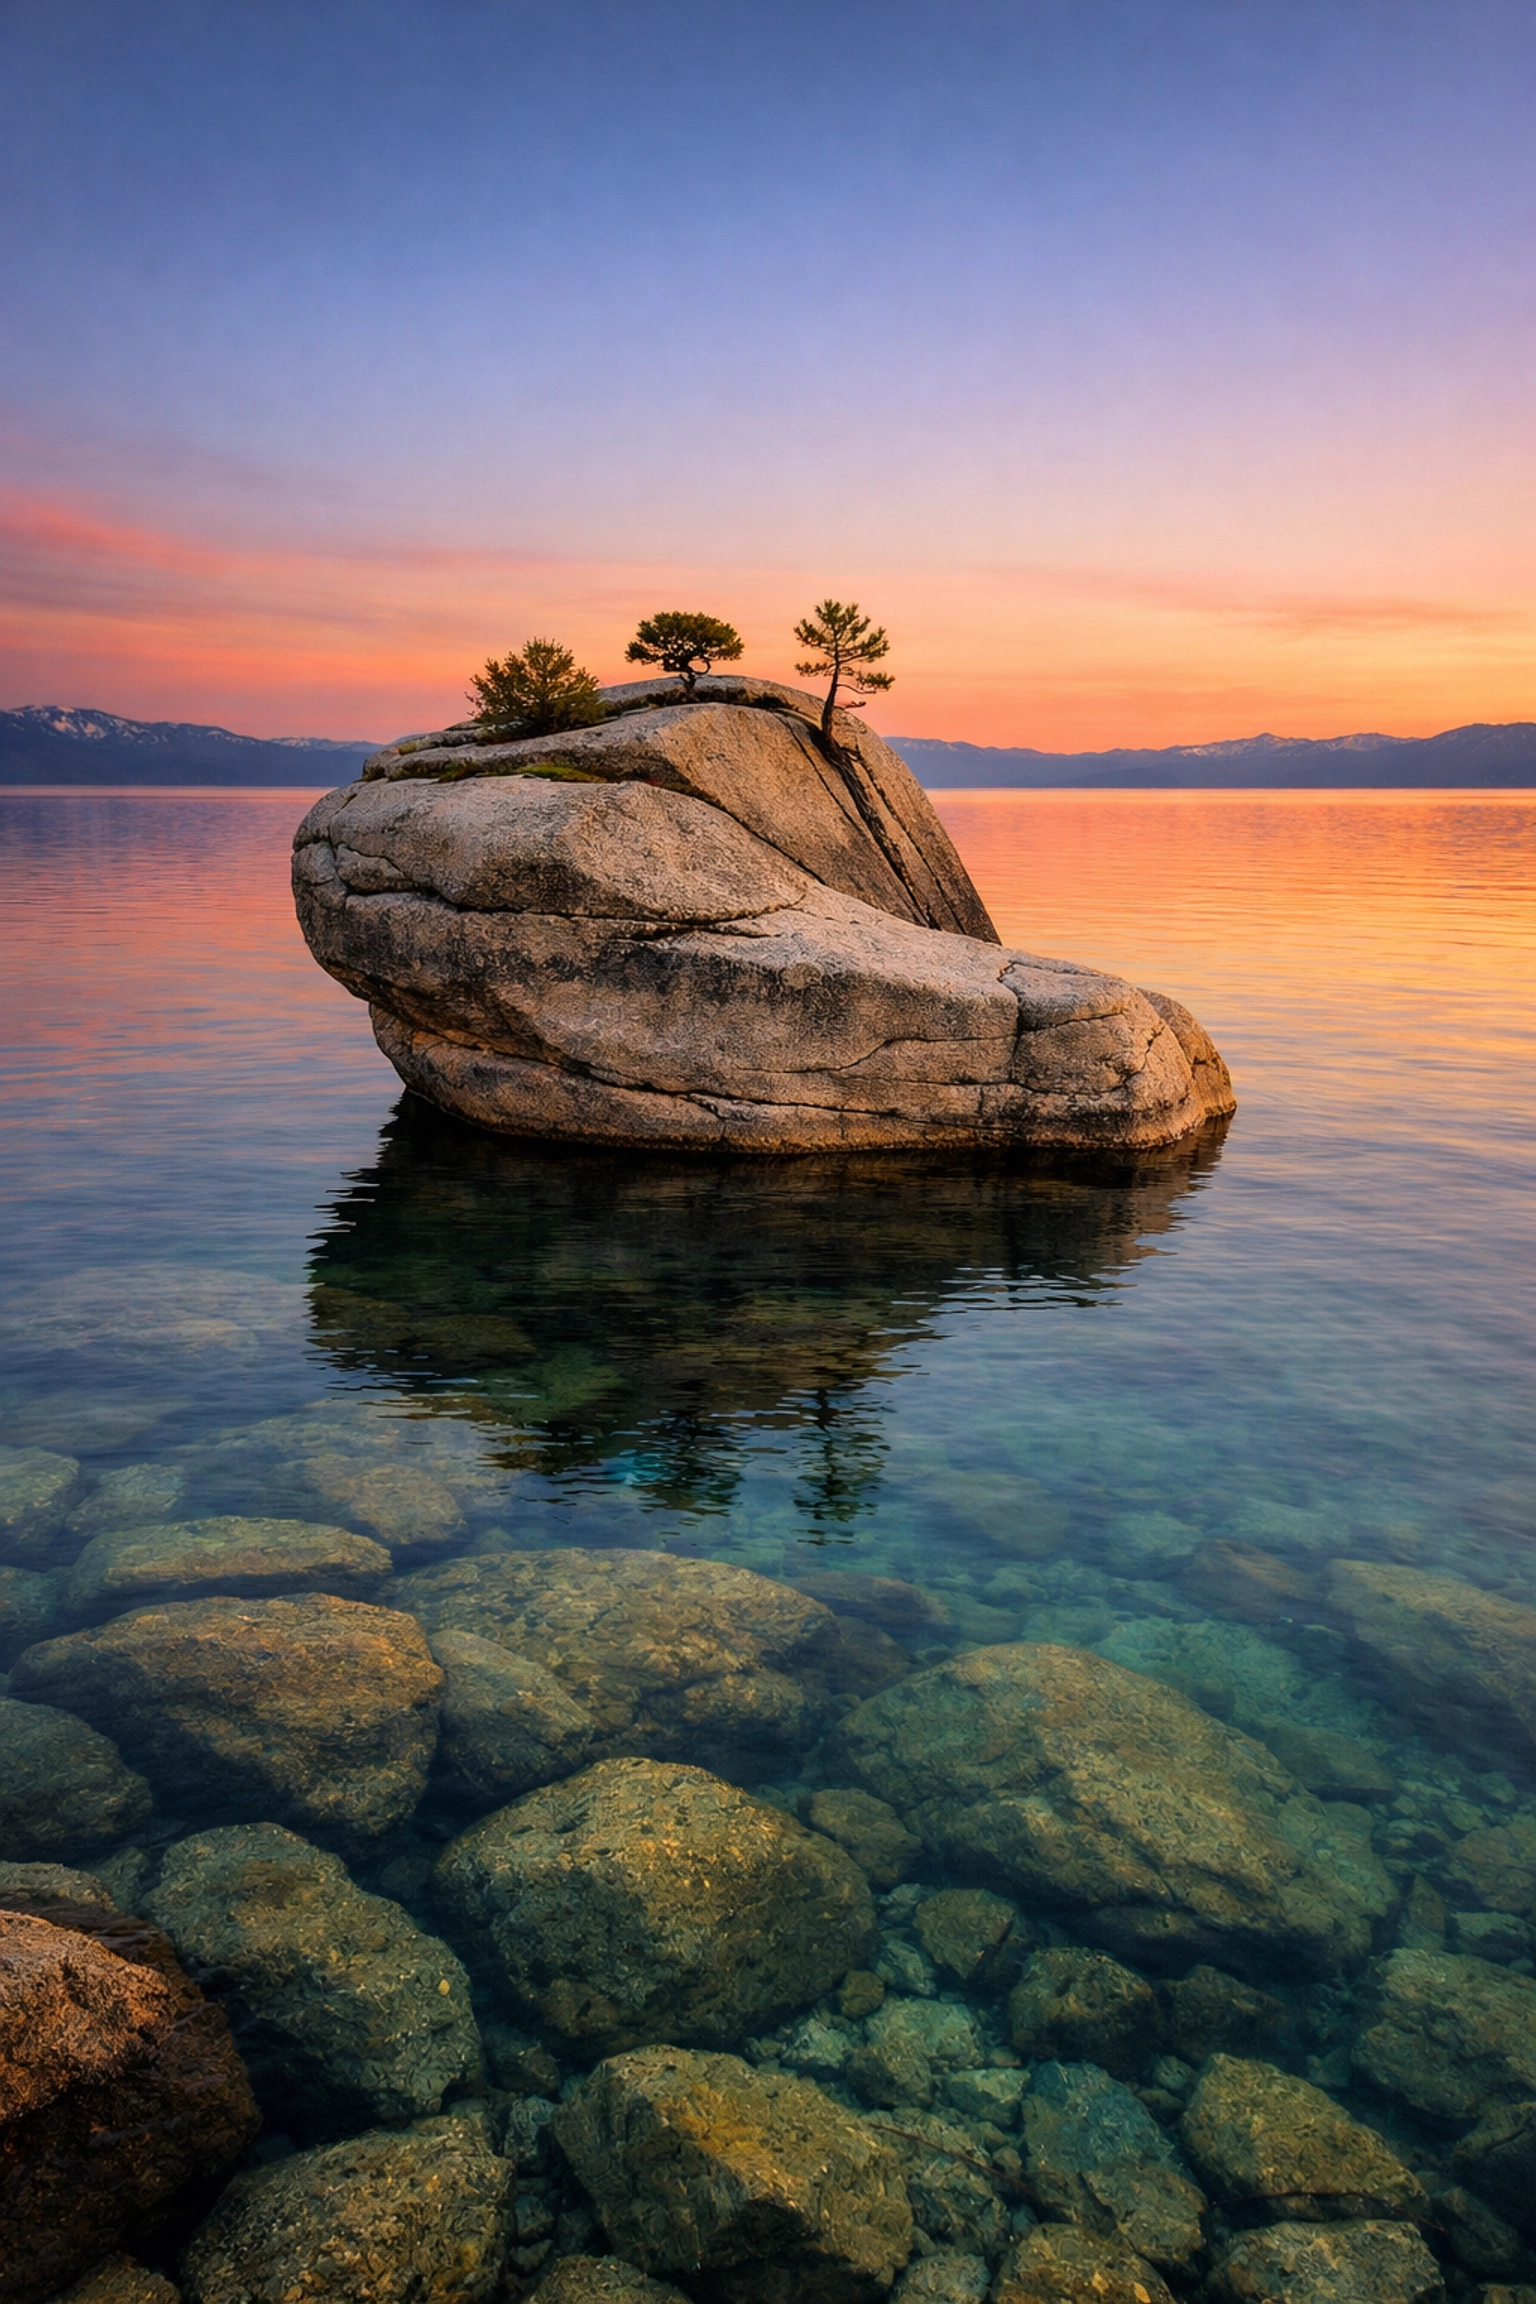
Bonsai Rock: Minimalist Perfection
Located on the East Shore, Bonsai Rock is a masterclass in minimalist landscape photography Lake Tahoe. It’s a large, weathered boulder sitting just offshore with four tiny trees growing out of a crack in its top. It looks like a giant, natural bonsai tree, and it is absolutely striking against the clear, turquoise water.
The vibe here is different from the grand scale of Emerald Bay. Bonsai Rock is about intimacy and composition. This is where you want to be for sunset. As the sun dips lower, the light hits the rocks along the shore, creating a warm, golden glow that contrasts beautifully with the cool tones of the lake.
Finding the Angle
Getting down to the water requires a bit of a scramble down a steep, sandy embankment. Watch your step: your gear will thank you. Once you’re at the waterline, you have endless options.
- Long Exposure: Use a 10-stop ND filter to turn the lake into a smooth, ethereal mist, leaving Bonsai Rock as a sharp, solitary subject.
- Drone Perspective: If you have a drone, this is the place to fly. From above, the water clarity is mind-blowing. You can see every rock on the lake floor, and Bonsai Rock looks like a jewel in a sea of turquoise.
For those who appreciate this kind of minimalist beauty but want it professionally captured and printed on museum-quality materials, you can explore my fine art landscape photography to find the perfect piece for your home.
Sand Harbor: The Caribbean of the Sierras
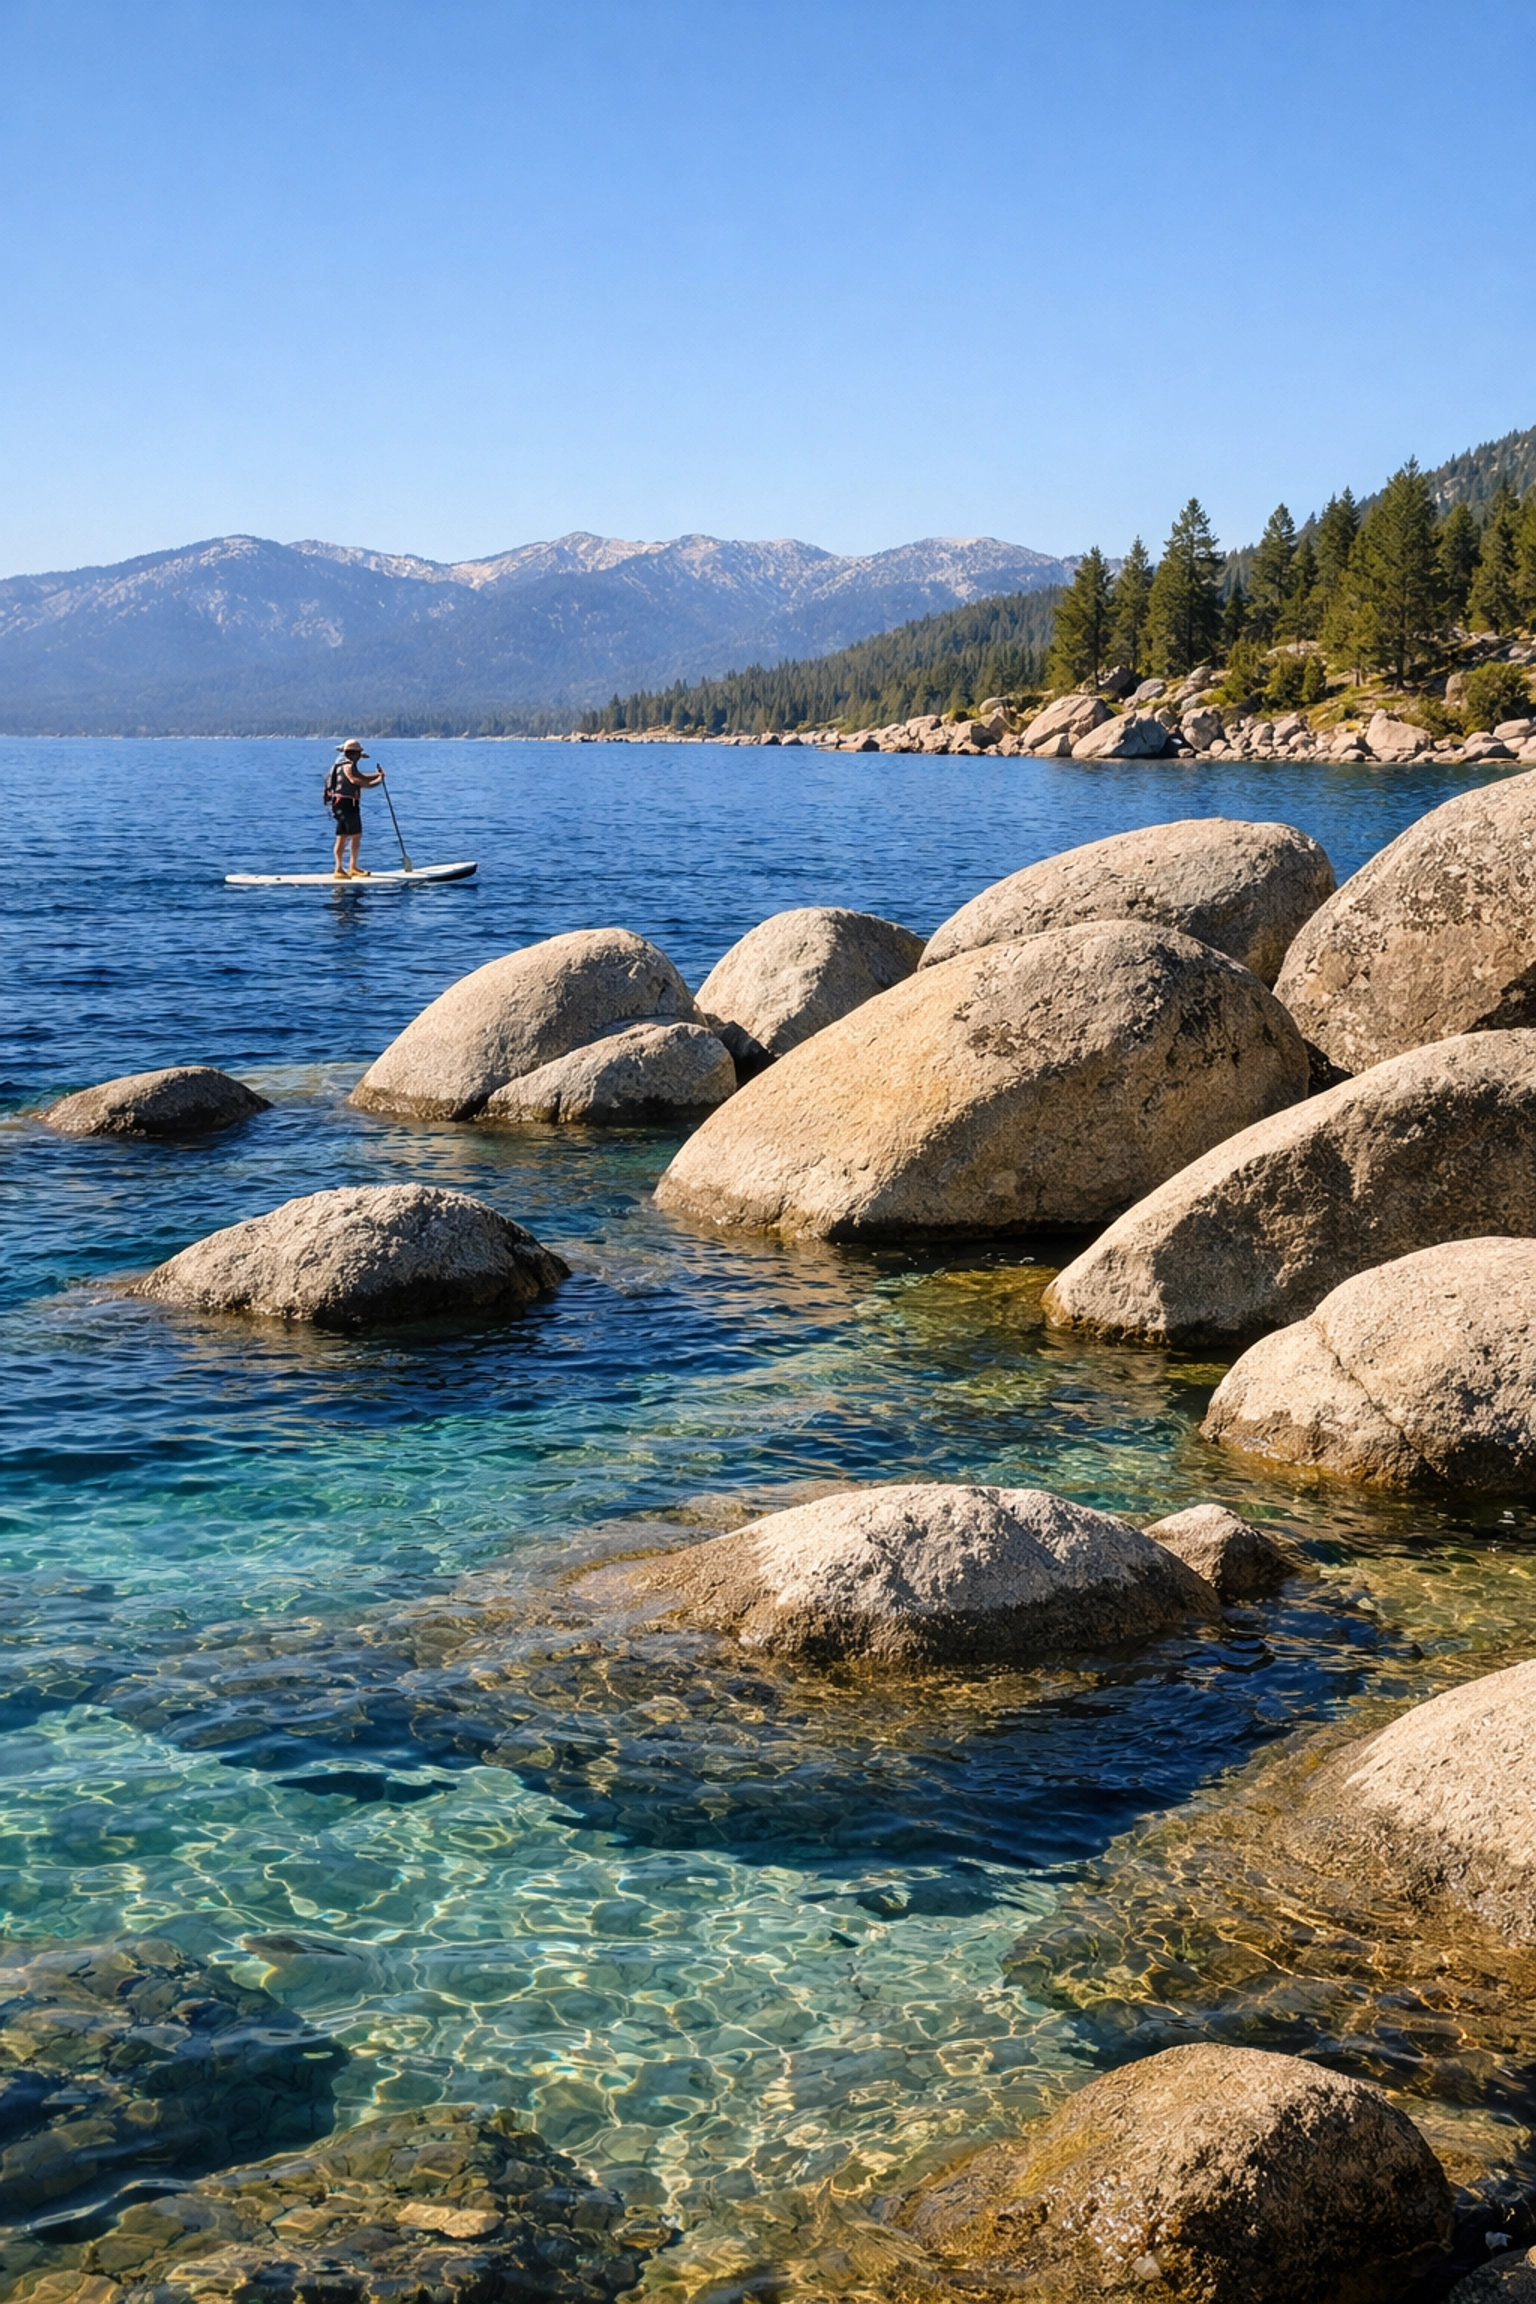
If you told someone you were in the Bahamas while standing at Sand Harbor, they might actually believe you: at least until they touched the freezing water. This is one of the best photo spots Lake Tahoe offers for anyone who loves dramatic rock formations and gradient water colors.
Sand Harbor is famous for its smooth, giant boulders that dot the shoreline and hide just beneath the surface. The water here transitions from a pale, translucent cream at the sand’s edge to a bright neon turquoise, then finally to a deep navy blue as the shelf drops off.
Master the Boulders
The "Bonsai Rocks" (not to be confused with the singular Bonsai Rock mentioned above) are the cluster of boulders at the north end of the park. These are your best friends for composition. Use them to create depth in your frame. Position your tripod low to the ground to make the foreground rocks feel massive and imposing.
| Feature | Best Photography Approach | Timing |
|---|---|---|
| Crystal Water | Use a CPL to see the underwater boulders. | Mid-morning for max light. |
| Sunset Glow | Look for the "Alpine Glow" on the distant peaks. | 20 mins after sunset. |
| Action Shots | Capture paddleboarders for a sense of scale. | Daytime. |
Sand Harbor is incredibly accessible, which means it gets crowded. If you want a clean shot without a dozen tourists in the background, you’ve got to be the first one through the gates in the morning or stay until the very last light when the crowds head to dinner.
Essential Gear for Lake Tahoe Photography
You can’t just show up with a smartphone and expect National Geographic results. To truly master these Lake Tahoe photography locations, your gear bag needs to be dialed in.
- A Sturdy Tripod: Between the wind coming off the lake and the long exposures you’ll want to take, a cheap tripod won't cut it. You need stability.
- Circular Polarizer (CPL): This is the most important filter for Tahoe. It removes the glare from the water and lets those famous turquoise colors shine.
- Neutral Density (ND) Filters: If you want that silky water look at Sand Harbor or Bonsai Rock, a 6-stop or 10-stop ND filter is your best friend.
- Wide-Angle Lens: A 16-35mm is the sweet spot for those massive Emerald Bay panoramas.
- Telephoto Lens: Don't sleep on the 70-200mm. It's perfect for compressing the mountains and catching details on Fannette Island.
Once you have the shots, the real work begins in the digital darkroom. To ensure your images reflect the majesty of what you saw in person, check out the tutorials at Edin Studios or jump straight to the finish line with my Ultimate Lightroom Preset Collection.
Why You Need the Lake Tahoe Photography Guide
Lake Tahoe is massive, and timing is everything. You can be at the right spot but at the wrong time and miss the shot of a lifetime. Should you shoot Emerald Bay in the winter? Which side of the lake gets the best "Alpine Glow"? Where can you park without getting a ticket or towed?
I’ve spent years scouting these shores, and I’ve put all that knowledge into the Lake Tahoe Photography Guide. It’s not just a list of spots; it’s a tactical manual designed to help you bypass the "tourist shots" and create high-end fine art.
If you’re serious about your craft, don't leave your trip to chance. Get the guide and arrive at the lake with a plan. Whether you are a seasoned pro or a hobbyist looking to level up, having an expert roadmap ensures you spend more time shooting and less time searching for a parking spot.
For more insights on how to elevate your work, explore our site for a deep dive into hundreds of tutorials and guides.
Final Thoughts on Tahoe’s Big Three
Emerald Bay, Bonsai Rock, and Sand Harbor are the foundations of any successful Tahoe trip. They offer variety, challenge, and immense visual rewards. Emerald Bay gives you the grand landscape; Bonsai Rock offers the artistic, minimalist challenge; and Sand Harbor provides the stunning colors and textures of a mountain paradise.
Remember, the best shot is the one you haven't taken yet. Grab your camera, respect the environment, and get out there. The light is waiting for you.
For more tips on locations like this, or to see how these spots look when printed for a gallery, visit the Edin Chavez Blog or see my latest work at Edin Fine Art. Happy shooting!


