
Just as the first light of dawn begins to pierce through the thick morning mist of the "River of Grass," you realize that the Everglades is far more than just a swamp: it is a living, breathing gallery of fine art. For many photographers, the sheer vastness of this 1.5-million-acre ecosystem can be intimidating. You might wonder where to even begin your journey to capture that perfect shot.
Whether you are chasing the elusive ghost orchid, tracking the prehistoric gaze of an American alligator, or waiting for the sun to paint the sawgrass in hues of gold, knowing the right Everglades photography locations is the difference between a folder full of "okay" snapshots and a portfolio of museum-quality prints. As someone who has spent years navigating these waters, let me guide you through the essential secrets of mastering wildlife photography in the Everglades and capturing the soul of this unique landscape.
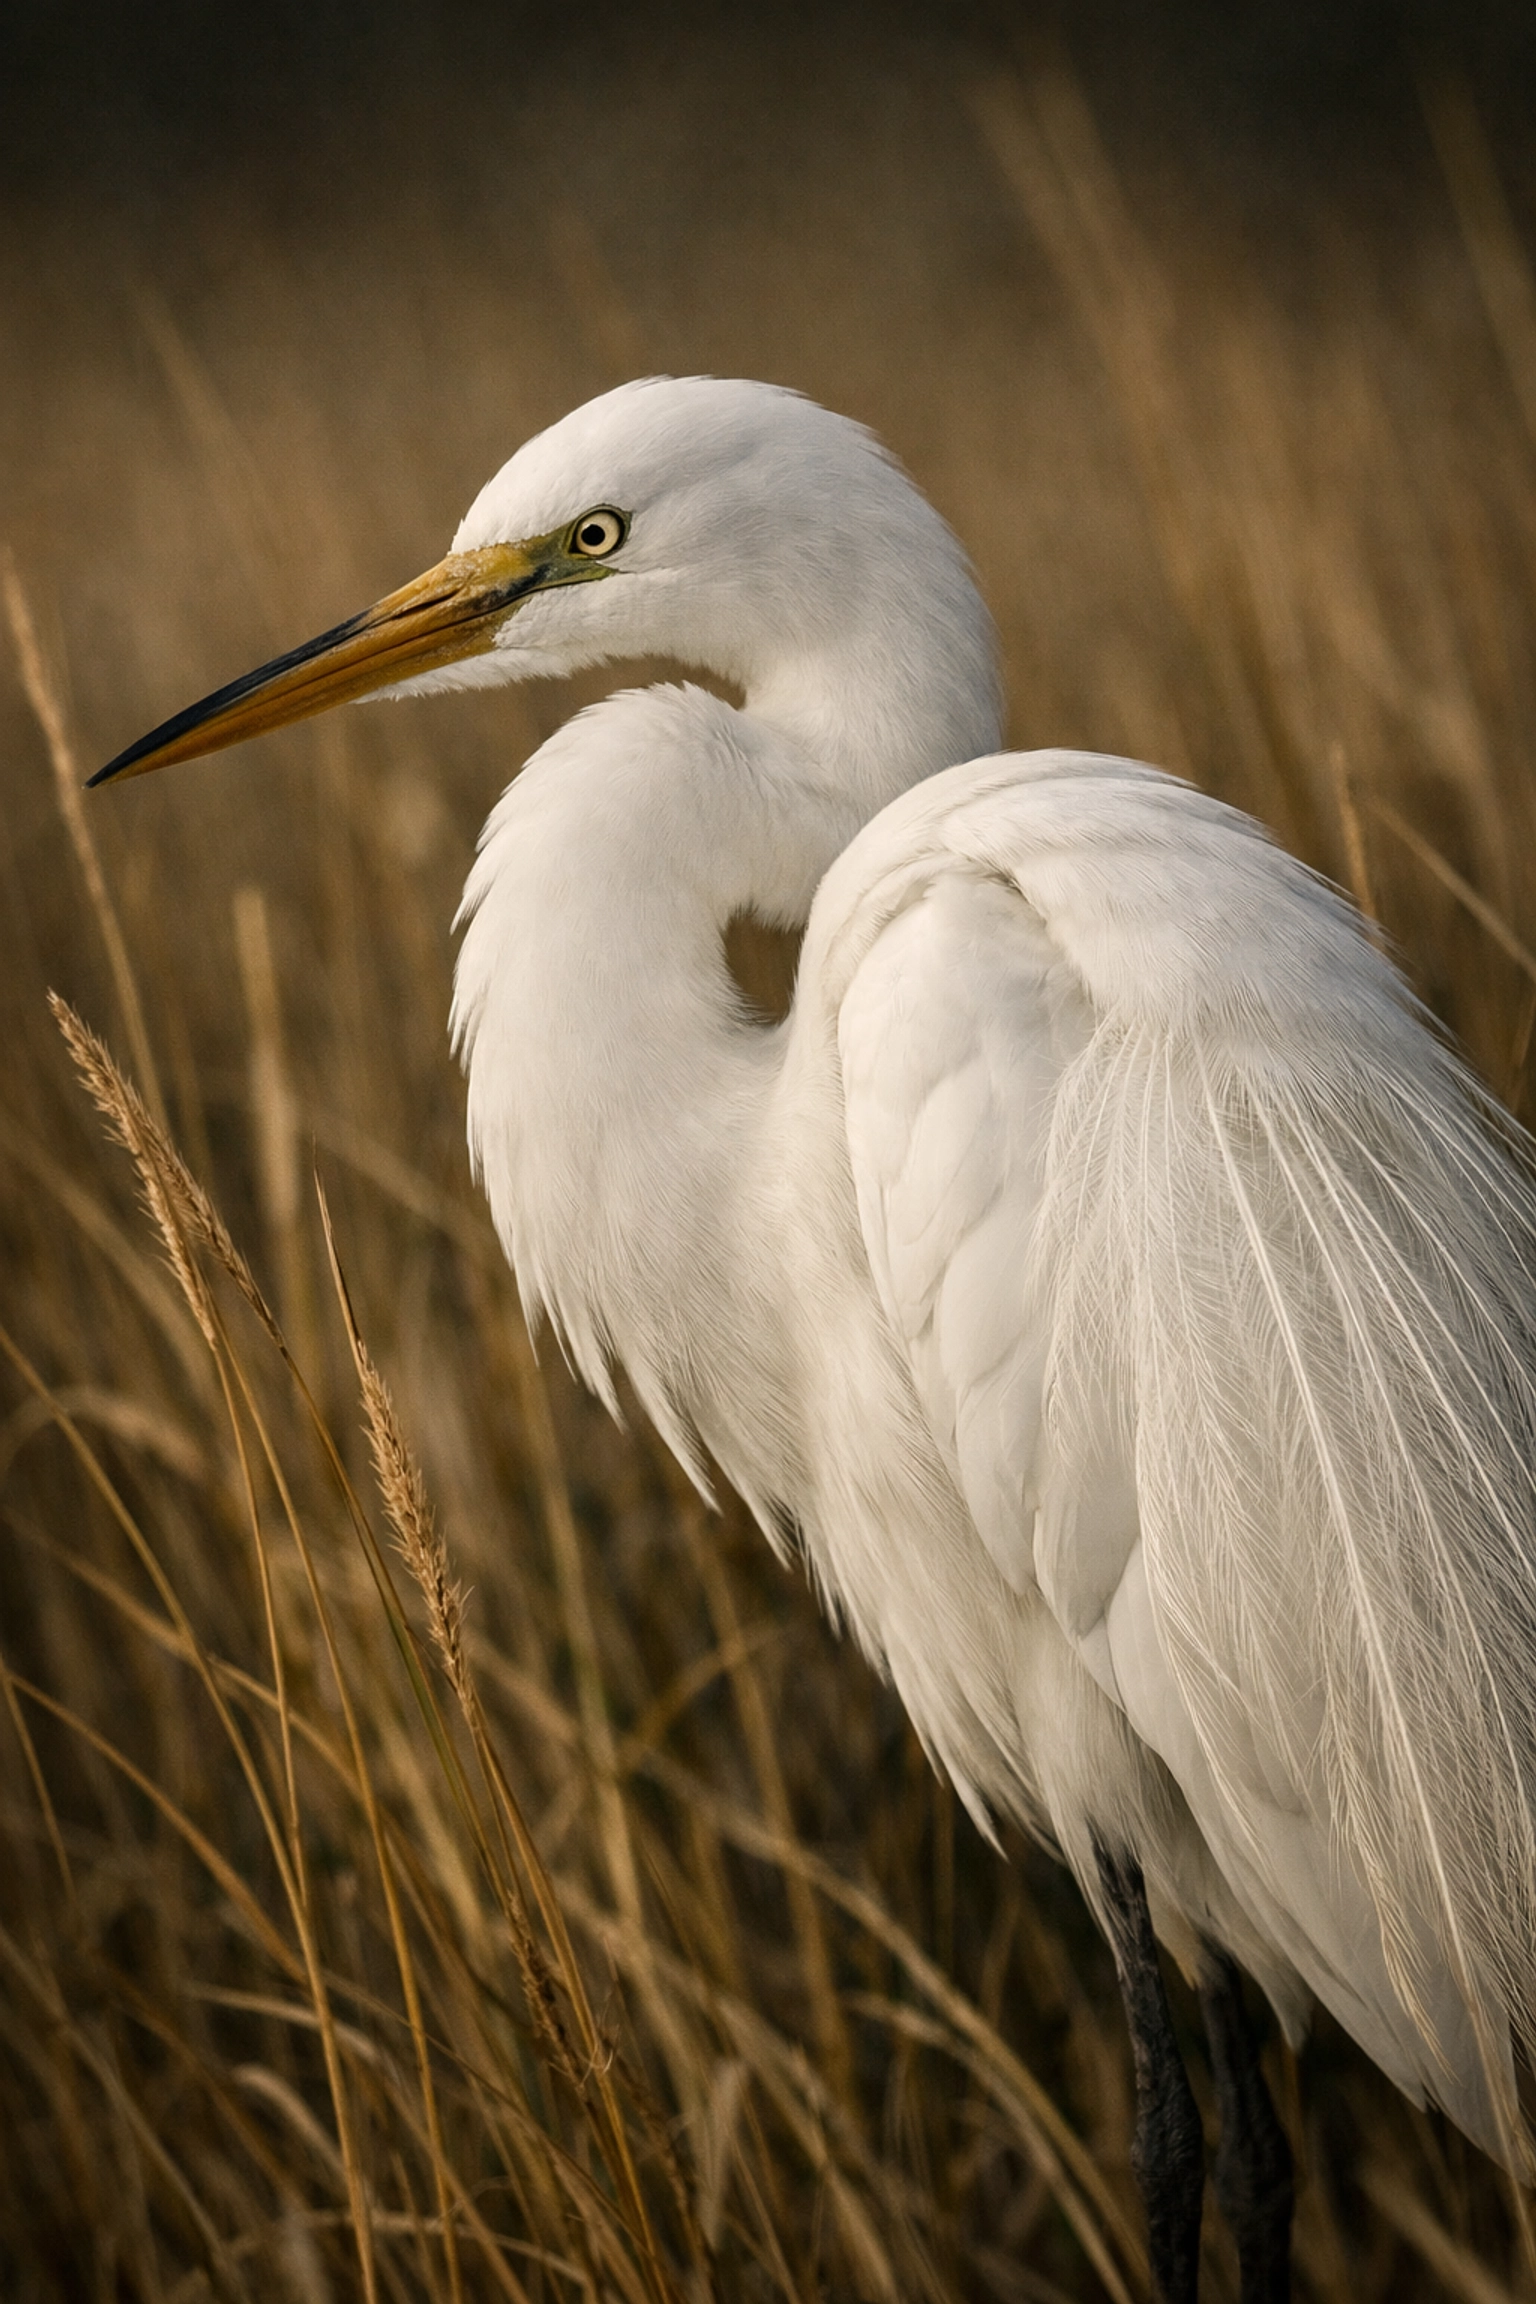
1. The Anhinga Trail is Your Fine Art Playground
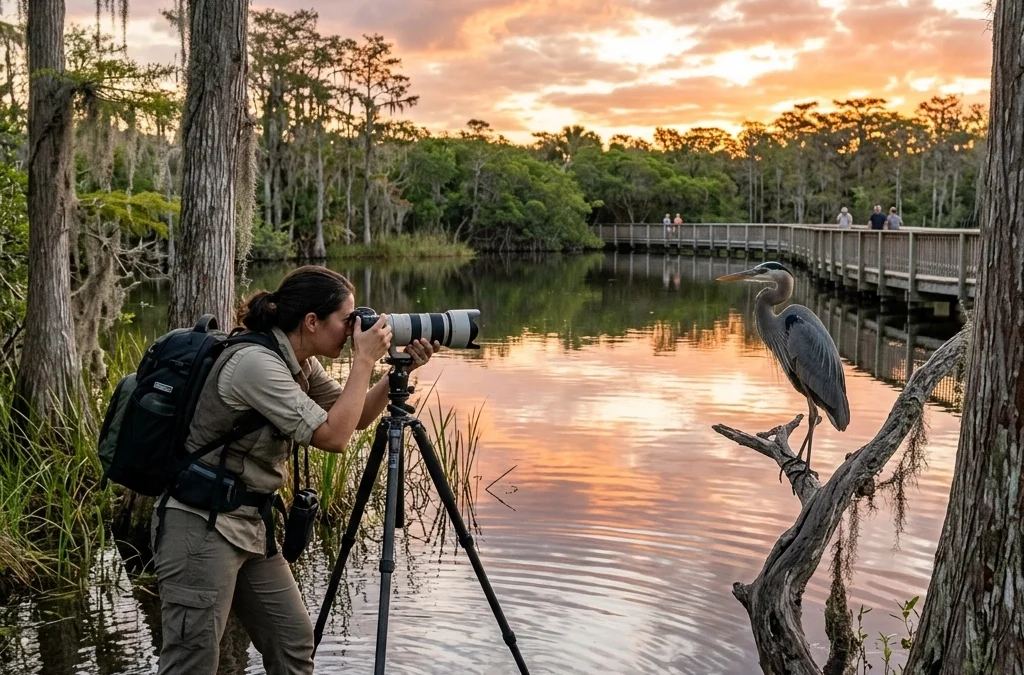
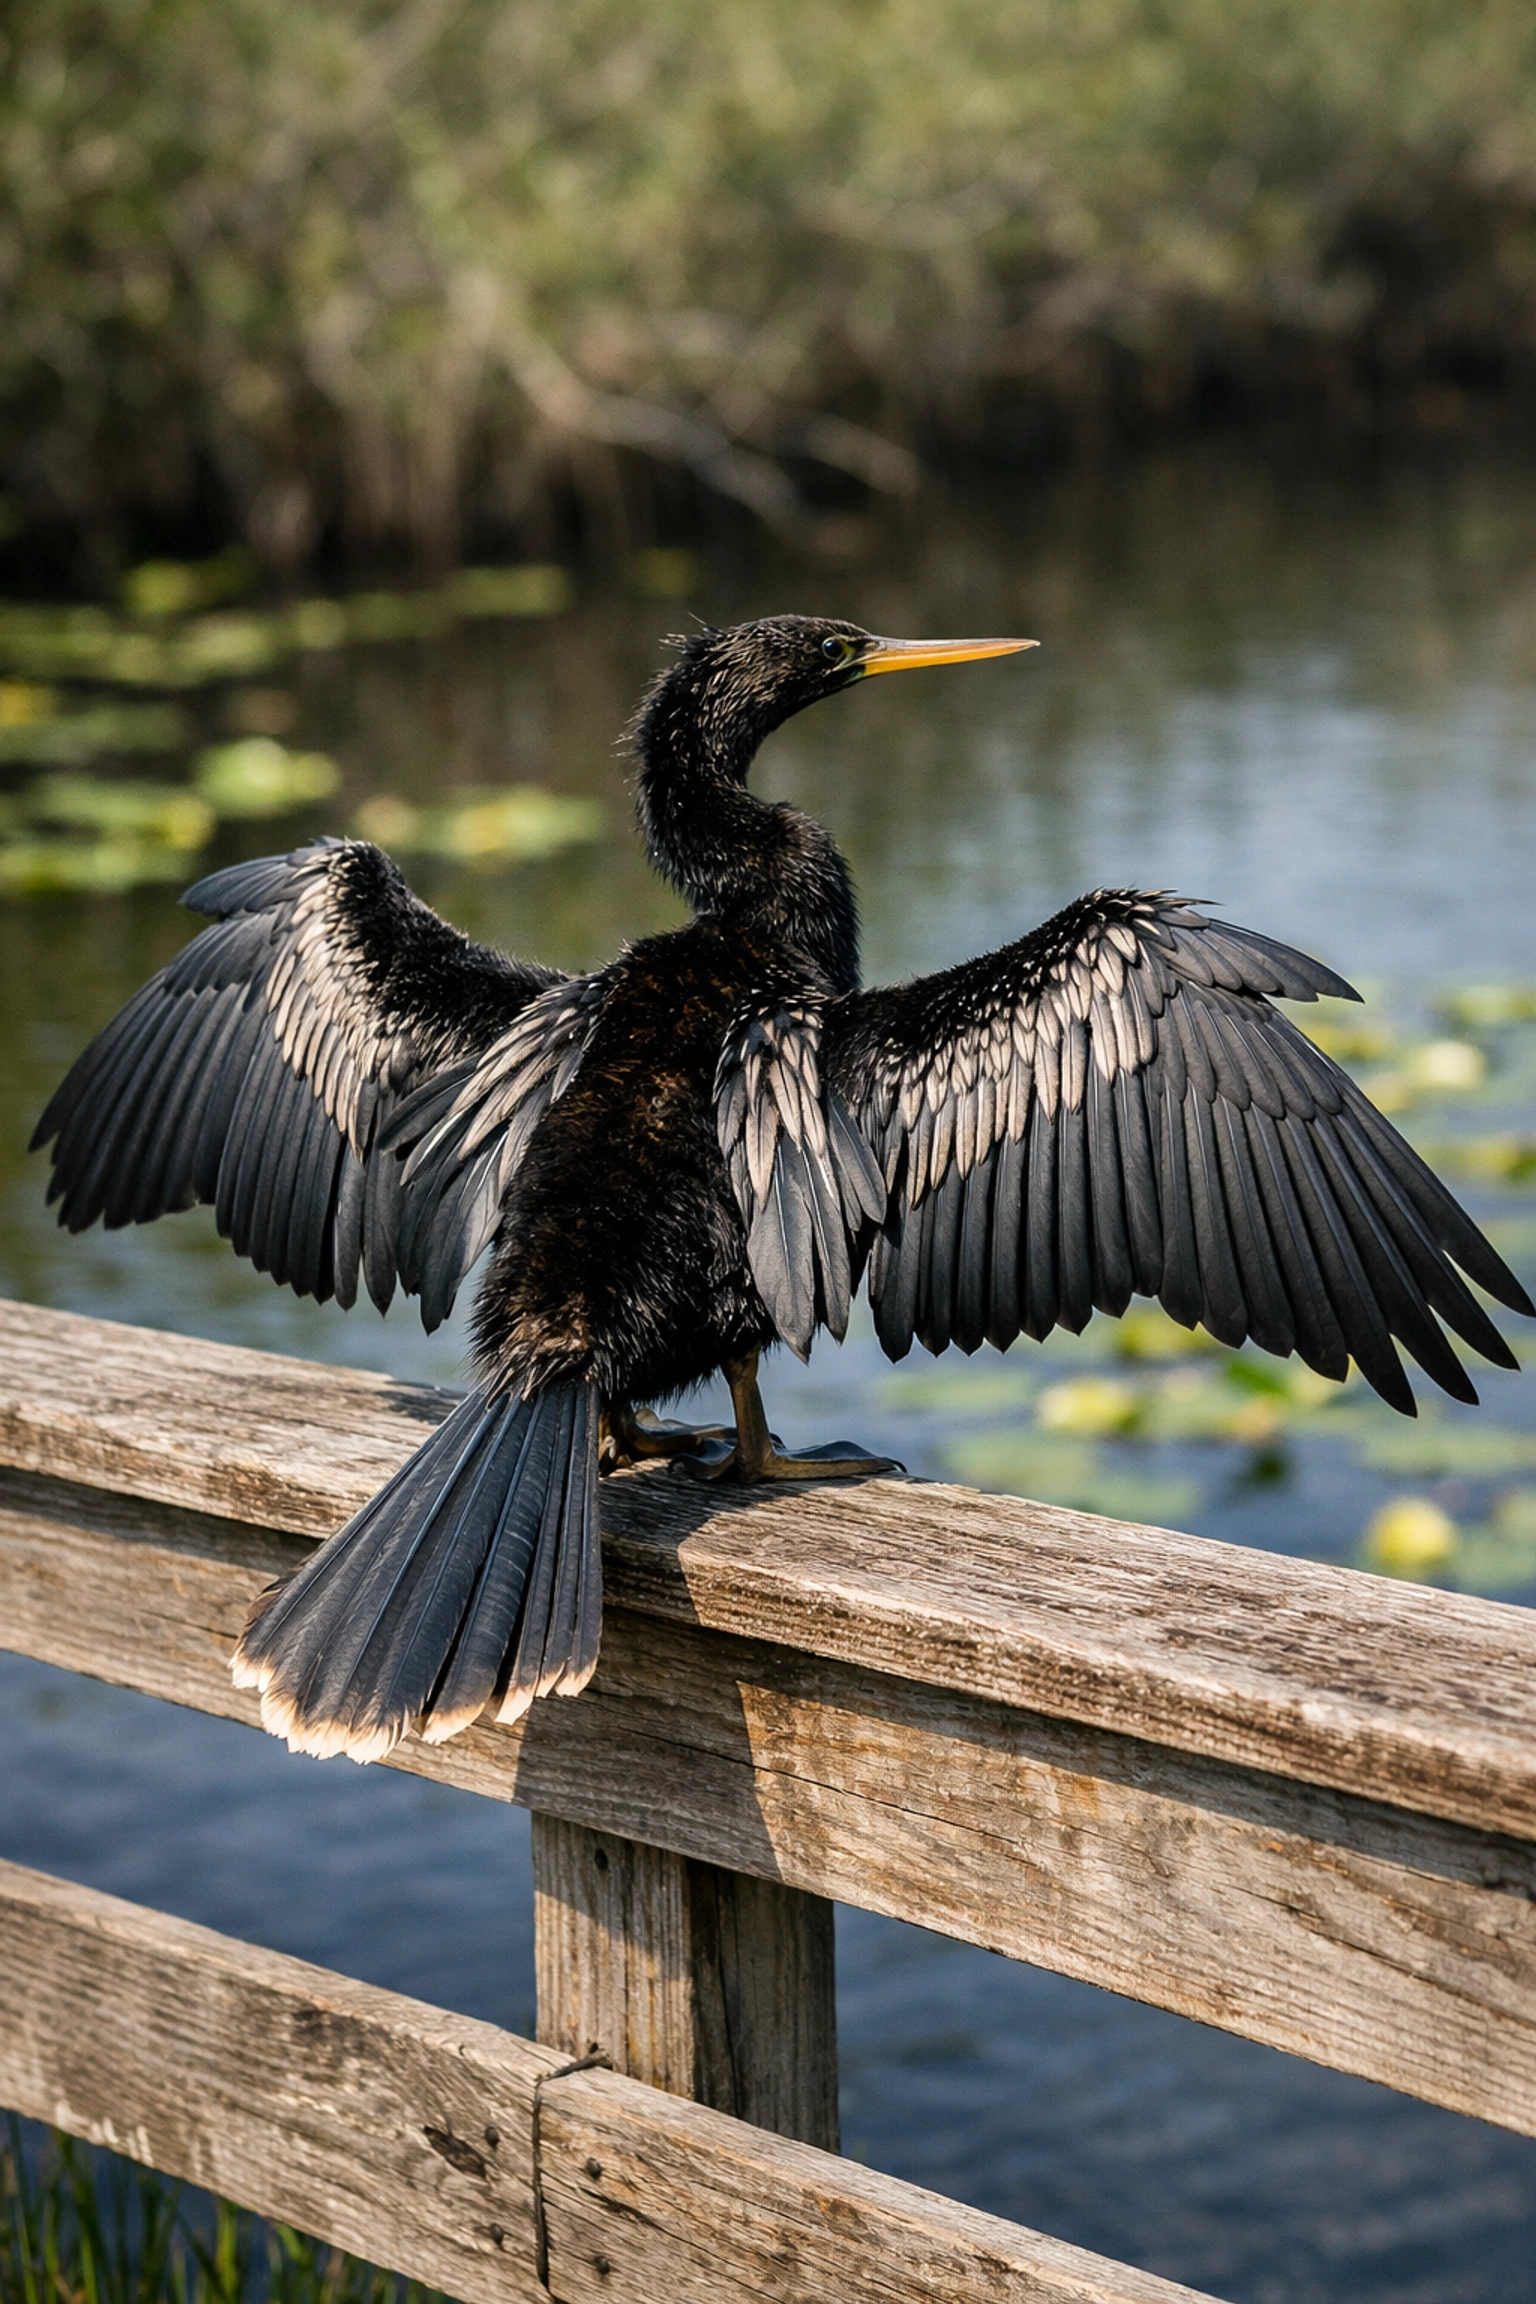
If you are looking for immediate results, the Anhinga Trail is the undisputed heavyweight champion of accessibility. Located just four miles from the main park entrance at the Royal Palm Visitor Center, this half-mile loop offers an intimacy with nature that is rare in the wild.
The birds and alligators here are famously habituated to human presence. This doesn’t mean they are pets: far from it: but it does mean you can set up your tripod and wait for that perfect reflection without the wildlife bolting the moment you adjust your focal length. Because of the trail’s east-west orientation, you’ll find direct, frontal lighting from sunrise to sunset, making it a reliable spot for high-detail wildlife photography in the Everglades.
2. Master the Dry Season Dynamics
Your success in the Everglades is dictated by water levels. To get the best shots, you need to visit during the dry season (December through April). As the water recedes across the glades, wildlife congregates around the remaining deep-water holes. This concentration of life provides you with unparalleled opportunities to capture predation, nesting, and social behaviors that are hidden during the wet months.
By February and March, nesting season is in full swing. You will see chicks in the nests, providing a narrative element to your work that resonates with viewers. If you want to take your editing to the next level to match the vibrancy of these moments, I highly recommend using the Ultimate Lightroom Preset Collection to bring out the rich textures of bird plumage and reptilian scales.
3. Shark Valley: The 15-Mile Loop of Opportunity
Located on U.S. 41 about 35 miles west of Miami, Shark Valley is a magnet for wading birds. The 15-mile paved loop (best navigated by bike or the park tram) allows you to spot subjects long before you reach them. Most of the action happens within 50 feet of your lens, meaning you can often leave the heavy 600mm primes behind in favor of a more versatile 100-400mm zoom.
| Location | Primary Subject | Best Light |
|---|---|---|
| Anhinga Trail | Alligators, Herons, Cormorants | Mid-Morning / Late Afternoon |
| Shark Valley | Wading Birds, Snail Kites | Early Morning |
| Pahayokee | Cypress Silhouettes | Sunrise |
| Flamingo | Ospreys, Crocodiles, Manatees | Sunset / Blue Hour |
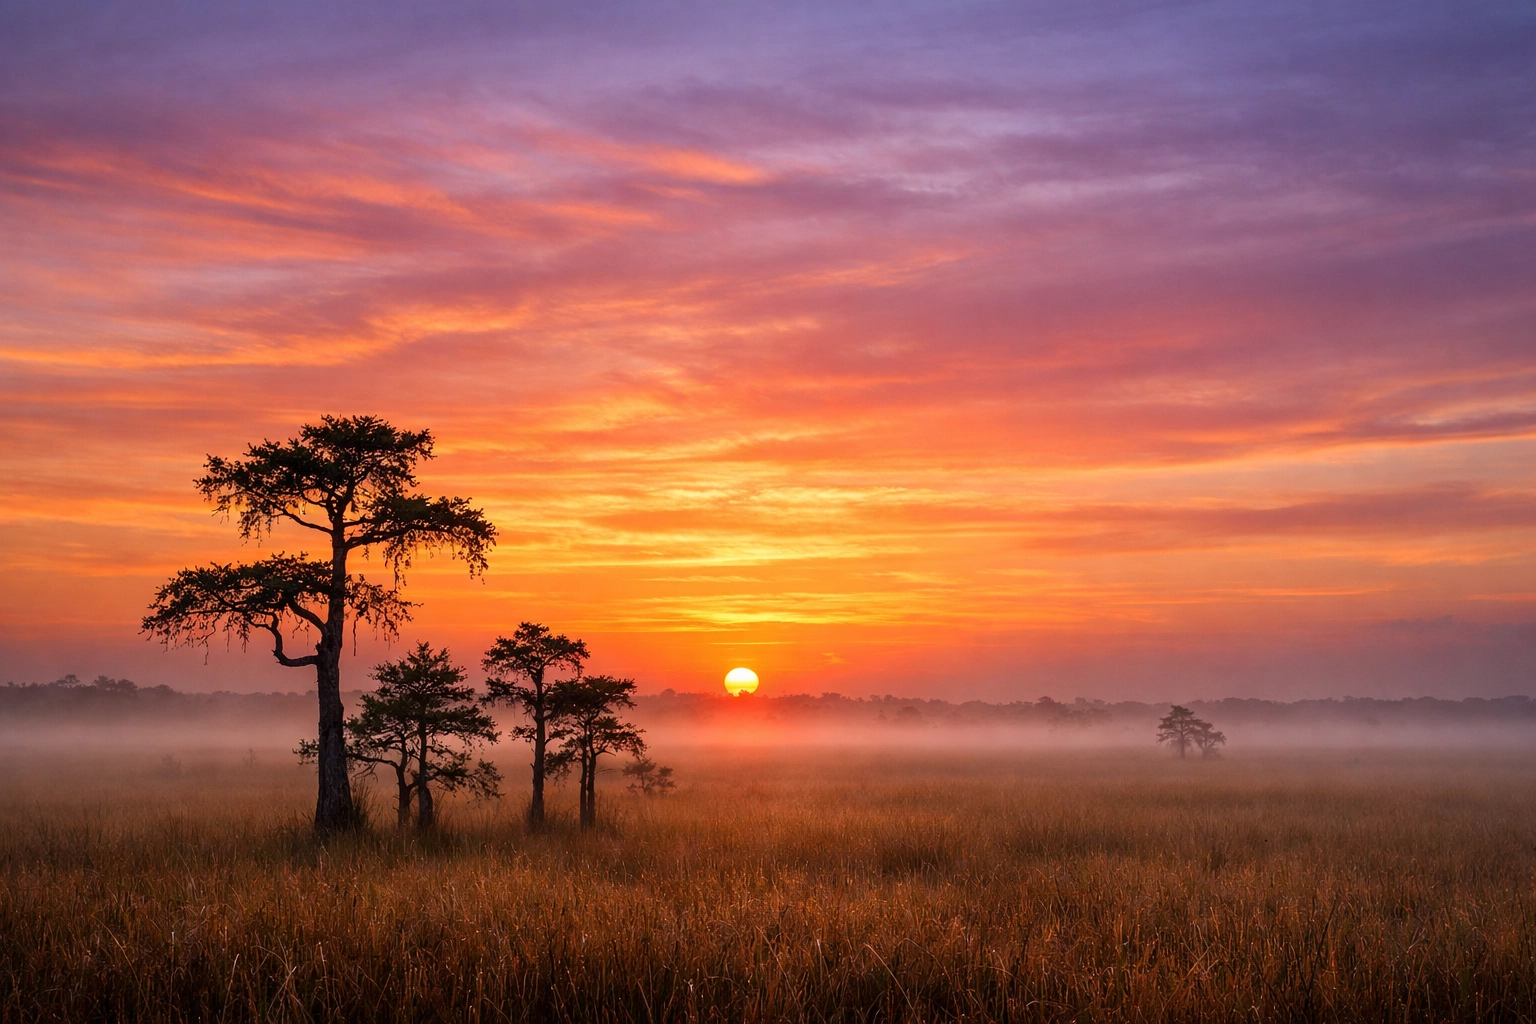
4. The Magic of Pahayokee Overlook
For those focusing on landscape photography in the Everglades, Pahayokee Road is your sanctuary. This location features a boardwalk that leads to an elevated observation platform overlooking a vast sea of sawgrass. It is arguably the premier sunrise location in the park.
Position yourself to shoot toward the east, where the silhouettes of dwarf cypress trees stand against the gradient of the morning sky. The minimalism of this scene is perfect for creating fine art pieces that emphasize form and atmosphere over busy detail. To see how these shots can look when printed on high-end materials, check out the gallery at Edin Fine Art.
5. Strategic Timing: The "Secret" Morning Combo
Your time is valuable, and in the Everglades, the light changes fast. A professional strategy I often use is starting at Pahayokee Road for the first light of sunrise. Once the sun is high enough that the silhouettes lose their drama, it is only a ten-minute drive back to the Anhinga Trail. By the time you arrive, the wildlife at Anhinga is becoming active, but the light is still soft and cool. This "one-two punch" ensures you maximize the "Golden Hour" across two distinct Everglades photography locations.
6. Gear Down for High Impact
One of the biggest misconceptions about wildlife photography in the Everglades is that you need a "big white lens" to get anything decent. While a telephoto is helpful, the habituation of animals at spots like Anhinga Trail and Wakodahatchee Wetlands (just a short drive north) means you often need to back up rather than zoom in.
I’ve often found that a mid-range zoom allows for more environmental portraits, which tell a much more compelling story than a tight headshot. If you want to dive deeper into my specific gear recommendations and secret spots, you absolutely need to grab the Everglades Photography Guide.
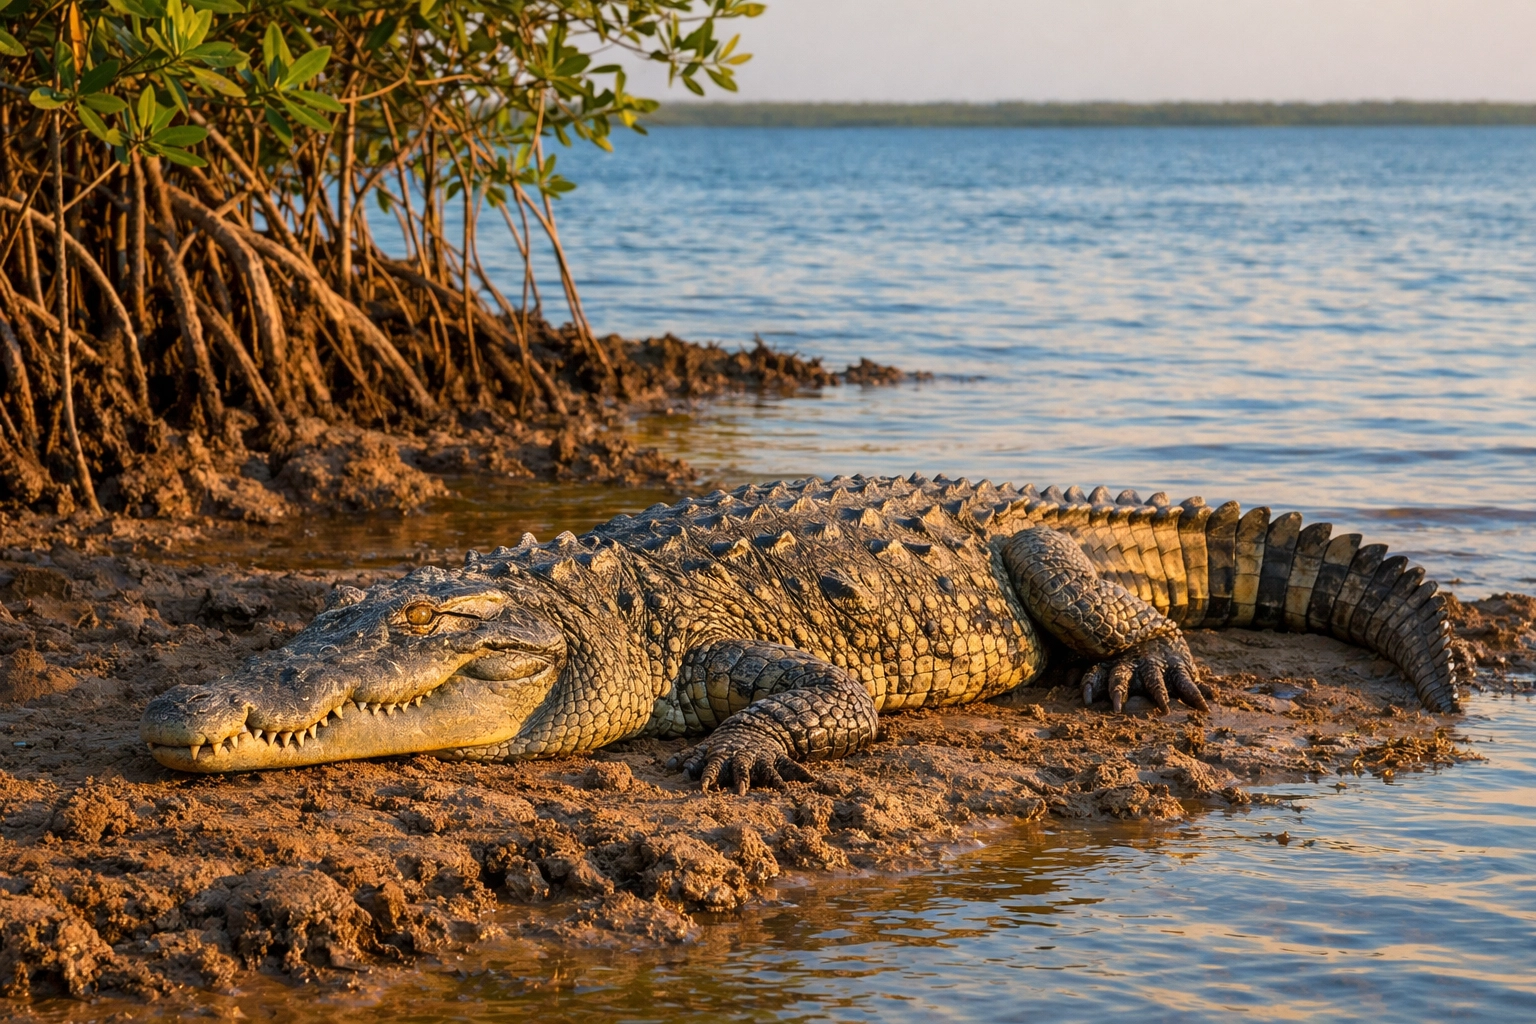
7. Flamingo: The Frontier of the South
Flamingo is at the very end of the park road, and it feels like the end of the world. This is where the freshwater of the glades meets the saltwater of Florida Bay. This transition zone offers a completely different vibe for your portfolio. Here, you can find American crocodiles: not alligators: and manatees lounging in the marina. The recently reopened Guy Bradley Visitor Center provides excellent context for the area, but the real prize is the sunset over Florida Bay, where the sky turns shades of purple and pink that seem almost impossible to capture.
8. Safety and Ethics in the Field
Your safety and the well-being of the wildlife are paramount. While the animals may seem "tame," they are apex predators and wild creatures. Always maintain the park-mandated distance. A stressed animal will not give you a natural-looking photo. Furthermore, the Everglades ecosystem is fragile. Stay on the boardwalks and paved paths whenever possible. By respecting the environment, you ensure these Everglades photography locations remain pristine for the next generation of artists.
9. Elevate Your Post-Processing
Capturing the image is only half the battle. To truly transform a raw file into a piece of fine art, you must understand how to manipulate the unique Florida light. The humidity in the air creates a natural haze that can either be a beautiful atmospheric tool or a distracting wash of gray.
Using my Ultimate Lightroom Preset Collection helps you cut through that haze or enhance the morning glow, ensuring your landscape photography in the Everglades has the punch and clarity it deserves. This is how you bridge the gap between a standard photo and the professional work you see on Edin Studios.
10. Planning Your Expedition
The Everglades is a seasonal beast. Before you head out, you must check the water levels and the mosquito forecast (trust me on this one). Always carry more water than you think you need and plenty of insect repellent. If you are coming from the city, you might also be interested in my Private Miami Photography Tour to balance your nature shots with some stunning urban architecture.
For those who prefer a more curated experience, I offer a Miami Self-Driving Photography Guide that can help you navigate the surrounding areas before you head into the wilderness of the park.
Final Thoughts on Capturing the Glades
The Everglades is a place of subtle beauty. It doesn't scream for your attention like the Grand Canyon or the Tetons; instead, it whispers. It requires you to slow down, observe, and wait for the light to reveal the hidden gems within the sawgrass.
With these ten tips, you are well on your way to mastering the Everglades photography locations and creating a body of work that reflects the true majesty of this ecosystem. Remember, the best gear in the world can't replace a solid plan and an understanding of the environment.
If you're ready to stop guessing and start shooting like a pro, don't forget to pick up the Everglades Photography Guide. It's the ultimate resource for any photographer looking to conquer the "River of Grass."
For more insights on how to elevate your work, explore our site for a deep dive into hundreds of tutorials and guides at Edin Chavez Blog. Whether you are looking for fine art inspiration or technical advice, we are here to empower your creative journey. Now, get out there and capture something extraordinary.


