
As Lake Tahoe photography locations go, Emerald Bay stands out as the undefeated heavyweight, the place where your wide-angle lens earns its keep and your tripod finally feels emotionally validated. You’re not just showing up for a “nice view.” You’re stepping into a scene built for layered, three-dimensional light, glassy water reflections, and that famous horseshoe curve that makes every composition feel intentional.
If you want the best photo spots Lake Tahoe can deliver in one compact area, Emerald Bay gives you a full menu: roadside overlooks, short hikes, waterfalls, and elevated ridgelines that turn the whole bay into a topographic masterpiece. And when you’re ready to stop guessing and start executing, you’ll want the full Lake Tahoe Photography Guide right here: https://blog.edinchavez.com/product/lake-tahoe-photography-guide/
Your Emerald Bay game plan (so you’re not sprinting in the dark)
Because Emerald Bay gets crowded fast, your results depend on timing and flow more than sheer talent. When you run it like a well-planned shoot, you leave with a cohesive series, wide establishing shots, mid-range detail frames, and a few “print this big” moments.
The simple schedule that ensures you get the hero shot
- Arrive 45–60 minutes before sunrise for the classic overlook (your tripod spot matters).
- Shoot sunrise at Emerald Bay Overlook until the color fades and the water loses its mirror look.
- Cross to Lower Eagle Falls for motion + spray + morning softness.
- Move to Inspiration Point for scale and clean geometry.
- If you want the “I worked for this” angle, hike Bayview Trail to the rocky outcropping (Maggie’s Peak direction).
- Wrap with details and long-lens compressions once the light goes harsh.
This sequence keeps you ahead of crowds and puts you in the right place as the light evolves. With these considerations, your morning becomes a storyboard instead of a scramble.
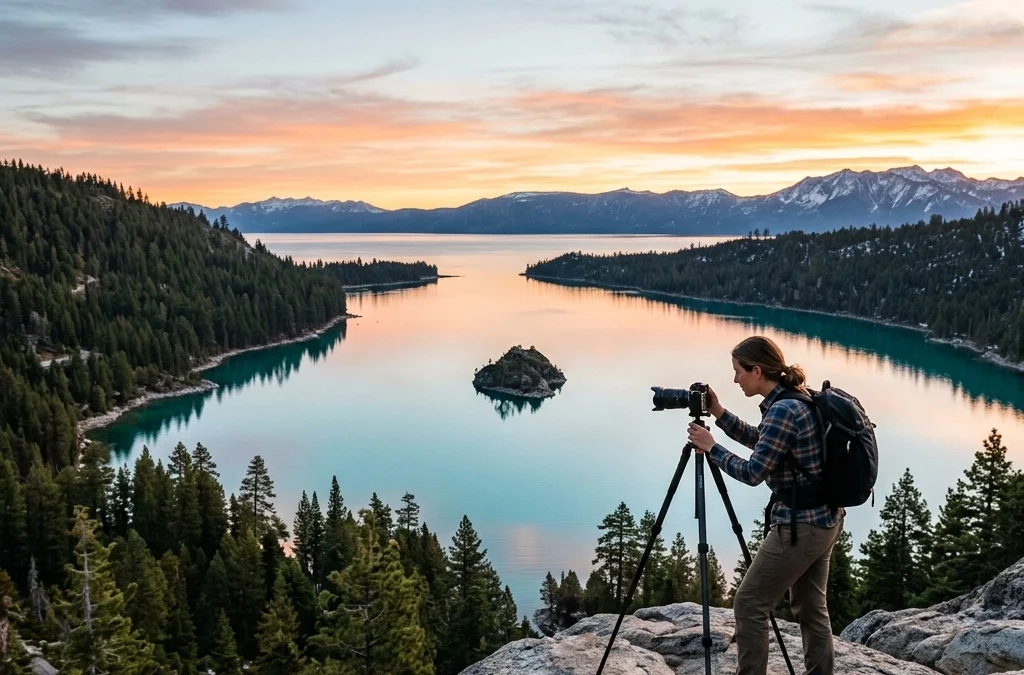
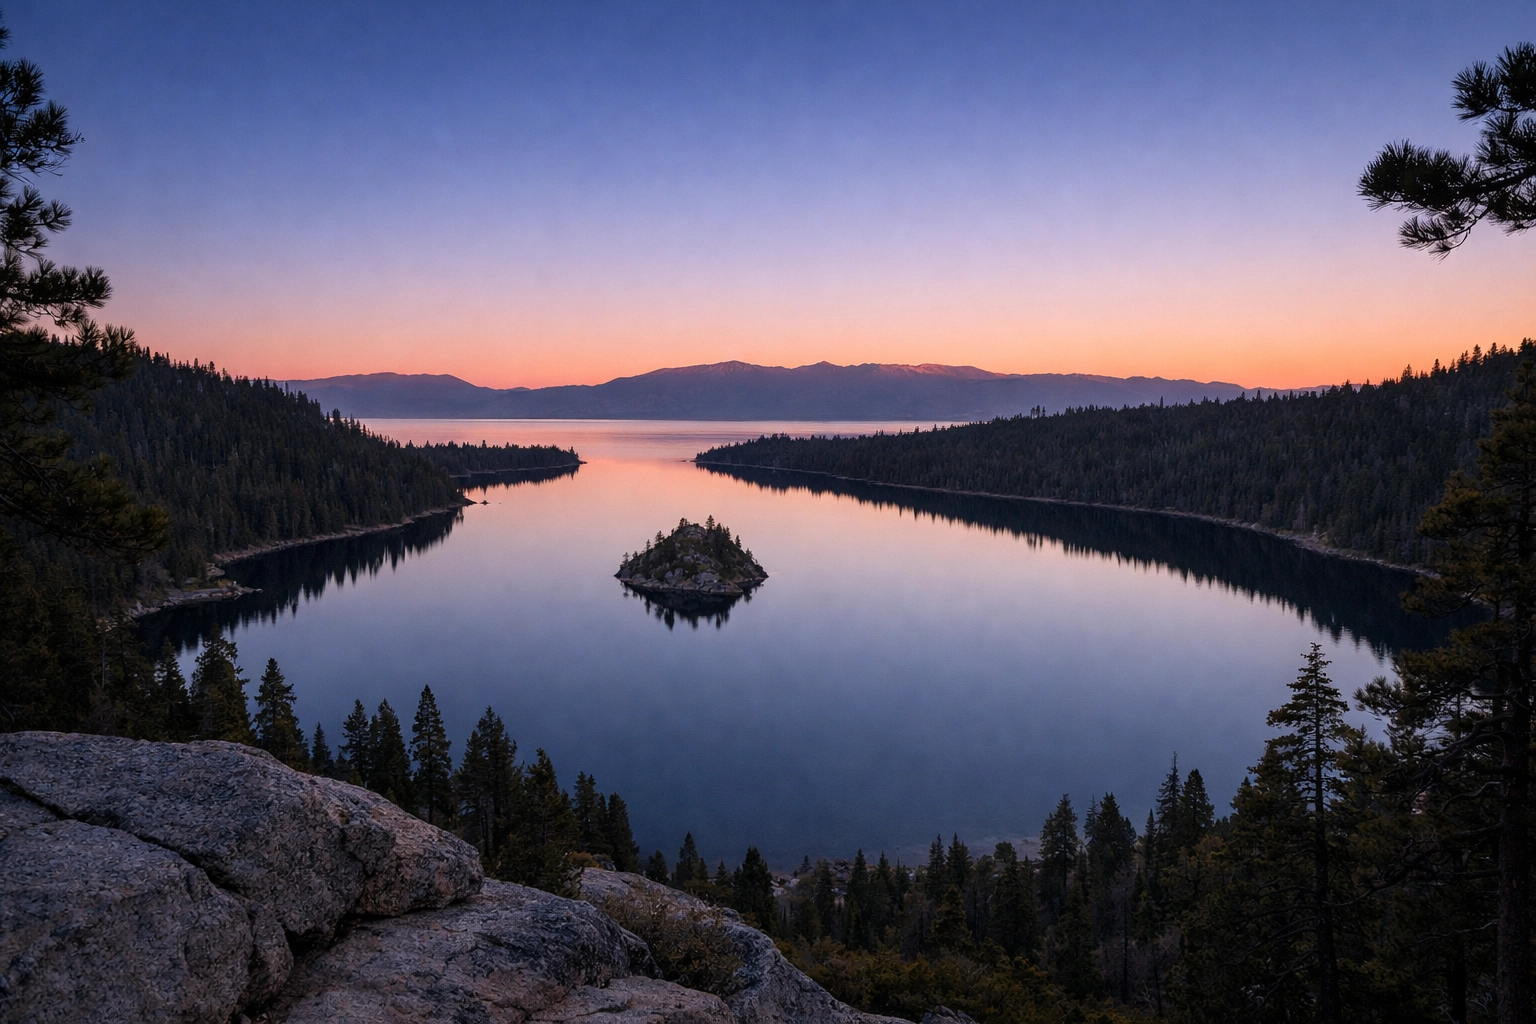
The classic: Emerald Bay Overlook (your sunrise anchor)
If you’ve ever seen a “landscape photography Lake Tahoe” photo and thought, Okay wow… where is that?: it was probably right here. Emerald Bay Overlook is the money spot because it gives you instant structure: the curve of the bay, Fannette Island as a focal point, and the Desolation Wilderness peaks stacking in the background like stage lighting.
When you arrive early, you catch the best part: the sky shifts from deep indigo to orange, and the water turns into a polished sheet of obsidian-glass. You’re not chasing color alone: you’re capturing depth, where the lit peaks feel carved out from the darker tree line.
How to compose it so it looks intentional (not touristy):
- Use the shoreline curve as a leading line that pulls the eye toward Fannette Island.
- Place the island center or slightly off-center depending on your foreground balance.
- Watch the brightest part of the sky: if it’s exploding, underexpose slightly to keep color.
- Shoot a few frames at different focal lengths so you get variety, not duplicates.
Lens picks that consistently deliver:
- 16–35mm for the full horseshoe + big sky drama
- 24–70mm for a tighter, more graphic composition with the island and headlands
Lower Eagle Falls: silky water, big payoff, minimal effort
Once the sun lifts and the overlook starts filling up, your next win is Lower Eagle Falls, located just across the road from the main Emerald Bay parking area. You’re switching from grand landscape to foreground energy, which instantly upgrades your storytelling.
In the morning, the light is softer, the contrast is manageable, and your long exposures look clean without feeling like a science experiment. You can frame rushing water in the foreground and still hint at the bay beyond, which gives your image depth and context in one shot.
Settings that make the waterfall look smooth-as-butter:
- Shutter: 0.5–2 seconds for flow with texture
- ISO: 100 (stay clean)
- Aperture: f/8–f/11 for sharp rocks + water detail
- Focus: lock on a rock edge, not the water surface
Pro move: shoot in RAW and protect highlights, because waterfall spray loves to blow out like it’s trying to win an Oscar for Best Supporting White.
Inspiration Point: the “scale” shot that makes people stop scrolling
Inspiration Point sits roughly 600 feet above the water, and that elevation is a cheat code for drama. From up here, you can show the entire bay’s geometry with the underwater shelf shifting from bright teal to deep navy. That color transition is one of the most satisfying visual cues in Emerald Bay: your viewer feels the depth change.
This is where you go when you want a clean, expansive landscape with fewer foreground distractions. You’re essentially photographing a living topographic map.
How to make Inspiration Point look massive (not flat):
- Use a wide-angle, but keep your horizon level: tilt makes the lake look “spilled.”
- Include a sliver of foreground rock/trees to add depth and scale.
- If the wind is calm, emphasize reflections; if it’s choppy, lean into texture and contrast.
Best time: early morning for clarity and softer shadows, or late day when side light rakes the ridges and makes everything look carved.
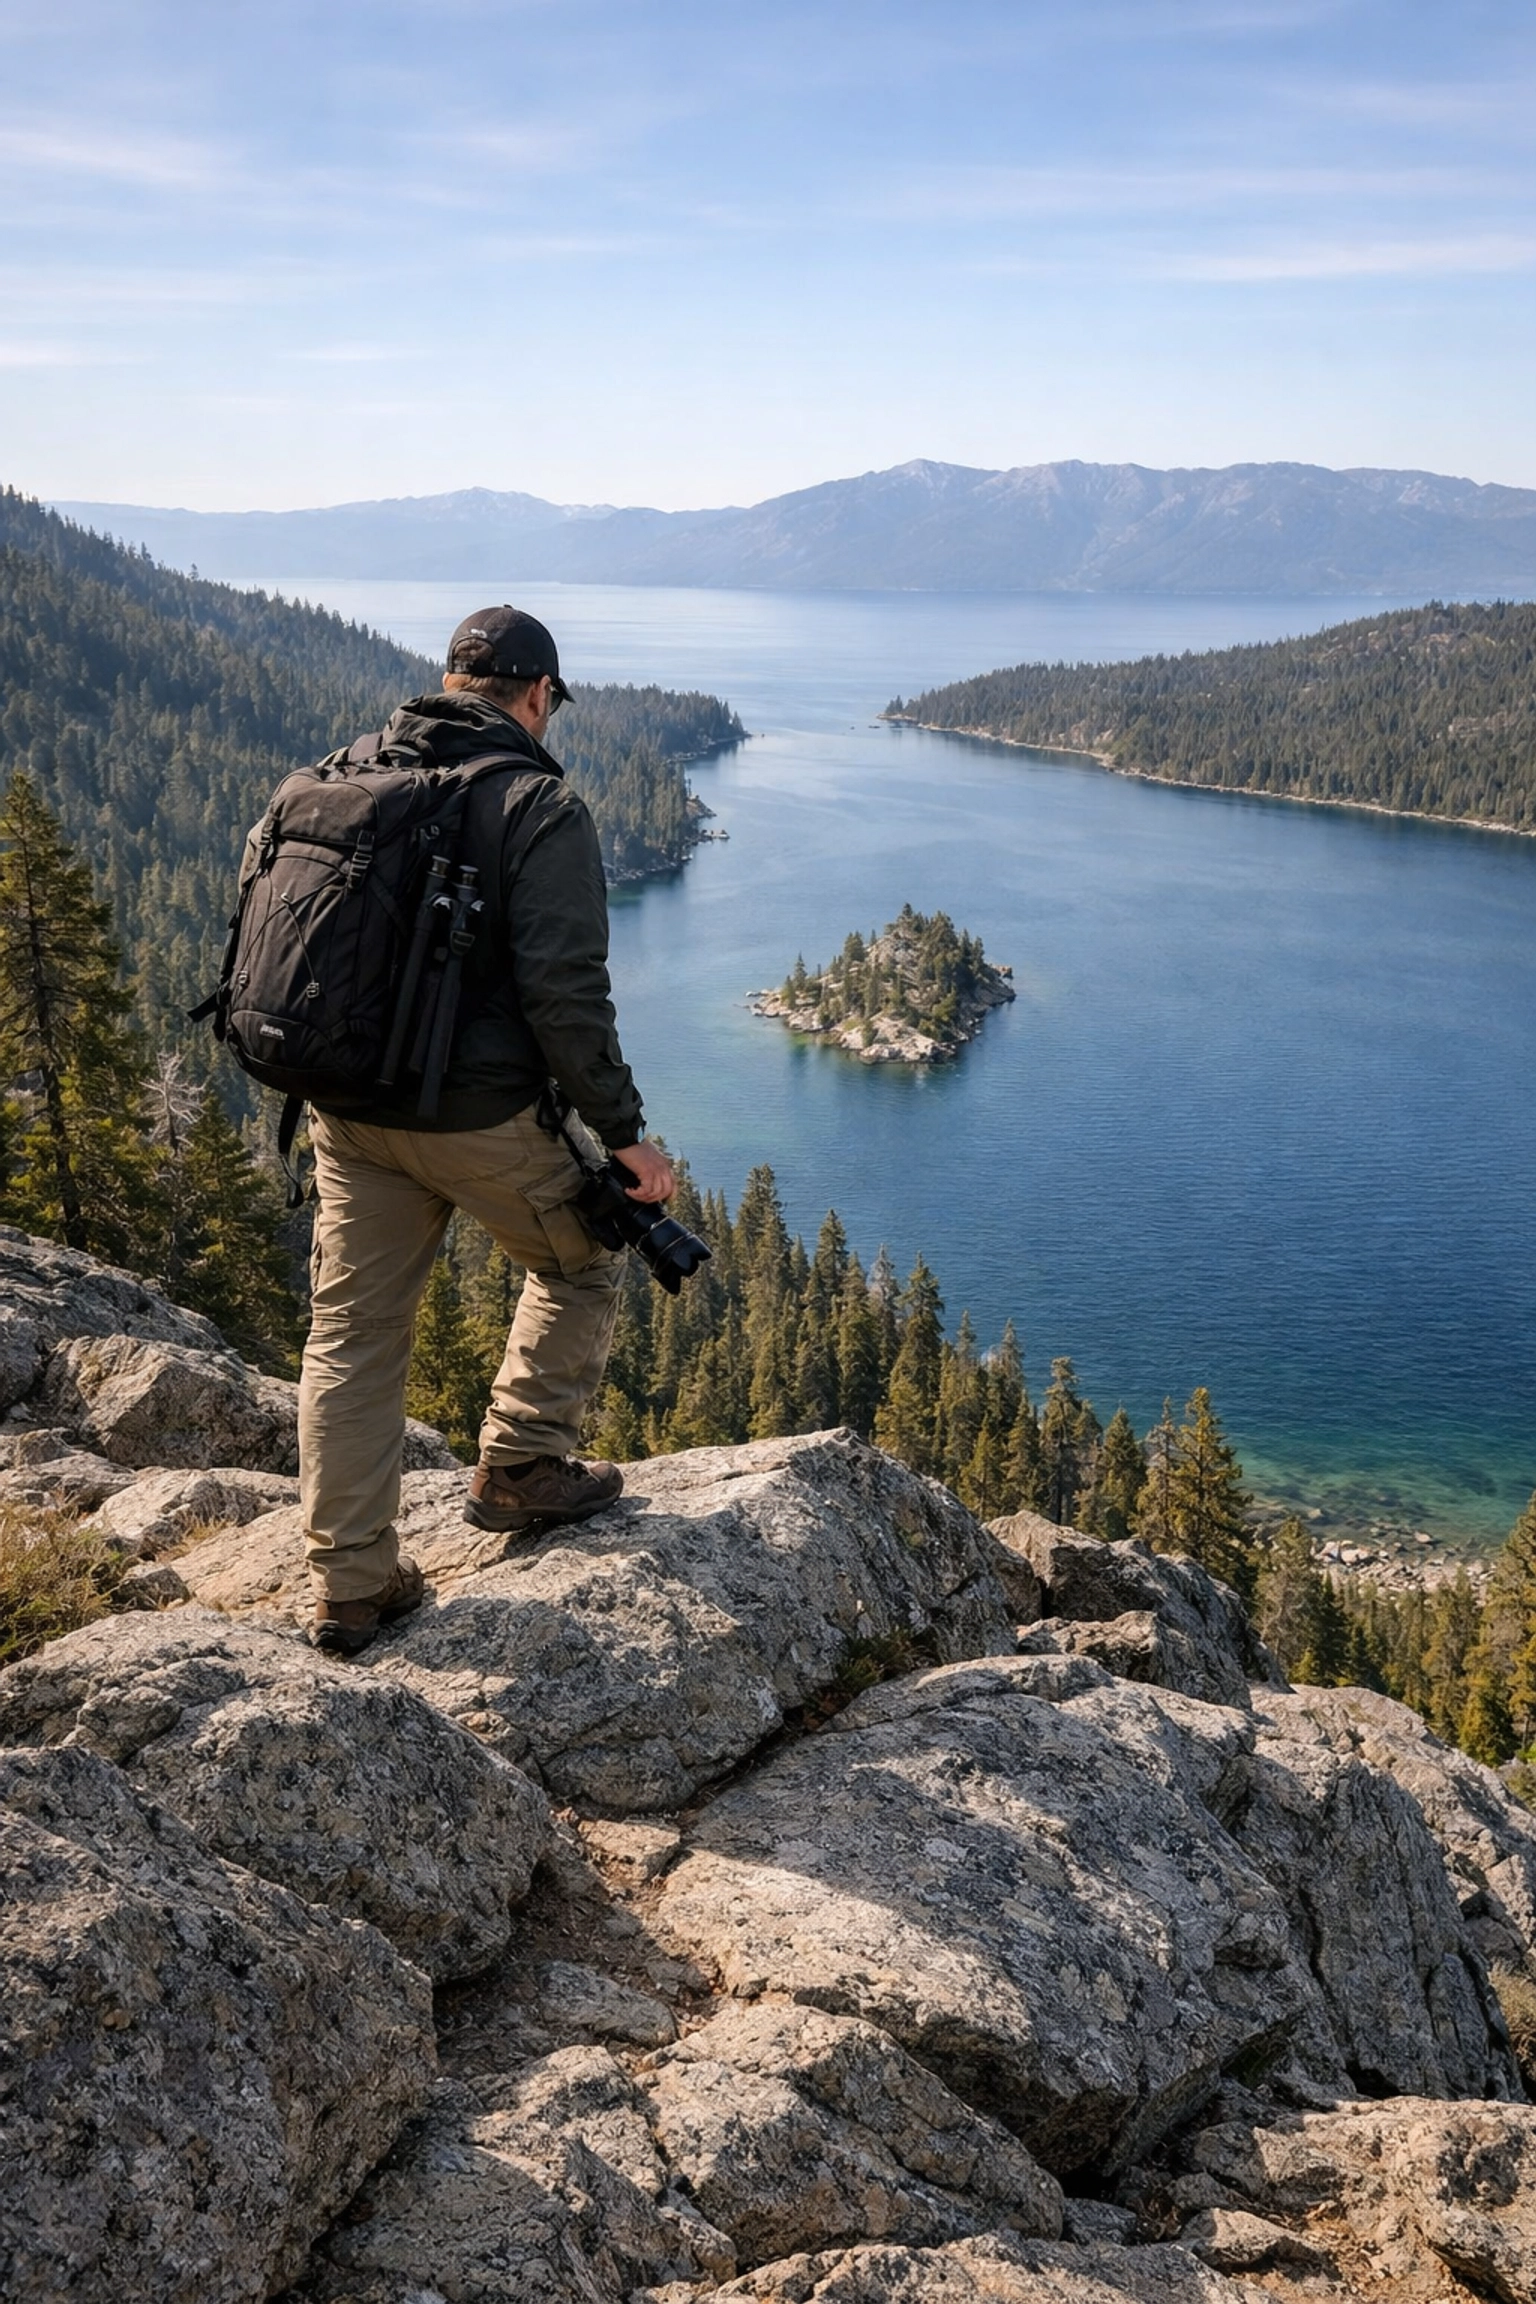
Bayview Trail overlook (Maggie’s Peak direction): your “earned it” perspective
When you want Emerald Bay without the “I stood in the same spot as everyone else” vibe, you hike. The Bayview Trail delivers fast: about 15 minutes in, you reach rocky outcroppings that give you a commanding angle on the “gateway” where Emerald Bay meets the main body of Lake Tahoe.
This location is pure compositional candy: layered ridges, the bay opening like a door, and water tones that shift with every passing cloud. Because you’re higher and slightly offset, you get a perspective that feels more cinematic than postcard.
What to shoot here:
- Wide frames that show the bay connecting to the lake (classic story shot)
- Mid-range compositions that emphasize the headlands and water color
- Details of granite + pines for texture studies
Bring: stable shoes. Your tripod can be fancy, but your ankles should also be premium.
Eagle Lake hike: calm reflections, clean frames, and variety in one loop
If you want a short hike that multiplies your options, the Eagle Lake route is your friend. On calm days, you get mirror reflections that make your scene feel double-wide. You also get elevated angles back toward Emerald Bay and the wilderness beyond, which keeps your shoot from turning into “50 versions of the same overlook.”
The key is commitment to early light. You’re not here for midday glare. You’re here for smooth water, soft contrast, and that crisp alpine atmosphere that makes your files look expensive.
How to build a mini-series on this hike:
- Start with a wide establishing shot
- Capture a reflection frame when the water is still
- Finish with detail shots: shoreline textures, granite patterns, pine silhouettes
The light rules at Emerald Bay (so you stop fighting the sun)
Because the bay sits on the southwest side of the lake, sunrise is your advantage: you’re looking toward light that builds behind the scene and wraps the peaks. Wind is the other boss fight. Calm days give you mirror water; windy days give you texture, which still works if you commit to it.
Conditions checklist that ensures your keepers rate stays high
| Condition | What you get | What to do |
|---|---|---|
| Calm wind | Mirror reflections | Prioritize the overlook + Eagle Lake |
| Light clouds | Color + depth | Underexpose slightly to hold sky detail |
| Clear sky | Clean contrast | Focus on composition and water color gradients |
| High wind | Choppy texture | Use faster shutter and emphasize patterns |
Your goal is simple: match the scene to the mood you’re shooting. With these considerations, you control the outcome instead of reacting to it.
Gear and settings that consistently win at Emerald Bay
You don’t need a truckload of equipment, but you do need the right tools in your bag so you’re not improvising when the light is perfect.
Practical kit list (built for real shooting, not bragging)
- Wide-angle (16–35mm): your main landscape workhorse
- Standard zoom (24–70mm): for tighter compositions and waterfalls
- Tripod: non-negotiable for sunrise and long exposures
- Circular polarizer: controls glare, boosts water color (use carefully: don’t overcook it)
- ND filter (optional): useful if the waterfall gets bright
- Microfiber cloth: spray happens, and it will find your front element
Quick settings cheat sheet by spot
| Spot | Shutter | Aperture | ISO | Notes |
|---|---|---|---|---|
| Emerald Bay Overlook (sunrise) | 1/4–1/60 | f/8–f/11 | 100–400 | Bracket if the sky is bright |
| Lower Eagle Falls | 0.5–2s | f/8–f/11 | 100 | Protect highlights in spray |
| Inspiration Point | 1/60–1/250 | f/8–f/11 | 100–200 | Keep horizon level |
| Bayview Trail outcrop | 1/60–1/250 | f/8–f/11 | 100–400 | Wide + mid-range variety |
How to get “that” Emerald Bay color without making it look fake
Your files should look ultra-realistic: like the viewer can smell the cold granite and feel the lake air. The trick is editing with restraint and intention: protect highlights, keep blues believable, and let contrast come from light, not sliders.
To speed up your workflow while keeping your look consistent, use the Ultimate Lightroom Preset Collection as your base and then fine-tune per scene: https://blog.edinchavez.com/product/ultimate-lightrooom-preset-collection/
Editing moves that keep it natural:
- Pull highlights down to hold sky color (especially near sunrise)
- Lift shadows slightly, but keep blacks anchored for depth
- Use a gentle linear gradient on the sky, not a nuclear saturation boost
- Add local contrast to granite and tree lines for texture realism
If you want a deeper Lightroom workflow that keeps you fast and organized, this tutorial pairs perfectly with your Tahoe edits: https://blog.edinchavez.com/how-to-organize-your-develop-module-in-lightroom
Safety + logistics that protect your shoot (and your day)
Emerald Bay is beautiful, but it’s still real terrain with real consequences. When you plan for the basics, you stay focused on making art instead of solving problems.
What ensures you shoot smoothly:
- Park early; sunrise fills lots fast
- Bring layers; mornings bite even when the forecast looks friendly
- Stay on stable footing near wet rocks (waterfalls + granite = instant slip-n-slide)
- Respect closures and signage; your best composition isn’t worth a rescue story
Make Emerald Bay part of your bigger Tahoe location strategy
Emerald Bay is the headliner, but your portfolio gets stronger when you build range across multiple Lake Tahoe photography locations: sunrise overlooks, boulder beaches, alpine lakes, and clean minimalist shorelines. That’s exactly why the full guide exists: it removes the guesswork and gives you a repeatable plan for the entire lake.
Grab the complete Lake Tahoe Photography Guide here (your future self will thank you): https://blog.edinchavez.com/product/lake-tahoe-photography-guide/
If you want to see where the fine-art side of this work ultimately lands: prints, collector pieces, and finished portfolios: visit https://www.edinfineart.com/ and browse what “final form” can look like when your capture and edit click together.
For more insights on how to elevate your work, explore our site for a deep dive into hundreds of tutorials and guides: https://blog.edinchavez.com/
If you want to connect the dots between shooting, printing, and building a body of work that holds up long-term, you’ll find more of our photography ecosystem at https://edinstudios.com/.


