

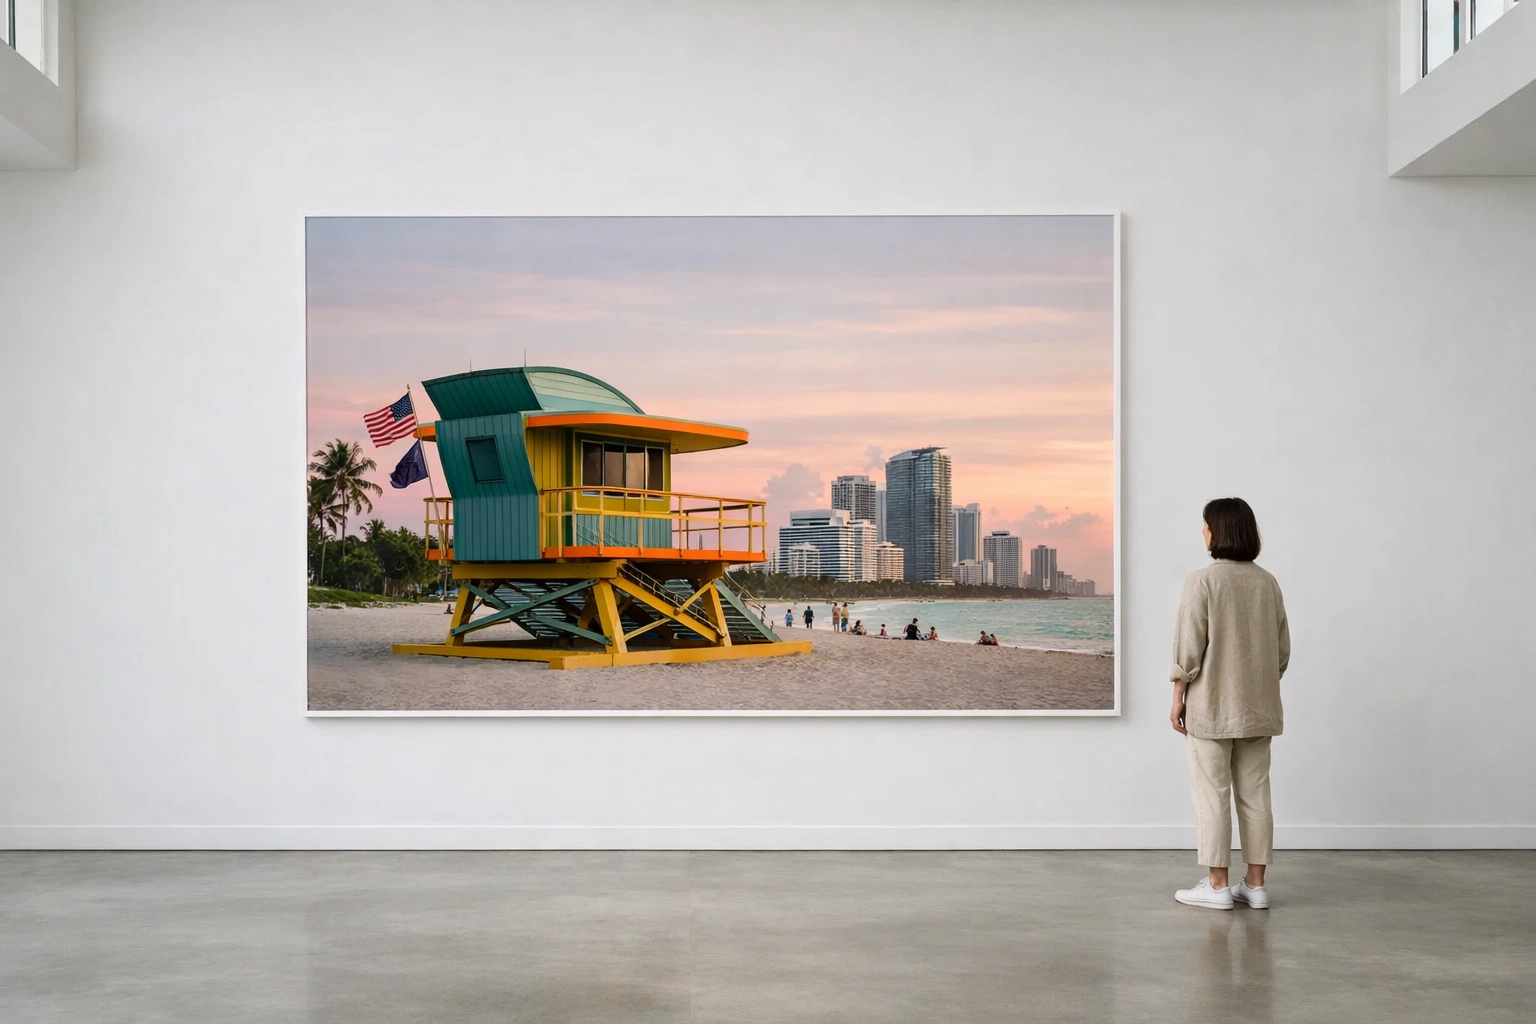
Just as you’ve spent hours scouting the perfect location or meticulously planning a concept, nothing kills the momentum of a creative breakthrough like a technical oversight. Fine art photography isn't just about taking a picture; it’s about creating a vision. When you’re aiming for that gallery-worthy finish, the margin for error becomes razor-thin. Whether you are chasing the perfect sunset or trying to capture the soul of a landscape, your technical execution must be flawless to support your artistic intent.
Many photographers struggle to bridge the gap between a standard snapshot and a piece of fine art. You might have the most expensive gear in the world, but if you’re falling into these common traps, your work will stay grounded while it should be soaring. Let's dive into the seven most frequent mistakes you’re likely making and how you can fix them to elevate your portfolio to the level of Edin Fine Art.
1. The Angle of Doom (Keystoning)
When you’re photographing architecture or specific skylines, you often find yourself tilting the camera upward to fit everything in. This creates keystoning, a perspective distortion where your rectangular subjects start looking like trapezoids. In the world of fine art, this lack of structural integrity screams "amateur."
To fix this, you need to ensure your camera is perfectly centered and level with the middle of your subject. If you can’t get the height you need, back up and use a longer lens, or better yet, invest in a tilt-shift lens. Your lines should be straight, intentional, and clean. If you want your viewer to feel like they are stepping into a scene, the geometry has to be right.
2. Using the Wrong Focal Length
It is tempting to grab a wide-angle lens to "get it all in," especially when you’re standing in front of a massive tower or a wide ocean view. However, wide-angle lenses introduce significant edge distortion. They stretch the corners and bulge the center, which completely ruins the proportions of your subject.
| Lens Type | Effect on Fine Art | Recommendation |
|---|---|---|
| Wide Angle (<35mm) | Distorts edges, stretches proportions | Use sparingly for intentional distortion |
| Standard (50mm) | Closest to human vision, natural look | Best for realistic fine art portraits and still life |
| Short Telephoto (85mm) | Compresses features, eliminates distortion | Ideal for museum-quality portraits and focused details |
For true fine art photography, you should lean toward a 50mm or 85mm lens. These focal lengths provide a perspective that feels natural to the human eye, ensuring your work remains sophisticated and true to life.
3. Producing Blurred or Soft Images
In the realm of ethereal photography, blur can be a powerful tool, but there is a massive difference between intentional artistic blur and a soft image caused by poor technique. Sharpness is non-negotiable when you’re aiming for high-end prints. If your focus is soft, the viewer’s eye has nowhere to rest, and the piece loses its professional edge.
The culprit is usually camera shake or a lens struggling in low light. To fix this, your tripod is your best friend. Whether you are shooting night photography or a high-contrast black and white photography set, a steady base is required. Use a remote shutter release or your camera’s timer to ensure that even the act of pressing the button doesn’t introduce vibration.
4. Relying on On-Camera Flash
If you are still using your built-in flash, you are essentially flattening your subject and killing any hope of a dreamy photography vibe. On-camera flash is positioned too close to the lens, creating harsh hot spots and distracting reflections. It strips away the depth and texture that make fine art so compelling.
Instead, master the art of natural light or use off-camera lighting with large diffusers. You want your light to be as smooth as butter, wrapping around your subject to create shadows that define form. Fine art is about the interplay between light and dark; don't let a cheap flash ruin that balance.
5. Falling into the Exposure Trap
Your camera's automatic exposure system is designed to make everything look "average." But your art isn't average. Fine art often lives in the extremes: either the moody, deep shadows of a low-key image or the bright, airy feel of high-key ethereal photography.
You must take manual control of your exposure. Don’t trust the screen on the back of your camera; trust your histogram.
- For High-Key: Increase your exposure compensation (+1 or +2) to ensure those whites are crisp without blowing out the detail.
- For Low-Key: Decrease it (-1 or -2) to keep those blacks rich and deep.
By mastering manual exposure, you ensure that you aren't losing critical detail in the highlights or shadows, giving you a much better canvas for your dreamy photography editing.
6. Creating Uneven or Harsh Lighting
Directional light can be great, but when it’s too harsh or unevenly distributed across your frame, it becomes a distraction. In fine art, you want the viewer to be immersed in the subject, not wondering why one side of the photo is squint-inducingly bright while the other is pitch black (unless that’s the specific point of the piece).
To fix this, look for "open shade" or shoot during the golden hour when the light is naturally diffused. If you’re working indoors, bounce your light off a white wall or use a scrim. The goal is to create a balanced, even glow that propels your subject forward and enhances the overall mood. This is a foundational step before you even think about opening Lightroom.

7. Making the Subject Too Small in the Frame
A common mistake is leaving too much "dead space" that doesn't serve the composition. If your subject is a tiny speck in the middle of a vast frame, the viewer's eye wanders, and the impact is lost. While minimalism is a valid style, every element in your frame must be intentional.
Get closer. Fill the frame with the textures, colors, and emotions of your subject. Whether you’re at a busy port or capturing the delicate details of a chrome surface, make sure your subject commands attention. Your composition should guide the viewer exactly where you want them to look, ensuring your message is loud and clear.
The Secret Sauce: Dreamy Photography Editing
Once you’ve nailed the technical skills in-camera, the real magic happens in post-processing. To achieve that sought-after ethereal photography look, you need to master dreamy photography editing. This involves softening the highlights, subtle color grading, and carefully managing contrast to create a sense of wonder.
You don't have to spend years learning every slider from scratch. To get that professional, polished finish quickly, you can use the Ultimate Lightroom Preset Collection. These presets are designed to enhance your work while maintaining the integrity of the image, helping you achieve a consistent, gallery-ready style across your entire portfolio.

Elevating Your Vision
Fine art photography is a journey of constant refinement. By fixing these technical errors, you free yourself to focus on the creative side of the craft. You’re no longer fighting your gear; you’re using it as a precise tool to express your unique perspective.
Remember, every choice you make: from the focal length to the way you handle the histogram: is a brushstroke on your digital canvas. When you combine technical mastery with a strong artistic voice, you create work that doesn't just look good on a screen but demands to be printed and hung on a wall.
Whether you are exploring the streets of America or looking for freedom in the wilderness, keep these tips in mind. Your commitment to excellence is what will ultimately set your work apart in a crowded digital landscape.
For more insights on how to elevate your work, explore our site at Edin Chavez Blog for a deep dive into hundreds of tutorials and guides. If you are ready to see what professional-grade fine art looks like, head over to Edin Studios to see the latest projects. Stop making excuses for technical slips and start making the art you were meant to create.


